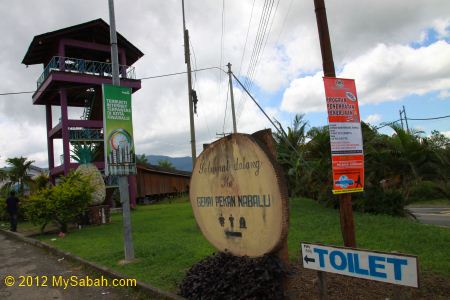
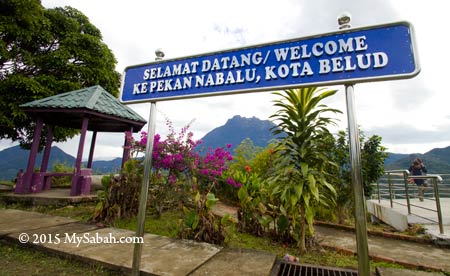
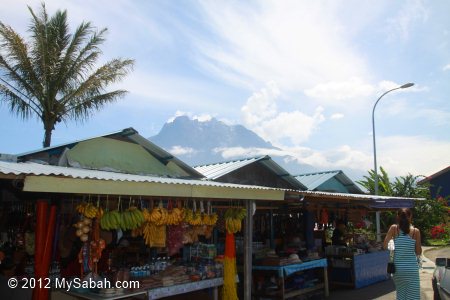
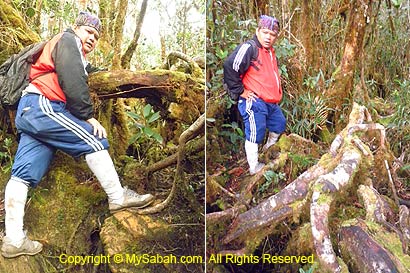
Pekan Nabalu (“pekan” means town) is used to be a “toilet stop” for tourists heading to Kinabalu Park. Now this small town is flourishing and become a “must stop” for tourists.
Pekan Nabalu is only 12 KM before Kinabalu Park, so a lot of tourists stop here for toilet break or breakfast. Tourist buses love to stop here due to the ample and spacious parking space in Nabalu.
However, there are more reasons why tourists like to stop here but not other places.
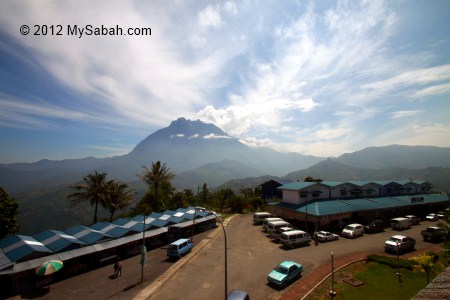
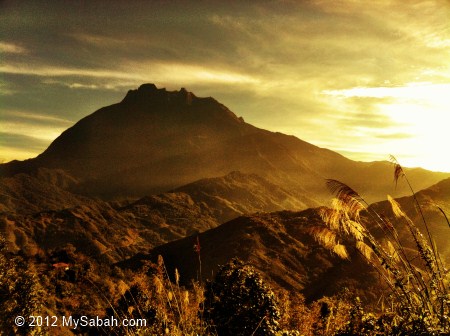
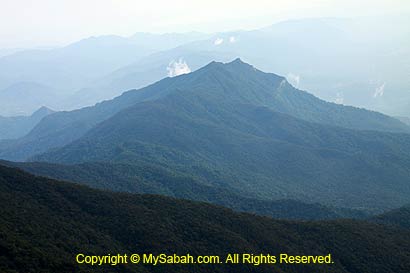
The 15-Meter watch tower of Nabalu is so prominent at the roadside that every motorist passing by will notice it. Nabalu town is one of the best spots to see Mt. Kinabalu and its adjacent landscape. Tour Guides also like to bring climbers here for a “preview” of the mountain before the climb.
Above: the view of Mt. Kinabalu from watch tower
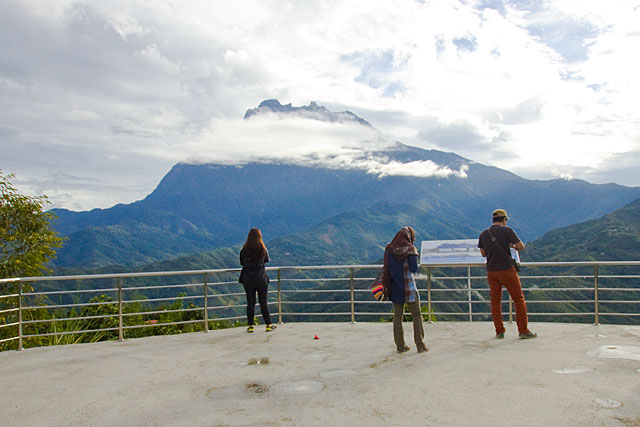
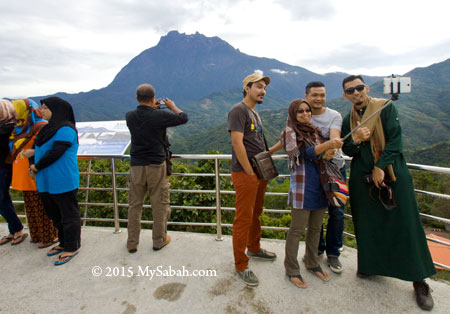
At the edge of the town there is also a platform to see Mt. Kinabalu. It’s an ideal photography point to use Mt. Kinabalu as your backdrop, as there is nothing obstruct the view, no tall trees, no electricity wire, etc. The mountain also looks very close as if you can hug it.
However, Mt. Kinabalu is covered in mist most of the time, so you need to be lucky to get a clear view of it. You will have better chance if you get there before 8am or 9am and the weather is good.
Above: group selfie with Mt. Kinabalu
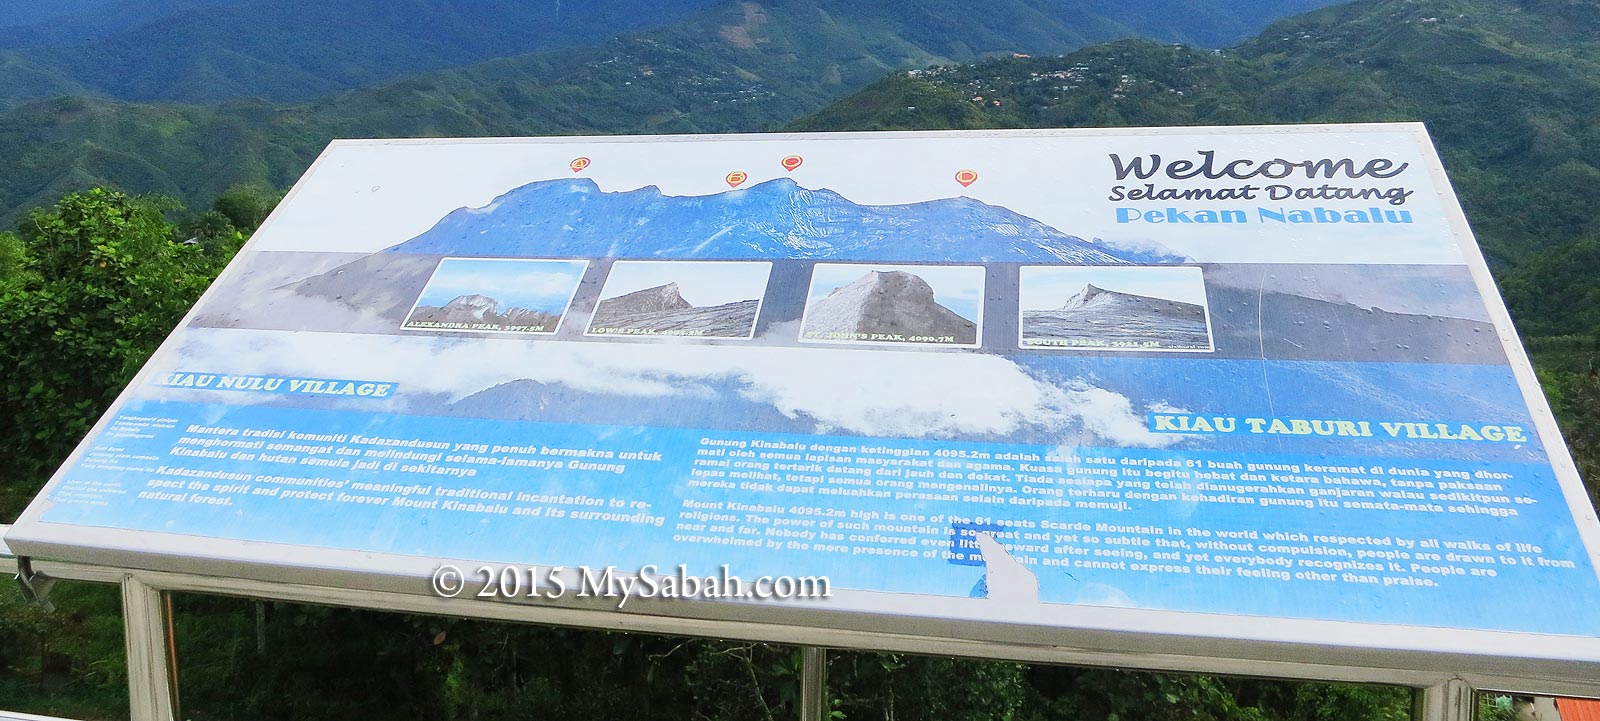
Above: The information board at the platform to show you what peaks you are looking at.
Above: a lovely morning view of Mt. Kinabalu from Nabalu
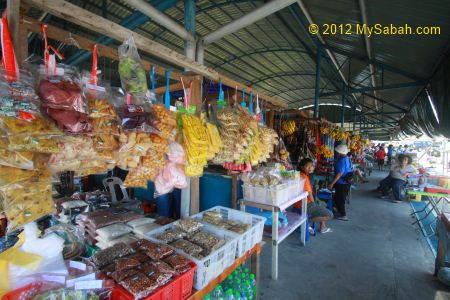
Reason 2: Local Handicraft & Food Markets
Another reason that draws the tourists is the handicraft and food markets in Nabalu. The price is cheaper than city, provided that you have good bargaining skill. Don’t be shy to ask for discount.
Above: a corner of the food market
You can find rich variety of local food and produces. Almost every type of fruits, vegetables and snacks are available in the food market of Nabalu.
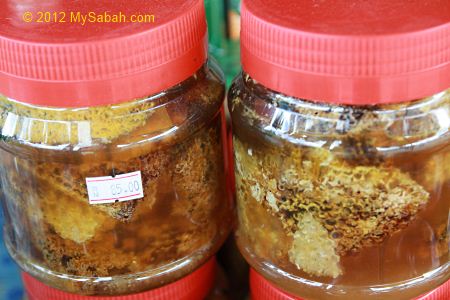
Above: honey with bee nest for RM85 (≈USD26)!
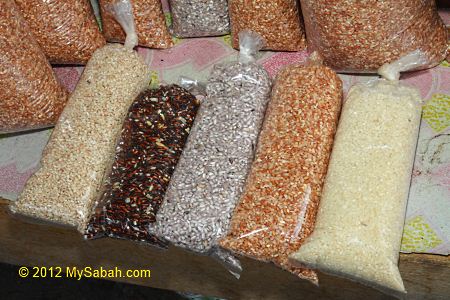
Above: hill paddy in 5 colors, RM5 per pack (≈USD1.50). The seller says the 1st one (from left) has aroma of maize, and the 3rd one is Pandan favor.
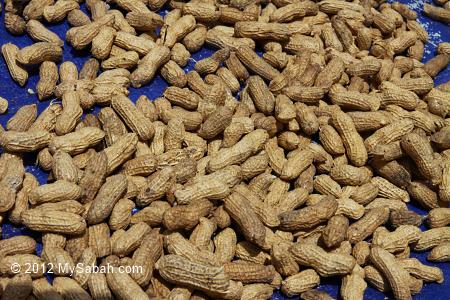
Above: local peanut
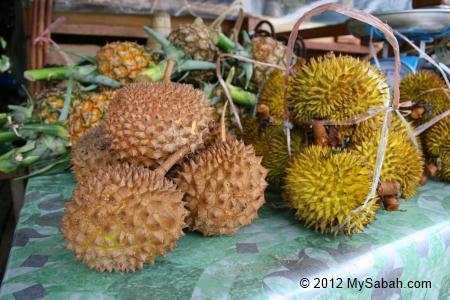
Above: they even have wild durian if you come at right season
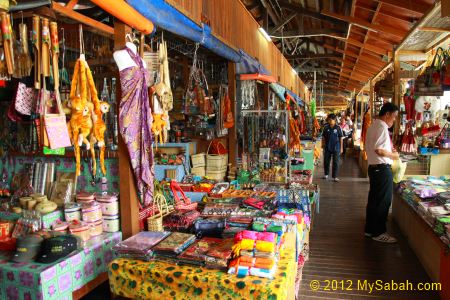
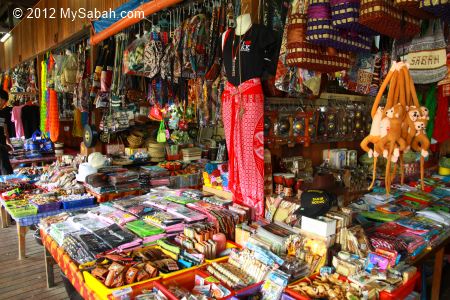
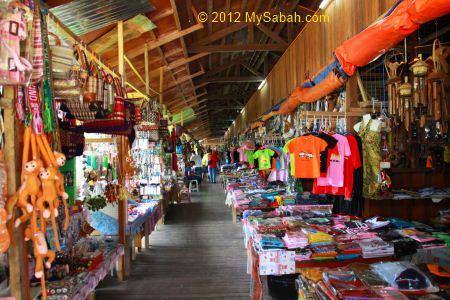
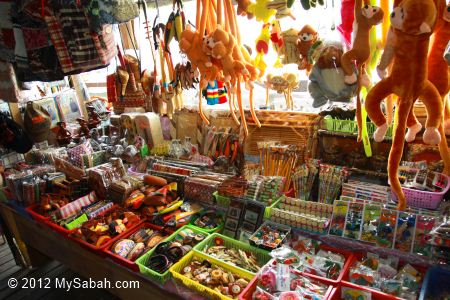
There is a building with tons of handicraft and souvenirs line up in its 50-Meter long verandah. Being bombarded by so many colorful and beautiful items, very few tourists can resist not buying anything.
The shops sell almost any item that you can name, e.g. T-shirt, bags, stationary, key-chain, refrig magnet, puff toy, batik cloth, hats, baskets, purses, handicraft, photo frames, bead work, postcards. The things pile up like factory outlet and you will be spoiled with choices. Remember, ask for discount.
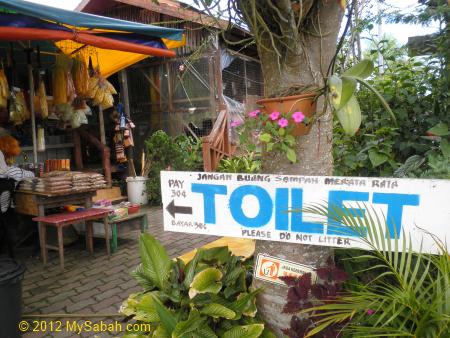
Reason 3: The Toilet
The last reason, but not the least, is the toilet. Though it’s not a 5-star toilet, it’s reasonably clean. The air in Nabalu is cool and refreshing, so it’s nice to take a short walk and stretch your muscle, after sitting so long in the car.
Above: public toilet, RM0.30 per entry (≈USD0.10)
Photos taken in Kota Belud, Sabah, Malaysia Borneo
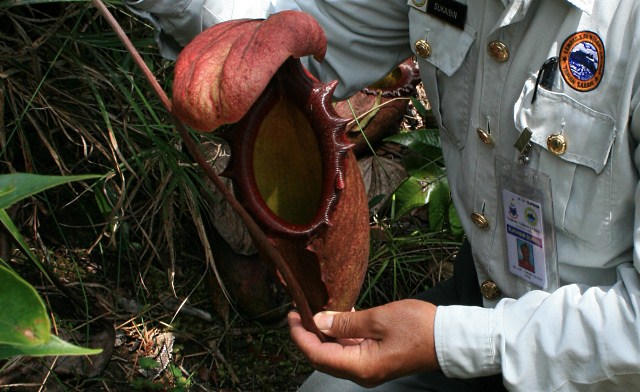
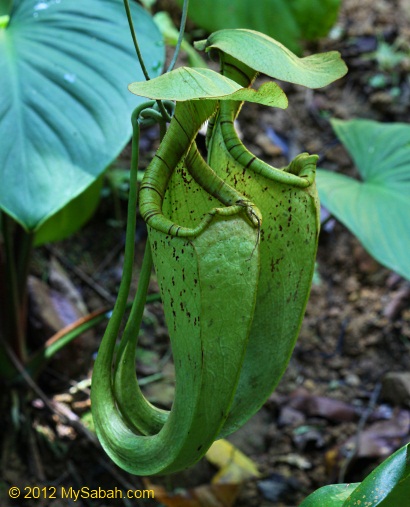
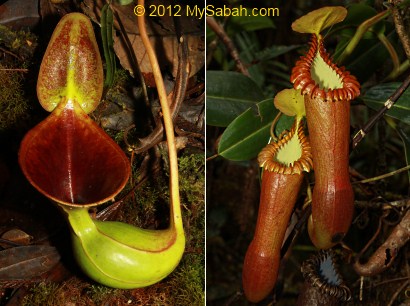
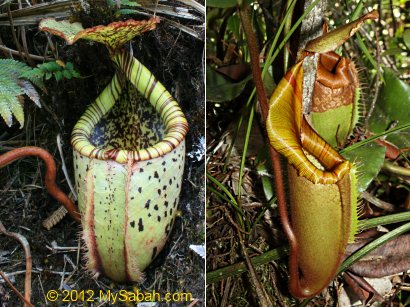
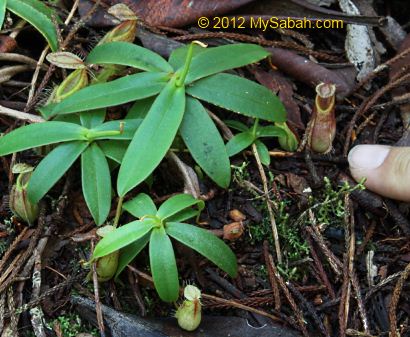
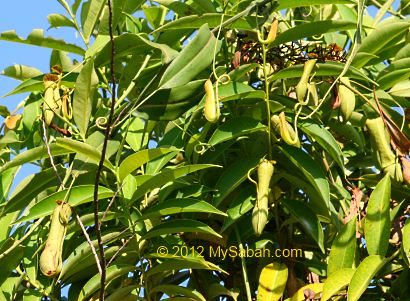
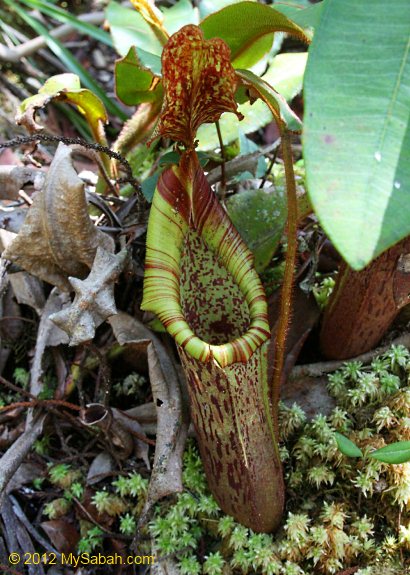
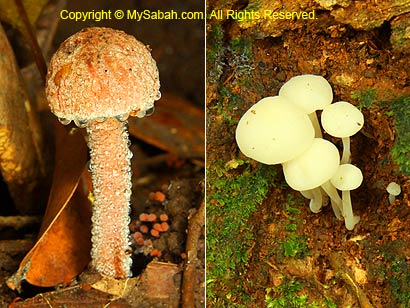
Pitcher plants of Sabah belong to the genus Nepenthes. Some call them “Monkey Cup.” Pitcher plant is one of the coolest plants on earth because it can “catch” bugs without chasing around. Pitcher Plants normally grow in places where the soil is very poor in nutrients, especially nitrogen.
To survive, they become carnivorous plants that are equipped with pitfall trap, consists of a deep cupped cavity filled with liquid. The lethal bait is the nectar of the pitcher that makes it smells like a jug of irresistible honey. Insects which forage for sweet food will fall accidentally into the deep cavity, drown in the digestive liquid and consumed by pitcher plant.
To learn more about this fascinating plant, I interviewed a pitcher plant named “Pit” who is fond of eating bugs.
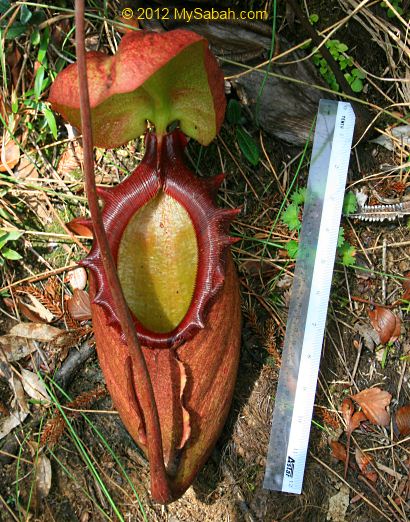
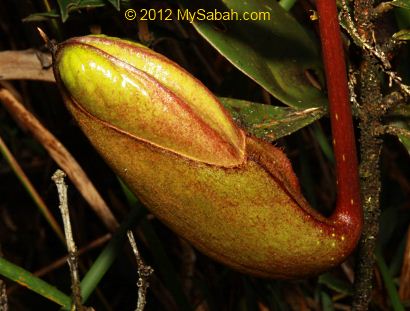
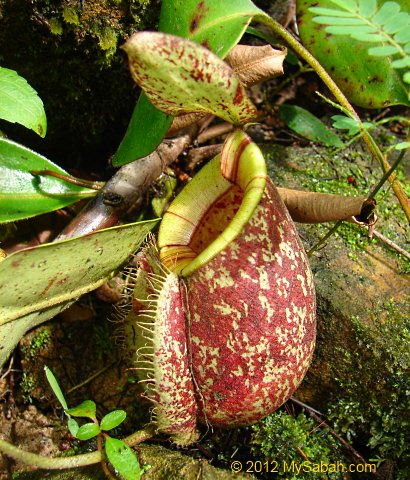
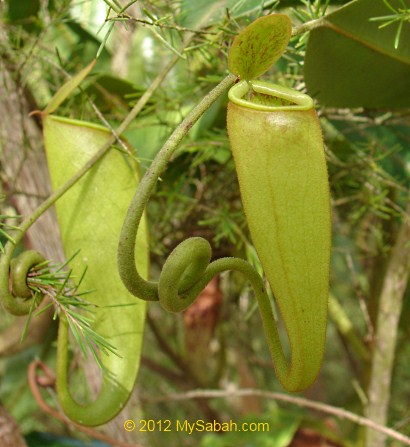
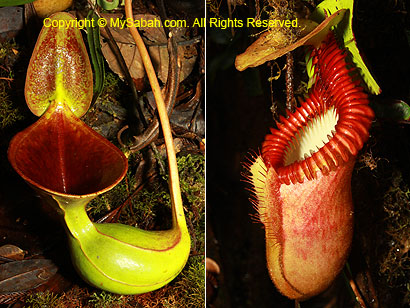
Pit: Hello! I am Pit, a Nepenthesis Rajah (species name) from Sabah. Rajah is the world’s biggest pitcher plant that can hold 1.5 to 2 Litres of water. I am only found in Mesilau, Kinabalu Park and Mt. Tambuyukon, that means I am endemic to Sabah.
MySabah: You make Sabahans proud. But wait! Are you man-eater? Pit:Nepenthesis Rajah can grow up to 35cm. There were two documented cases of mouse corpses found in pitchers and our cup can trap small animals such as frog and lizards, but no, pitcher plant is not big enough to eat human though we wish. We cannot move so we cannot bite, unlike the common myth saying that we can open and close our lids to chew your fingers.
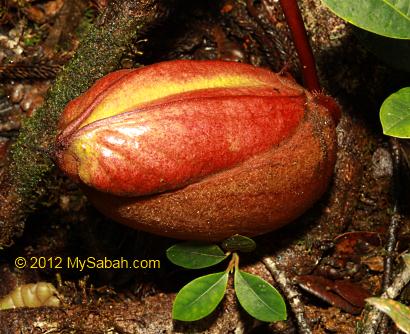
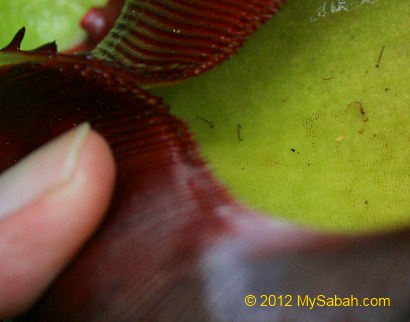
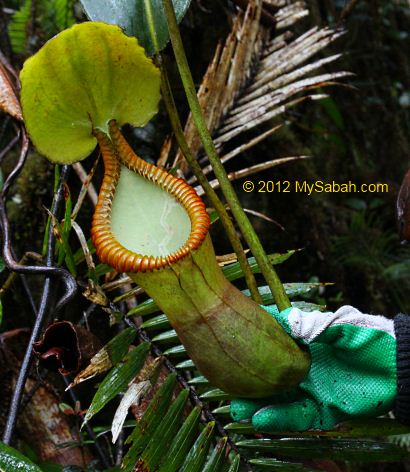
Above: pitcher plant about to open. The locals say the serum inside virgin nepenthes is used as hair tonic
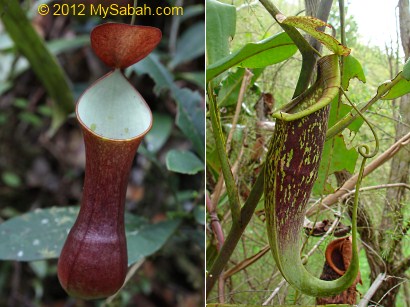
MySabah: 35cm!!? WOW, you are such a huge fruit! Pit: Wrong. The pitcher is not a fruit. It does not make sense for flower to kill pollinators that visit it, right? As a matter of fact, the pitcher is the modified tip of a leaf that has evolved to trap insects. Pitcher plants do have small flowers that attract different kinds of insects for pollination.
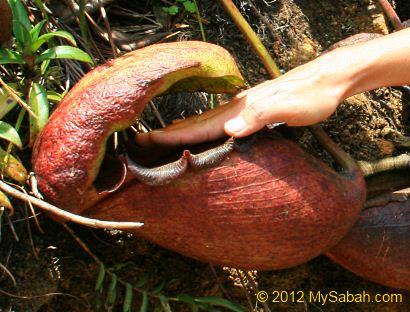
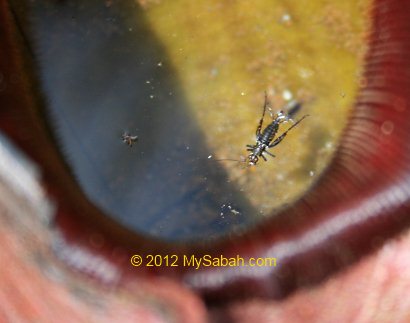
Above: insect trapped inside pitcher plant
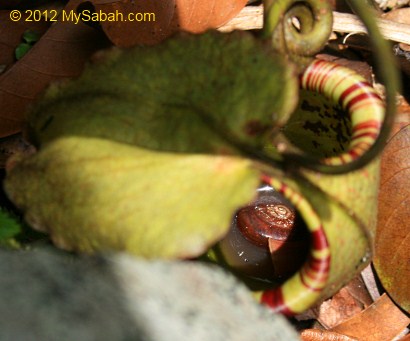
Above: snail trapped inside pitcher plant
MySabah: Is the murky fluid in pitcher poisonous? Pit: The water in pitcher contains highly acidic enzymes (sometimes up to pH 1.90!) to digest the prey and some wetting agents that make their escape harder. However, most captured insects died of drowning when they fail to climb out from our smooth inner wall, instead of being killed by the acid. The liquid is acidic, smelly and full of bacteria, so drinking it will lead to very uncomfortable consequences. You have been warned!
Above: larvae of mosquito inside pitcher plant
MySabah: Weird… How come I saw mosquito larvae swim happily in your “gastric” then? Pit: Oh yes. Larvae of certain insects such as mosquito and flies, live in the pitchers during juvenile stage, have adapted to the acidic environment. Actually they also help to break up the carcasses of the death bugs so my enzymes can decompose the prey easier. By sharing food, they also keep my cup clean by removing excessive organic leftover. The insects will leave me after they grow up and fly away, never return again except for laying eggs.
Photos: endemic pitcher plant of Sabah
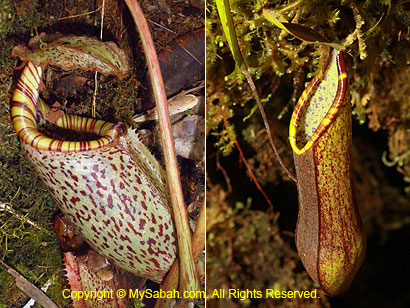
MySabah: How many species of pitcher plants are found? Pit: There are about 160 species of Nepenthes in the world. Most of them are concentrated in South-East Asia. 39 species are found in Borneo and 22 species are found in Sabah. Six out of the 22 species are endemic to Sabah, with four endemic to Mount Kinabalu (N. burbidgeae, N. edwardsiana, N. rajah, N. villosa), one endemic to Mount Trus Madi (N. macrophylla) and one obligate ultramafic species (N. macrovulgaris).
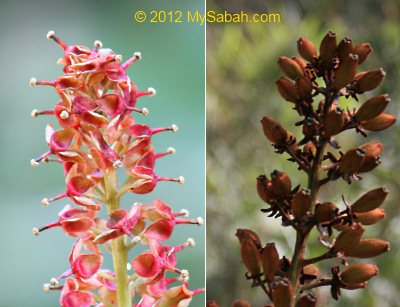
Above: flower of nepenthes (left is male, right is female)
Most pitcher plant species have very restricted geography distribution. Sometimes two different species crossbreed with each other naturally to produce a hybrid, such as Nepenthes xkinbaluensis (fusion of Nepenthes rajah and Nepenthes villosa).
New species is found at a rate of 1 to 2 every year. In October of 2006, Dr Charles Clarke discovered a new species on Gunung Alab (highest peak of Crocker Range Park) in Sabah, and named it as Nepenthes chaniana after Sabahan Datuk CL Chan. This is the first nepenthes species named after Malaysian!
MySabah: You are so cute. Can I plant you in my garden? Pit: All pitcher plant species are protected in Sabah. For people who possess or trade pitcher plants without a license, they can be fined RM5,000 or being jailed for 2 years, or both. In severe case, the penalty fee can reach RM10,000 (USD3,000++). You can buy a diamond for that price. Besides, pitcher plant is hard to cultivate in-house, most of them die under human care.
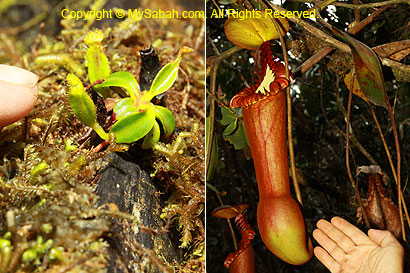
Above: Nepenthes Garden of Tenom Agriculture Park
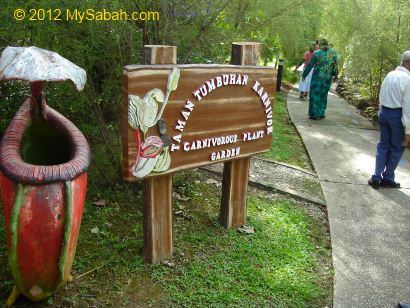
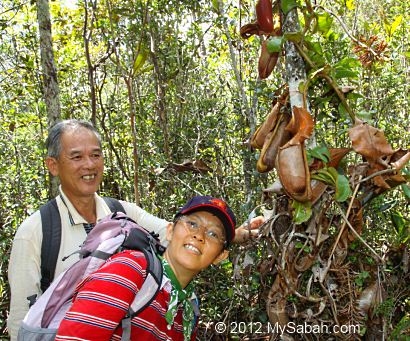
MySabah: Many tourists would love to meet pitcher plants and get autograph of them. Where are the best places to find you all? Pit: If you would like to see many species in a garden, you should check out Botanical Garden of Lokkawi Wildlife Park or Carnivorous Plant Garden of Sabah Agriculture Park in Tenom. They have collection of over 10 beautiful local and foreigner species. Even the roadsides to Beaufort, Papar-Kimanis, and Keningau have a few common Nepenthes species wait to be seen. If this is not close enough, you could look for them in nature jogging trail of Tun Fuad Stephens Park.
Above: wild pitcher plant at Tun Fuad Stephens Park
To see pitcher plants in the wild, Mesilau, Kinabalu Park, Maliau Basin, Mt. Trus Madi and Mt. Tambuyukon are the best spots to look for rare & endemic species. But you need to have very observant eyes because the colors of pitcher plants blend nicely in the wood. January to May is a good time as we grow well in wetter season.
Above: rare Nepenthes macrophylla in Mt. Trus Madi
Above: pitcher plant in Maliau Basin
Pitcher plants are sensitive, so please do not touch it. If you have to, hold its body gently and do not flip its lid, which is the most fragile part, to see what is inside. While you enjoy watching them, please do not feed them with stuff such as cockroach, as pitcher cannot cope with a mouthful of bugs. Camera flash is believed to be harmful to us, so please use it sparingly. By being considerable, the next tourist can see our beauty intact.
MySabah: Thank you so much, Pit! Pit: You are welcome. For further info about us, you could read the book “A Guide to the Pitcher Plants of Sabah” published by Natural History Publications. All the best!
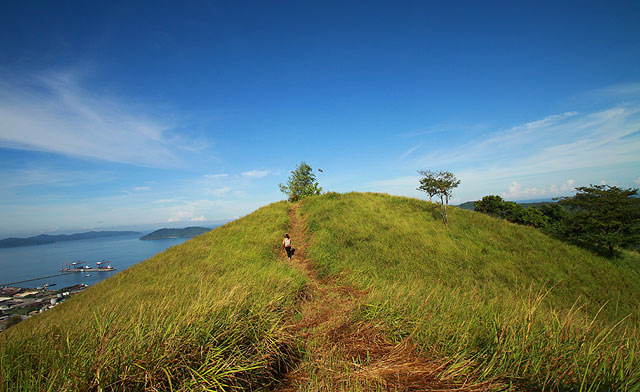
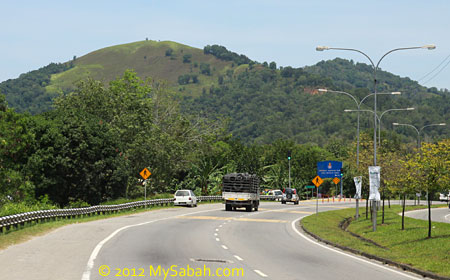
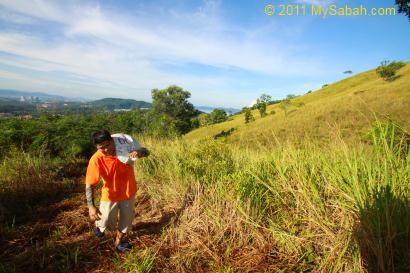
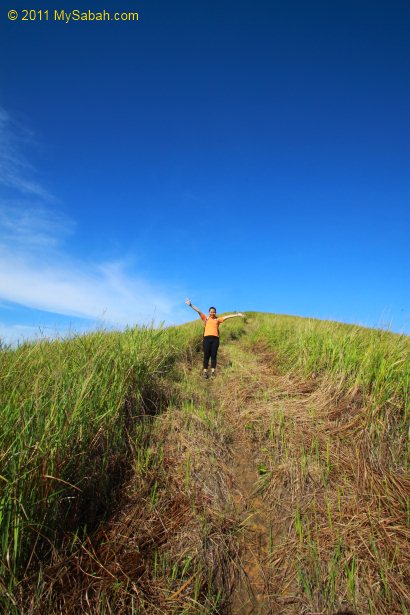
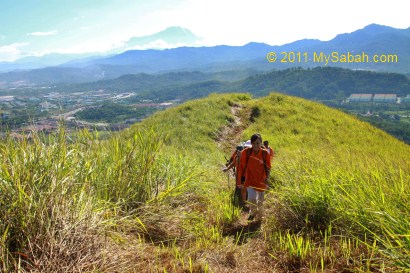
If you are on the way to Sepangar, you would notice a beautiful green hill with “bald” top. That’s why the locals call it “Bukit Gundul” (or Bukit Botak), which means Bald Hill. As Gundul Hill is so different from other surrounding hills with lush trees, I joined a hiking trip to explore it last month.
Above: view of Gundul Hill from the road
There are two starting points to climb Gundul Hill, one from UiTM campus, another from a construction site, the one that we used. Since both points are inside private land, you need to ask for permission from owner to enter. The hill is a state land (owned by government).
Above: the starting point of our climb from a construction site. You can see our cars parked very far below.
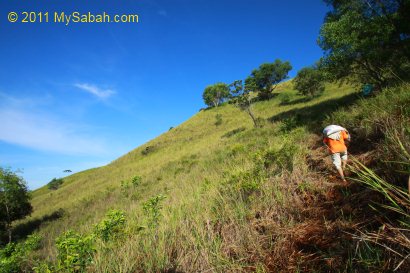
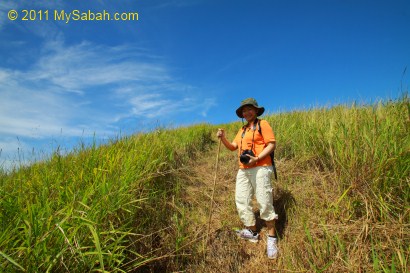
There are very few shades along the trail so we started our hiking at 7:30 early in the morning, before the scorching sun rising high.
At first we walked 15 minutes in a wood at the foothill. Watch your steps as snake might be lurking around here. No, there is no forest leech.
Very soon we walked out of the wood and exposed to hash sunlight. It’s a good idea to bring an umbrella with you. At least put on your sun block.
The hiking trail is mild in steepness. The length of trail is about 1.5 Kilometers and takes less than an hour. It is not challenging but can be tiring. The main problem is the heat. Do bring 1 Litre of water with you to fight the dehydration.
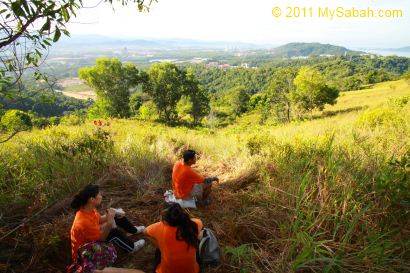
Beware of sun stroke too. We take a rest whenever we find a shade to cool off our bodies. Despite the hot day, breeze is here to comfort.
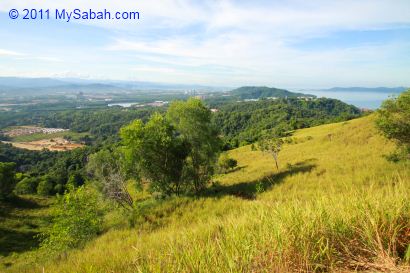
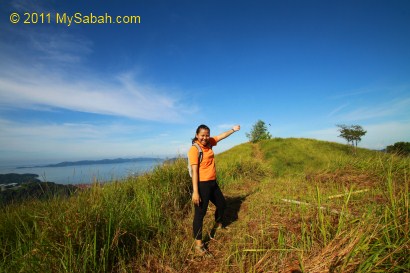
We already can see the sea of Sepangar Bay and UMS mosque from the slope. The grass land looks like flat area. In fact, the elephant grass is as tall as our chest. Nobody can explain why there are so few trees on Gundul Hill. We saw pitcher plant, which grows on soil with poor nutrients. May be that’s why.
The view near the top is one of my favorite. It looks like a meeting point of blue sky and green hill, lovely.. Such scene is so unlike Sabah.
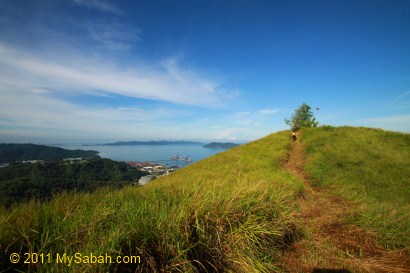
The last 500-Meter path is on a double-humped knoll.
Above: see the little bamboo tree in front? That’s the highest point of Gundul Hill.
Bukit Gundul really lives up to its name (Bald Hill). There is no tree except a small bamboo tree on top of hill. All of us try to squeeze into the little shade offered by that small bamboo tree.
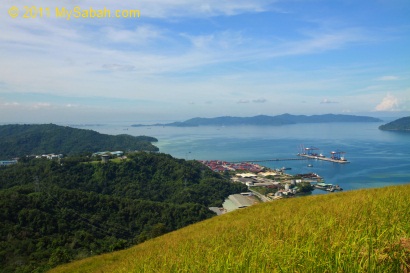
The view from the top of Gundul Hill is impressive! The hill is surrounded by forest, hills, sea, lake, mangrove and housing areas. We can see the port and navy base of Sepangar Bay. The height of Bukit Gundul is only 200 Meters, quite a small effort to get such a beautiful view.
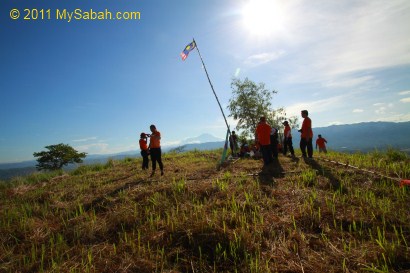
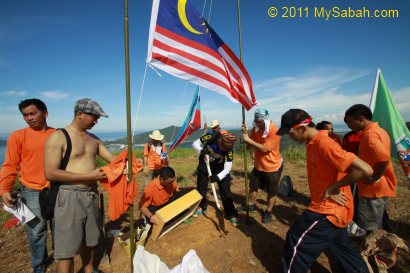
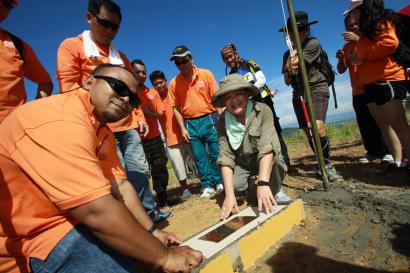
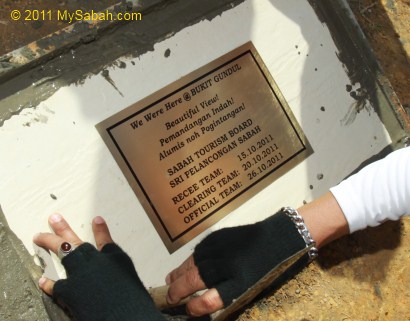
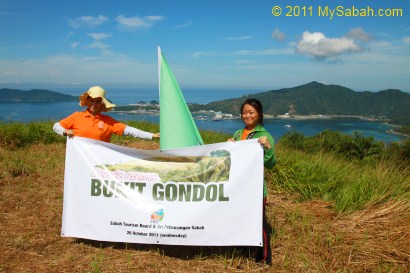
To mark our “conquer” of Gundul Hill, we installed Sabah & Malaysia flags and plaque on the hill.
After a few rounds of group photo taking, we left Gundul Hill at 10am. Bukit Gundul is really a good place for a short hike. It is only known among a small group of local hikers. However, no travel agent offers tour package to climb this hill, so you have to organize the trip yourself.
You may watch the 40-sec video below to see the surrounding of Gundul Hill. You will see Malaysia Tourism Minister checked us out in a helicopter too:
This article tells you how to organize a climbing trip to Mt. Tambuyukon. You may skip this if you don’t plan to climb the mountain. Please note that planning and preparation for Mt. Tambuyukon trip is tedious and time-consuming. If you have little spare time, getting a tour operator to arrange everything is a good option, but the cost will double or even triple.
Planning & Preparation for the Climb
Step 1. Gather the Climbers
First, you need to decide the number of climbers and the climbing date. Prepare a name list (with Full Name, MyKad/Passport No. and Phone contact) and confirm a date with all the climbers. Usually May to July are dry months and best time to climb. However, the global climate has gone haywire, for example, the La Nina or El Nino phenomenon would change weather pattern. Nobody can predict the weather, so you better be prepared for the worst. But try to avoid Dec and Jan, which are the wettest months.
Normally, you need 5-day-4-night to complete the climb. For experienced and fit climbers, 4-day-3-night is possible. If you are unsure, just plan for a 5-day climb.
Step 2. Book the Date with Sabah Parks
You need to book the climb with Sabah Parks at least 1 month in advance. All the paperwork and registration are done with Sabah Parks office in Kinabalu Park (Tel: +60 88-889888). Later, you will still need to communicate with Sabah Parks back and forth on various arrangement, more on this later.
Under Sabah Parks policy, only a maximum of 9 climbers (exclude Sabah Park rangers and porters) are permitted in one trip. Inform Sabah Parks your climbing date and submit your name list. They will mark the date for you if no other group climbing.
Step 3. Plan the Itinerary
Once the climbing date is confirmed, you may plan your itinerary.
Below is the summit trail map of Mt. Tambuyukon. Click it for bigger picture:
Below is a standard 5-day schedule (for reference only. You may adjust it):
Day 1
6:00am
Depart from Kota Kinabalu to Kinabalu Park
8:00am
Register at Kinabalu Park. Fill up climber & Indemnity forms. Pay for climb permit & insurance. Collect climber tags.
9:00am
Transfer into 4WD to Monggis Substation
10:30am
Register at Monggis Substation. Meet porters & Briefing by guide.
11:00am
Start trekking to Wuluh Camp (KM6)
4:00pm
Arrive Wuluh Campsite for camping overnight
Day 2
7:00am
Breakfast
8:00am
Trekking 4.8KM to Musang Camp (KM10.8) for camping overnight
3:00pm
Arrive Musang Campsite
Day 3
3:30am
Breakfast
4:00am
Trek up to summit of Mt. Tambuyukon
10:00am
Reach the Summit (KM14)
5:00pm
Back to Musang Campsite for dinner & overnight
Day 4
7:30am
Breakfast
8:30am
Descend 13 KM (via old trail) to Monggis sub station. Overnight in Monggis Sub Station
Day 5
8:00am
Breakfast
9:00am
4WD transfer back to Kota Kinabalu
1:00pm
Arrive KK
Below is a 4-day itinerary (for very tough climbers only):
Day 1
Depart to Kinabalu Park
Register at Kinabalu Park.
Go to Monggis substation by 4WD
Overnight in Monggis
Day 2
8am: Breakfast
Start climbing to Musang Camp (13KM old trail recommended)
Overnight in Musang Camp
Day 3
Breakfast
Climb to the Summit (KM14)
Back to Musang Camp for overnight
Day 4
Breakfast
Back to Monggis via 13KM old trail
Go to Ranau (by 4WD)
Back to Kota Kinabalu
Of course there are other variations of itinerary, depends on your needs.
Step 4. Working out the Budget
This part is not easy… You only know the exact amount spent after the trip.
Mandatory Expenses
Climb Permit: RM100 for Malaysian, RM200 for foreigner
4-Wheel-Drive (4WD) Transport (Ranau-Monggis Substation return trip): RM400-500 per car
Sabah Parks Ranger Guide Fee: RM70/day (Policy: 1 ranger is required for every 3 climbers)
Conservation Levy: RM3 for Malaysian, RM10 for foreigner
Insurance: RM7 per day (you must insure the porters & rangers too)
Camping Fee: RM10 per pax
Food: estimated RM20/day per pax
Optional Expenses
Tour Guide: RM100-150 per day. Besides guiding, they can cook & setup camp for you.
Porter: RM70/day (carry up to 20Kg)
Cooking service: extra charge if you also want tour guide to cook for you
Accommodation (Monggis Substation): RM10/pax per night (not so sure the rate)
Use of cooking facilities (e.g. gas) in Monggis Substation: RM50
Certificate: RM5
Misc. Expenses
Individual / group may purchase the items below:
Camping tent
Portable cooking stove & utensils
Cooking gas cylinder, RM5 each (for portable cooking stove)
Personal medication (e.g pain-killer, anti-septic cream) & 1st Aid Kit (for minor cut & injury)
Insect repellent, mosquito coils (anti-sandfly)
For example, there are 3 Malaysian climbers who would like to hire one 4WD and two porters for a 5-day trip. The budget will look like table below (all fees in Malaysian Ringgit (RM), USD1 = RM3.3):
Item
Price
Qty.
Total (RM)
Climber Permit*
100
3
300
4WD Transport
500
1
500
Sabah Parks guide fee (RM70 x 4 day)
280
1
280
Camping Fee
10
3
30
Conservation Levy*
3
3
9
Porter (RM70 x 4 day)
280
2
560
Insurance (RM7 x 4 days x 6 pax)
28
6
168
Food (RM20 x 5 day)
100
3
300
Accommodation (Monggis)
10
3
30
Certificate
5
3
15
GRAND TOTAL:
2,192
*Malaysian rate
So the basic fee is about RM731 (=RM2,192/3 pax) per climber. Please note that optional, individual and misc expenses are not included in this calculation, so the final cost will be more than this.
Step 5. Physical Training
Very Important! Ask your climbers to start physical training. Climbing Mt. Tambuyukon is a few times harder than Mt. Kinabalu, and it is no joking matter. Climbers who never exercise regularly is almost guaranteed failure. You just can’t hide your weakness from Mt. Tambuyukon. The climber must jog at least 15KM per week for consecutive 3 months, the more the merrier. The more pain you get in training, the more relaxing your climb will be. The most suitable training track is the hilly trail. Do exercise the muscles of arm and waist, because the extra strength will help you a lot on carrying bag and free climbing.
For elder climbers, you may advise them to take glucosamine daily supplement before the climb. That can help preventing serious knee pain after climb.
Step 6. Briefing & Discussion with Climbers
Have at least one meeting with all the climbers and do the following:
Briefing: Tell them what they should prepare (see “Things to Bring” below) and what to expect (better if you can show them my blog about Mt. Tambuyukon, haha).
You may start collecting money from all climbers, so you can start purchasing food & supplies for the group, also as a non-refundable “deposit” to avoid inconsiderate people withdraw in last minute.
Get the mobile phone number of everyone to keep in touch.
Assign one or more members to help you on food preparation.
Step 7. Booking Porters & 4WD Transport
Though it’s possible to carry the bags and supplies yourselves during the climb, hiring porters will greatly reduce your burden and the climbers will have better chance of reaching the summit. During emergency situation, porters will be the extra hands that save life. Besides your personal backpack, do not forget you also need someone to carry your camping tents, food & supplies, portable cooking stove, cooking utensils, etc.
You can contact Kinabalu Park to arrange for the porters and 4WD transport. Each porter can carry up to 20Kg of stuffs. Just call Kinabalu Park about 1 week before the climb and tell them how many porters you need. Most of them are villagers from Monggis Village near to the Substation. Usually they will wait for your group at Monggis Substation.
Step 8. Guidelines for Food
You may start buying food 1 or 2 weeks before the climb. Below are some tips:
Our warm and humid climate causes food to spoil quickly and you can get food poisoning. Avoid bringing “wet” food (e.g. fresh meat & fish), which is prone to growth of bacteria.
Avoid food that needs a long time to cook coz it will consume more cooking gas.
You don’t need to prepare food for porters and rangers.
Instant noodle is a poor choice for breakfast (before the climb) coz the excessive salt dehydrates you. Personally I highly recommend Oat meal coz it releases energy for many hours. You may mix oat meal with sugar & milk powder to make it tastes better.
Avoid heavy or canned food. You also can’t dump the empty can in the camp. No, you can’t bury them.
You may bring frozen meat so you can have meat in day 1.
Remove food packing to reduce weight & size.
Every day the climb starts from morning and ends at evening, so you can’t stop to cook lunch. You need to prepare packed lunch in the morning.
Ration, organize, pack and label the food nicely in plastic bags (prevent getting wet).
Store all the food in a proper backpack for porter to carry.
Hang the food on air to prevent rats and civets having a buffet.
Prepare food menu list so you knows what to cook each day. It is taxing if you only start sorting out what to cook, after a long tiring climb.
You can refill water at the rivers / streams (KM5, KM6, KM8 & KM10.8), but bring a few bottles just in case.
Bring a few garbage bags for disposal of leftover food.
Please find out if anyone has any food preference (allergy, vegetarian and religion).
Control the weight of your food. Don’t bring tons of food!
Step 9. Final Check
To make sure everything is in place, you should do the following a few days before your climb:
Pack and weight your food to check if you have hired enough porters to carry it.
Remind Kinabalu Park again on the climbing date and number of porters you need.
Sabah Parks may send their Ranger from Poring. Confirm with them if the ranger will wait for you at Poring or Monggis.
Confirm with 4WD driver on the pick-up date & time.
Send a friendly reminder to all the climbers (e.g. date of departure & gathering time).
Things to Bring
MyKad/Passport: required for registration at Kinabalu Park
Camping tent
Sleeping bag (the temperature can drop to 10°C at night)
Optional: energy bars, hand glove, pen & notepad, lighter, camping light
Tips & Advices
Keep your backpack light. I repeat, keep it LIGHT!
The temperature of Mt. Tambuyukon ranges from 6°C – 30°C (43°F – 86°F). of course, the higher the altitude, the colder. It’s quite windy near the summit.
If you hire a porter to carry your bag. Don’t let him carry everything. He might be very far ahead. Bring raincoat and water with you in a small bag.
If you plan to overnight in Monggis Substation in last day, you may leave a set of clean clothing (and some food) in their storeroom. Pointless to bring unused stuffs up and down the mountain.
Don’t bring too many clothing. Keep 1 set of clean clothing for bedtime
One of the best shoes for trekking in wet tropical forest trail is “Adidas Kampung” rubber shoes, available locally for RM6–7 a pair only and water-proof.
Hygiene: wash your hands before meal and try to drink only boiled water.
Drinking unboiled river water is quite unavoidable. Prepare some water purification tablets to sterilize river water. Available in outdoor shops.
Trim your fingernail & toenail before the climb.
Potential Problems / Dangers
Below are a list of issues you should prepare to prevent/rectify:
Diarrhea: use handwash sanitizer for cleaning before meal. Bring medicines just in case.
Leech Bites: wear leech socks
Wasp / Bee / Hornet: bring medicines if any climber allergy to bee stung
Deer Fly / Sandfly: apply insect repellent with DEET formula or burn mosquito coils
Thorny rattan & poisonous plant along the trail: look before you grab anything for support
Snake: just watch out under the rocks / log
Dehydration: bring enough water. Rehydration salt is useful.
Fall / Slip: be extra careful at slippery or steep trail
Sprained ankle: watch your steps
Blister & small cut: use anti-septic cream
Losing way: stick with the group
Falling tree branches: pray!
Tour Packages
Now you can see that it’s a lot of work and preparation. If you don’t want to do the tedious planning, you may hire TYK Adventure Tours (Tel: (6088) 232821, 238702 Email:tykadto@gmail.com) to arrange everything for you, from transport, meals, registration, porters, guides to camping tents. Of course it’ll be more costly.
After spending 3 days of camping inside the forest, we go back to Monggis Substation (starting point of the climb) today. Please refer to trail map for the location.
DAY 4. Back to Starting Point
Descending to Monggis Substation
We are going home. When we worried that we needed to go through the same dreadful 10KM undulating trail again, Maik said we would use the old 13KM trail (some says 15KM), which is longer but mostly flat and descending route. We packed our stuffs and left Musang Campsite at 7:30am.
Maik was right, the walk on old trail is a heaven compared to previous 3 days. We only climbed over a few mildly steep slopes and hardly called these a challenge.
In contrast to the dim new trail, there are more sunlight came in from the open canopy.
You may watch the 2.5-min video below to see the jungle trekking via old trail:
Track marks and footprints of wild boars and deers are found along the way. I could hear hornbills flied over the canopy too.
Above: hole dug by wild boar
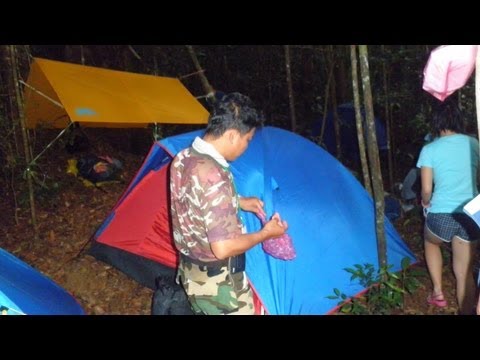
Camp 1
By 11:30am, we arrived Camp 1 (altitude 578M), a large flat ground that can accommodate 6 camping tents and under a canopy of tall oak trees. There is a stream nearby for refilling our water. We had some fried rice as lunch there, rest a while then moving again.
Above: Camp 1 on old trail
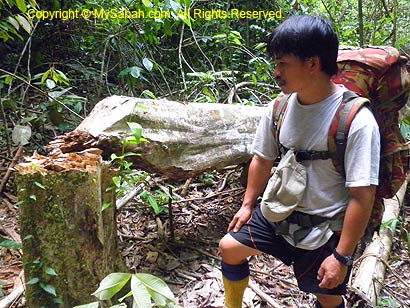
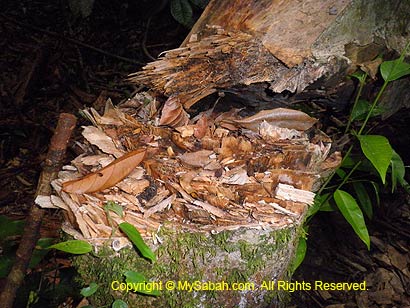
Not a single signage is found along this 13KM old trail, so we had no idea how far we went. After Camp 1, the trail is narrower and nearly unrecognizable. The old trail is poorly maintained and flanked by dense undergrowth. During rainy season, the climbers will harvest dozens of leeches while walking and brushing through the dense shrubs. On the way, we saw a wild Agarwood (gaharu) has been cut and left to dry by thief. Gaharu is a highly precious fragrant wood, which can fetch for RM5,000 per Kg.
Above: Agarwood cut down by thief
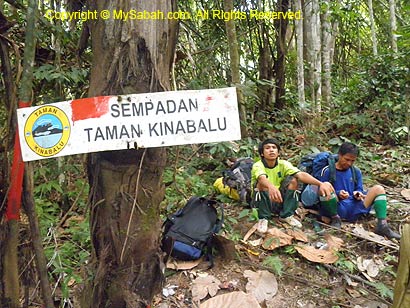
By 2:30pm, we reached the Kinabalu Park boundary which means we are only 2-hour away from Monggis Substation.
Above: Boundary of Kinabalu Park
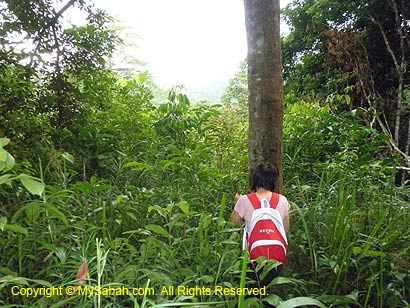
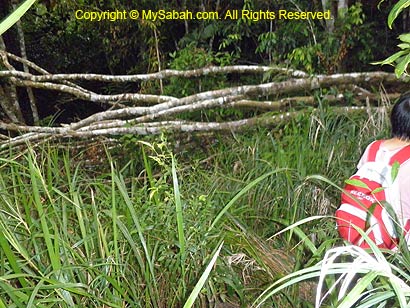
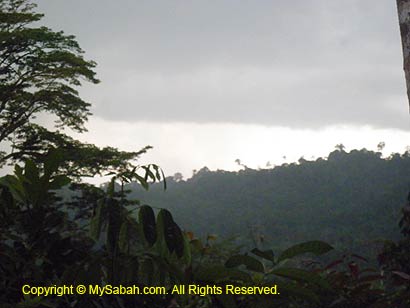
After this point, we were walking on private land and passed through rubber plantation, farm land and orchards. The trail is inside private land and not maintained at all. We trekked inside bushes and occasionally moved around the fallen trees that blocked our way. All of us made it to Monggis Substation around 4:30pm, right before the pouring heavy rain.
Above: heavy rain coming
Overnight in Monggis Substation
Most of us have been wearing the same trekking outfit since day 1 and didn’t take shower, so everyone smells funny. We took a shower in Monggis Substation and put on clean clothing.
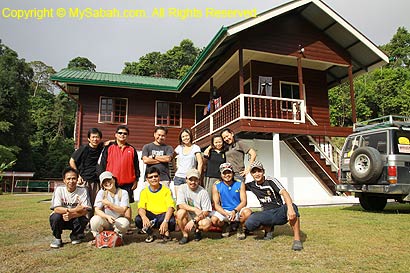
We are also glad that we can sit on a proper chair to rest our exhausted legs and bodies. After I settled the payment for porters and guides, I submitted the name list of climbers to Justin, manager of substation, for printing of certificates.
You may watch the 40-sec video below to see Monggis Substation:
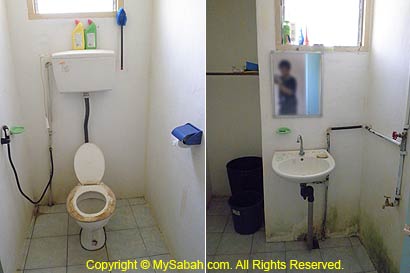
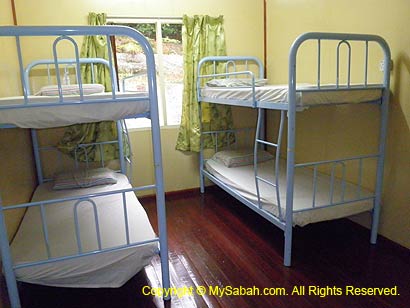
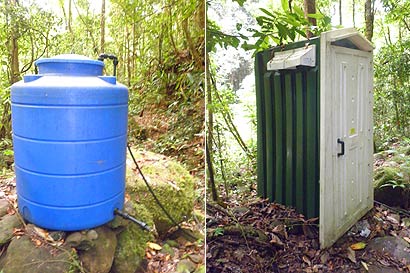
Monggis Substation is a two-storey administration building and accommodation of Sabah Parks. In ground floor, there is a bathroom, toilet, park office, kitchen, living room (with TV) and a bedroom.
Above: standard room with bunk beds
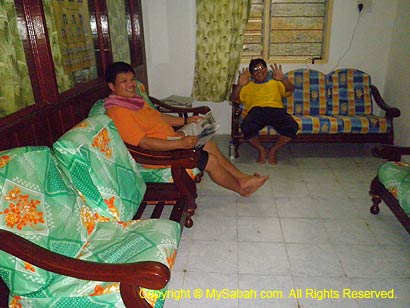
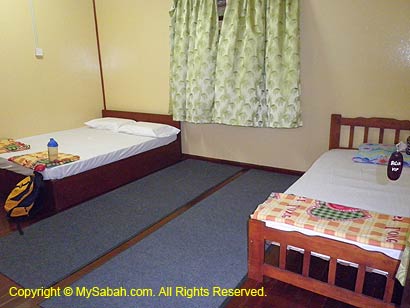
In first floor, there is a living room (with TV), 3 bedrooms with bunk beds and one VIP room with two beds. Electricity is only available from 6pm to 11pm and powered by generator. The accommodation can accommodate up to 20 visitors for a small fee. My room has a ceiling fan, wardrobe and bunk beds come with pillow. To us, this is a 5-star accommodation compared to camping. By the way, you better close the windows, otherwise your room will be full with hundreds of insects attracted by the room light.
Above: VIP room of Monggis Substation
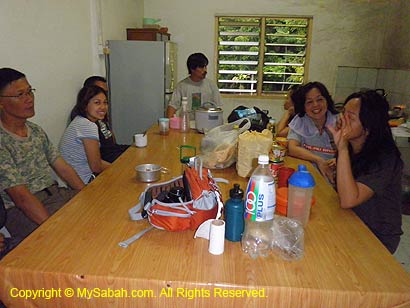
No, there is no restaurant here and neighborhood, so you need to prepare your own meals. The kitchen in substation is quite well-equipped, common items such as refrigerator, cooking stove, gas, cooking utensils, dining table and tableware are available. Visitor is required to pay a fee of RM50 for using the gas and cooking facilities. We had rice, chicken, curry, sardine and mixed vegetables as dinner, reminisced about our experience, then crawled to our beds.
Above: kitchen
DAY 5. Going Home
Back to Kota Kinabalu
Last day is a happy day for everyone. Climbers are happy that they will be back to civilization soon; guides and porters are happy to receive their tips. After a few rounds of photo sessions, we say good bye to Monggis and Mt. Tambuyukon. Despite the muddy road caused by heavy rain last night, it was a smooth ride to head back home.
Bye bye Mt. Tambuyukon!!!
Above: Exhausted climbers. Better not showing their faces or I’ll be skinned alive. :p
Mt. Tambuyukon Vs. Mt. Kinabalu
Many ask me, “Mt. Kinabalu and Mt. Tambuyukon, which one is harder to climb?”
I can tell you, though Mt. Tambuyukon is about half the height of Mt. Kinabalu, it’s 3 times harder (multiply 2 if the weather is bad) to climb. IMHO, “Mt. Kinabalu is for kids, Mt. Tambuyukon is for men.” After the climb, whenever I see online travelogue that says climbing Mt. Kinabalu is “extremely challenging”, I laugh my ass off. One advice – do not try Mt. Tambuyukon if you think climbing Mt. Kinabalu is hard!
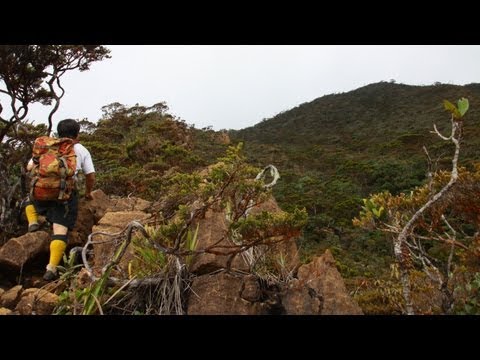
You may watch the 5-min video below to see our climb from the start to the summit:
In contrast to Mt. Kinabalu, Mt. Tambuyukon is a forested mountain. The climbing route is pure nature trail, full of leeches and no boardwalk, rope, hand rail and other support. In our team, one member stung by wasp, two got swollen finger/arm caused by poisonous plant, one suffered altitude sickness, and one got sore knees. Overall, it’s impossible to came back from Mt. Tambuyukon without any cut, wound, bruise, pain and leech / sandfly bites on our bodies.
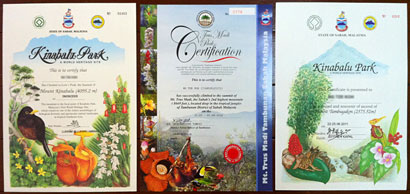
Above: Now I have climbing certificates of Malaysia’s top 3 mountains. From left to right: Mt. Kinabalu, Mt. Trus Madi & Mt. Tambuyukon.
Today is the BIG day because we will go to the summit. Please refer to trail map for the location.
DAY 3. To the Summit!
All climbers wake up and had oat meal / Maggi instant noodle as breakfast at 3:30am and headed to the summit at 4am. In the briefing, our tour guide, Maik, says today will be the most challenging day and he is right. As difficulty multiple, the so-called 4 KM distance to summit looks more like a longish 8 KM trek.
Climb to Summit
For safety reason, we target to reach the summit before 11am. All climbers must return to Musang camp at 11am, no matter how far they make. As there is no water point along the way, a few porters will carry some water and follow the climbers.
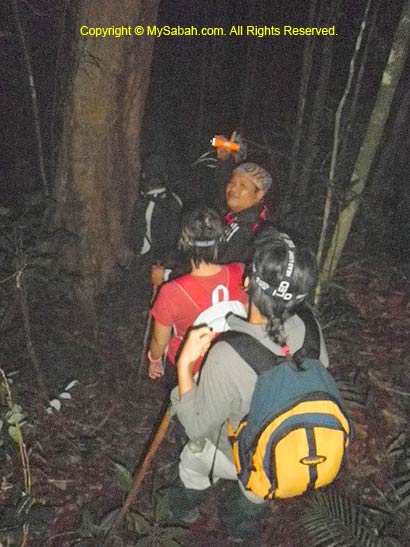
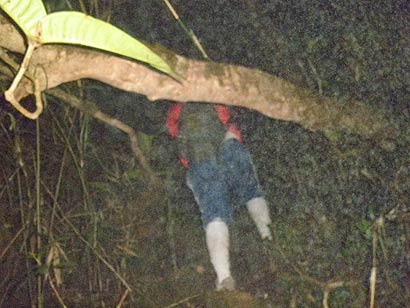
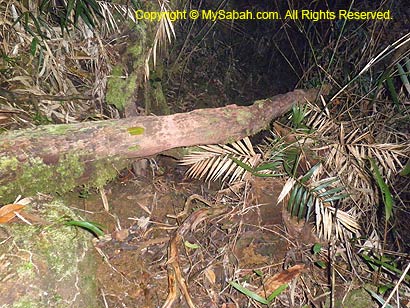
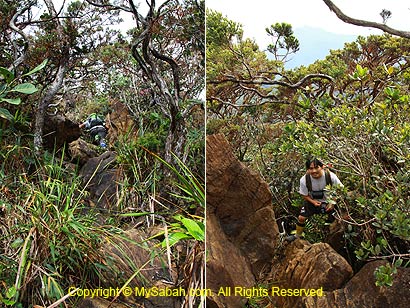
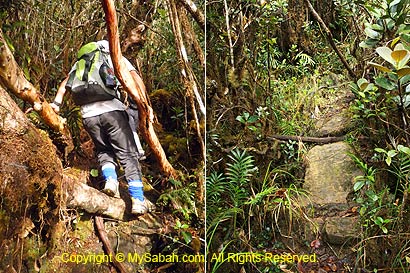
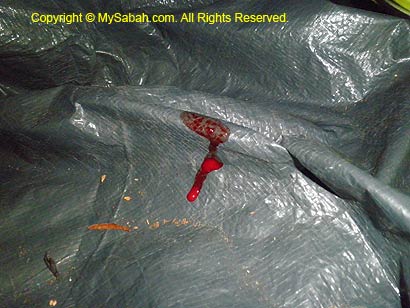
Under a mixed feeling of apprehensive and excitement, we climbed slowly and quietly in the dark. The first 1.5 KM is steep and narrow ascending trail and many parts need to climb over by hands. Besides, the overhanging tree trunks always blocked our way that we have to move over or under them. My head bang on a tree and bleed when I struggle to move up in the dark.
Above: Mind your head and feet!
After KM12, we were awarded by a few hundred Meters of relatively flat trail to the Jeneral Camp (named after General Poon, who led a team of Royal Malaysian army on this route years ago) at KM12.6.
Above: climbing over network of slippery entangled roots
Jeneral Camp is a small open area which can setup 3 small camps. I checked my watch and it was 6:40am, but the summit is still a long way ahead.
Above: Jeneral Camp (KM12.6). Still a long way ahead…
You can watch 10-sec video below to see the Jeneral Camp:
Though it didn’t rain, after the morning shower by mist, the cloud forest was wet all over the place, and I can even feel the moist filling my nose. Most of the time, I had to hold the trees and roots to move up, actually I like it coz climbing by hands saves a lot of leg work.
Nepenthes Garden (KM11.5 – KM14)
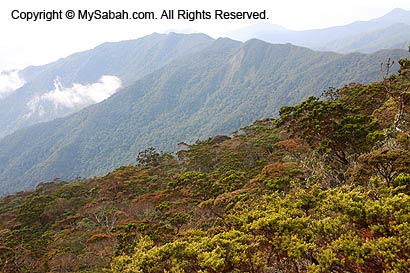
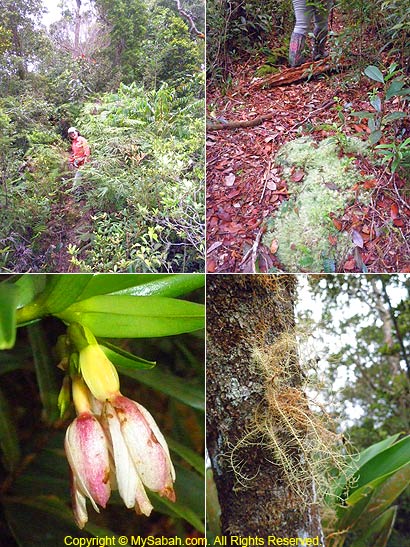
When the day turns brighter, I can see clumps of pitcher plant along the trail after KM11.5. The most spectacular Nepenthes edwardsiana is hard to be missed due to their bright color and huge size (20 to 40 CM, and known to reach 50CM). Nepenthes edwardsiana is characterized by highly developed ribs and teeth peristome. They are most abundant between KM11.5 and KM13, where a few small colonies of Nepenthes villosa and lowii are also found in this mossy environment.
Above: Nepenthes edwardsiana (left) and rajah (right)
Above: Nepenthes lowii (left) and villosa (right)
Above: Nepenthes burbidgeae (left) and tentaculata (right)
After KM13, colonies of Nepenthes rajah, the largest pitcher plant species in the world, takes over. Botanists also record the presence of N. burbidgeae, N. tentaculata, N. fusca, N. stenophylla and various hybrids such as N. xKinabaluensis (N. villosa x N. rajah), N. harryna (N. villosa x N. edwardsiana), N. tentaculata x N. burbidgeae and N. edwardsiana x N. burbidgeae in Mt. Tambuyukon.
Above: pitcher plant from 1CM to 40CM
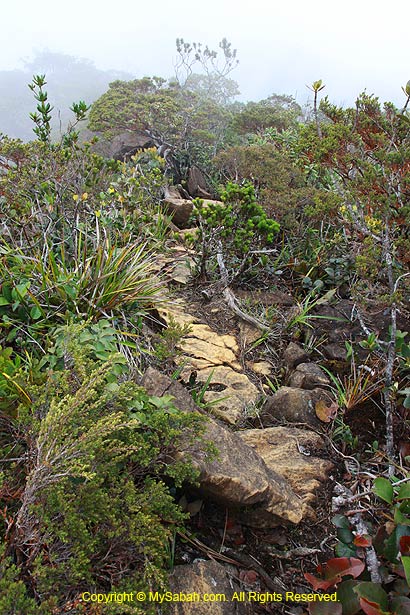
KM13
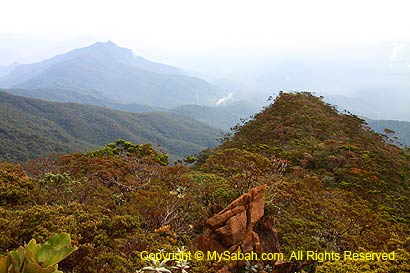
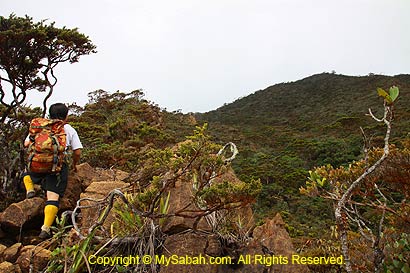
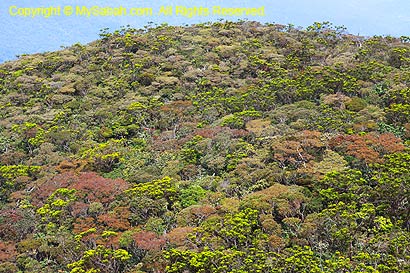
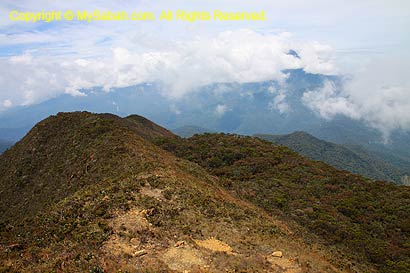
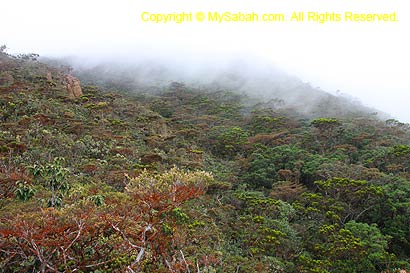
The summit trail is relatively less steep after KM13. Shortly the luxuriant mossy forest thin out and we came to a long rocky ridge with clearing to sky. If you turn around, you can have a panoramic view of neighboring ridges of Tambuyukon converging towards the summit. I feel like walking on the backbone of a gigantic dinosaur.
When the mist clears, I can see Nambuyukon (second highest peak of Tambuyukon Range) in Kota Marudu. I have to put on my jacket when it gets cold and windy in open area.
Above: Nambuyukon Peak, 2nd highest peak of Tambuyukon Range
An author (Clarke, Charles M.) has the best description of the mountain relief:
“The summit sits at the top of a number of very long ridges which drop away gradually over several Kilometers. The sides of these ridges plunge steeply down into deep and similarly long gullies. These gullies funnel strong winds up towards the summit. The winds rush over the summit at tremendous speeds, the result being that the vegetation can only grow up to 1 Meter high in places. The upper parts after 2,100M of mountain are covered with low, scrubby vegetation, punctuated by large ultramafic boulders.”
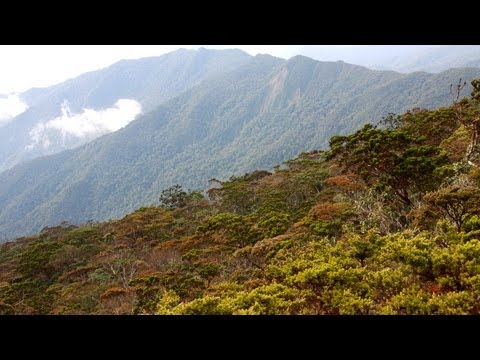
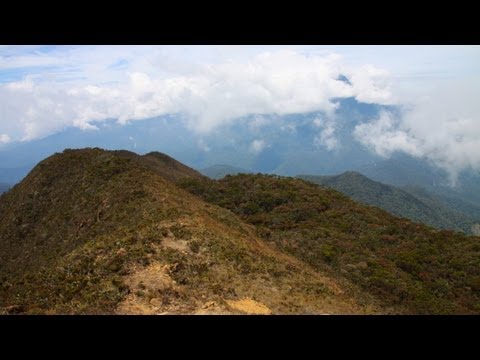
You can watch 1-min video below for panoramic view of Tambuyukon Range:
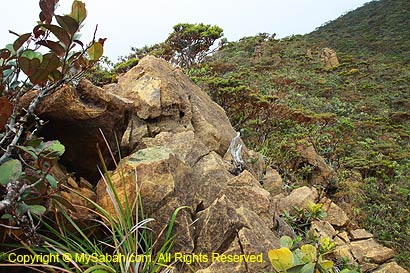
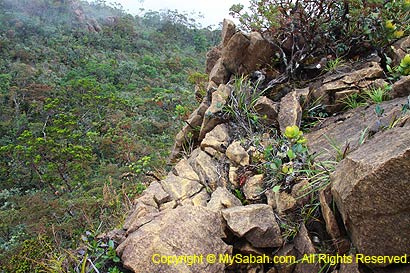
Ultramafic Boulders
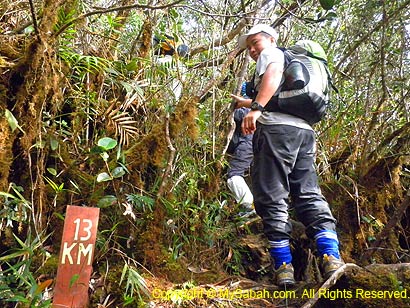
We moved carefully along the rocky ridge and conquer a series of hillocks. At this point, we know the true meaning of Tambuyukon, which always cheats us with a number of “faked summits”. And DON’T believe those milestones as they lie too. My experience and gut feeling tell me that the distance between KM13 and KM14 is not 1KM, but 3KM!!!
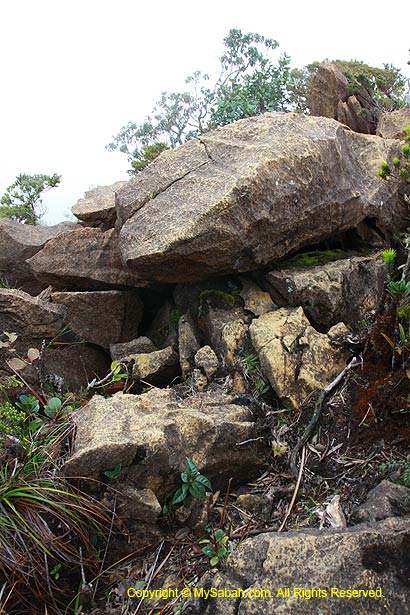
The huge yellowish-grey boulders near the summit are ultramafic rocks. Ultramafic rock derived from the Earth’s mantle, the layer of the Earth below the crust and above the core, formed billions years ago from melted rock when the Earth first solidified. Such rock consists of heavy minerals (Magnesium, Iron, Nikel) and its soil is poor in nutrients, which promotes the growth of endemic and highly specialized plants adapted to this environment. Ultramafic rock was pushed to Earth’s surface mostly during tectonic movement and Mt. Tambuyukon has the highest concentration of ultramafic rocks in Sabah. Sound cool but watch out for snake under the rock.
After 9am, we reached the last and smallest camp, Rajah Camp (KM13.6), which can hold only one camping tent. More N. rajah is seen around this area.
Above: Rajah Camp (KM13.6)
The last 400 Meters to the summit is a narrow and rocky passage under the leptospermum recurvatum dwarf trees and dense with underbrush.
Above: see the summit at the right?
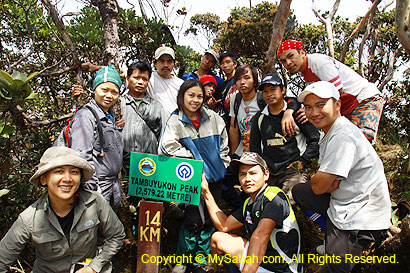
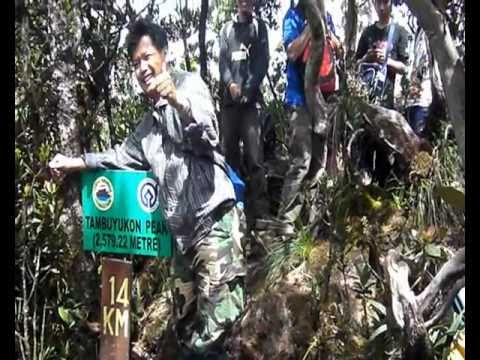
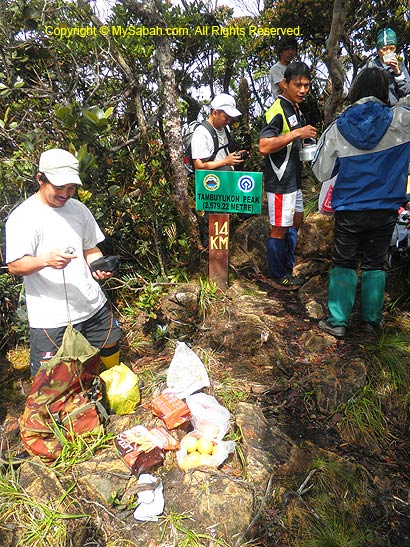
The Summit (KM14)
Finally, all of us reached the summit at 10:10am. The summit has no beacon or survey landmark, but only a signage that shows the trail distance and height of Mt. Tambuyukon.
Above: group photo on the summit. WE MADE IT!!!
The summit area is no wider than 20M across and densely surrounded by leptospermum trees. Frankly, it is not an impressive peak, but we are still happy about the victorious moment. We had an early lunch on the summit. The guides and porters have brought some rice with dried anchovy fishes, biscuit and 3-in-1 hot drink.
You can watch 5-min video below to see the climb from the start to the summit:
Behind the signage is a narrow trail that takes us to the side (very windy!) facing Mt. Kinabalu. Many say we can get the nearest and best view of Mt. Kinabalu from Mt. Tambuyukon. Too bad Mt. Kinabalu was covered by thick mist and refused to show her face.
Above: Mt. Kinabalu refused to show her face..
The temperature was about 20°C but the chilling strong wind makes us feel like 10°C. I notice there is a vast camping area that can house more than 5 tents behind the summit.
Above: camping ground behind the summit
You can watch 1-min video below to see the surrounding of the summit:
Return to Musang Camp
We need to be back to Musang Camp before 5pm, so we must leave the summit by 11am. By coincidence, today (24/6) is the birthday of Joimis, so all of us gave him a surprise by singing a birthday song to him on the summit. This might be the first time ever a birthday song echoes on the peak of Mt. Tambuyukon.
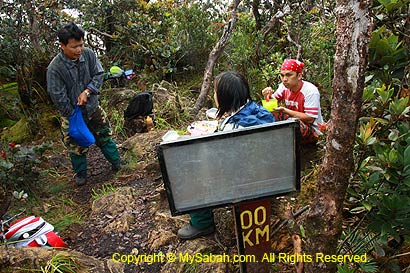
Above: The end is also the beginning. Now we are 0KM on the way back to the starting point.
The descending route is not easier than ascending. On the way down, I spotted a few N. tentaculata and N. burbidgeae. We arrived Musang Campsite around 4:30pm. The climb is considered over. Everyone was in relaxing mood and shared their joyful stories. We also prepared a birthday fruit cake for Joimis to celebrate his birthday.
Above: you do not want to fall from here….
Though extremely tired coming back from the summit, I took a shower at the small stream nearby. A leech bites me. Anyway, I feel fresh and clean after the cold shower. Because of humid environment, our cloth is always damp and “sticky”, making us uncomfortable. Tonight is still a warm night, but free of stress.
We wake up at 7am to have chicken porridge as our breakfast and trekked 5KM to Musang Campsite (KM10.8) at 7:45am for day 2. Please refer to trail map for the location.
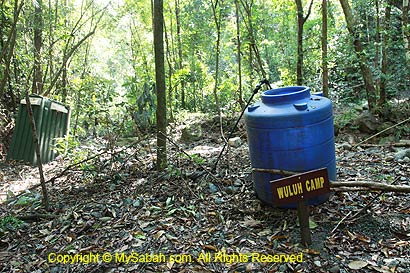
Wuluh Campsite (KM6)
KM5 to KM6 is mainly steep descending trail and we reached Wuluh Campsite (KM6) after an hour. Wuluh Campsite is next to Wuluh River and has large clearing that can house 4 to 5 camps.
If the mobile toilet and water tank there are not in bad shape, Wuluh Campsite can be the best camping spot on summit trail. We continued our climb after a brief stop at Wuluh Camp.
Above: Camping ground of Wuluh Campsite
Below: Wuluh River next to the camp
You can watch 1.5-min video below to see the surrounding of Wuluh Camp:
The undulating terrain between KM6 and KM7 was punishing and I was told that the narrow walk along the hillside at KM6.5 took a life of a foreigner who fell. We rest a while on a high point at KM7, then descended one hour to Kepuakan Campsite (KM8).
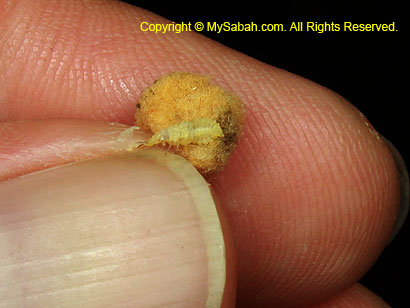
Above: probably an ant-snatching assassin bug that likes to pile stuffs behind its back to confuse preys and predators
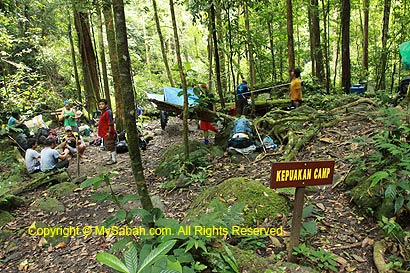
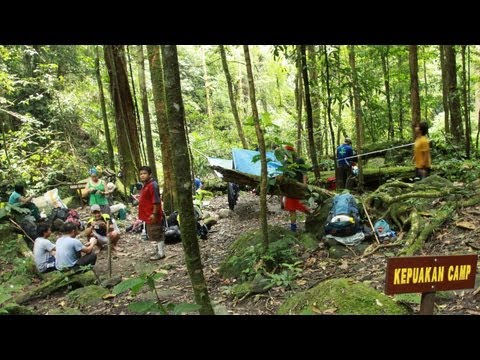
Kepuakan Campsite (KM8)
Around 11:30am, we arrived Kepuakan Campsite, where we had Maggi instant noodle and fried rice as our lunch.
You can watch 1-min video below to see the surrounding of Kepuakan Camp:
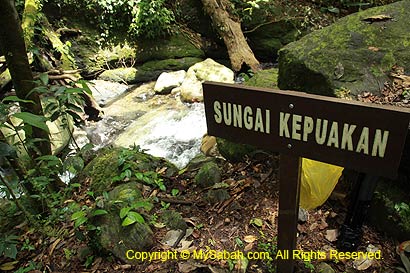
Above: Kepuakan River next to the camp
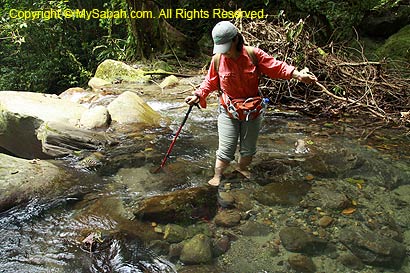
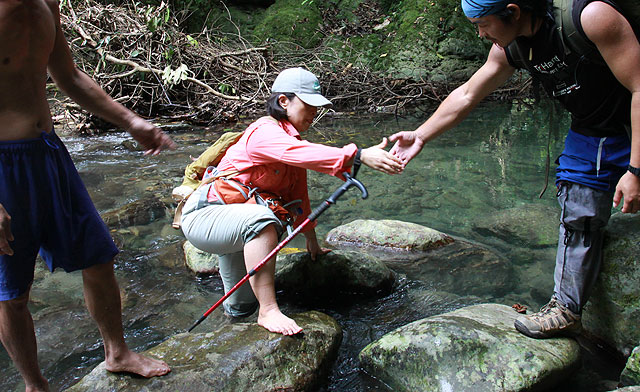
The Kepuakan River next to the campsite is bigger than Wuluh River, but the camping ground is a smaller area which can fit only 3 camping tents. Mobile toilet and water tank are available in the site. Gaining more energy from lunch and rest, we crossed Kepuakan River to head to Musang Campsite (KM10.8) at 12:30pm.
Above: Crossing Kepuakan River
Tough! KM8 – KM10
80% of the trail between KM8 and KM10 is over 50 degrees of steepness and the worst part for day two. The climb is twice the difficulty of previous day.
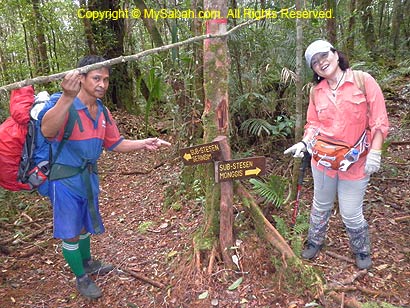
Things got better after KM10. The trail is relatively flat and the air is cooling and refreshing, as we reach 1,400M above sea level. From the misty air, mossy carpet and slimmer trees around, we can see the switch of hill forest to montane vegetation. 10 minutes later, we came to a junction that can take us to Serinsim Substation in Kota Marudu. According to the ranger, the journey to Serinsim takes 5 days.
Above: Junction to Serinsim substation in Kota Marudu
We knew Musang Campsite was only a few hundreds Meters away so we speed up, then the ranger advised us to be cautious and stick to the right. Because a few steps to the left of the narrow trail is a sheer drop. A lady from Peninsular Malaysia fell here just a month ago and luckily stopped by trees from a fatal plunge.
Above: I’m only one step away from the cliff at the left
About 200M before Musang Camp, we were surrounded by 3 to 4 species of birds. Probably they never seen a human before, so they perched on the trees and made calls to us, as if they were asking who we were. I only can tell there were an Ashy Drongo and a Magpie Robin among them.
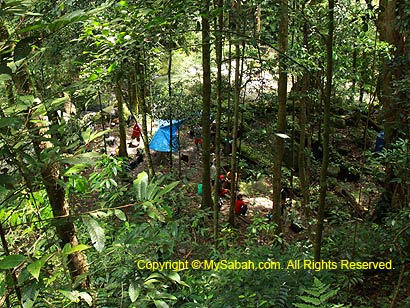
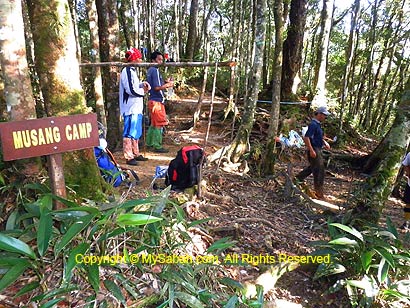
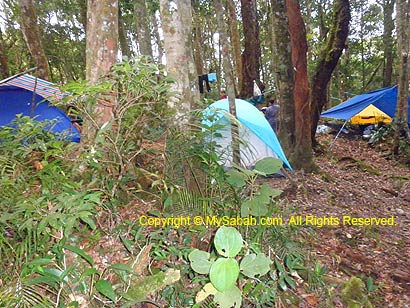
Musang Campsite (KM10.8)
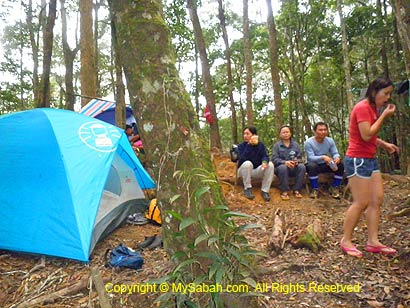
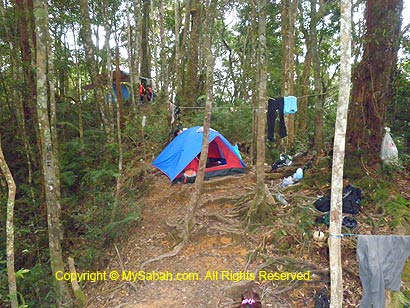
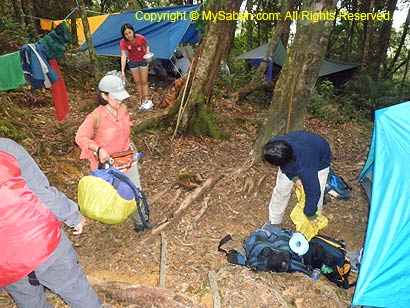
Situated at 1,445M above sea level, Musang Campsite gets its name from the presence of civets around the site. Though the ground is not so wide and flat, Musang Campsite is quite spacious and able to host more than 4 camping tents on a long ridge that overlooks deep valley at both sides.
We overnight here on day 2 and 3. The canopy of montane forest is thinner, allowing more light to enter, so the surrounding is brighter here.
You can watch 1-min video below to see the surrounding of Musang Camp:
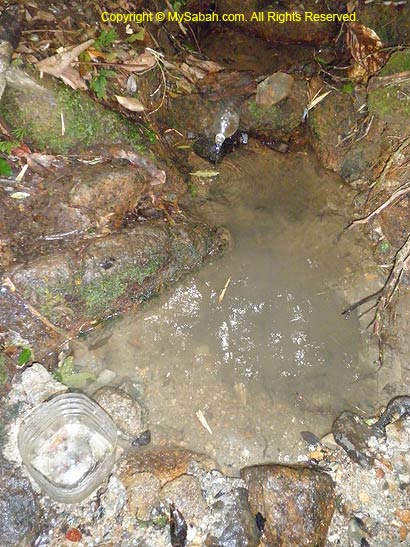
However, the only available water source is a small stream that requires 5 minutes walk on a steep descending trail (10 minutes to come back). I checked out the stream and found that its volume is only slightly better than tap water.
Climbers can take shower there by scooping water from a small pond, though icy cold but still bearable. May be leeches exist in this wetter area, so few are keen to come here. I also saw an abandoned mobile toilet and shower area not far from the stream.
Above: small stream for taking shower (icy cold water)
You can watch 40-sec video below to see the stream:
Above: check if any girl taking shower
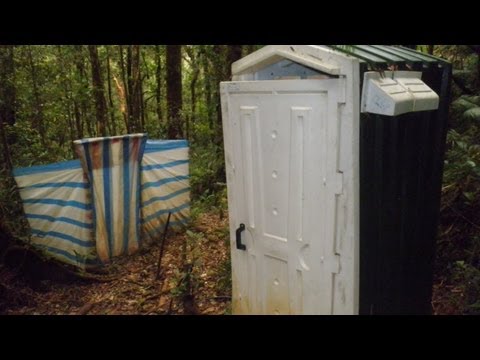
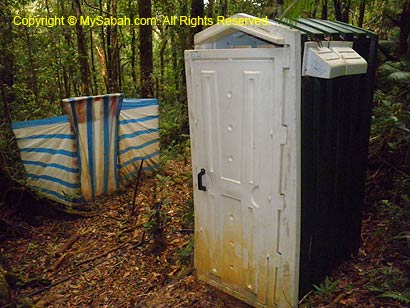
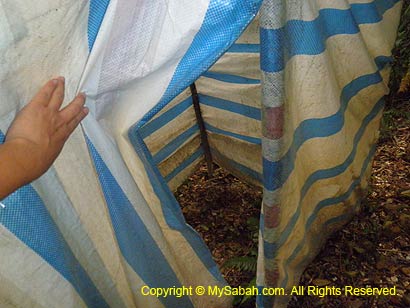
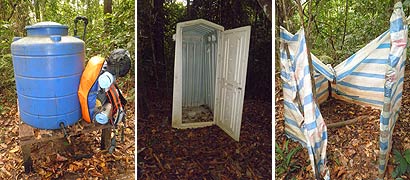
Our makeshift toilet is 15-second walk from our camp. Basically it is just a deep hole with rotten wood plank cover on top, and 3-side surrounded by canvas as wall. The toilet is really smelly after everyone “contributes” their bit for 2 days.
For dinner, we had rice served with dried anchovy fishes and mixed vegetables. It was a bit warm tonight and we were bitten by tiny sandflies (agas). The bites are very itchy and can last for days (The itches worsen if you scratch). There were a few leeches in the campsite, presumably brought in by porters who took water from the stream.
Tomorrow is the day to climb to the summit, so we went to bed earlier. The late night was windy, we heard loud rustling leaves and felt the howling strong wind shaking our tents. Mt. Tambuyukon is like a living monster that breathes.
Above: someone bitten by leech and bleed inside the camp
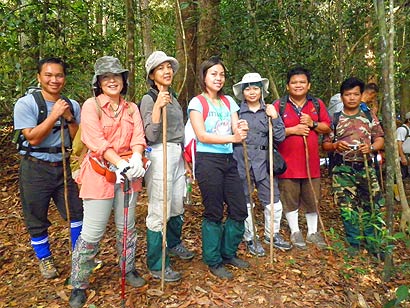
Top 5 highest mountains of Malaysia are all in Sabah. After conquering the Mt. Kinabalu (4,095M) and Mt. Trus Madi (2,642M), last month I climbed Mt. Tambuyukon (2,579M), which is the 4th highest mountain and the hardest one. I’ll share my experience in 5 articles, 300 photos and 16 videos here, so you know what I went through in this 5-day trip.
Below is the structure of my blog on Mt. Tambuyukon trip:
Part 1: Day 1. From Starting Point to KM5 (this article)
With a height of 2,579.22 Meters (8,462 Feet) and lies northeast of Mount Kinabalu, Mt. Tambuyukon is the 4th highest mountain of Sabah and Malaysia. It is part of the Kinabalu Park and managed by Sabah Parks. Tambuyukon means “cheating” in Dusun language. The origin of the name is – during the climb, a guide named Tam keeps on cheating other climbers that the summit is not far ahead but it is still a long way.
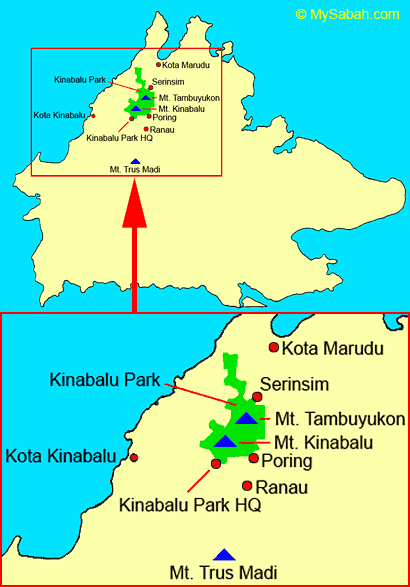
There are two climbing routes to Mt. Tambuyukon, namely, the northern entry from Serinsim Substation in Kota Marudu, and southern entry in Monggis Substation, situated about 35 KM from Poring. We started our climb at Monggis as the summit trail is 14KM (Kilometers) and shorter than northern trail (over 20KM).
DAY 1. Start of Climb
Register at Kinabalu Park HQ
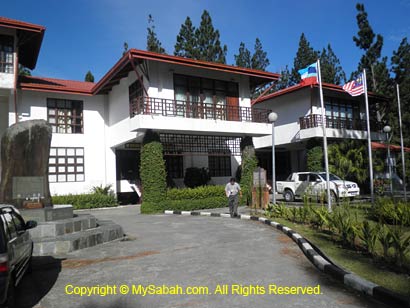
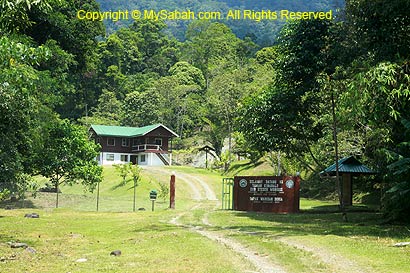
On day 1, we departed from Kota Kinabalu at 6:30am and reached Kinabalu Park HQ (Kundasang) at 7:45am. Even though we have booked the climb 1 month earlier, we still need to register in Kinabalu Park administration office before the climb, and fill up the indemnity form (MyKad / Passport is required for identification).
Above: Sabah Parks administration office (Kinabalu Park)
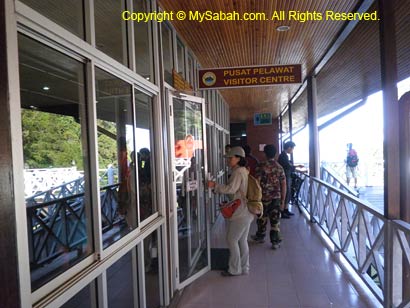
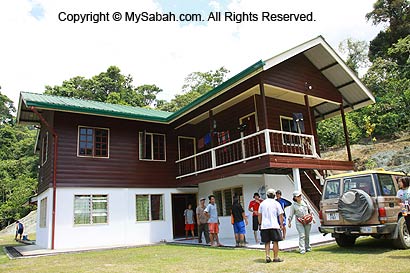
Above: Visitor Center of Kinabalu Park
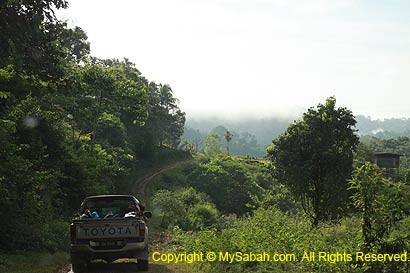
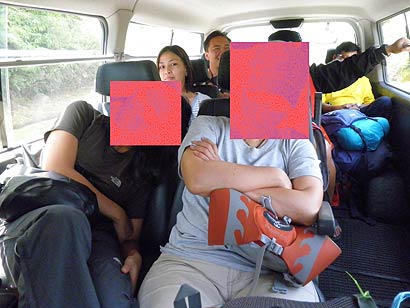
Then we proceeded to Kinabalu Park visitor center to pay for climb permit and insurance, and collect our climber tags. We met our tour guides and transferred our luggage and supplies to their 4-Wheel drives (4WD). After having breakfast and buying packed lunch (fried rice) at a restaurant nearby, we headed to Monggis Substation at 10am. We stopped briefly at G*Mart Supermarket at 10:30am to purchase last-minute supply.
Road to Monggis Substation
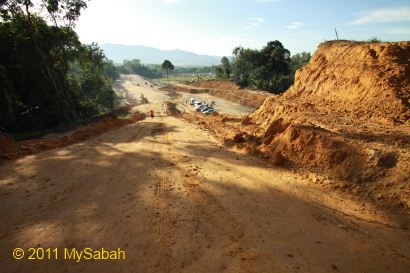
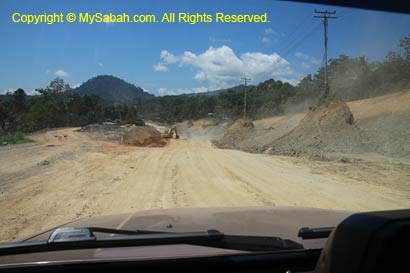
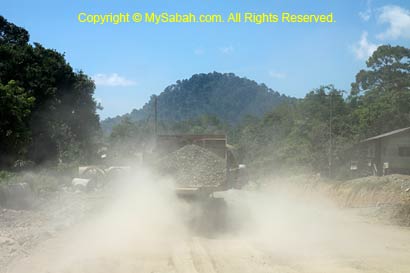
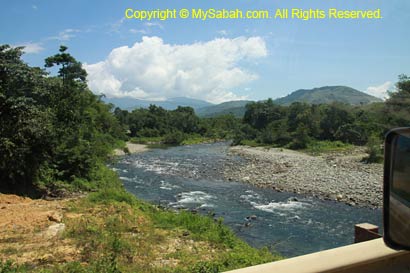
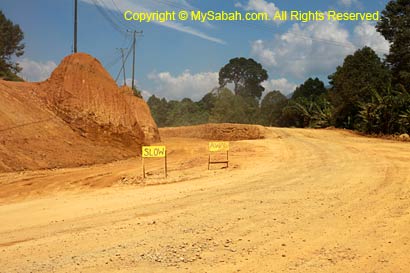
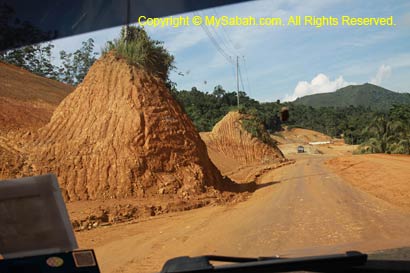
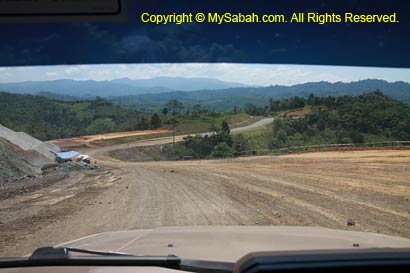
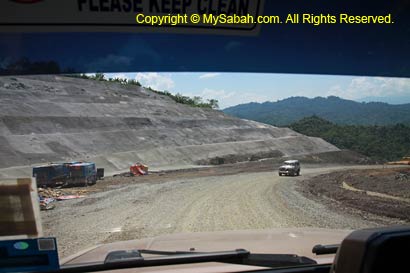
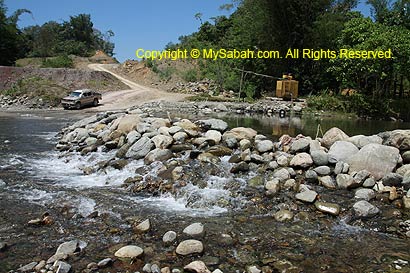
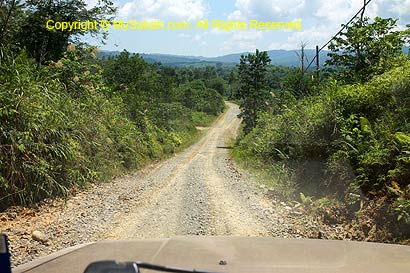
The road journey from Kinabalu Park to Monggis Substation takes 1.5 to 2 hours (for 60KM). At first we drove on an asphalt road. After a roundabout near Poring Hot Springs (13KM from Ranau), we turned to Bongkud, the start of a long and dusty gravel road and the point we are about 35KM from Monggis Substation. We saw dozens of heavy trucks and dozers busy building this Ranau – Kota Marudu highway.
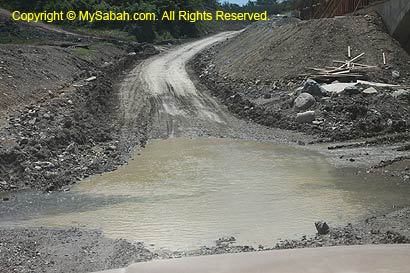
The gravel road can turn muddy and slippery during rainy season. With heavy trucks moving around, it is dangerous for vehicles to lose control on slippery surface. You must use 4WD to go to Monggis. The highway is supposed to be ready by April 2011, but it seems like it is far from completion and less than 5KM of this highway is paved (as of June 2011).
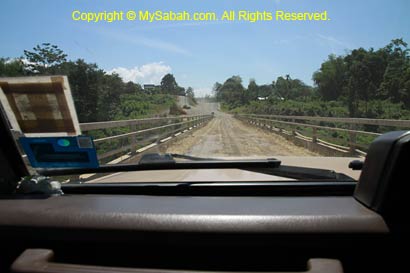
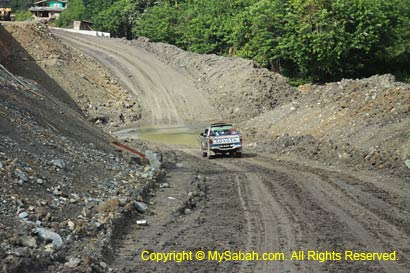
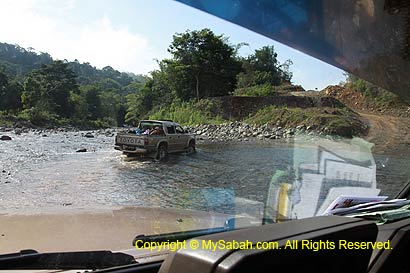
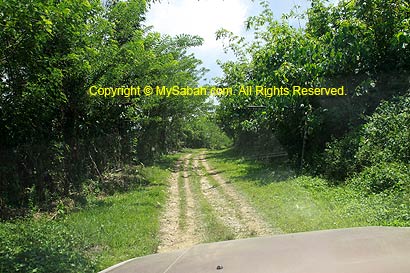
Then we passed through Kampung Pinawantai (village) on a narrower and bumpy gravel road. We crossed 3 small streams on the way. According to the guide, the streams would flood and become big rivers during rainy season, and only 4WD can cross them. We drove through a few single-lane bridges and saw two new bridges under construction.
About 10KM before Monggis substation, we came to a small countryside track of Kampung Monggis (Monggis Village). Finally, we arrived Monggis Substation (of Kinabalu Park) at 12pm, about an hour late to our planned schedule.
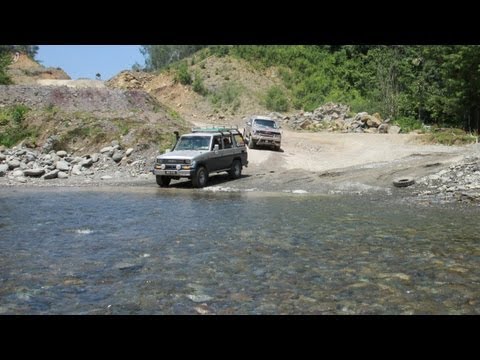
You may watch the 3-min video below to see the overall road condition:
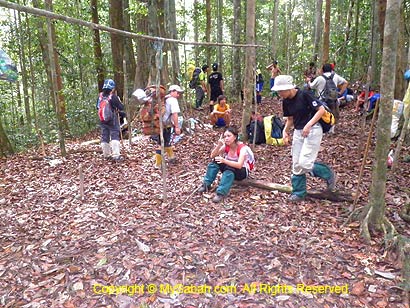
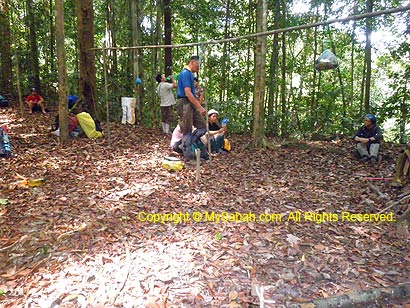
Start of Climb
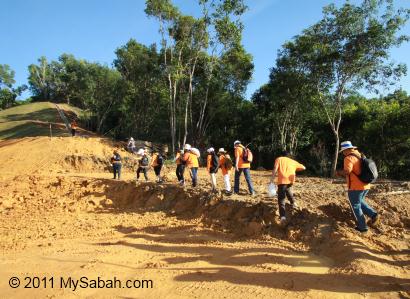
Our Sabah Parks rangers and porters already waited for us at the substation. We unloaded our bags and supplies, and did the final packing. Since it is noon time, we decided to have our lunch before the climb.
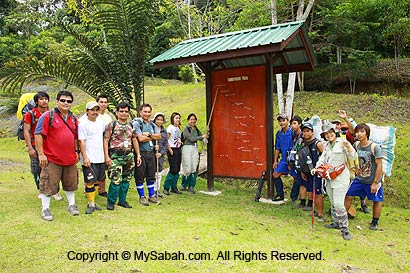
At 1pm, everyone put on their leech socks and joined the short briefing by Sabah Park ranger, Mr. Wasidi Wasli. The starting point is just next to the substation, which is 267M above sea level. The total distance to the summit is 14KM, and we plan to arrive Wuluh Camp at KM6 before 5pm today. You may check out the trail map. You will need to refer to this trail map again for the rest of the articles.
Below is the summit trail map of Mt. Tambuyukon. Click it for bigger picture:
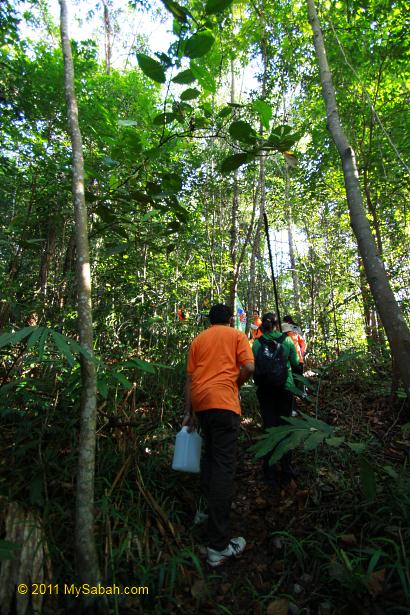
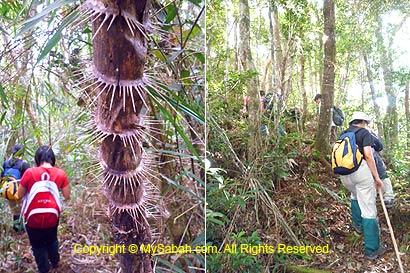
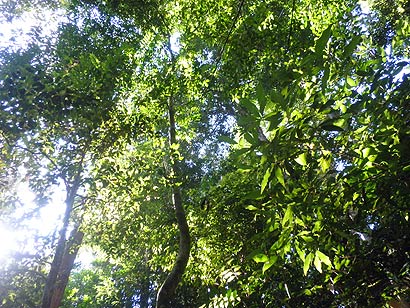
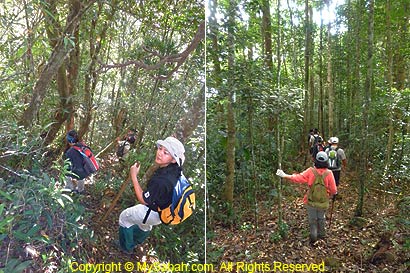
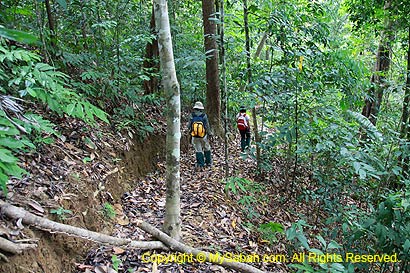
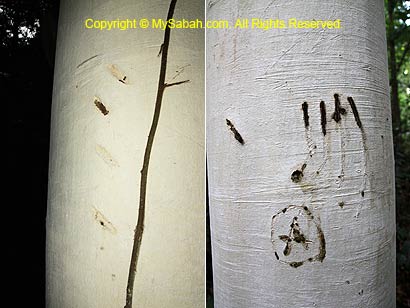
We walked slowly under the tall and dense canopy of lowland and hill dipterocarp rainforests. Even though the climb just began, the air was so warm and humid that we felt a bit short of breath during jungle trekking. Then the rain showers came on and off, fortunately they were blocked by dense canopy. We didn’t see any big animals but we know the presence of sun bear, wild boar and deers from the claw marks on the tree trunk, or the footprint. Hornbills and monkey are also spotted or heard on the way. If we are lucky, we might see orangutan before KM11, the ranger said.
Above: Now I know bear also knows how to write ABC
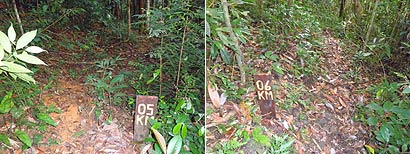
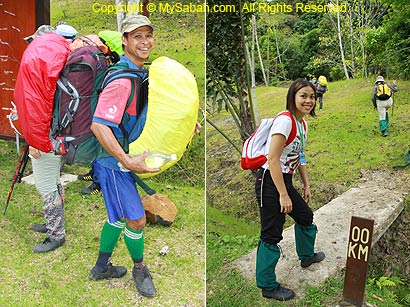
KM0 – KM4
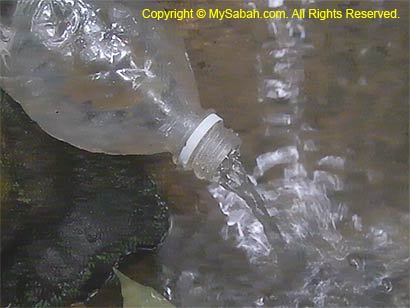
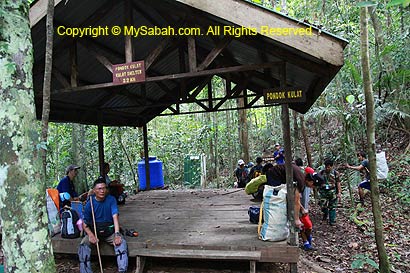
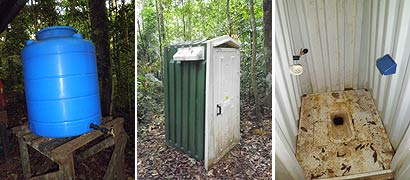
To experienced hikers, the first 4KM of the trail is not tough (and thanks to our porters who carried over 100Kg of our bags & supplies). But due to the warm environment, we sweated a lot, so we ran out of water very soon. You can refill water at two shelters, i.e. (1) Kulat Shelter (at KM2.2), and (2) Kera Shelter (at KM4), but the water tanks may not have water sometimes. There are small mobile toilets next to both shelters too.
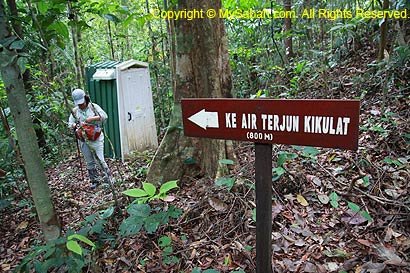
Kulat Shelter (KM2.2). We reached Kulat Shelter (Pondok Kulat) at 2:30pm. Climbers may explore a trail that takes them to Kikulat Waterfall about 800M away. Due to time constraint, we didn’t visit the waterfall.
You may watch the 45-sec video of Kulat Hut:
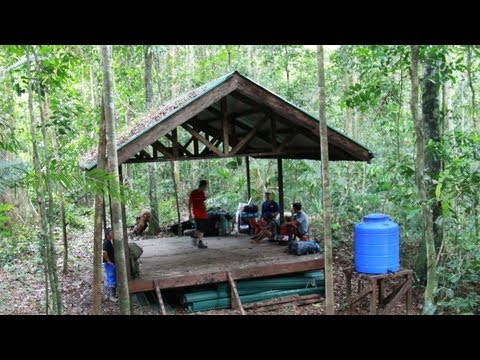
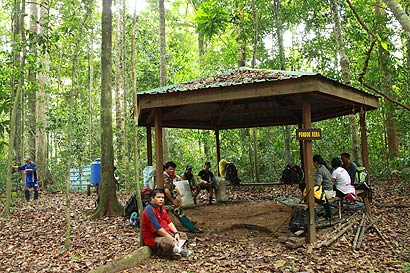
Kera Shelter (KM4). The 2nd and also the last shelter. A shower area surrounded by canvas is found next to the water tank, but its pipe is not working. A wide and flat open space beside Kera Shelter is big enough to fit 3 to 4 camping tents, making this area a suitable camping site.
You may watch the 40-sec video of Kera Hut:
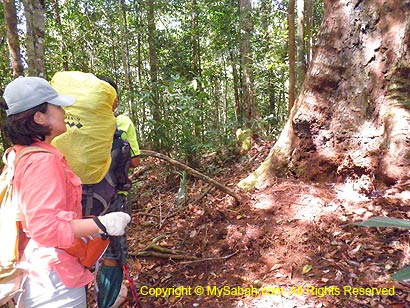
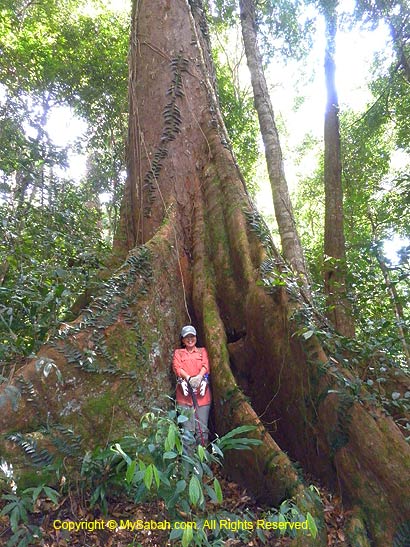
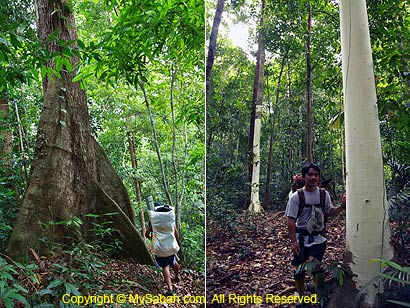
It’s dry season so we didn’t see many leeches, the little blood suckers that live in wet environment of rainforest. The trees are tall (30+ Meters) and many have huge buttress. The most interesting tree is the Seraya Putih trees with white-color trunk.
You may watch the 2-min video of the rainforest trees in Mt. Tambuyukon:
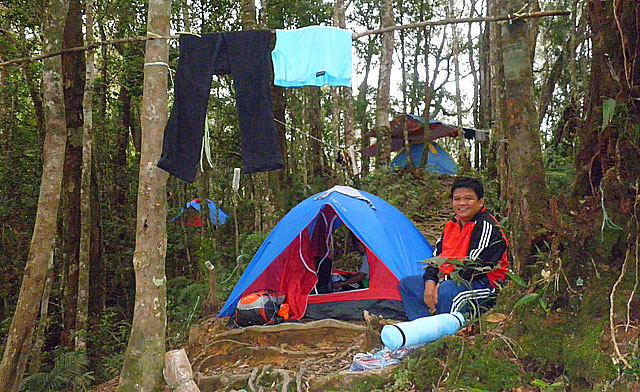
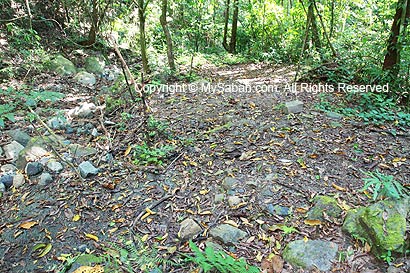
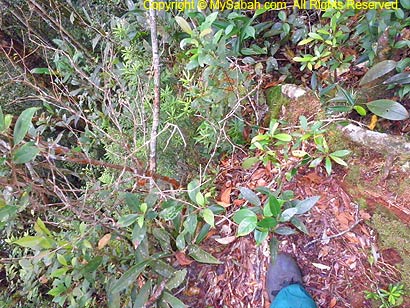
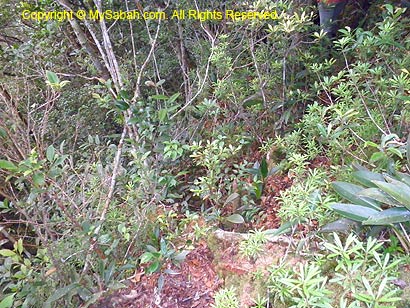
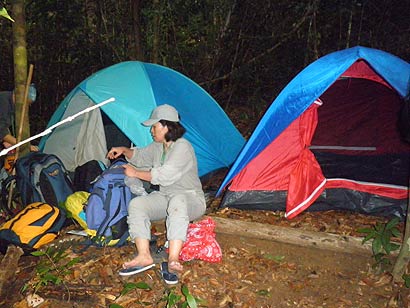
Camping at KM5
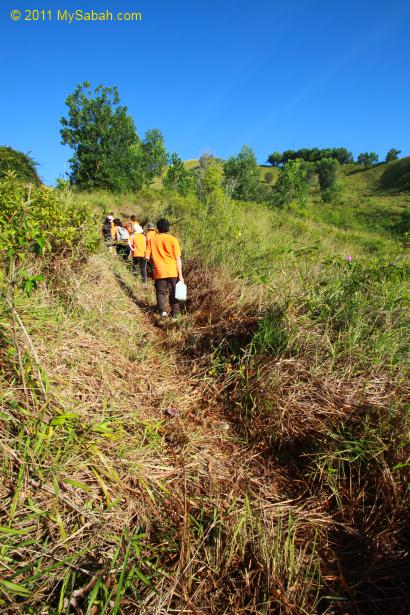
It is after KM4 where our hardship starts, the trail doubles in steepness and we were slowing down. We were supposed to camp at Wuluh Campsite (KM6), but had to stay at KM5 at 5pm, due to the vanishing daylight.
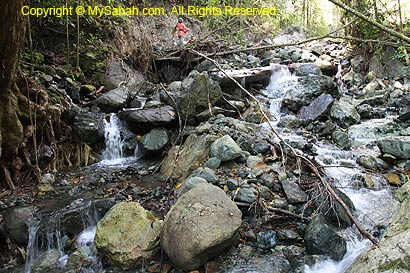
Above: view from KM5. The climbers are crossing a small stream
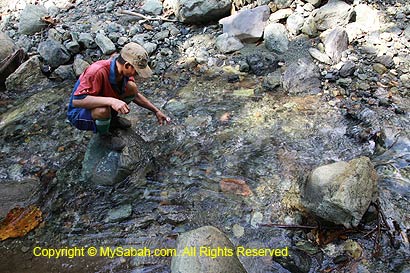
KM5 campsite is an irregular slope area with lot of shrubs and heavily foliaged ground. The area has less clearing and less suitable for camping. The only good thing is – a small stream is only a 30-second descending walk from the campsite, so most of us can take a shower that evening.
You may watch the 30-sec video of KM5 camp:
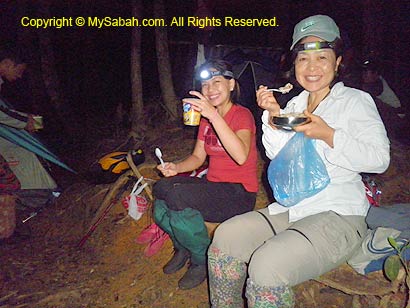
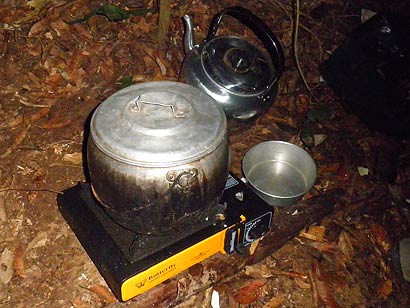
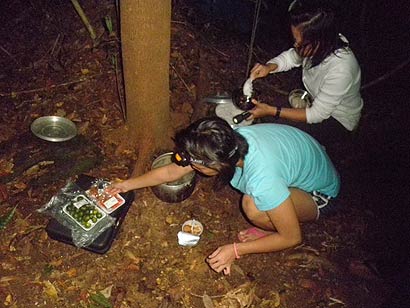
Our tour guides setup 3 dome camps for us and also cooked our dinner. Wood cutting is not allowed so they cooked with portable cooking stove. We had rice and porridge as dinner. No bench is available so we have to sit on the forest floor to enjoy our meals.
Without toilet, we have to do our business a distance away from our camp and river. This is the first time I digging a hole to do my number 2. I covered my “stuff” with soil and leaves, put a tissue paper on top as a marker, so others won’t step on it. Luckily, leech is not around here during dry season, so my private part is safe from leech attack, haha.
This is only day 1 so we went to sleep very early, hoping to fully recharge for the next 3 days. Due to painful toes and the loud snores in the camp, I didn’t sleep well. In midnight, I heard my friend sleeping next to me talking in his dream. I turned over to other side, trying to ignore the noise. Then he talked louder and louder, to the level that he’s like shouting and struggling. I quickly turned on the torchlight and he stopped shouting, opened his eyes and said “shit!”. Seemed like he was having a nightmare. After the trip, he told us that he experienced incubus and he couldn’t move his body, as if “someone” was pressing him. Spooky… many had told me that Mt. Tambuyukon is a place full of spirits.