Category Archives: Mountains

View of Mount Nombuyukon behind the chalet in Serinsim park

Climbing Mount Nombuyukong (1,603.57 Meters)

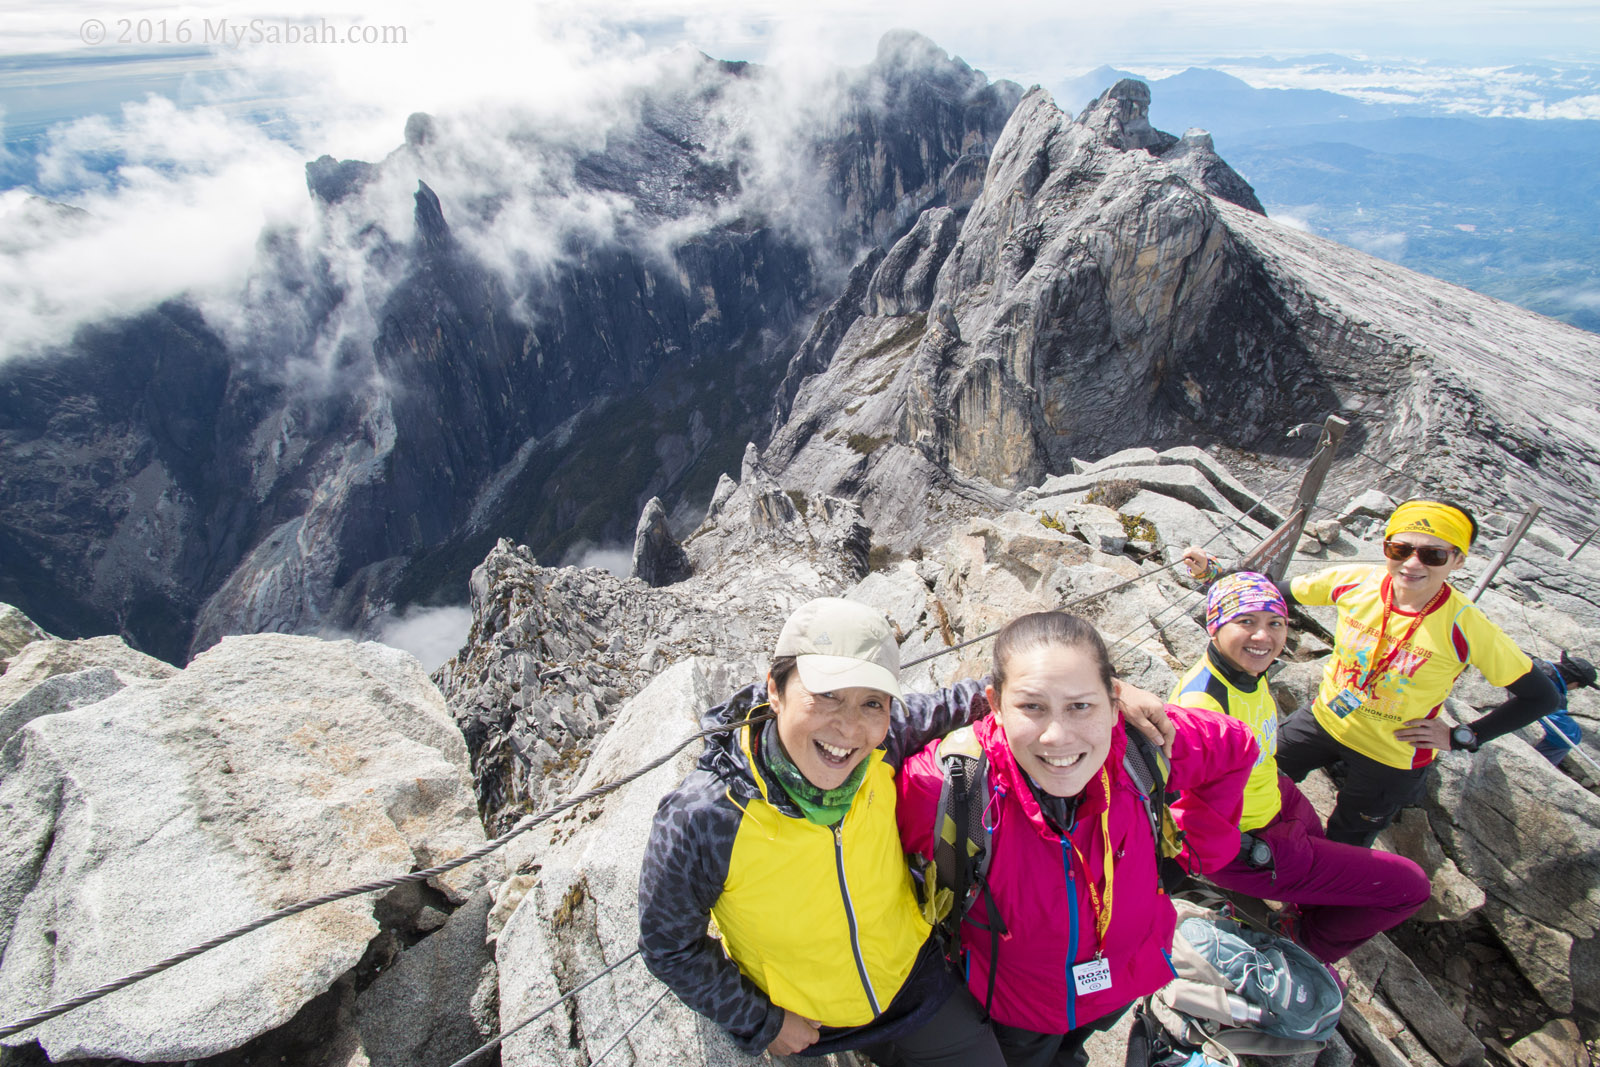
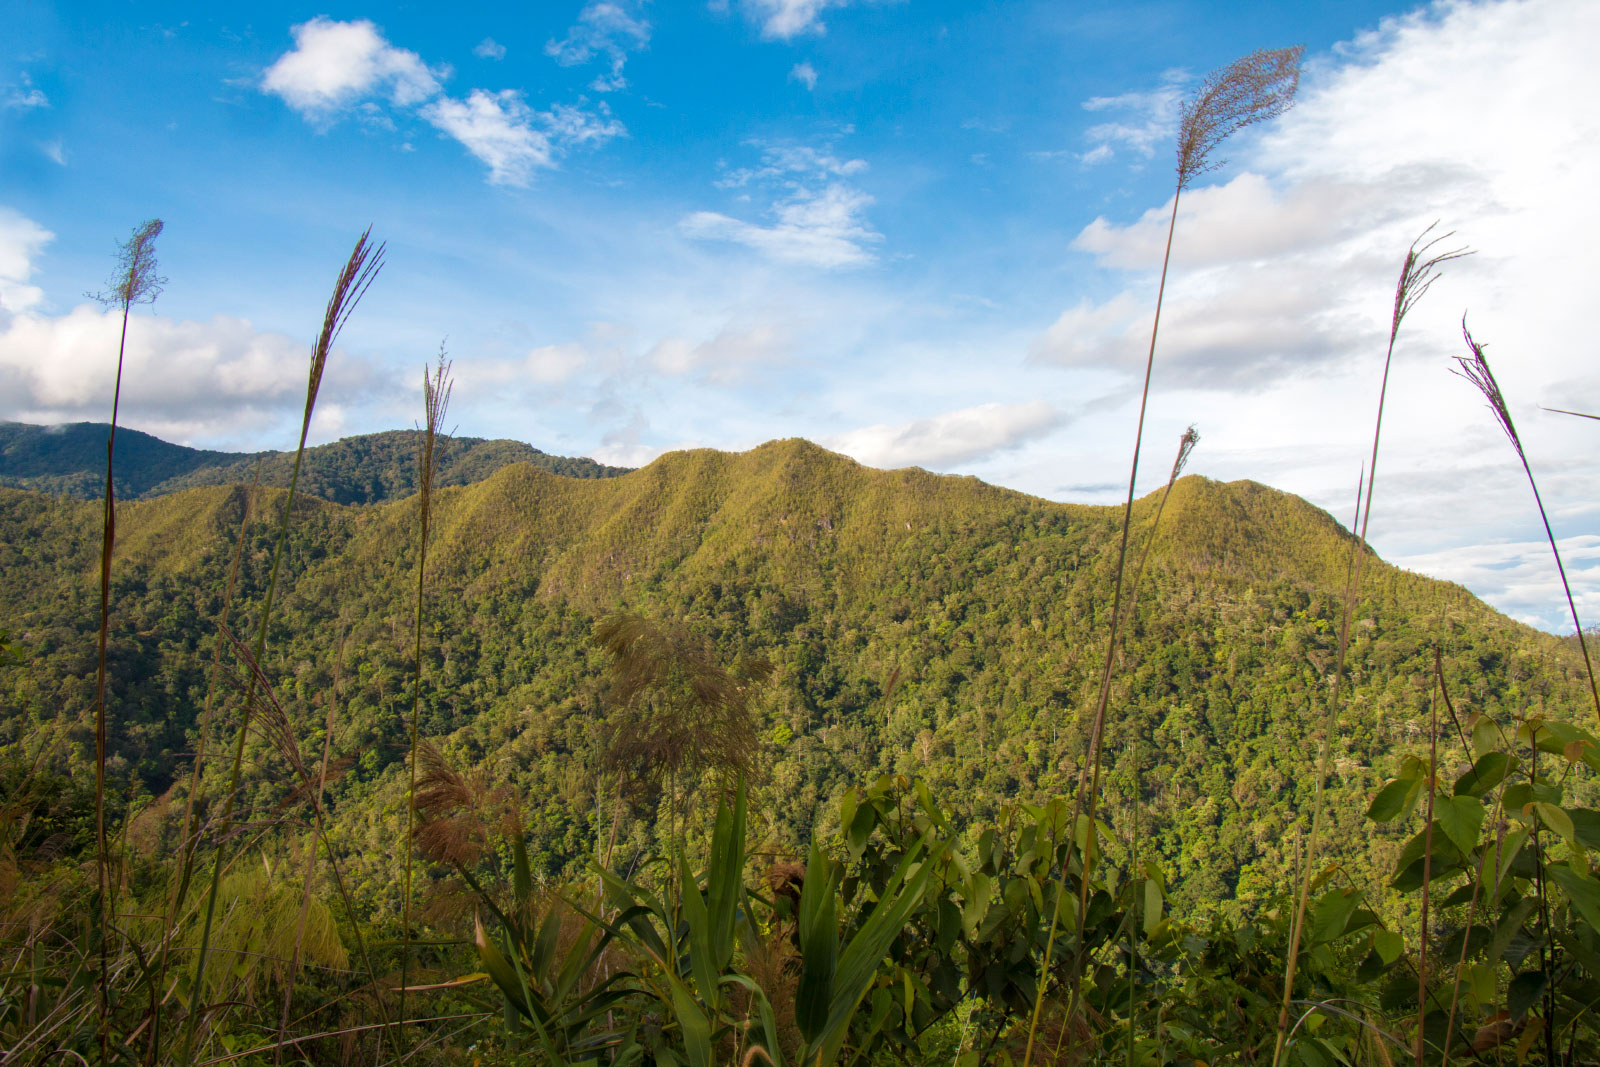
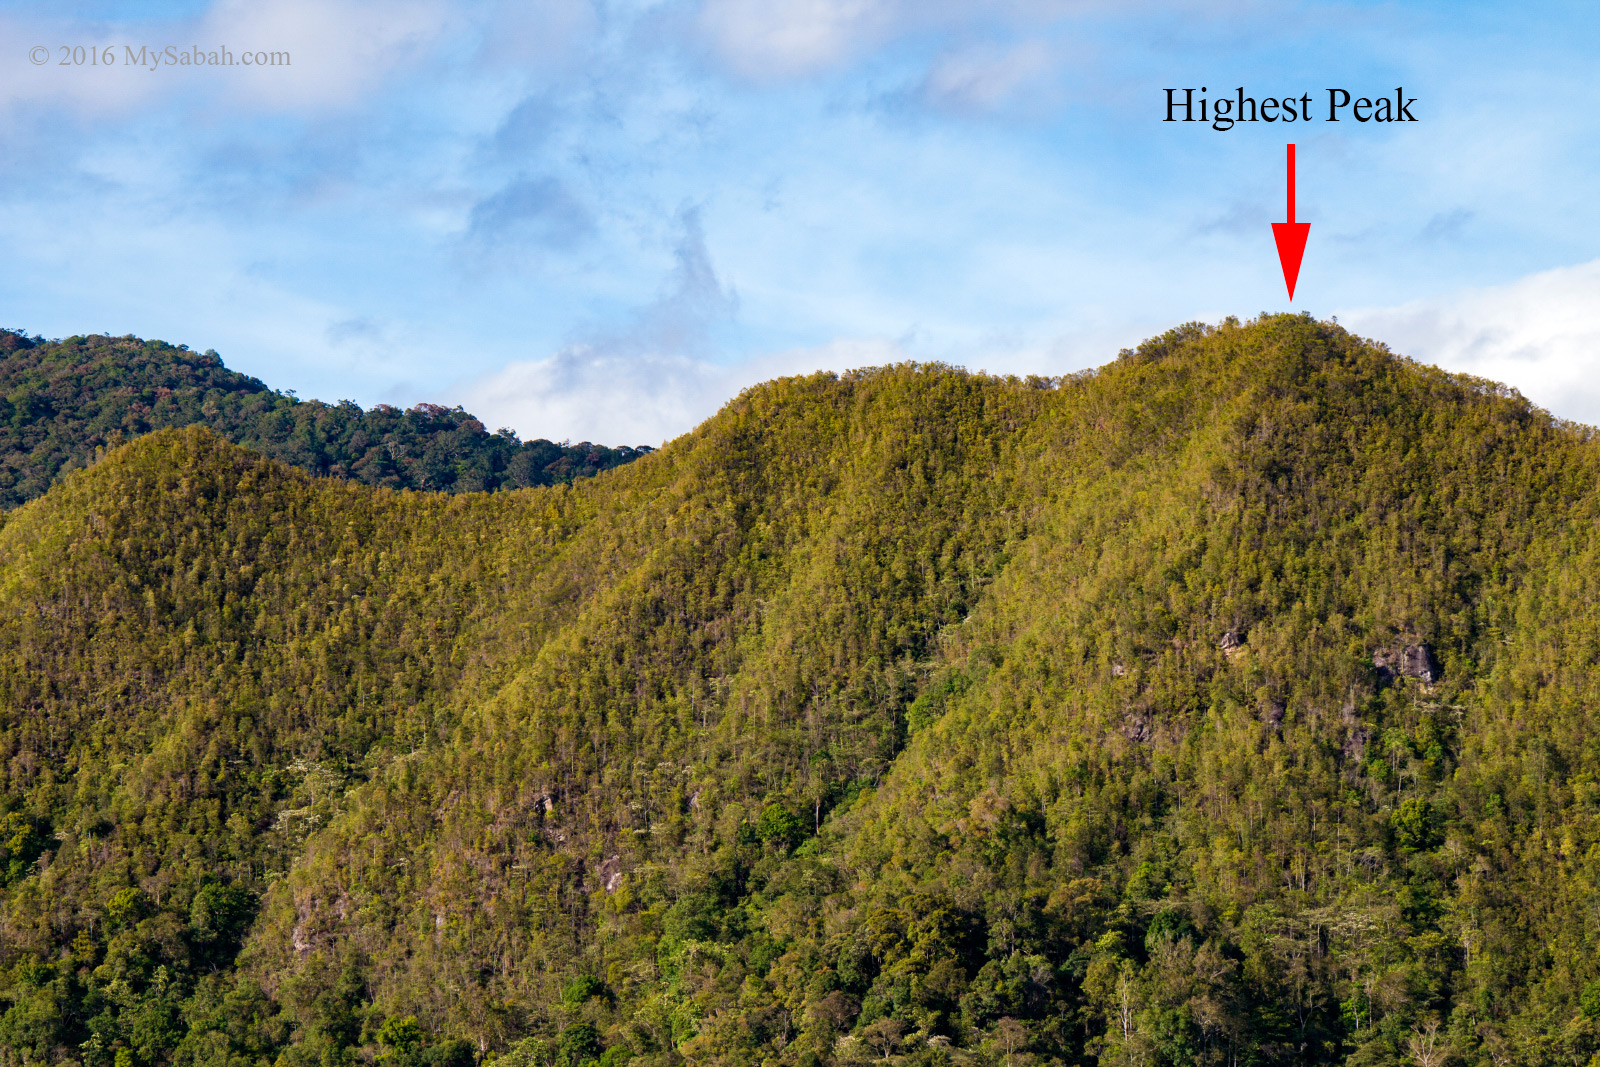
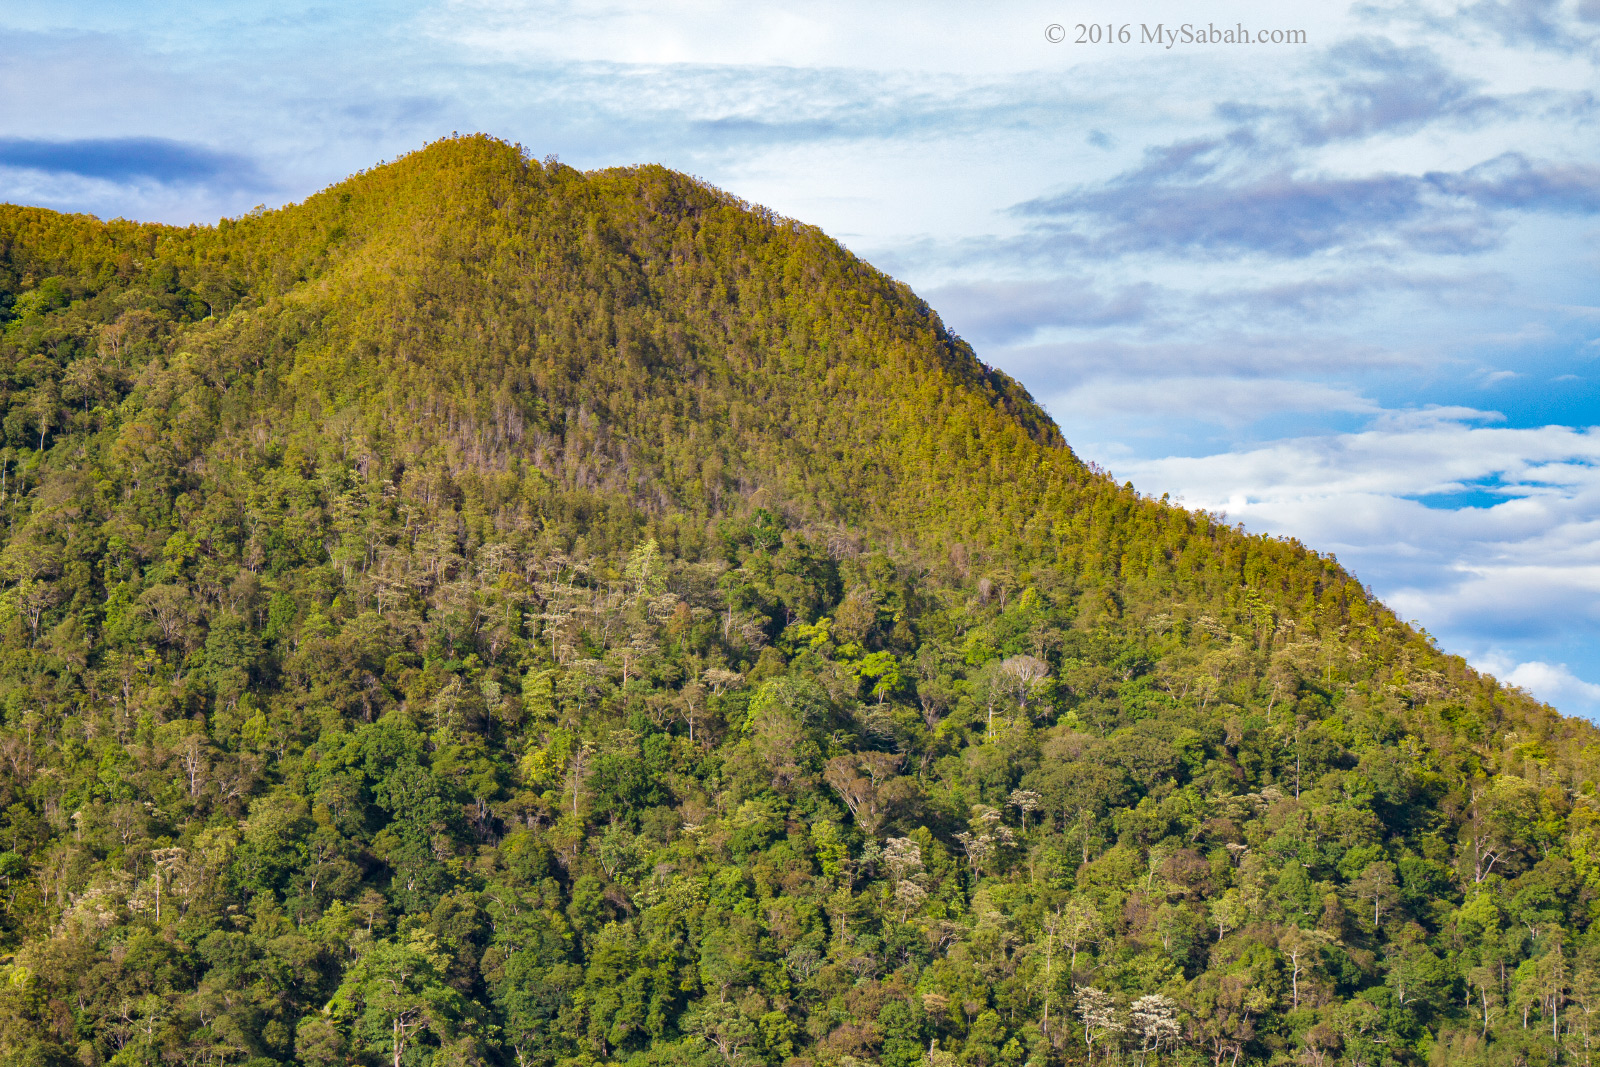
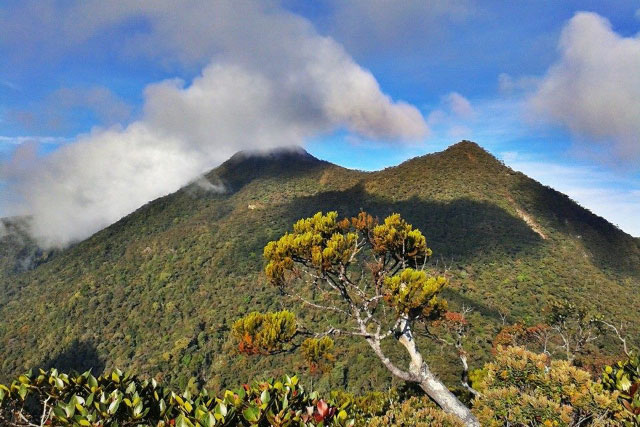
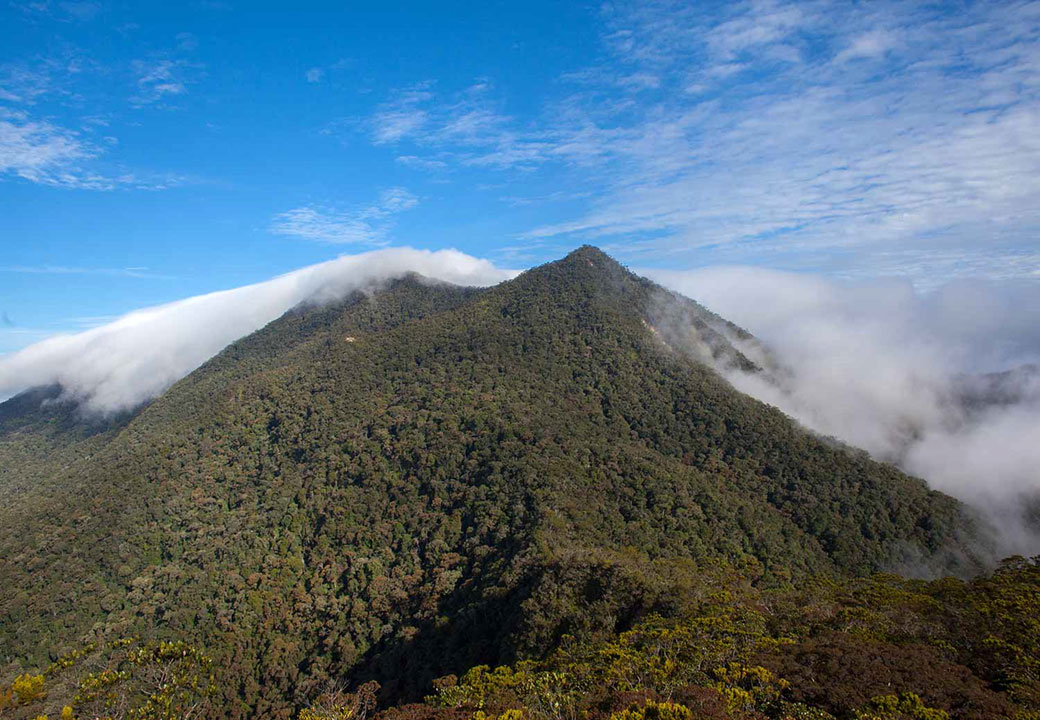
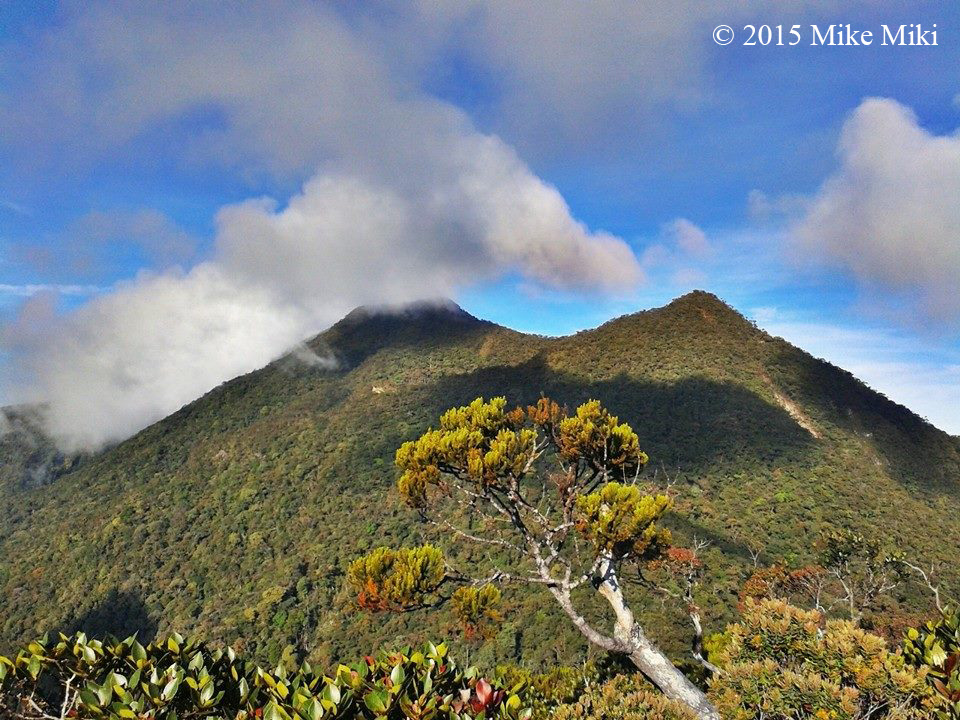
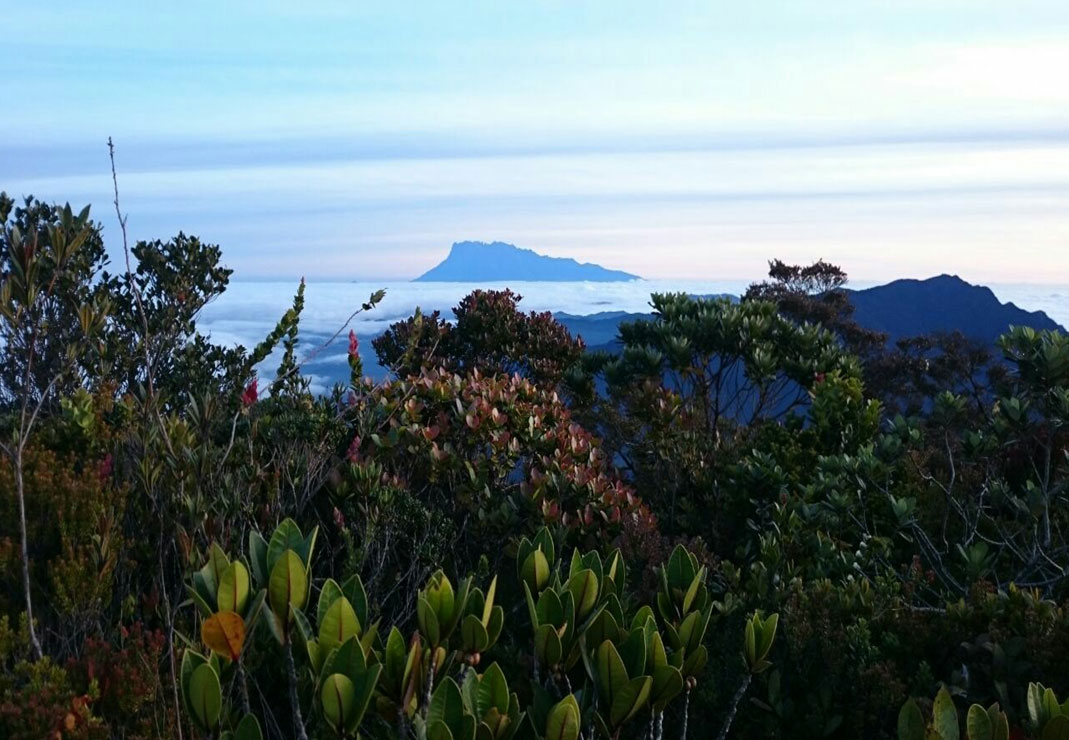
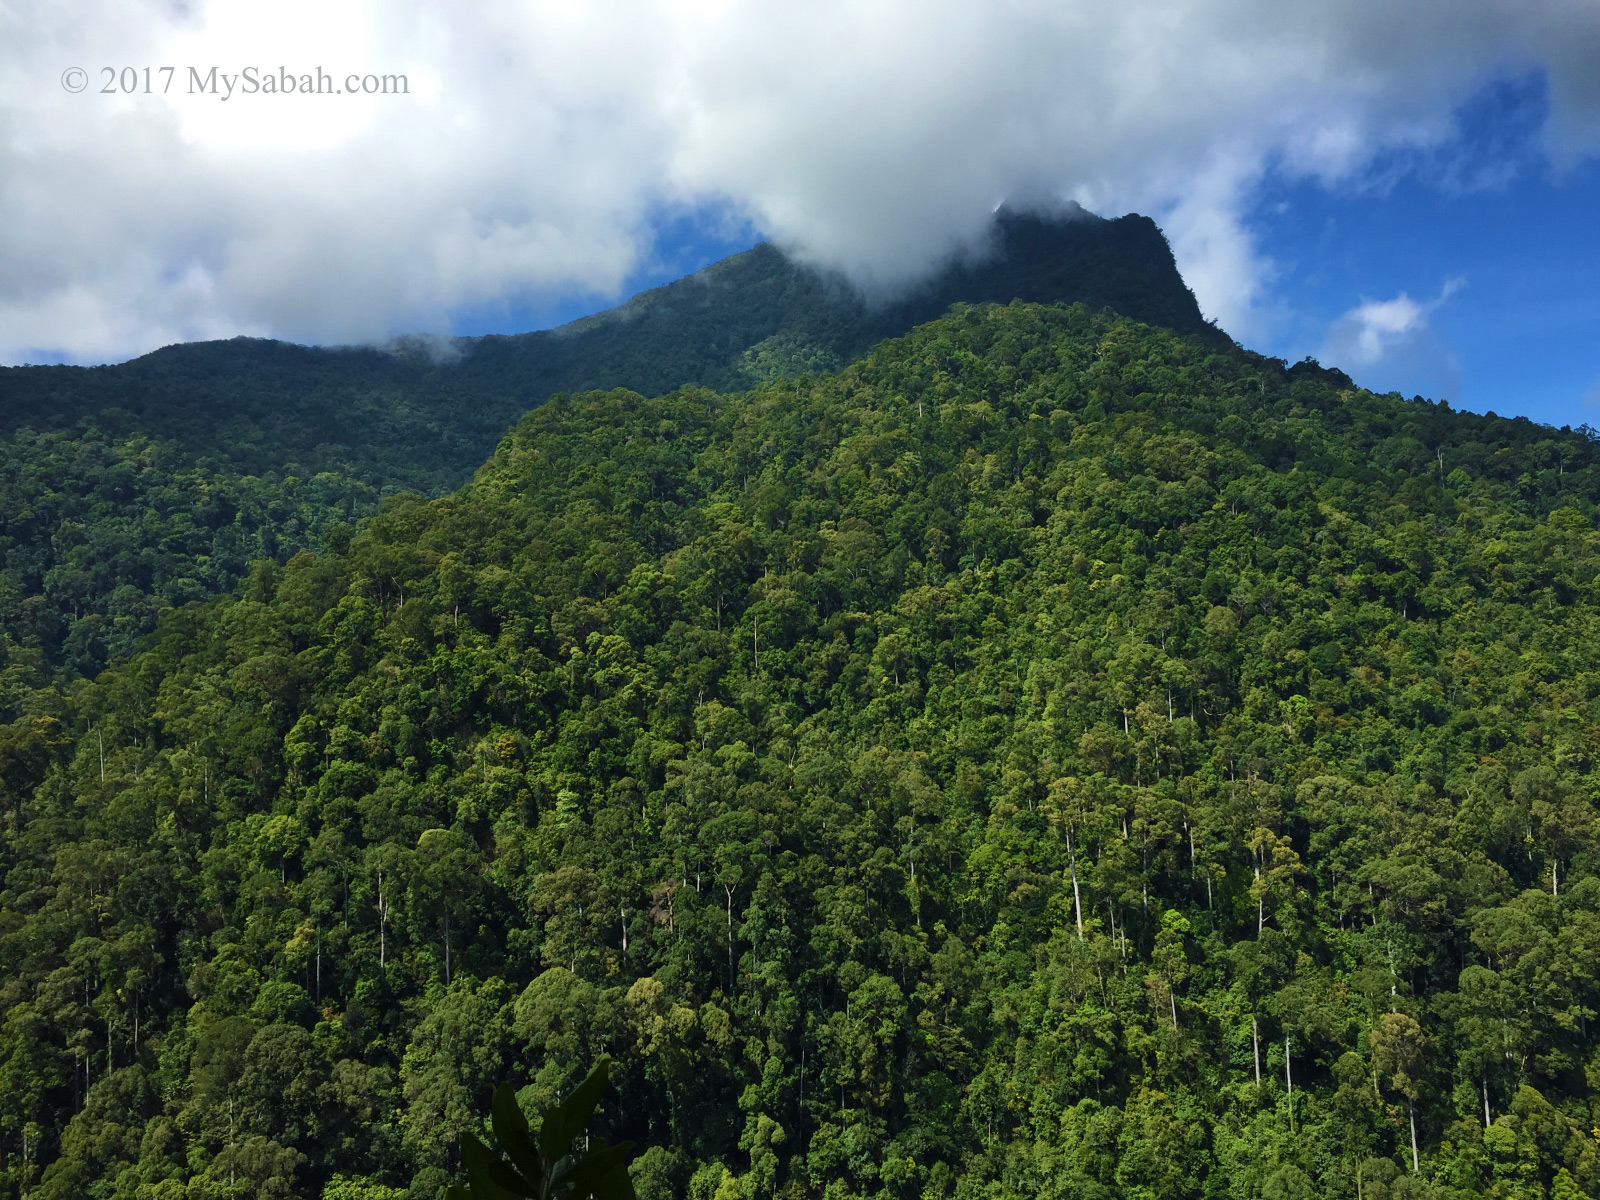
In a dreadful climb to Mount Tambuyukon, the third highest mountain of Malaysia, I rested on a high ground where I could enjoy a panoramic view of rolling mountain range. Then I noticed Mt. Nombuyukong (Gunung Nombuyukong), which has a pointy peak like a witch hat. I was bewitched by its beautiful tit tip and wanted to climb it since then, and I did, after 6 years.

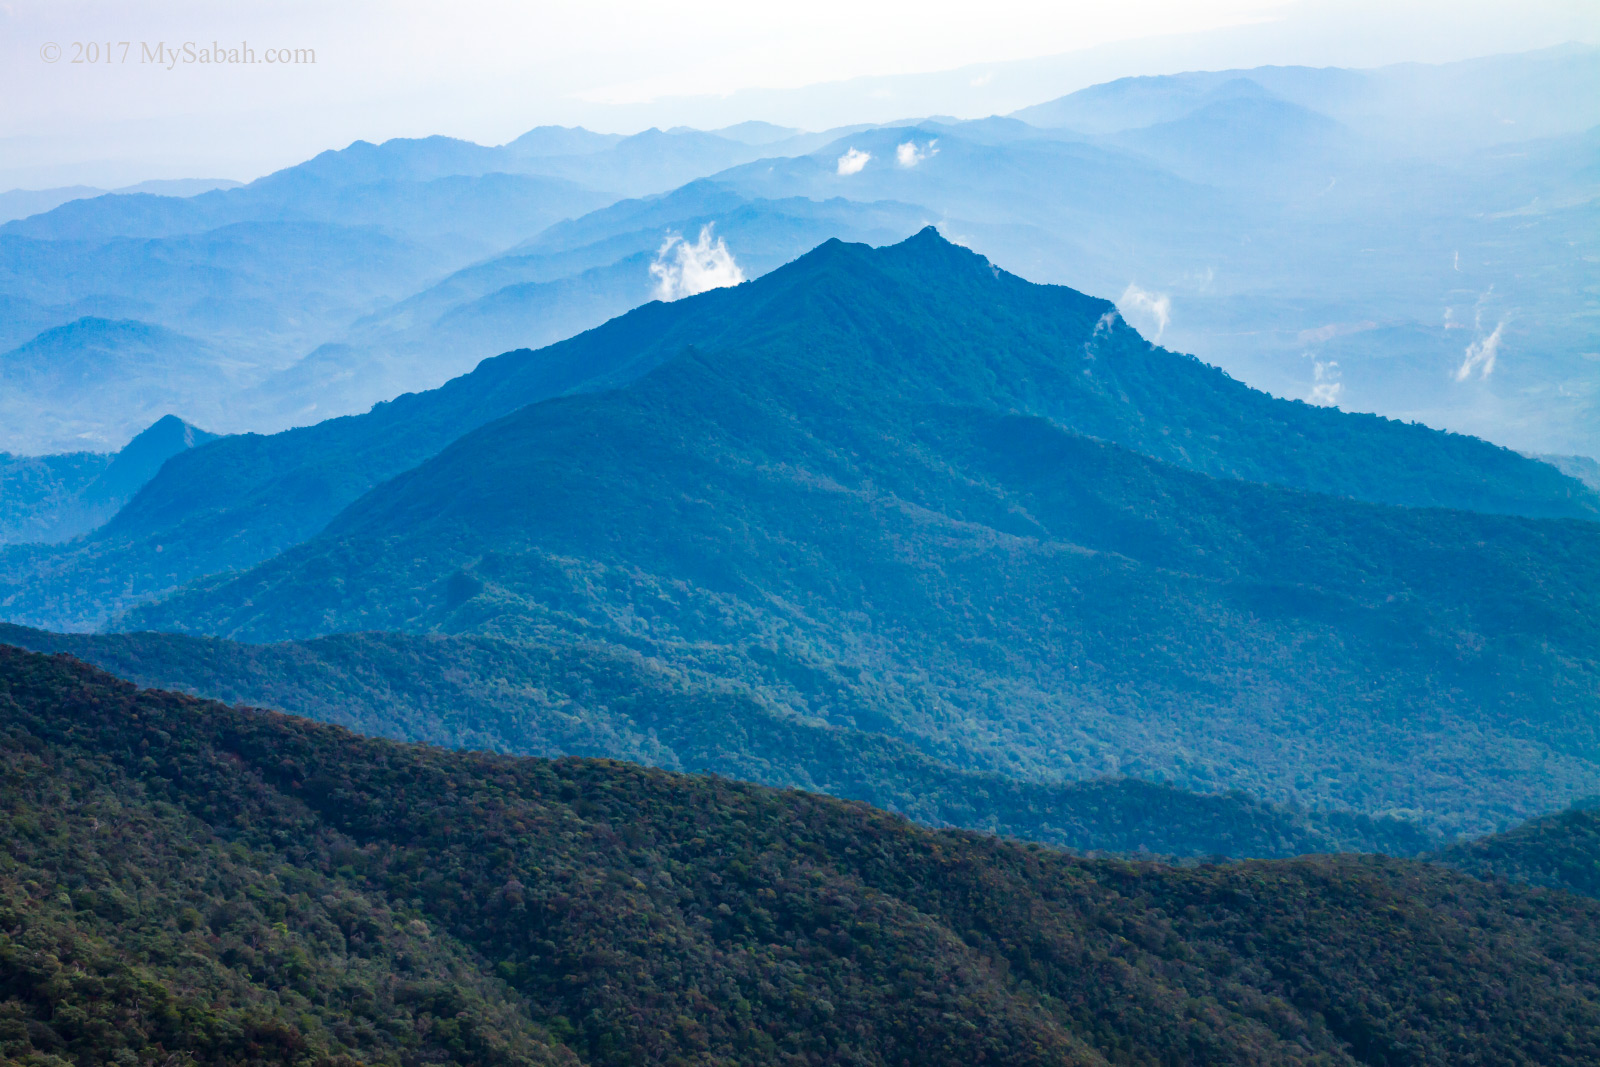
View of Nombuyukong Peak from Mt. Tambuyukon

Compared to Mt. Tambuyukon (2,579M), Mt. Nombuyukong’s height at 1,603.57 M is less intimidating and can be conquered within half-day. Since it’s on the same mountain range with higher Mt. Tambuyukon, technically it’s a peak, but people call it Mount Nombuyukong anyway.

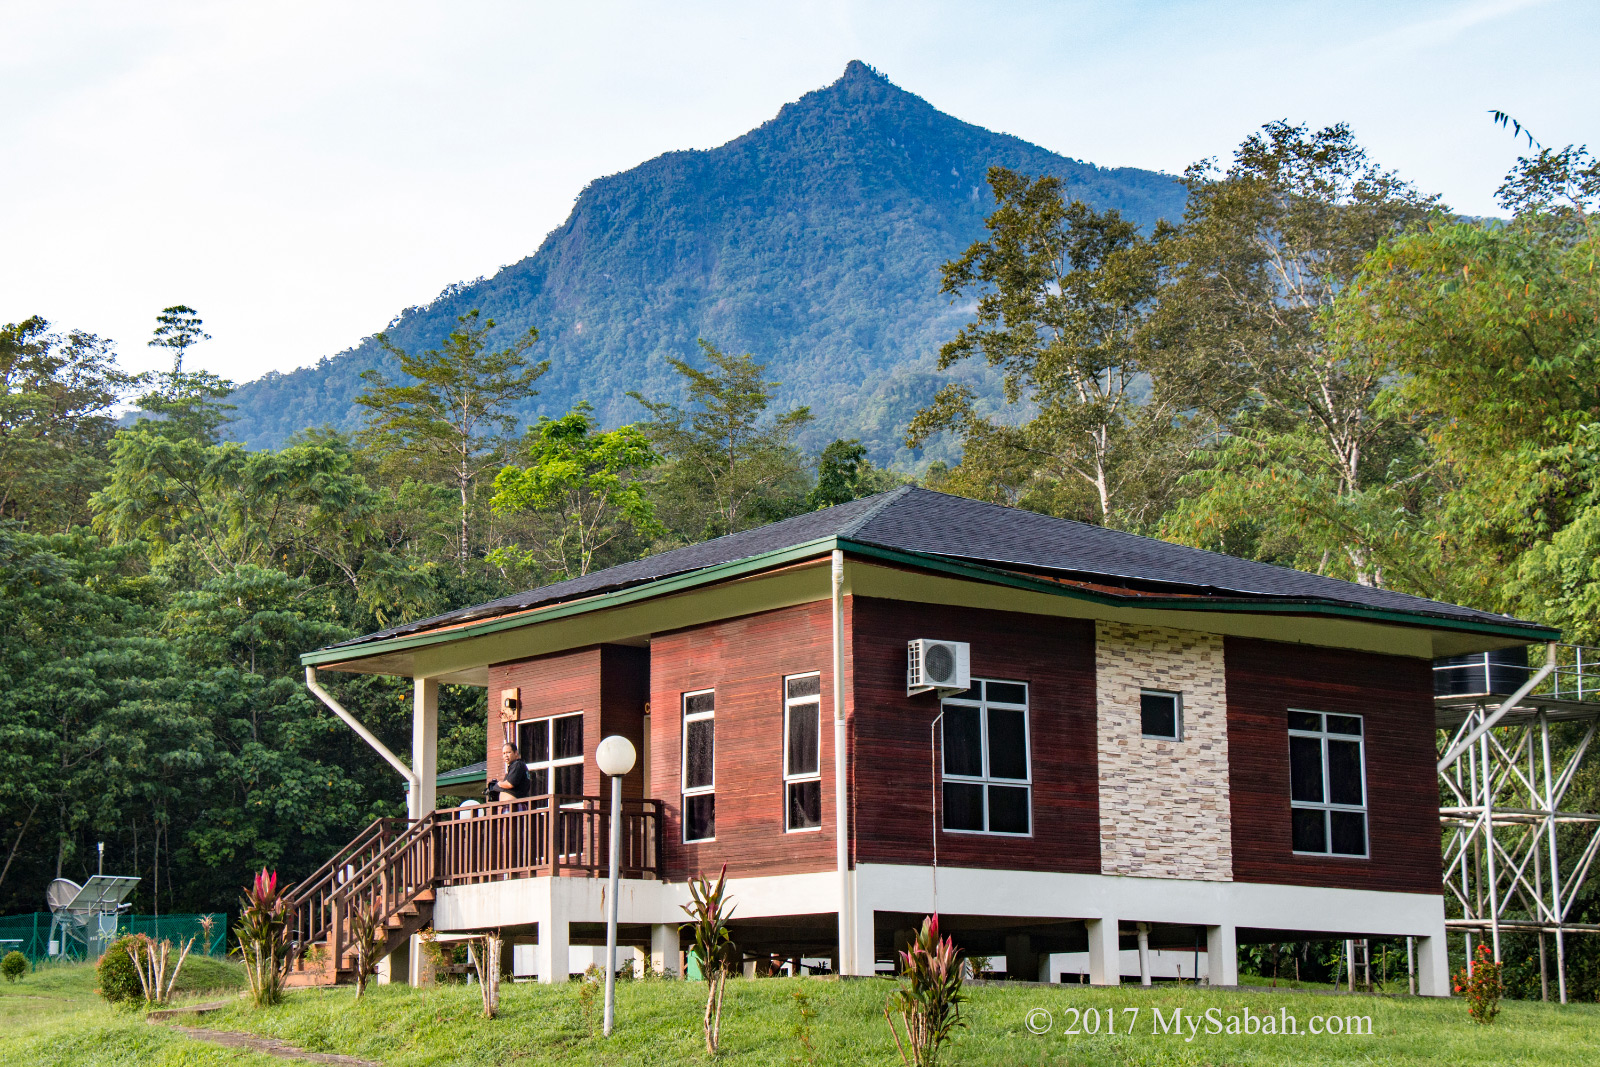
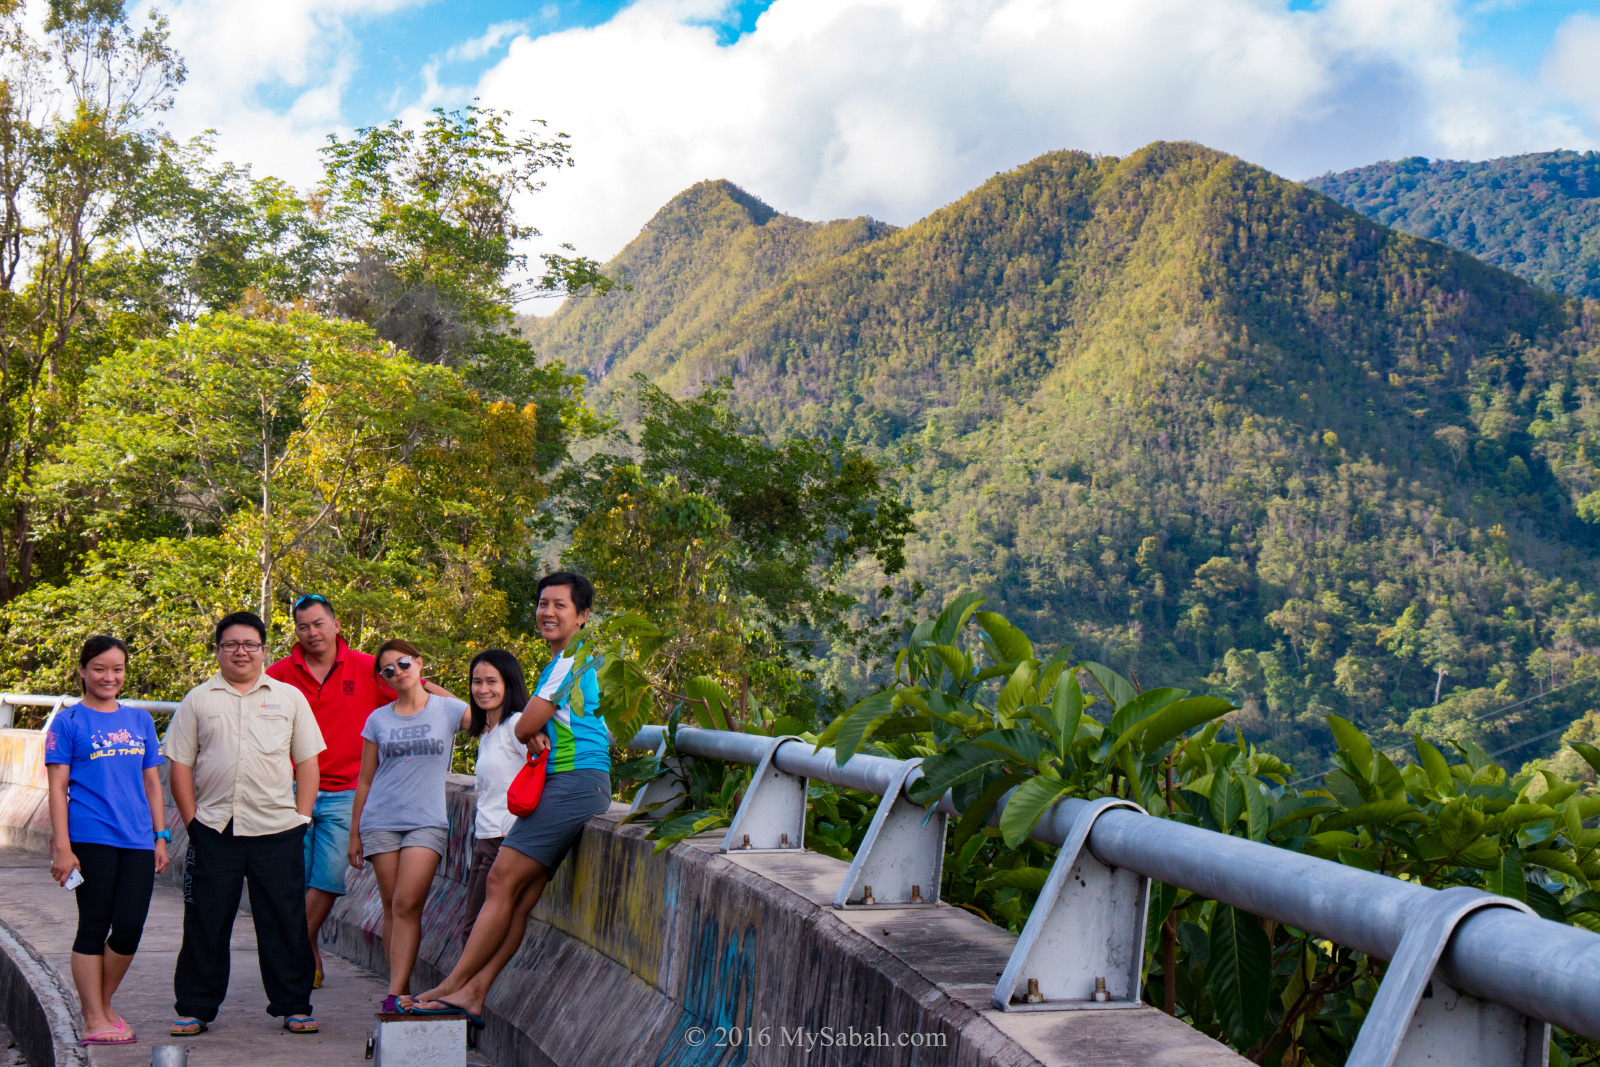
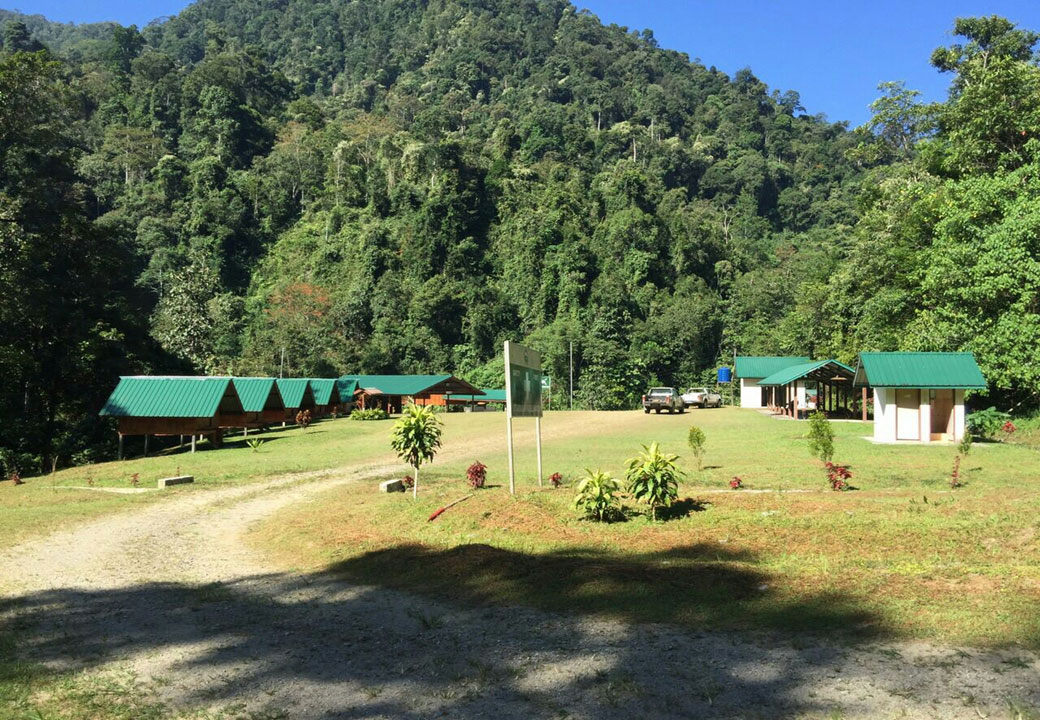
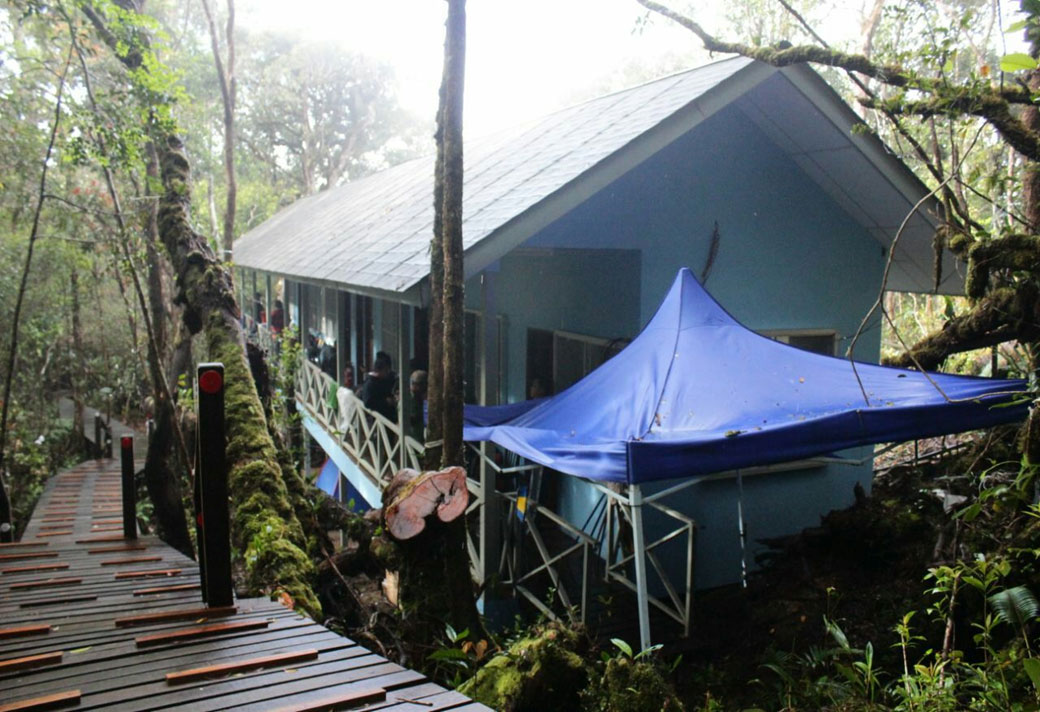
View of Mount Nombuyukong behind the chalet in Serinsim park

Managed by Sabah Parks, Mt. Nombuyukong is located in Serinsim Park substation (in Kota Marudu) at north of Kinabalu Park. The park is highly accessible by paved road and about 130 KM away from Kota Kinabalu City (KK), the capital of Sabah, Malaysia. Currently, this mountain is not well-known, and most climbers are hardcore adventurers from Peninsular Malaysia, who would try to conquer Mt. Tambuyukon and Nombuyukong in one trip.

Summary of Mt. Nombuyukong

Height: 1,603.57 Meters (5,261 feet)
Starting Point: Serinsim Park, Kota Marudu. GPS: 6.292631, 116.707422 (see Location Map) (130 KM away from Kota Kinabalu City)
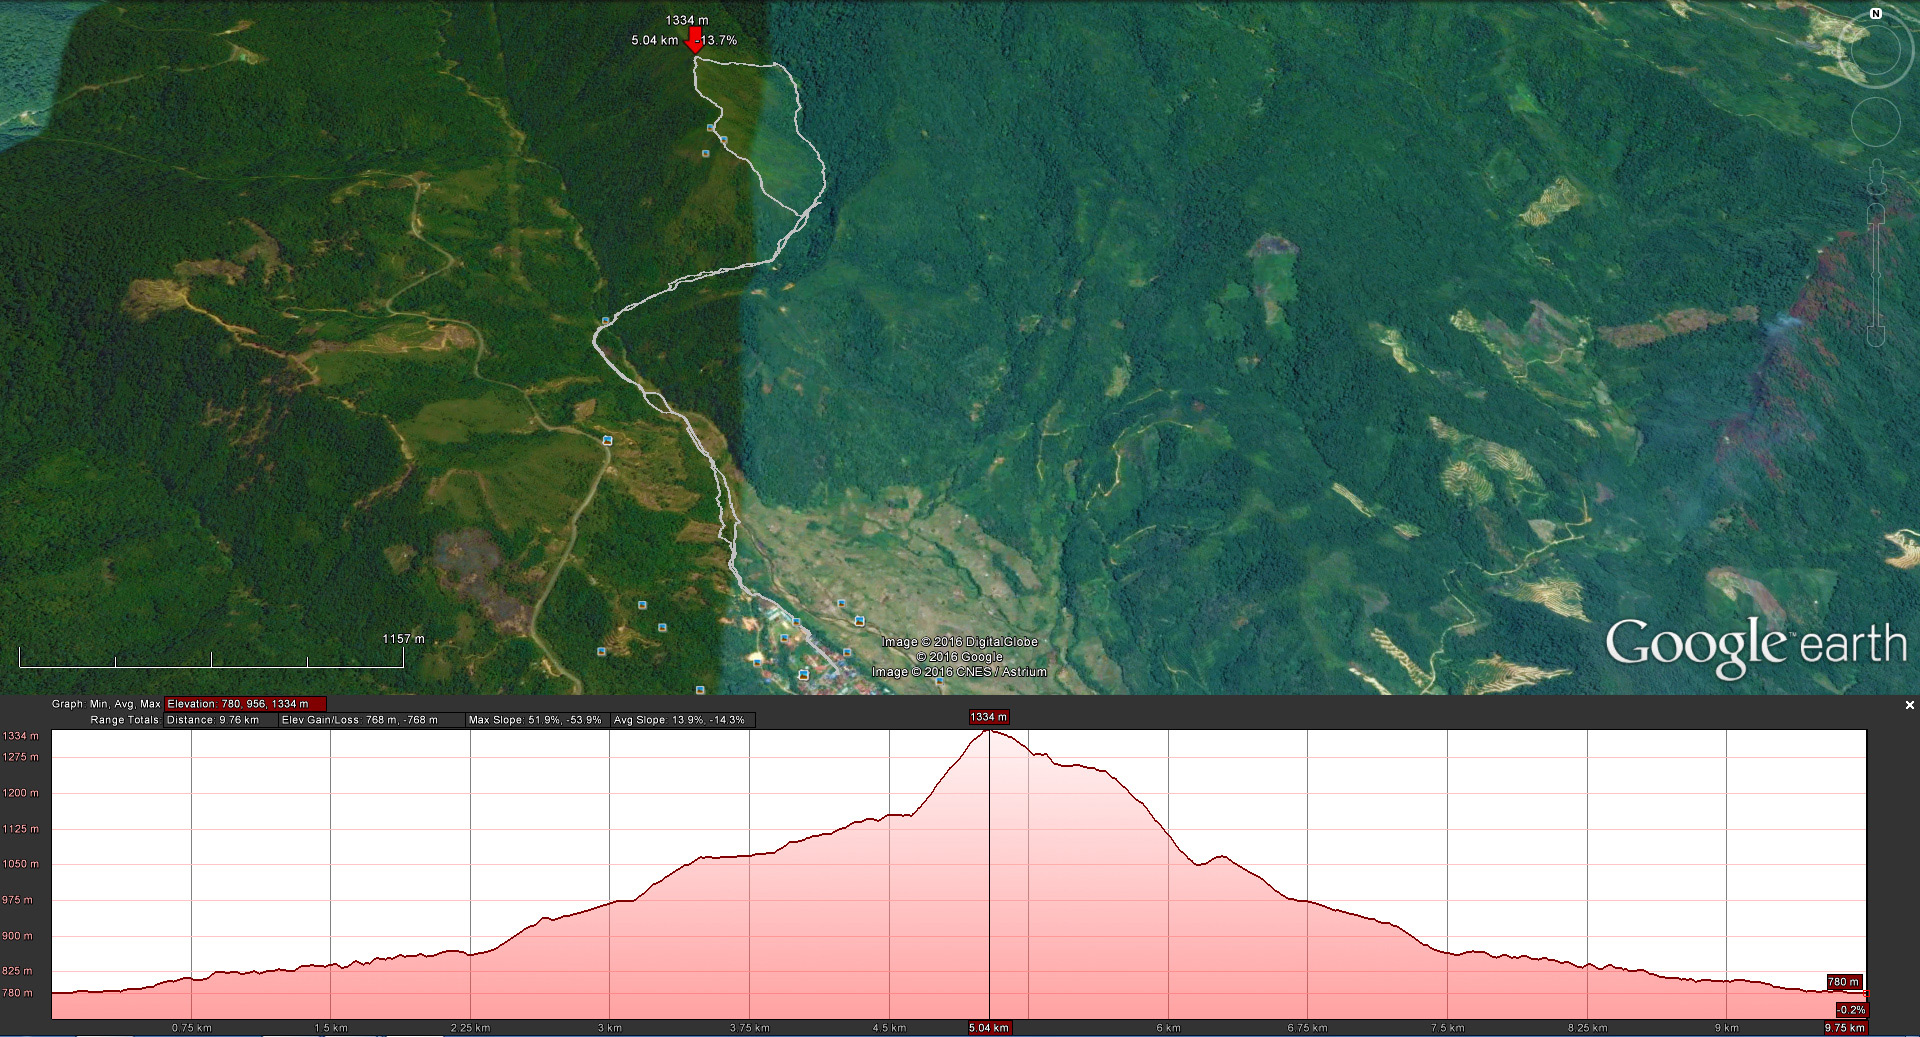
Hiking Distance to Summit: 6.47 KM one way (You will use the same route to ascend & descend)
Time: Return trip (nearly 13 KM) normally takes 9 or more hours

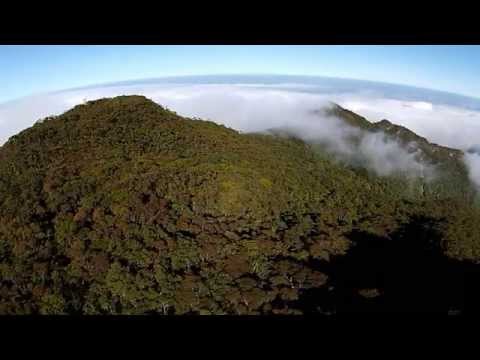
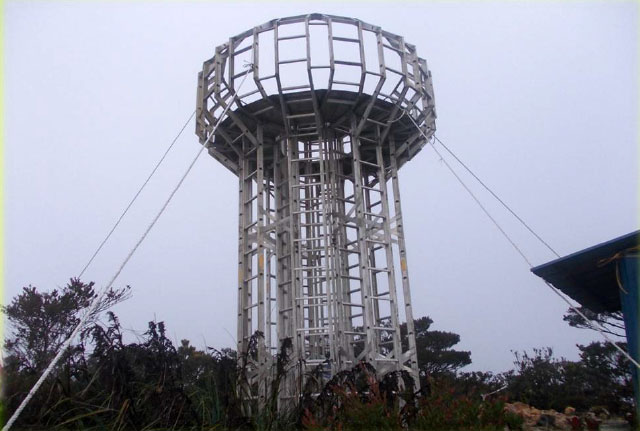
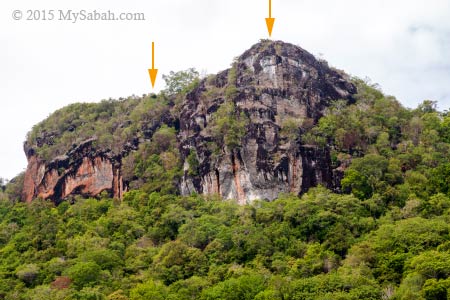
Peak of Mt. Nombuyukong in the cloud

Difficulty: 3.5 out of 5 (I’m a seasoned hiker)
Temperature: about 27C. On the Peak: 20-24C
Minimum Cost of Climbing: MYR59.80 (Malaysian) or MYR146.00 (Non-Malaysian) per adult (approximately USD$15 and 35 respectively). More details on this later.
Notes: Register and pay first before climbing. Sabah Parks requires climbers to start climbing before 7:00am, and you must hire a guide from them.

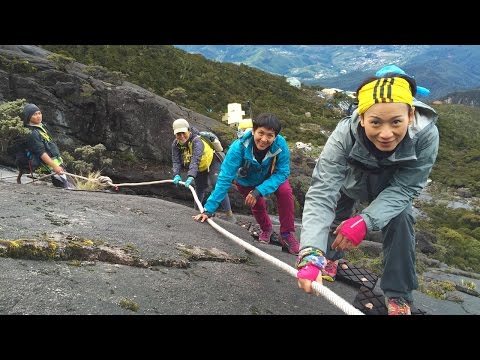
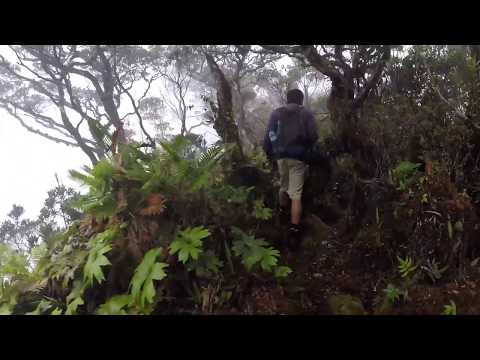
The 6-min video below will show you how the climb looks like:

How soon you reach the summit is depend on your fitness and “style”. For example, I started climbing at 7:00am, reached the top at 1:15pm, and return to the park at 6:20pm (a total of 11 hours & 20 minutes!). I was slow because I stopped a lot to take photos.

The Climb

The following is my climbing log. You can click any photo in this article to enlarge it.

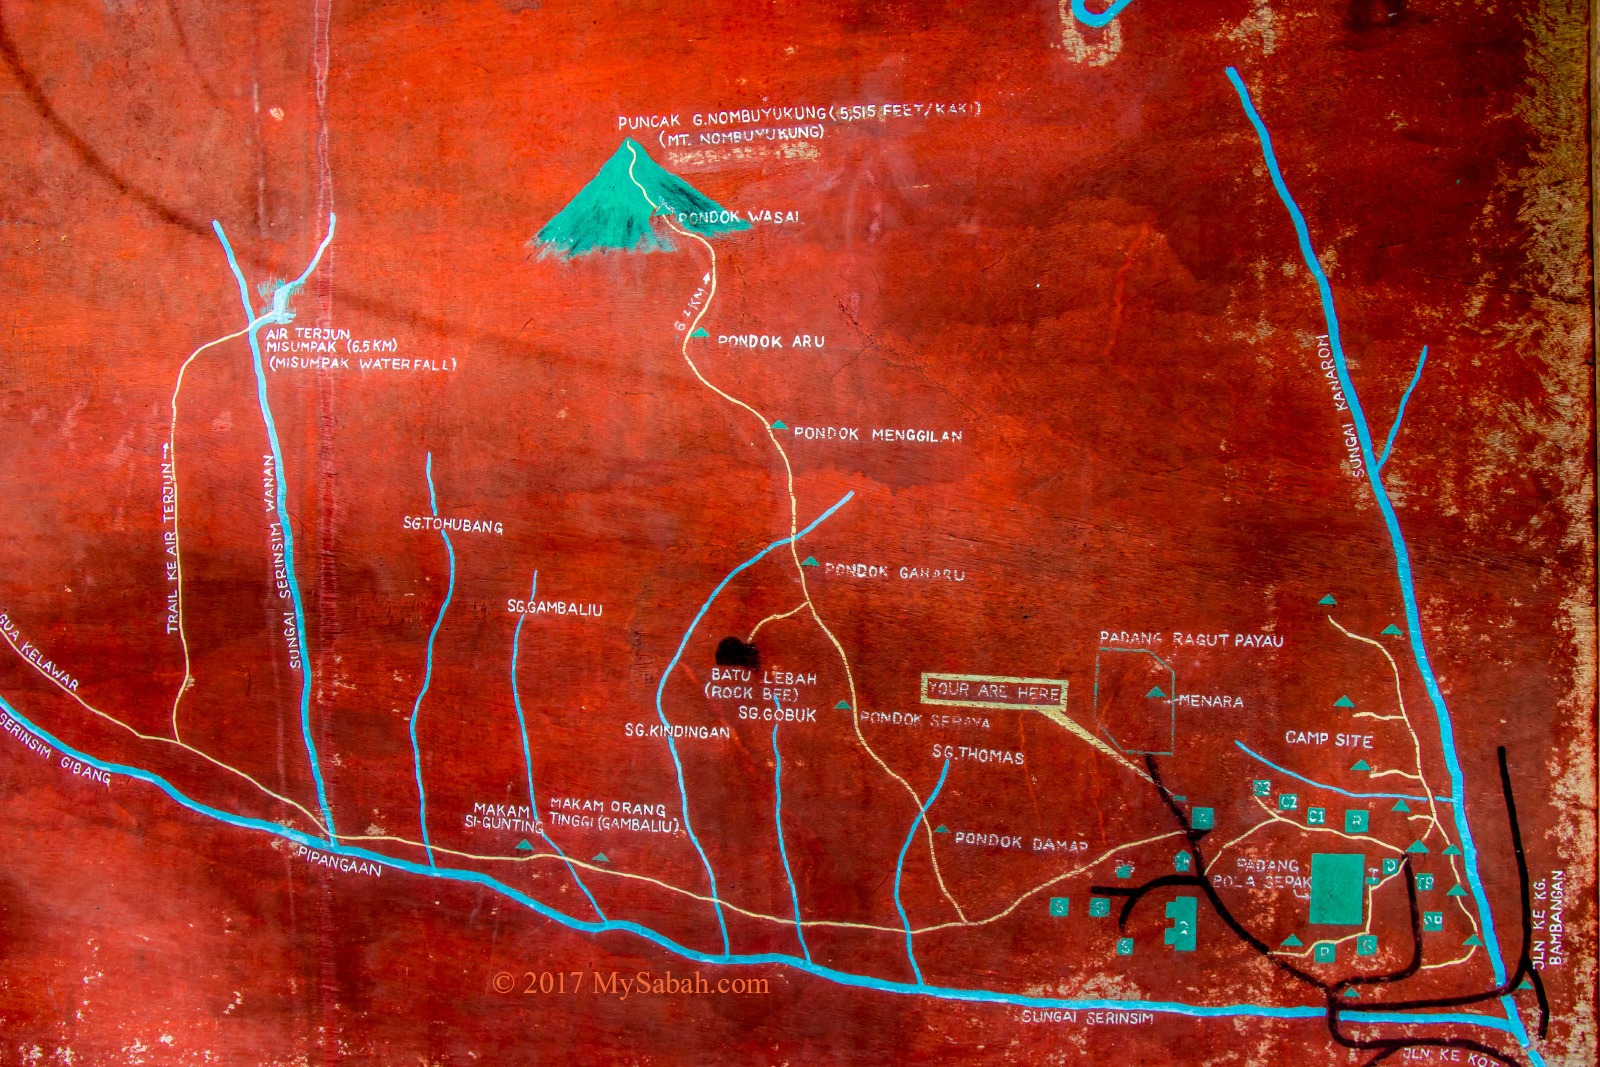
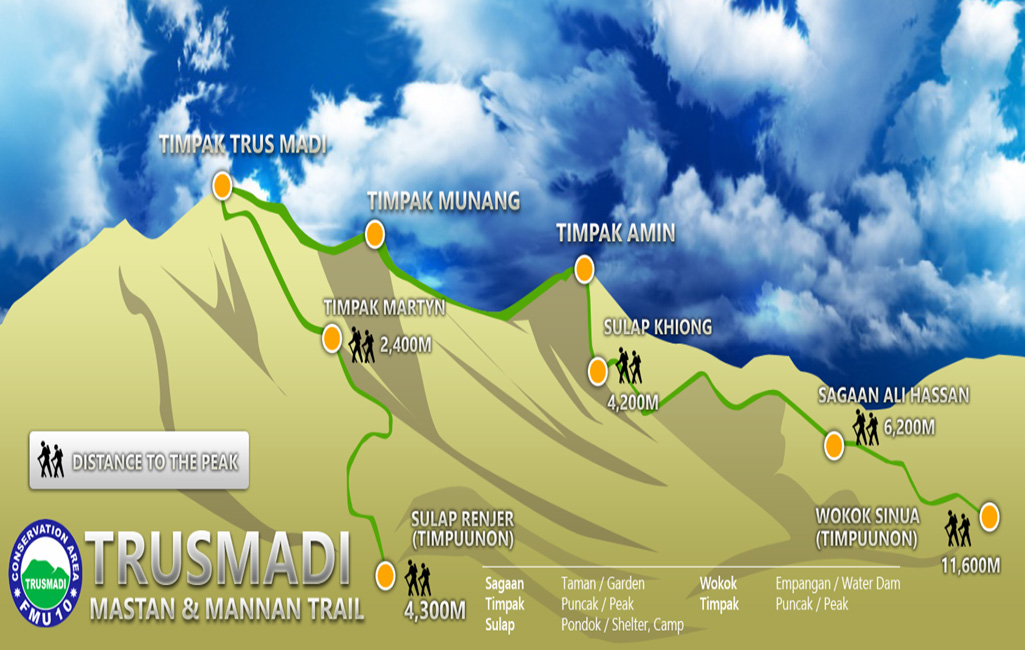
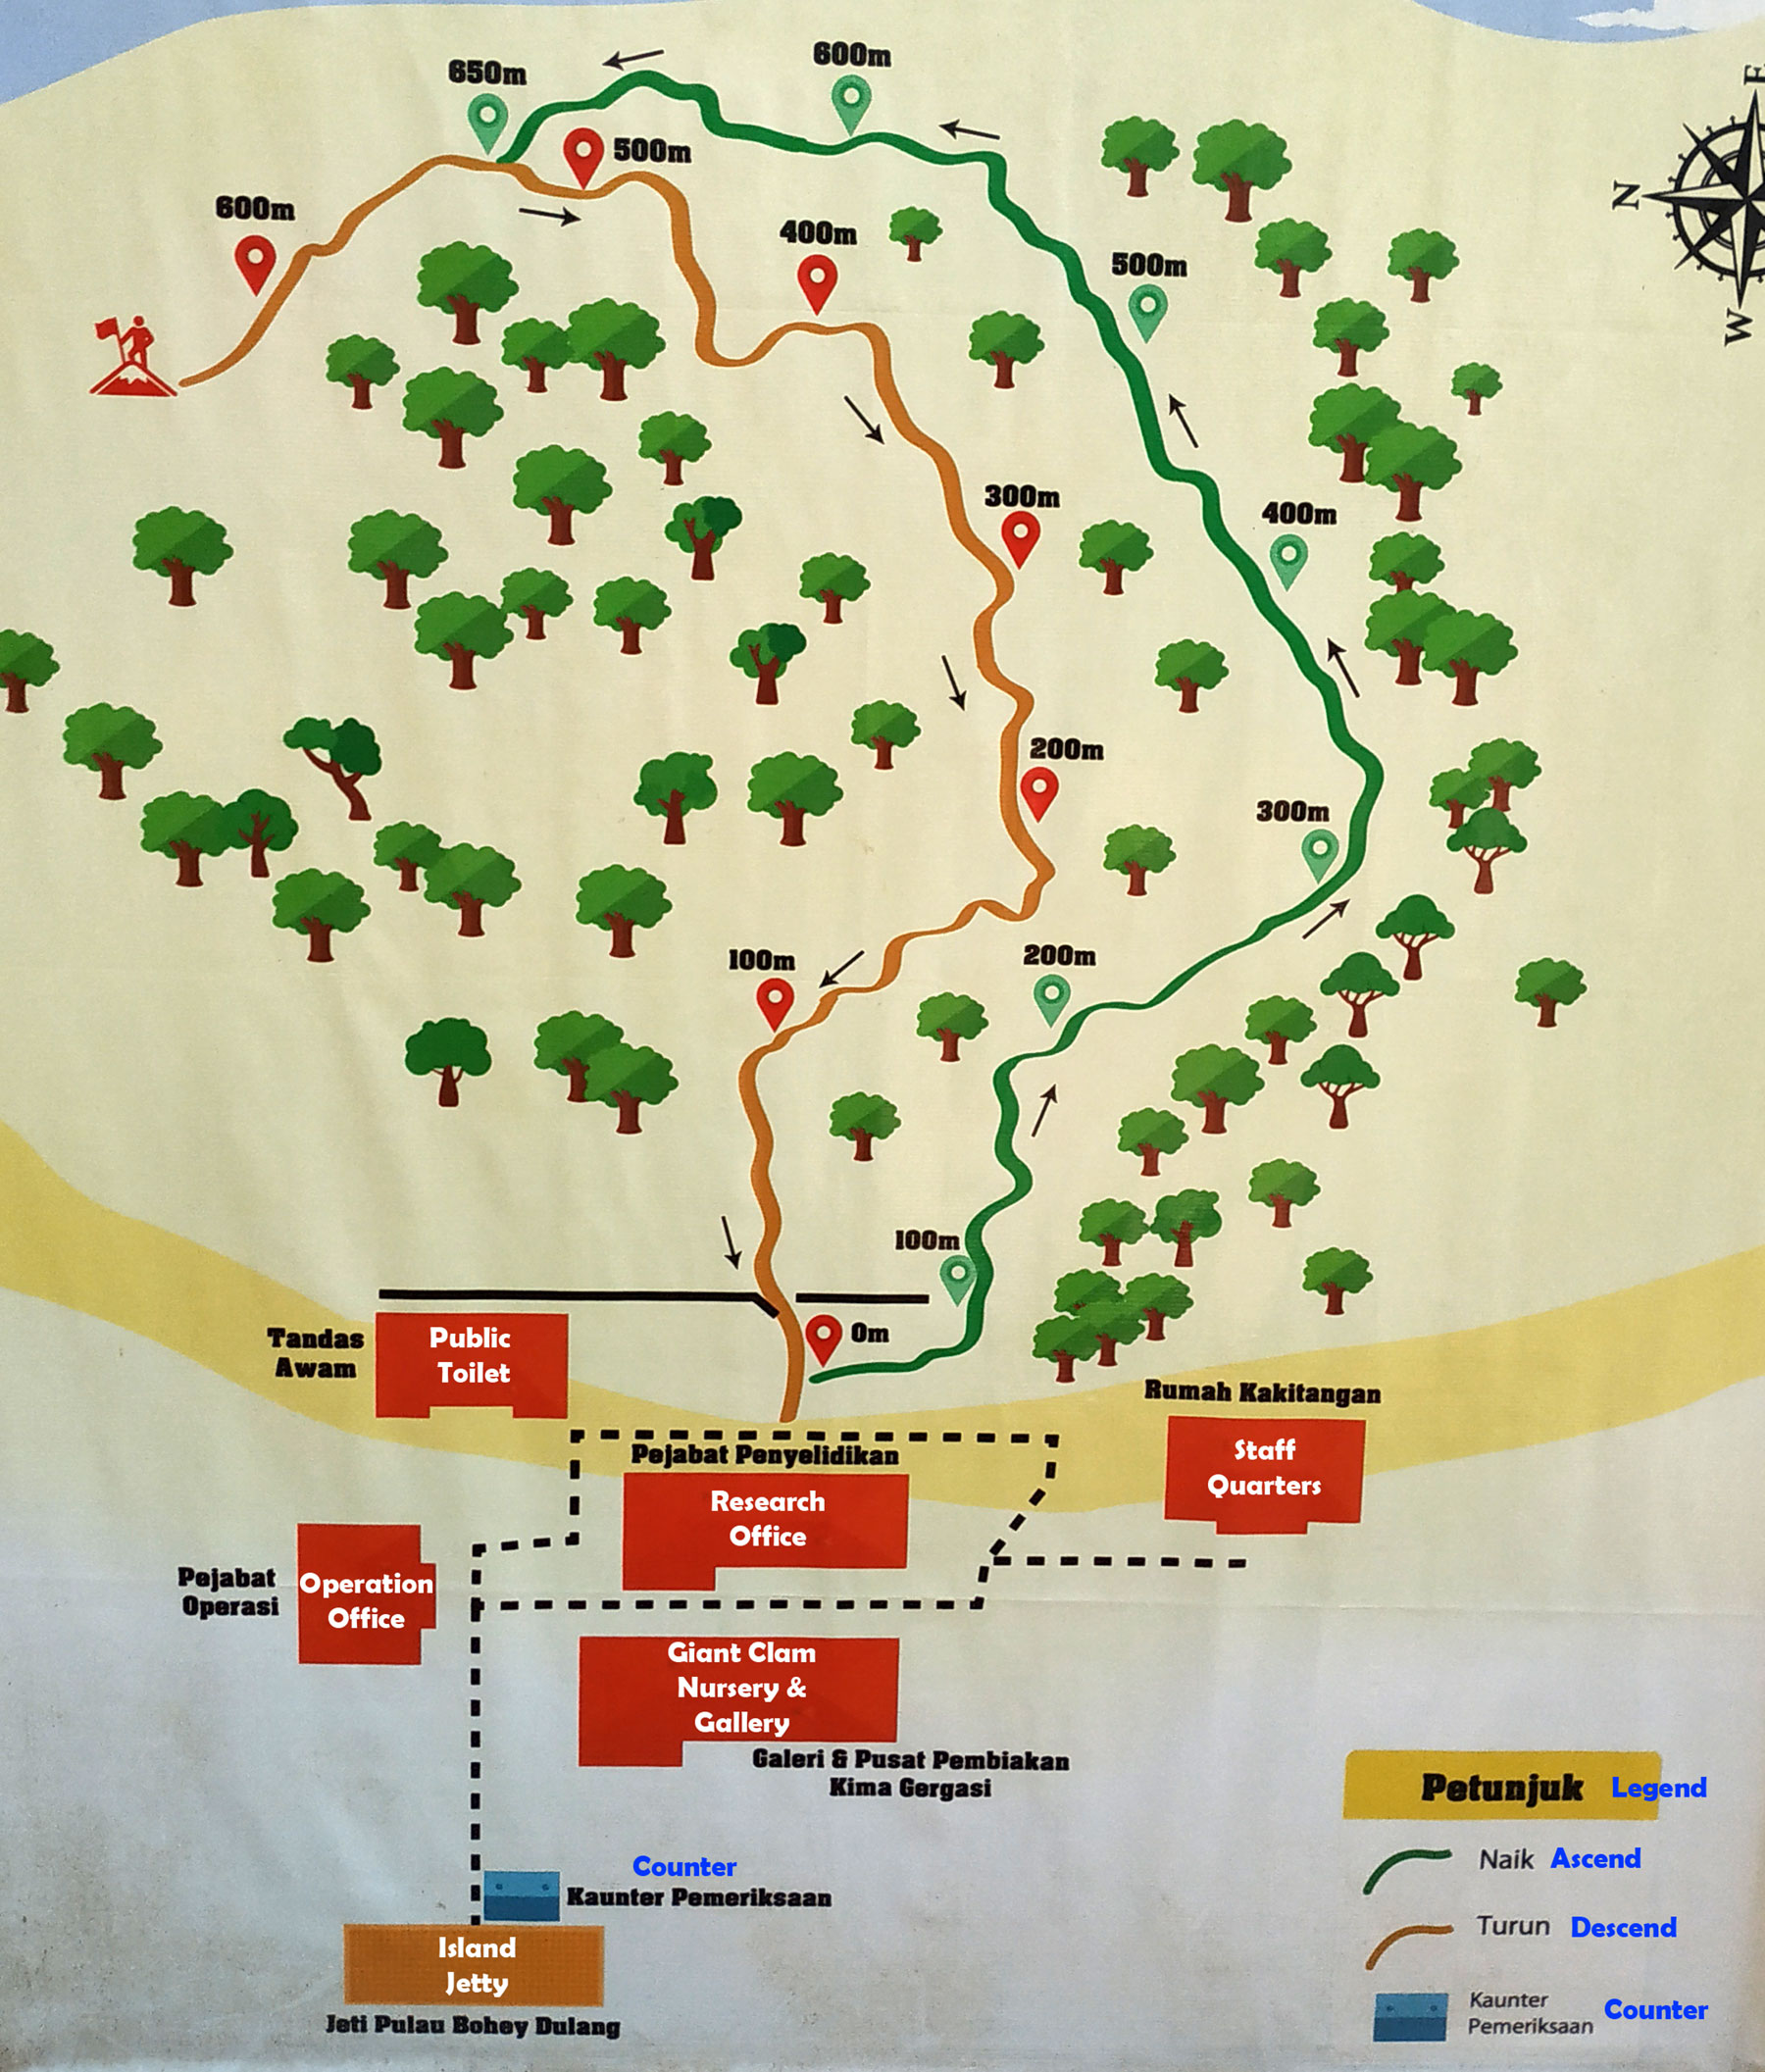
Trail Map of Mount Nombuyukong
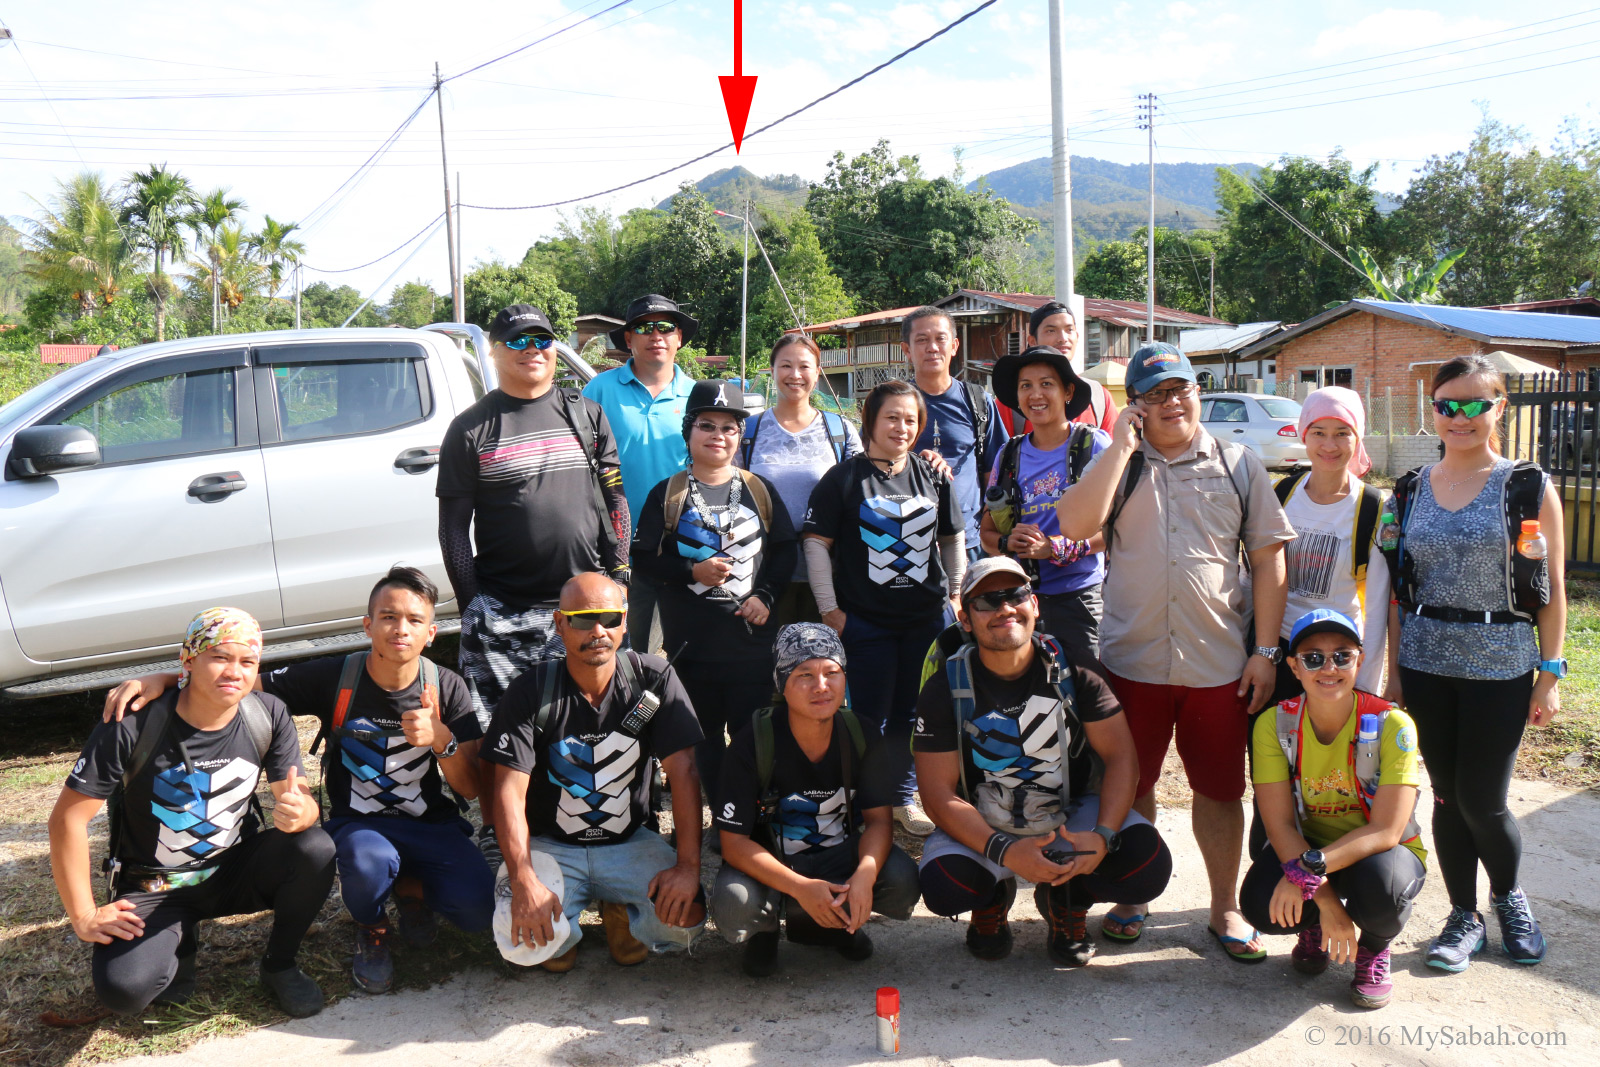
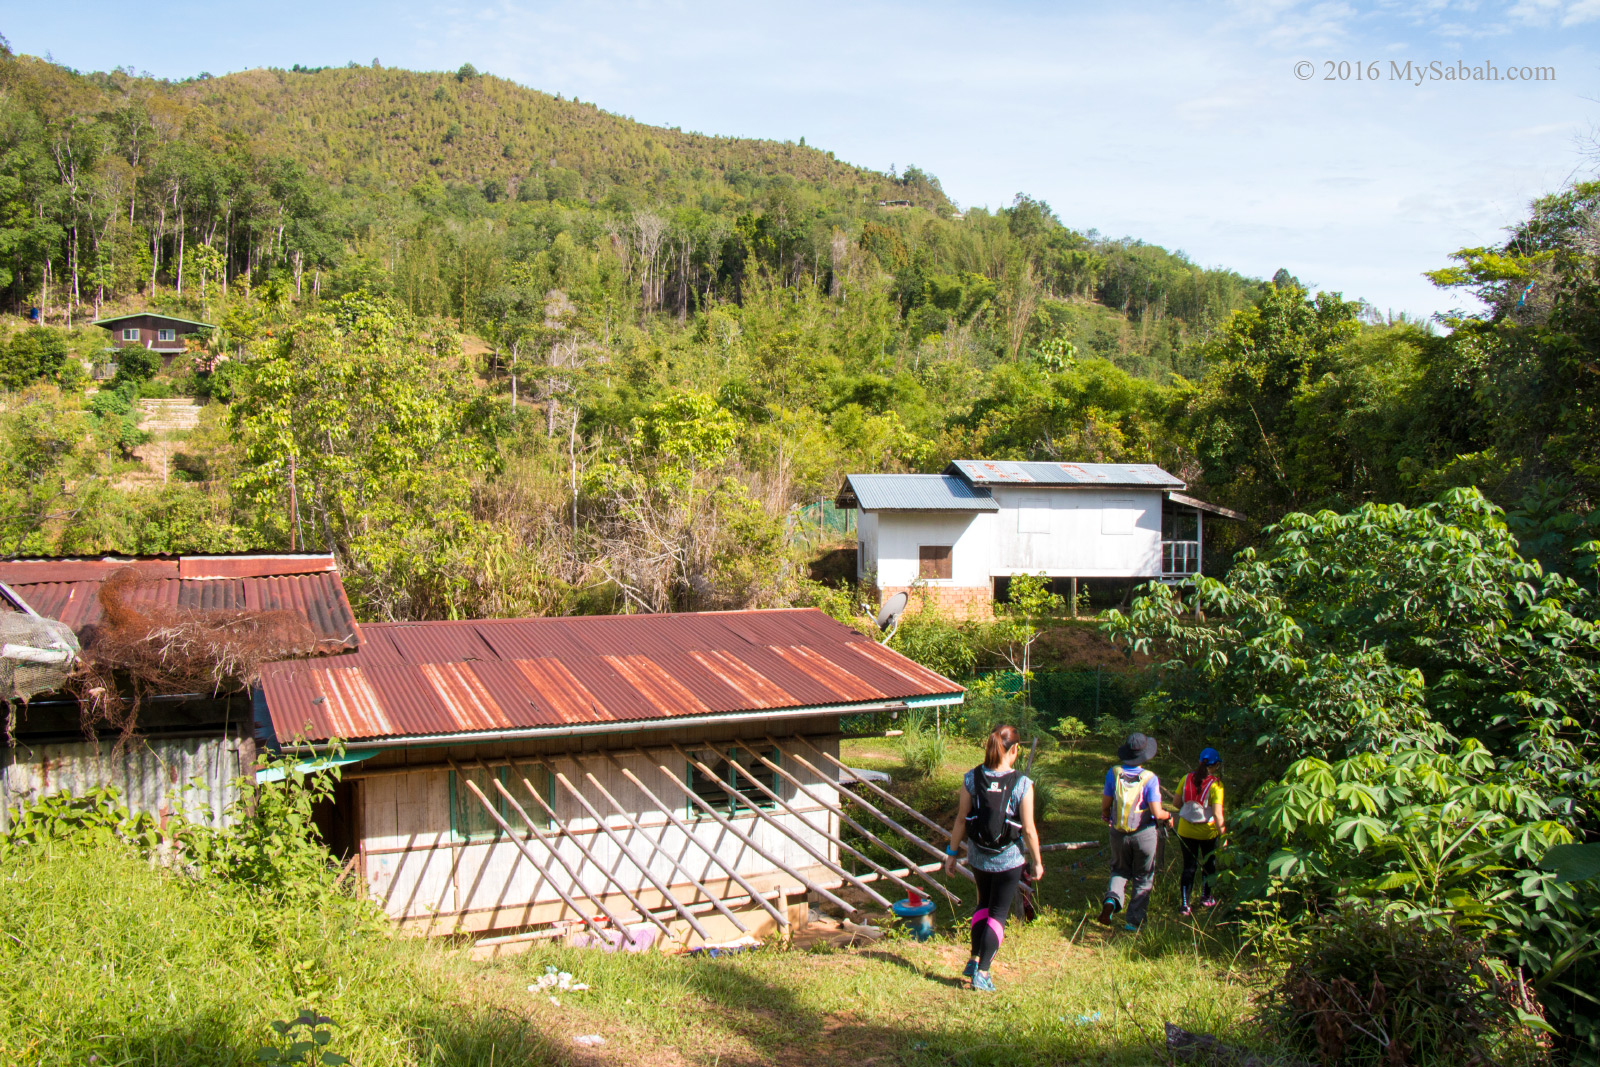
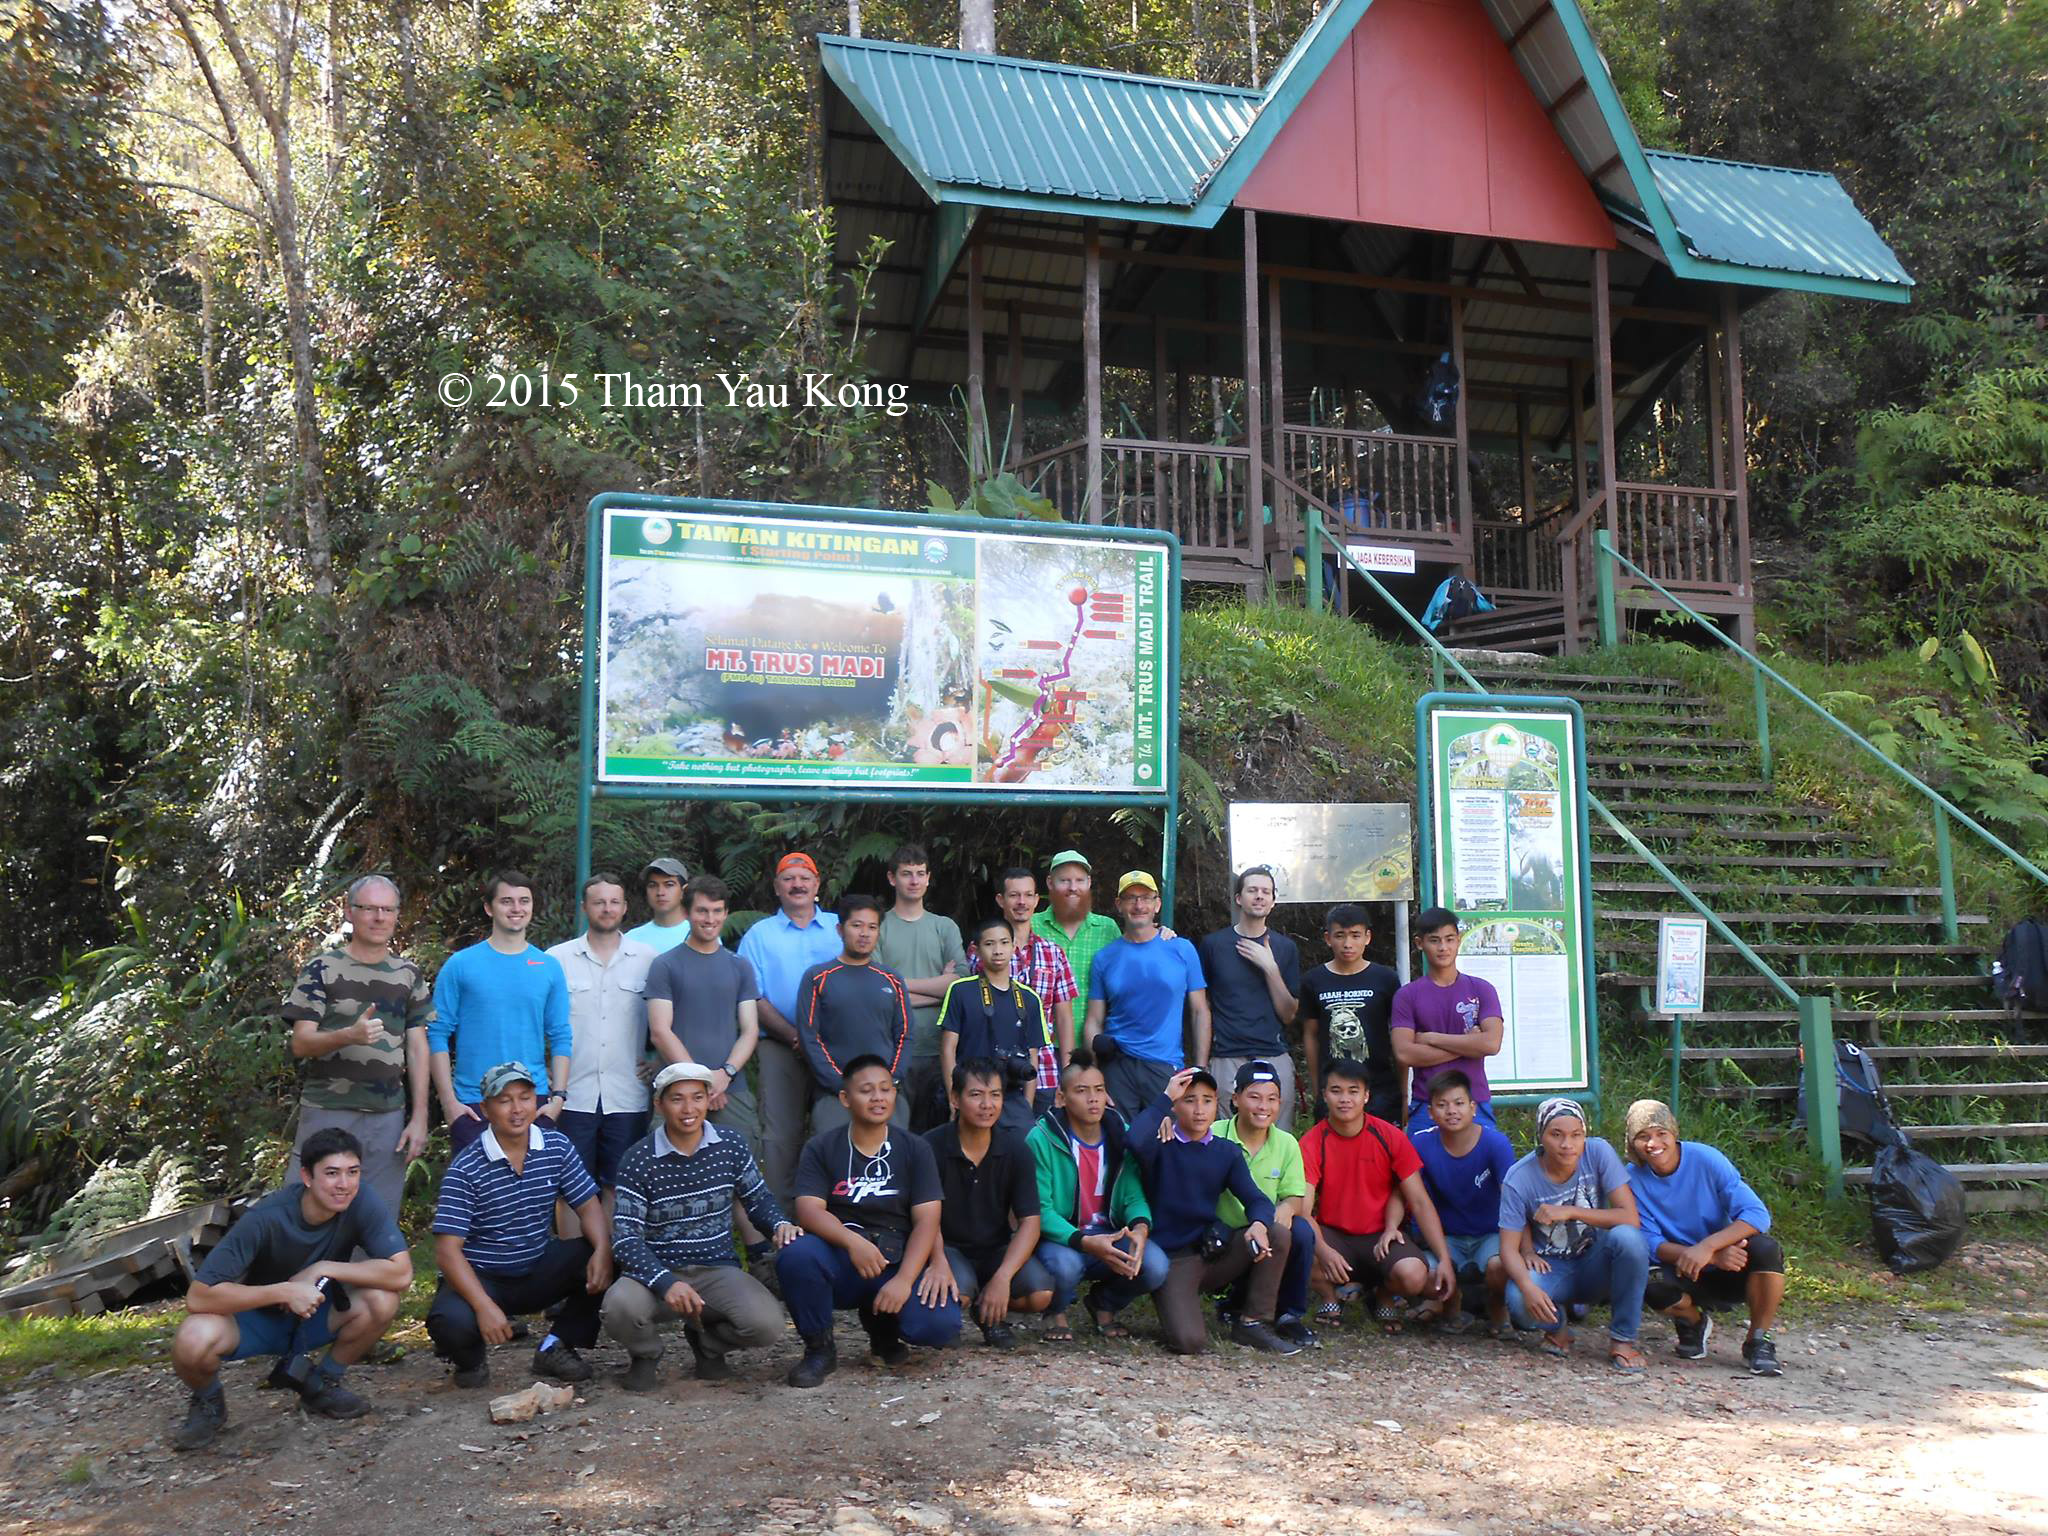
Start of Climb

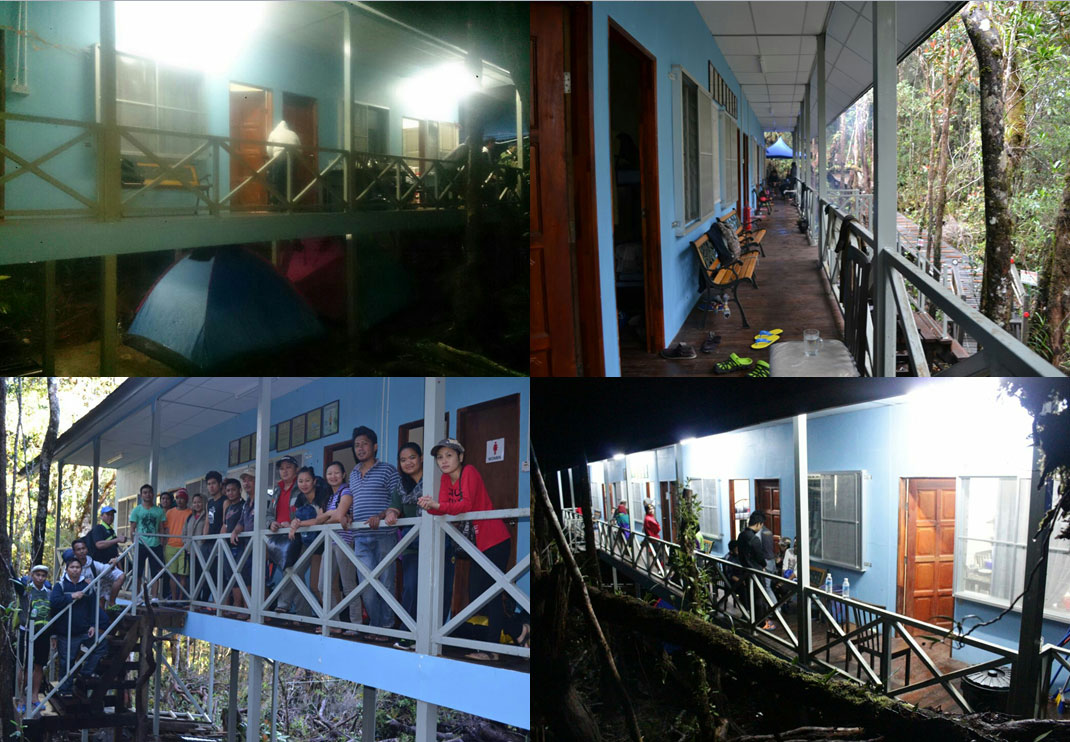
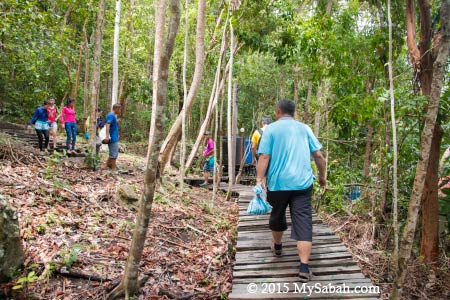
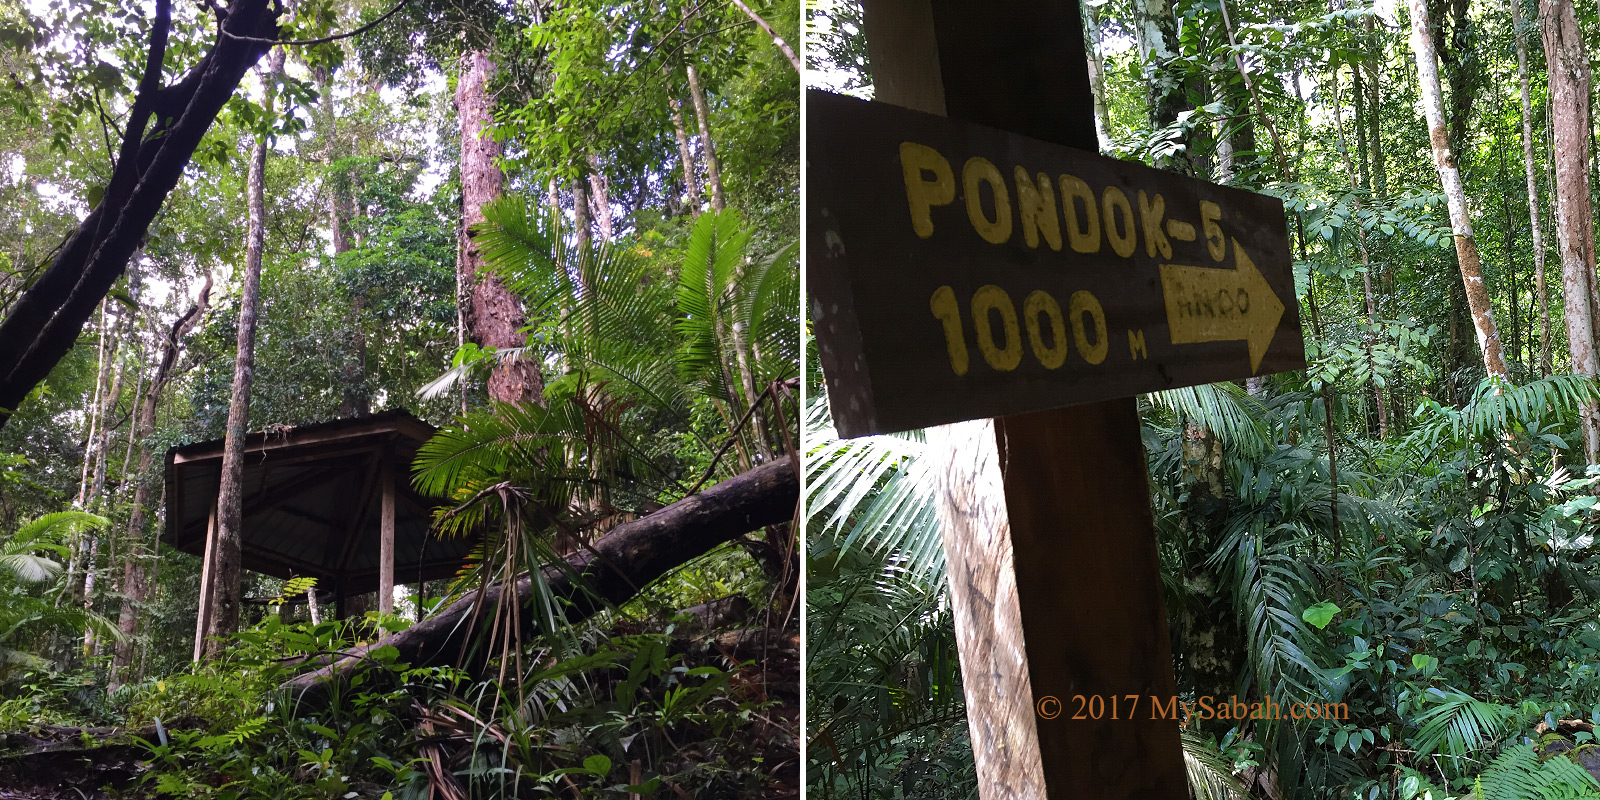
I met my guide, Mr. Hendrick, at the starting point of the climb, which is just behind my hostel (Name: Asrama Kanarom) in Serinsim Park. After a short briefing, we started the climb at 7:00am. Please note you will pass through 6 gazebos along the way (about one for every 1 KM)(Pondok is Gazebo in Malay language). I use them as markers here.

Starting Point?Gazebo No.1

We reached Gazebo No.1 (Pondok Damar) at 7:25am.

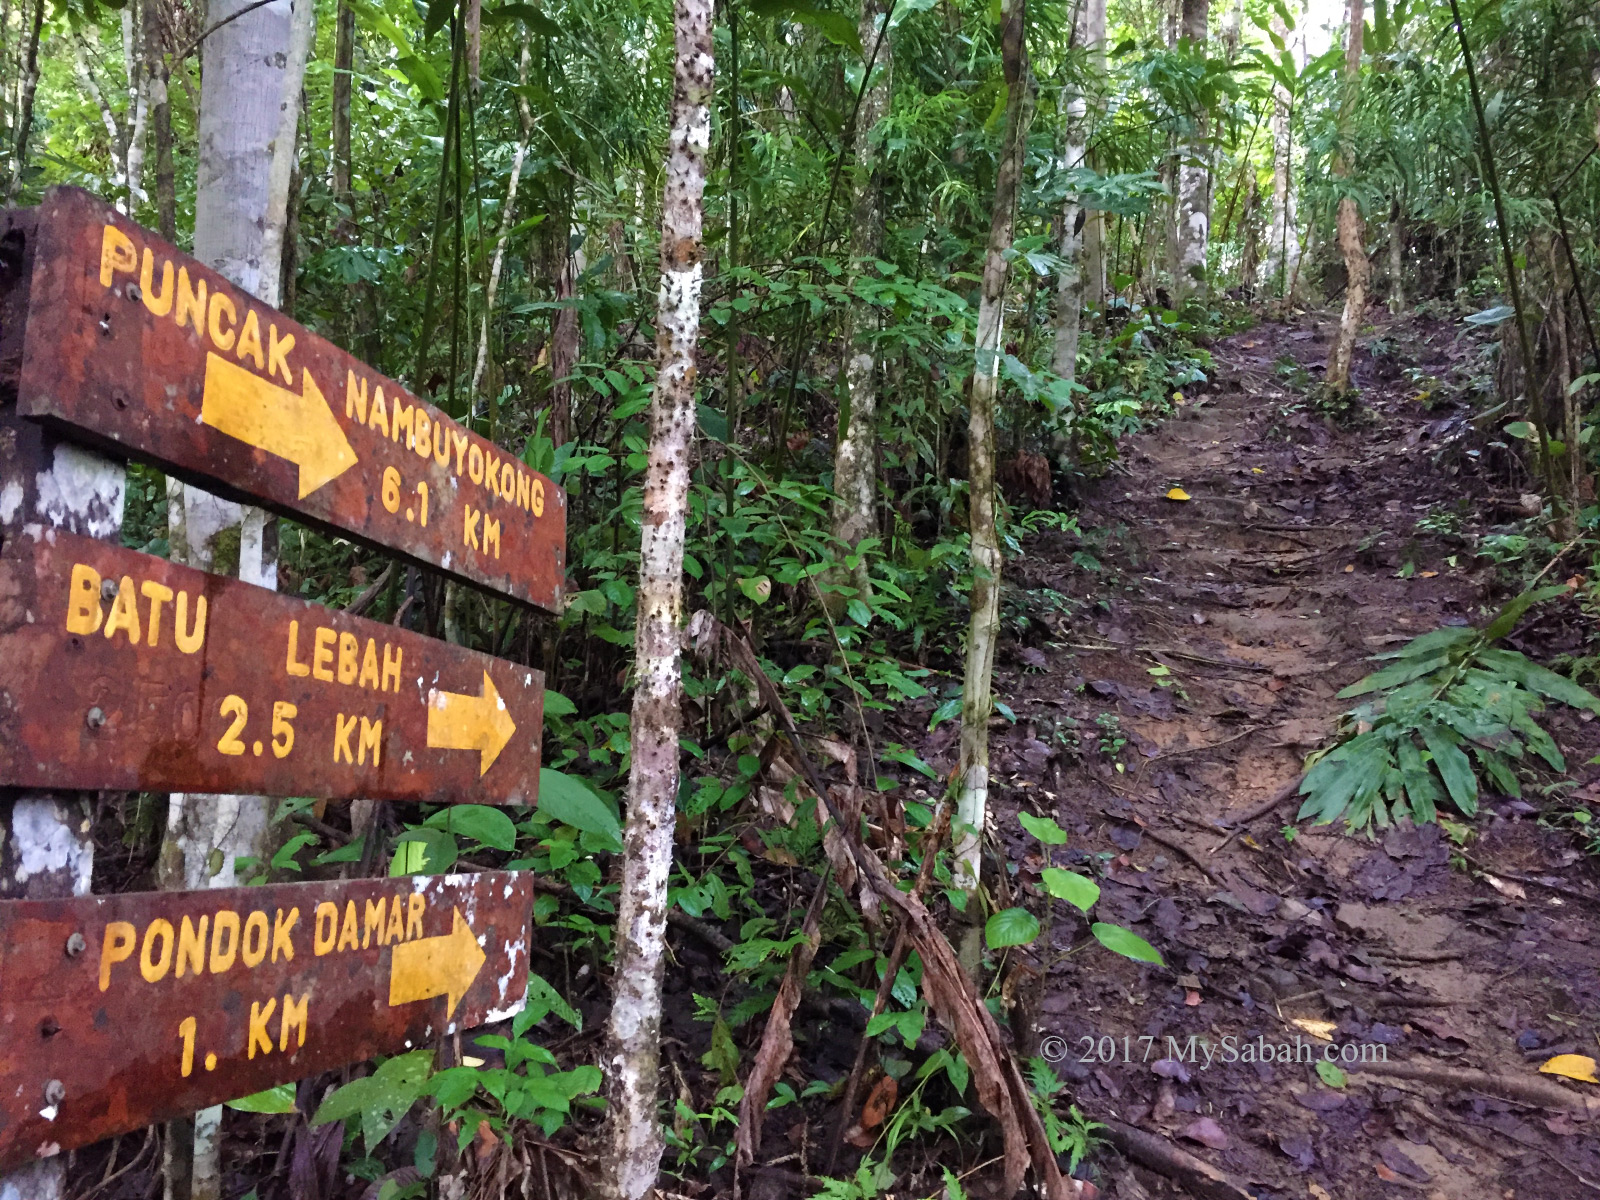
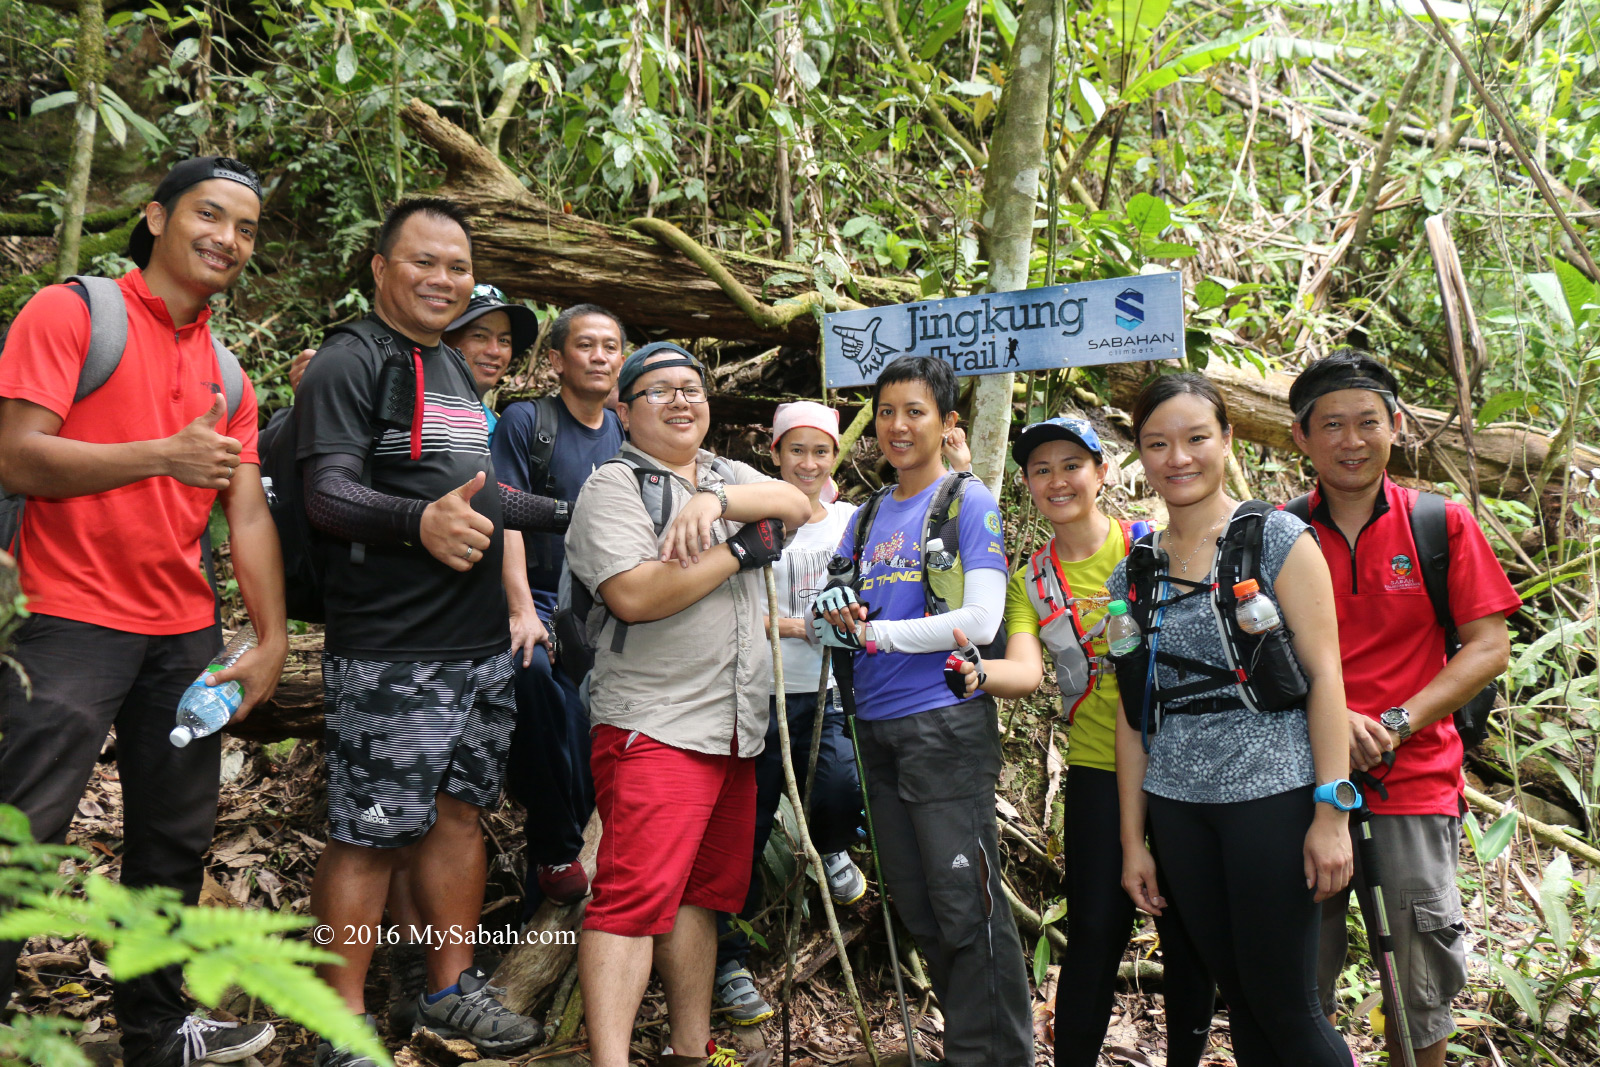
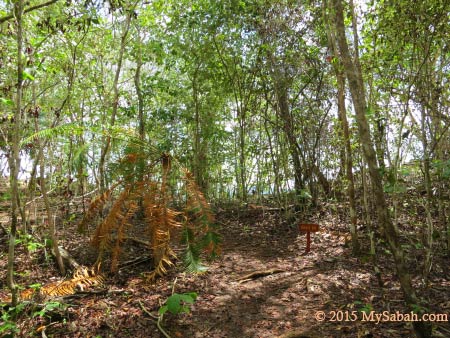
Junction to the peak of Mt. Nombuyukong after 400 Meters

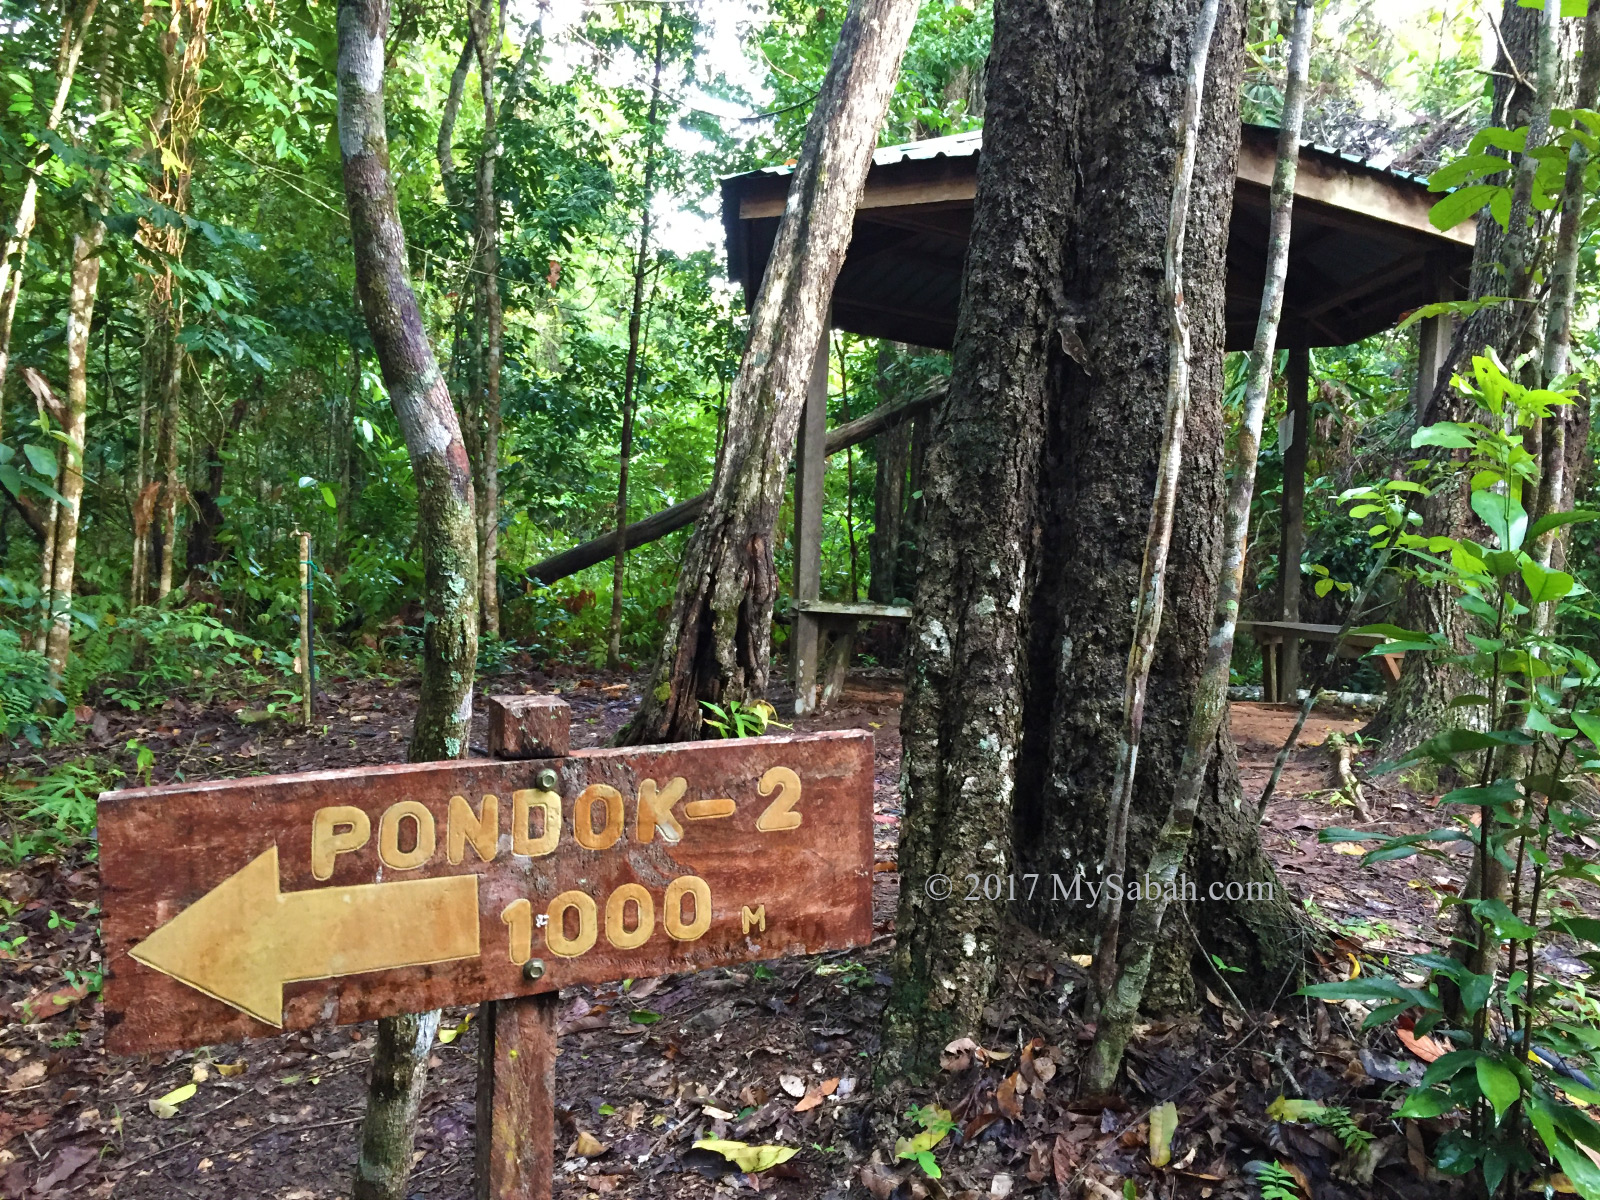
Gazebo No.1: Pondok Damar, 1,000 Meters to Gazebo No.2. (Pondok = Gazebo)

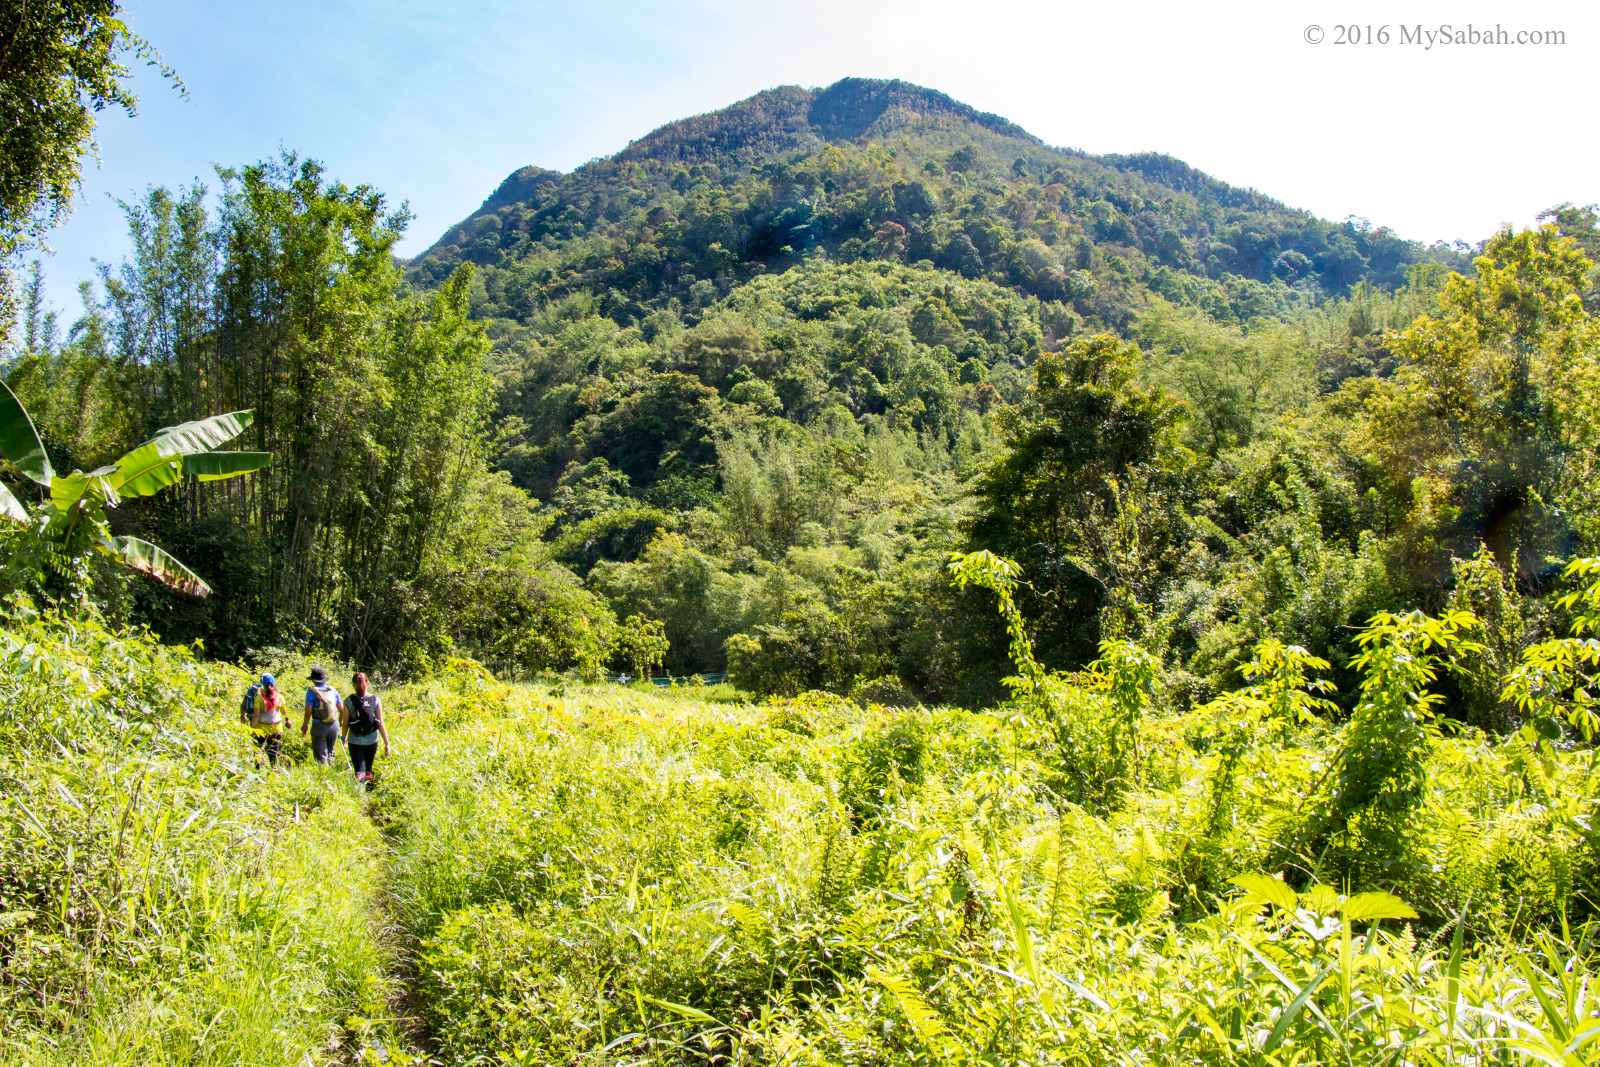
The trail is mostly flat in the beginning and under the shade of lowland rainforest. Mt. Nombuyukong is a mini version of Mt. Tambuyukon. Whatever hardship you experience in climbing Mt. Nombuyukong, multiple it by 3 and that’s what you will face on Mt. Tambuyukon. Both look quite alike in terms of vegetation and trail condition.

Gazebo No.1?Gazebo No.2

We reached Gazebo No.2 (Pondok Seraya) at 7:45am.

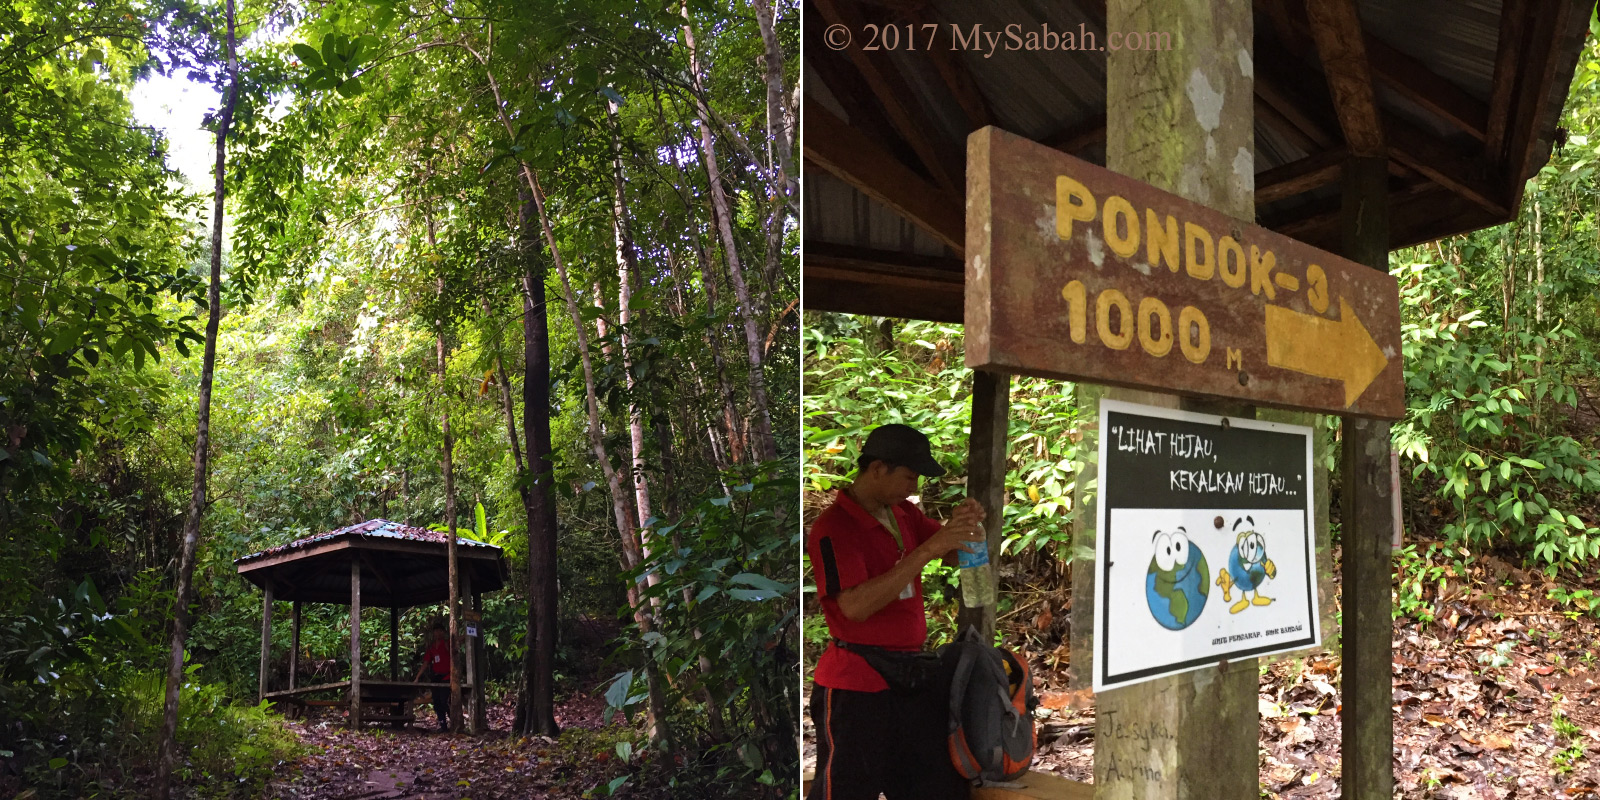
Gazebo No.2: Pondok Seraya, 1,000 Meters to gazebo No.3

The peak looks so far away, even for car. But sorry, no shortcut such as cable car and helicopter.

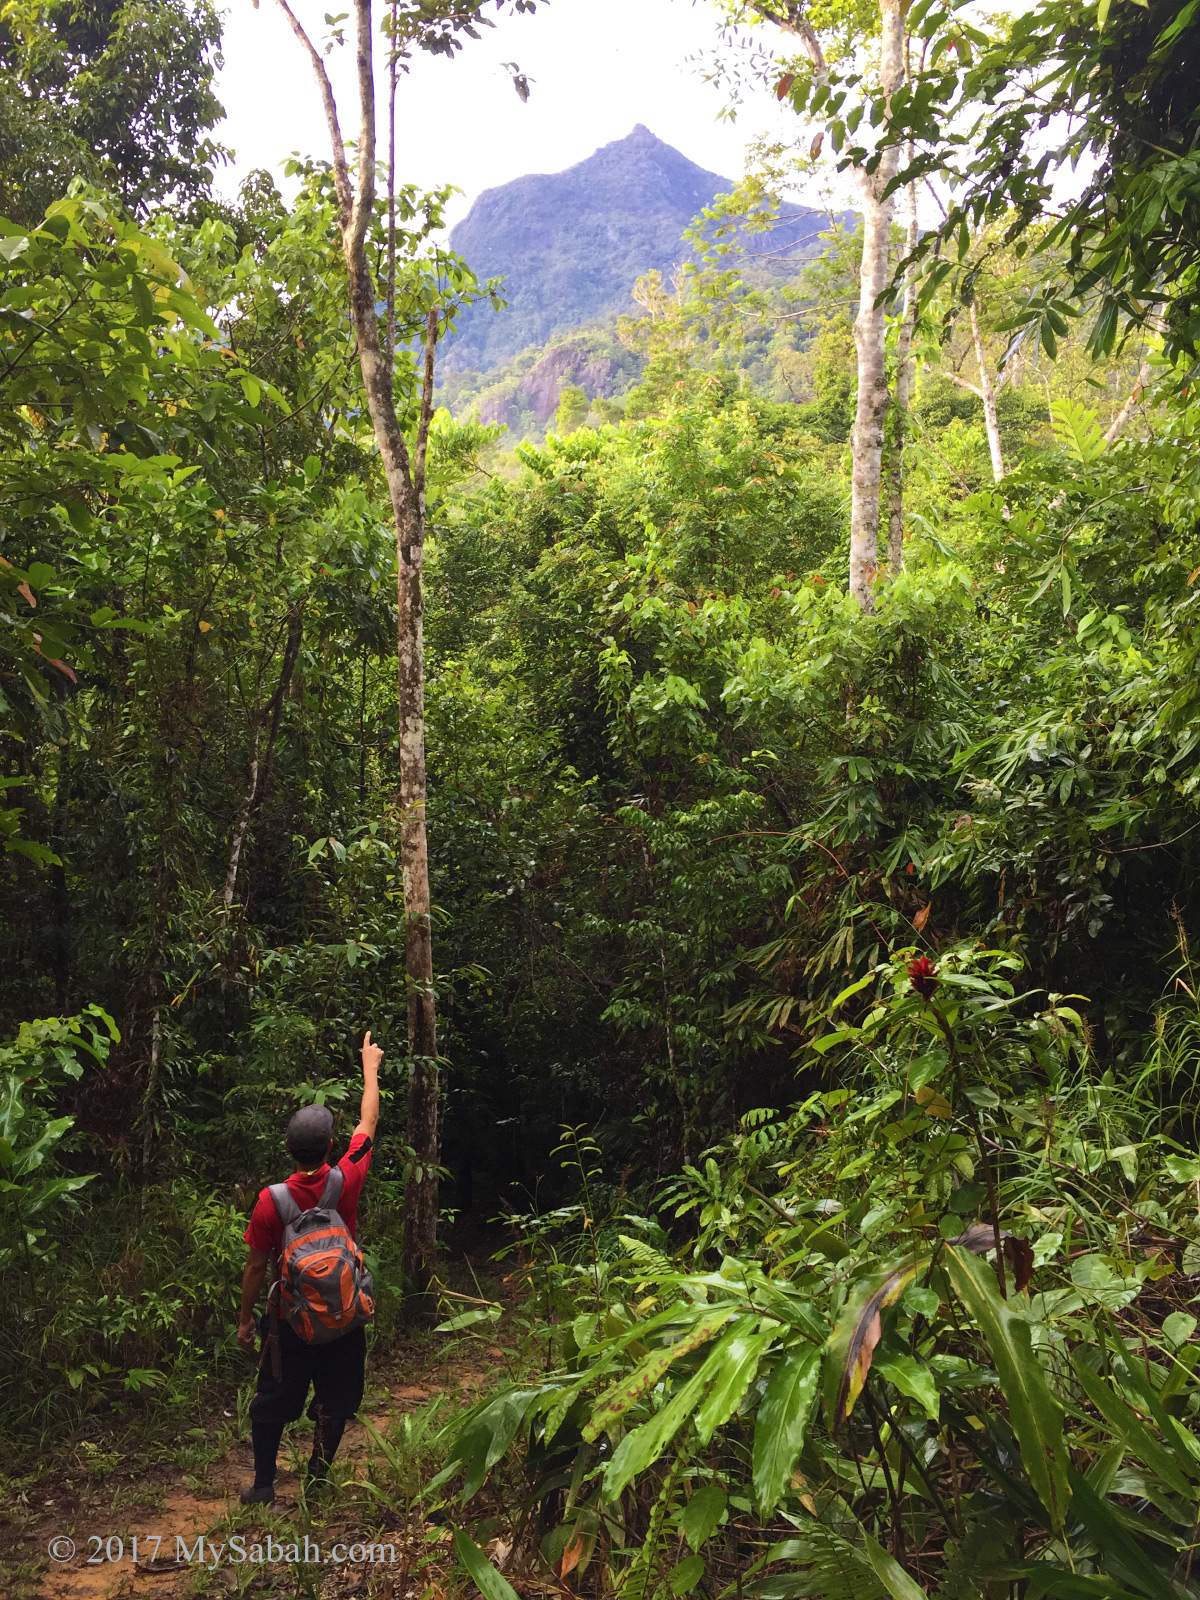
The peak of Mt. Nombuyukong is about 6.47 KM away

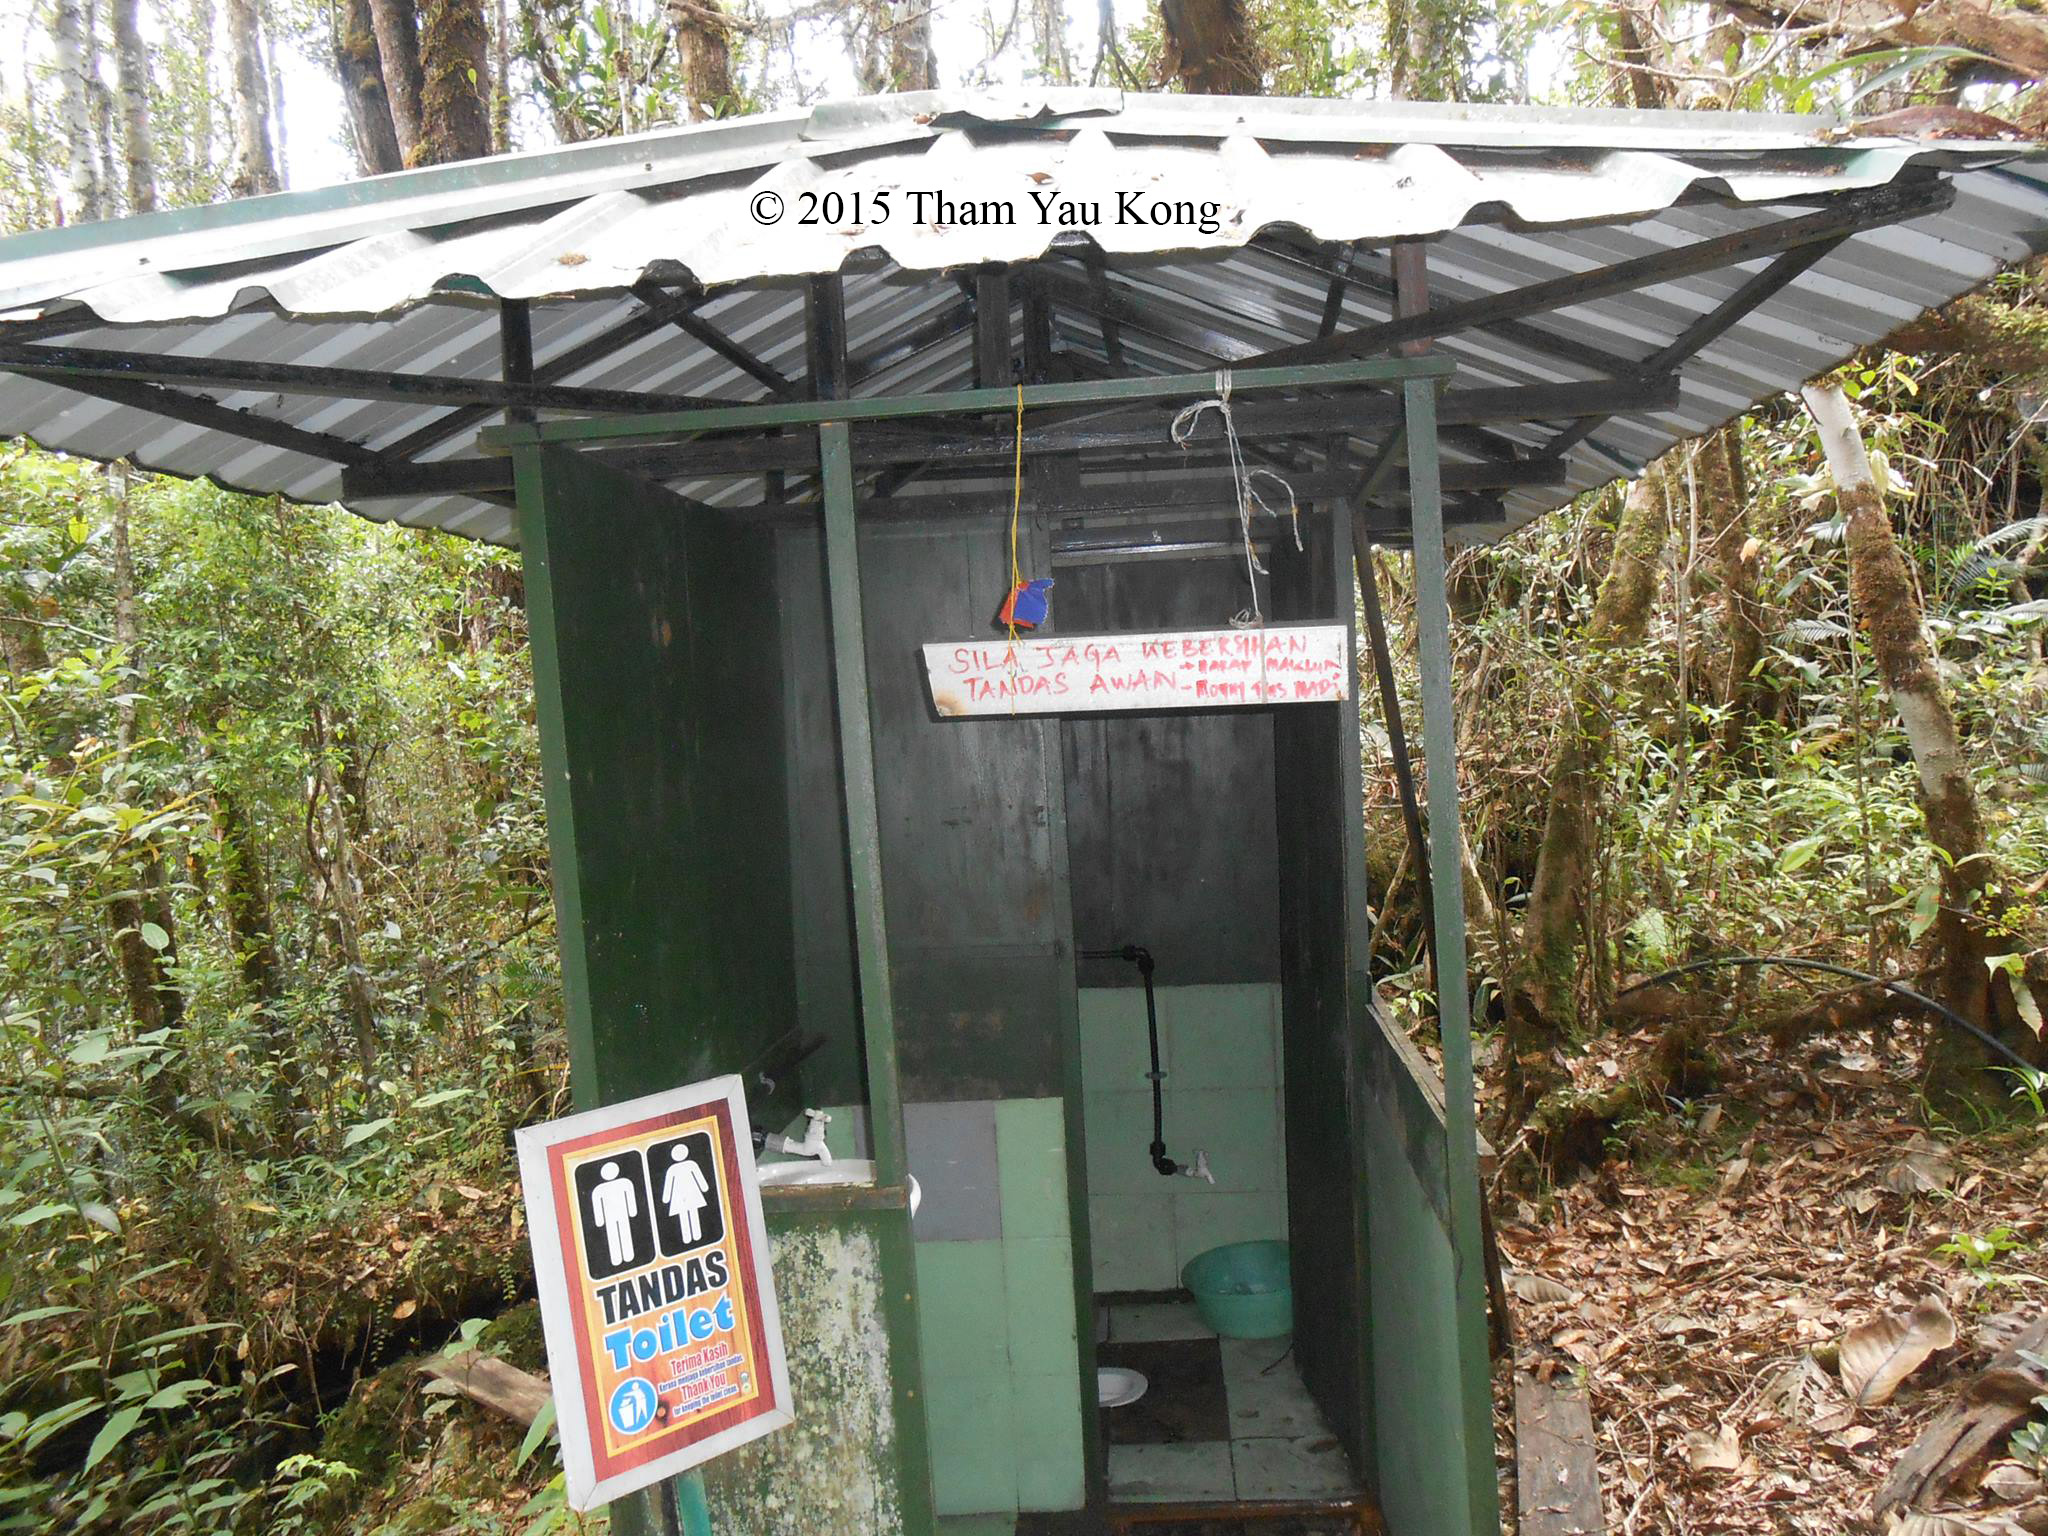
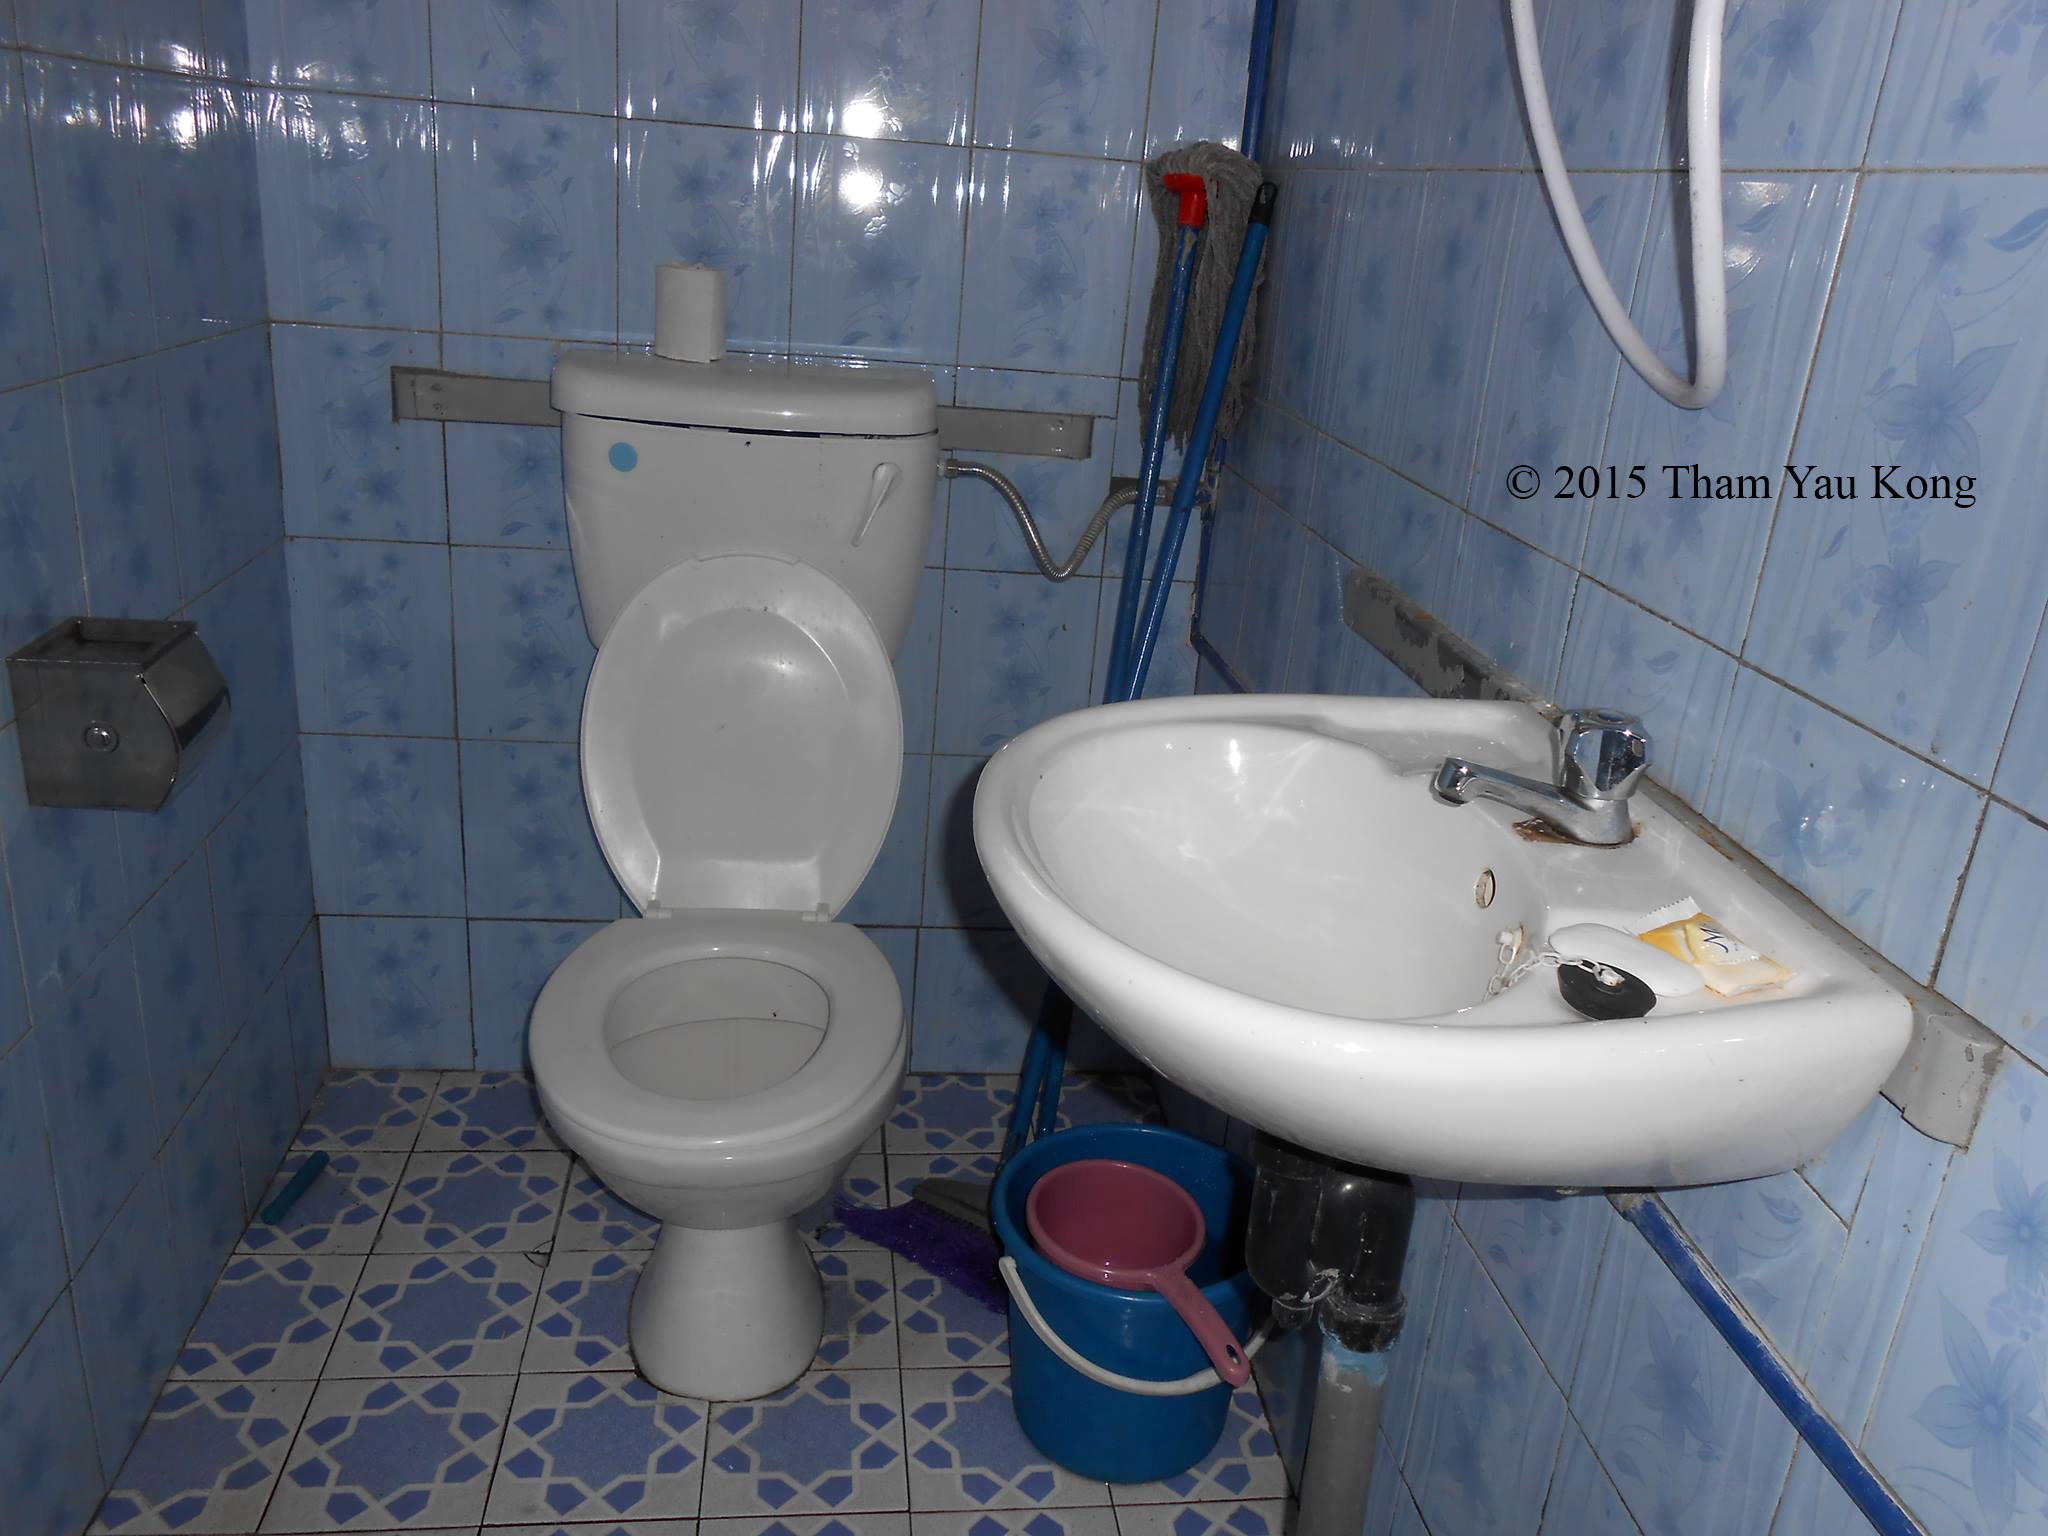
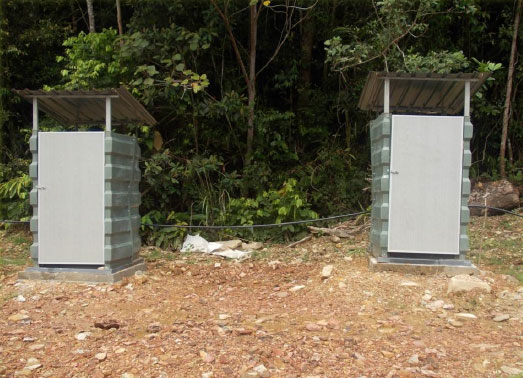
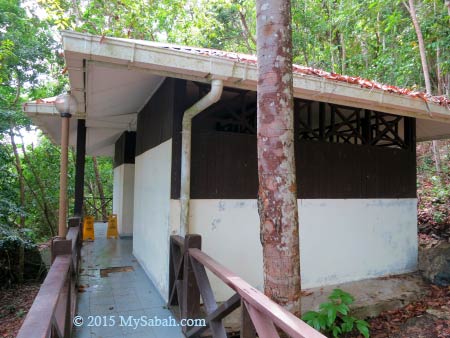
With a few gentle slopes, this trail section is relatively flat and a bit muddy. Next to Gazebo No.2 (Pondok Seraya) is a portable toilet (squat type) with a broken door.

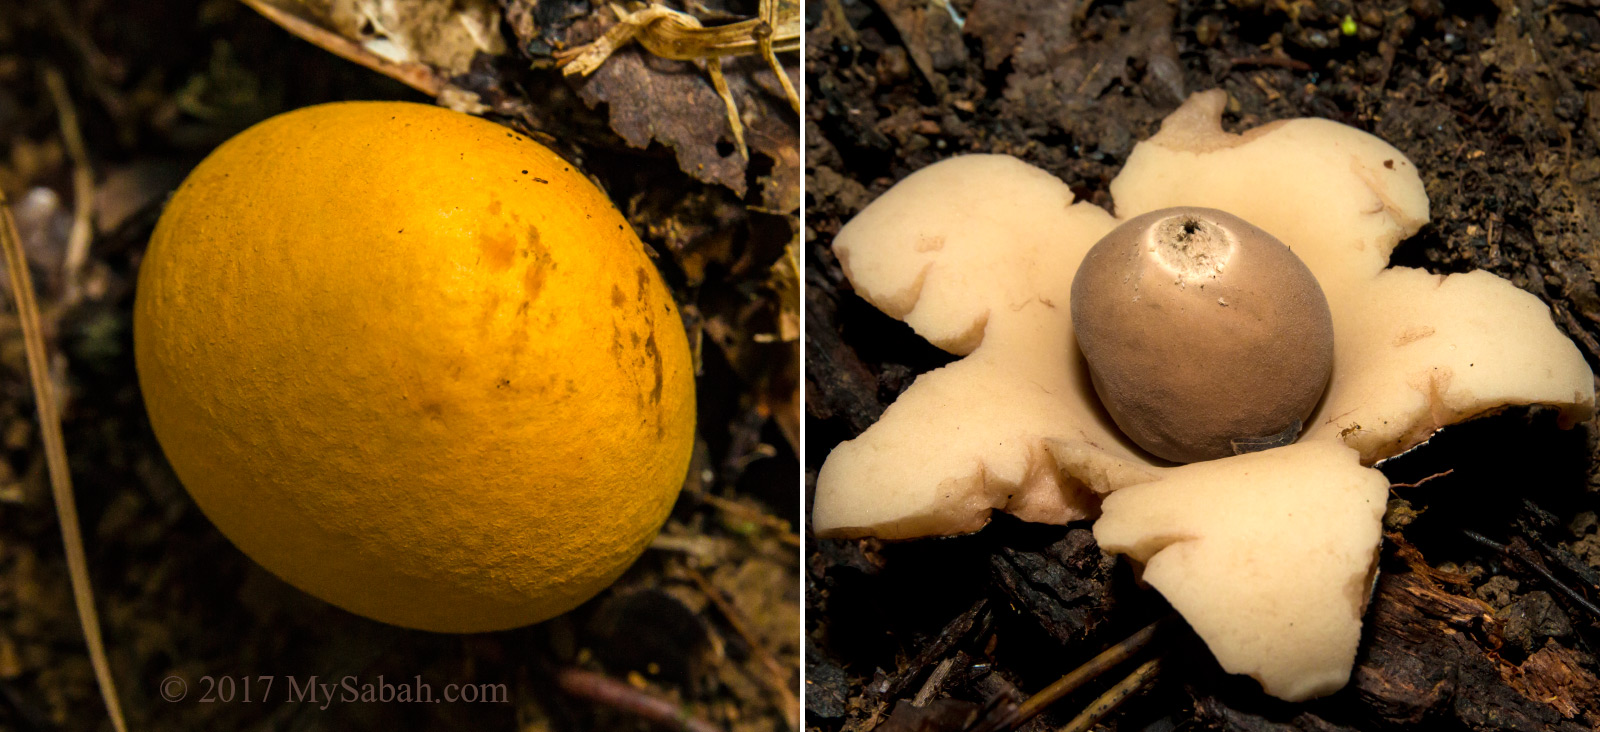
Earthstar mushroom (Geastrum sp.) looks like miniature orange before mature (left). When mature (right), the outer layer of its fruiting body splits into segments which turn outward creating a star-like pattern and reveals a smooth, grayish-brown and egg-like spore sac. Then it waits for rain drops on its central pore to force a jet of spores out through a small opening in the middle. They are generally not toxic but inedible.

Gazebo No.2?Gazebo No.3

We reached Gazebo No.3 (Pondok Gaharu) at 8:36am.

Gazebo No.3: Pondok Gaharu, 1,000 Meters to gazebo No.4

We walked in mixed hill dipterocarp and lowland rainforest in the beginning

There are about 300 Meters of steep trail, and the trail is relatively flat after that.

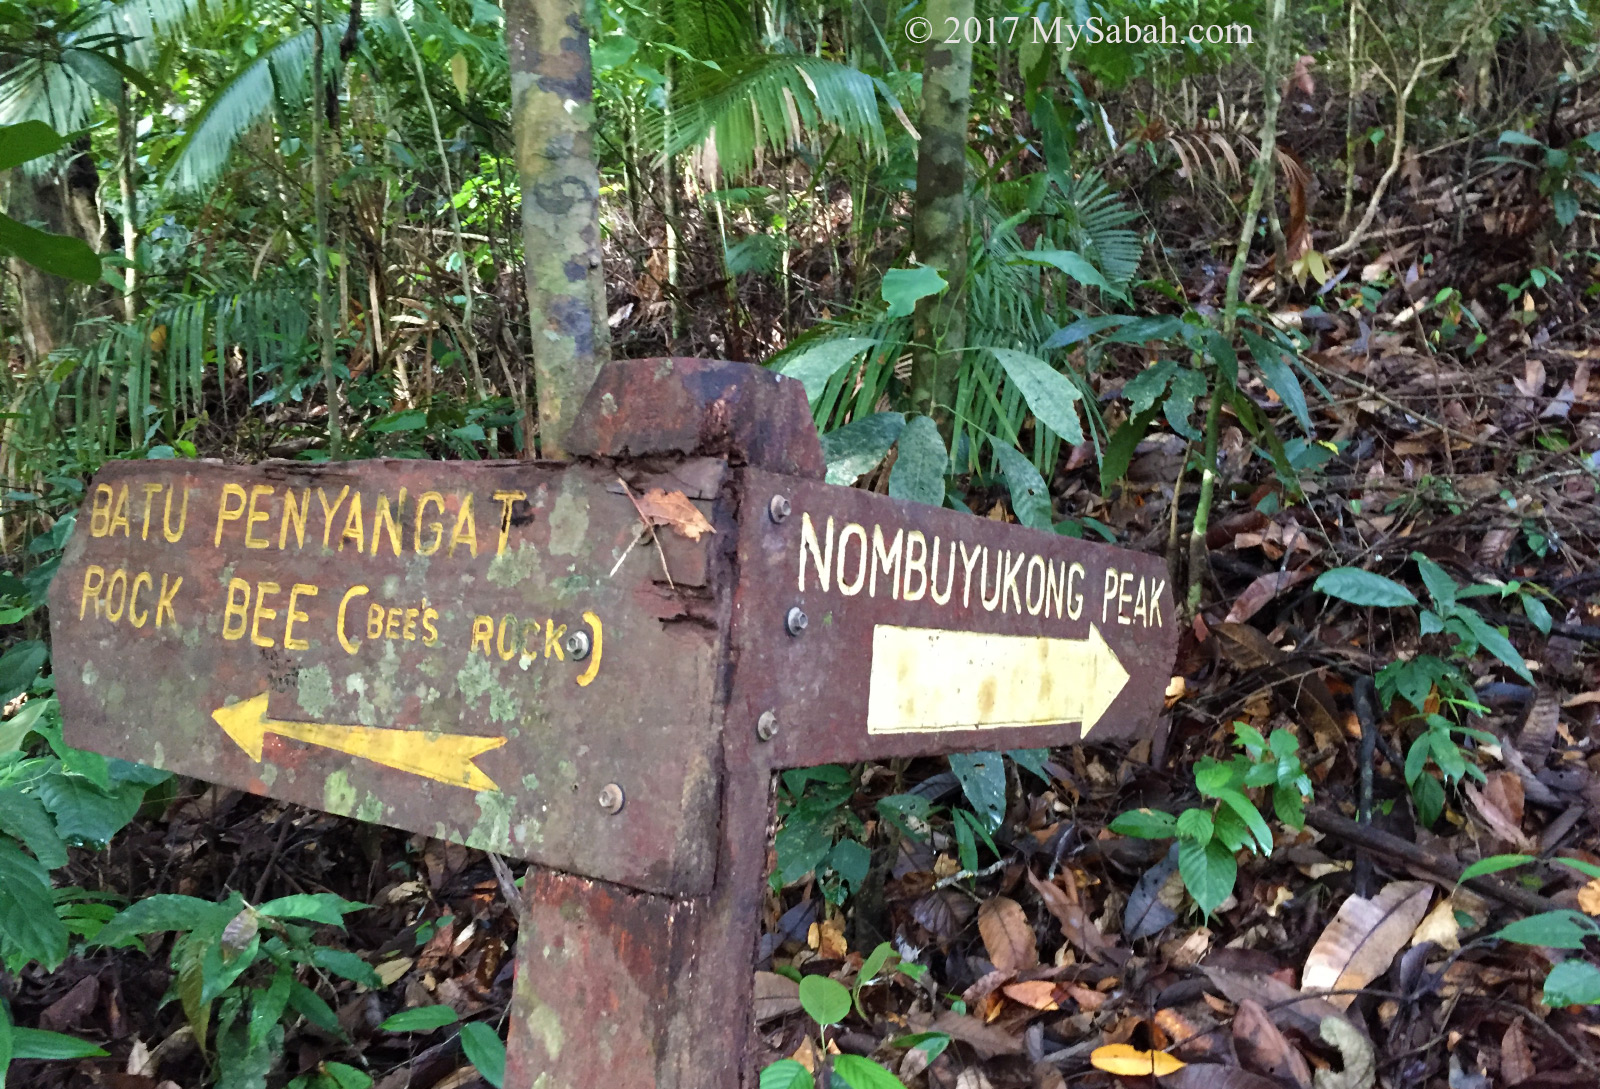
Second junction to Mount Nombuyukong

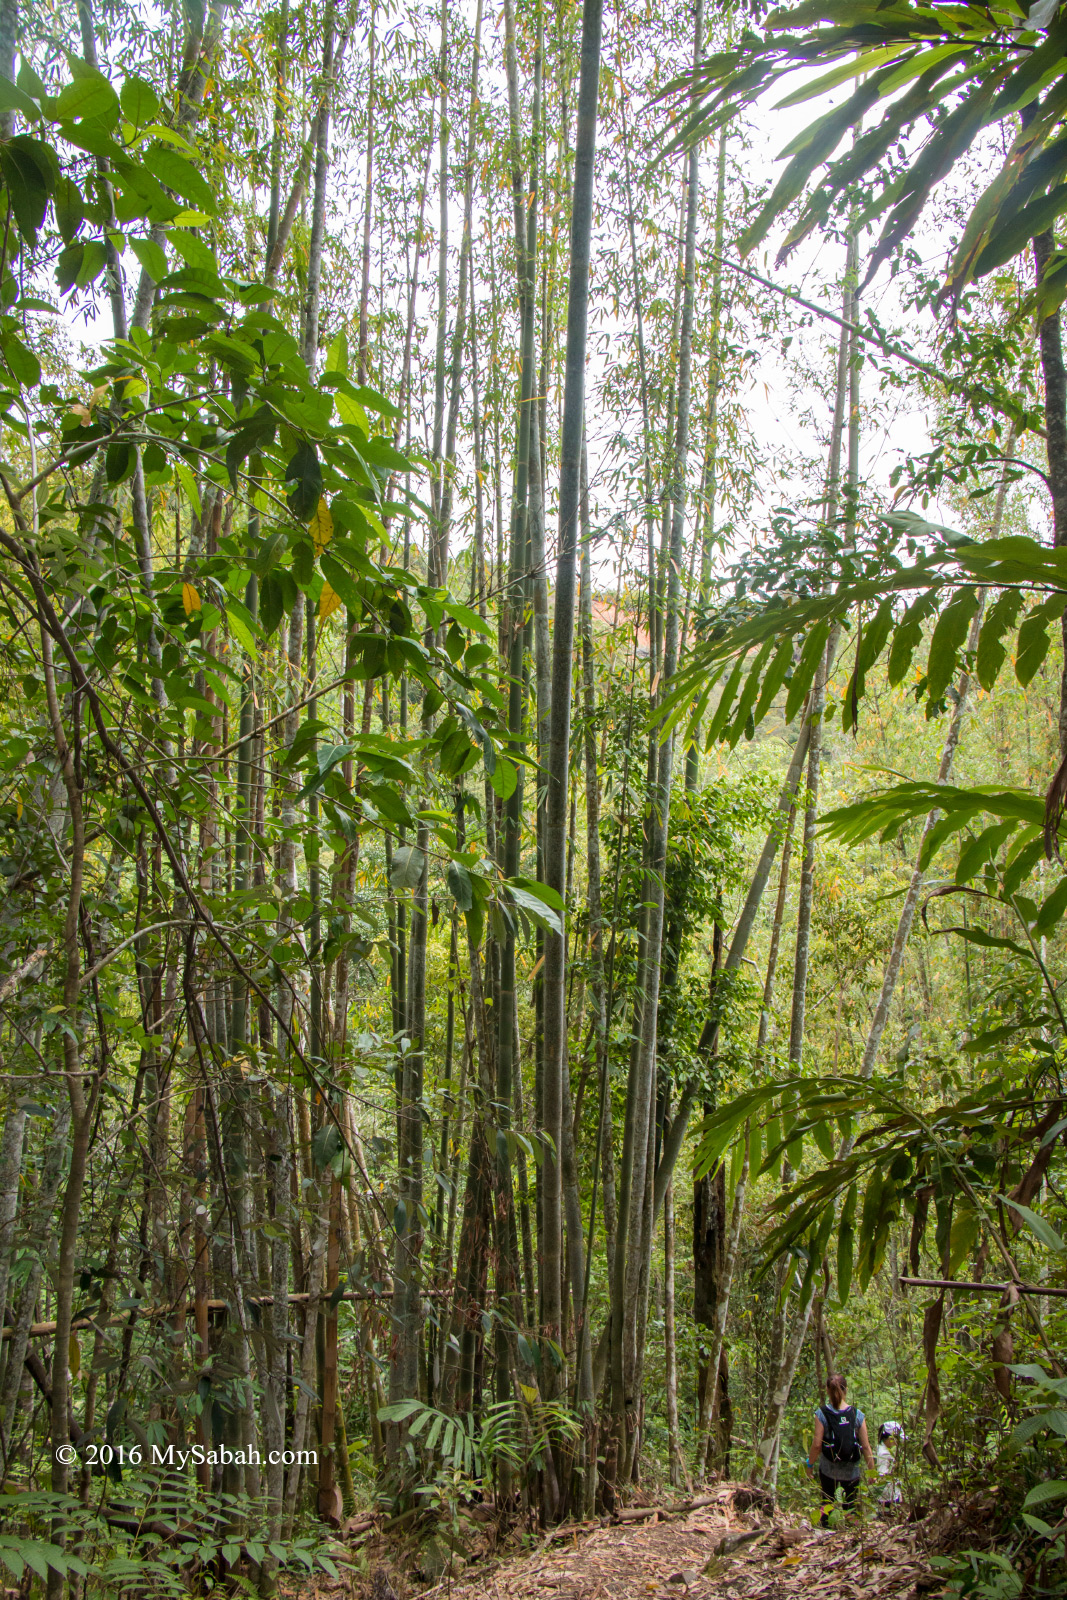
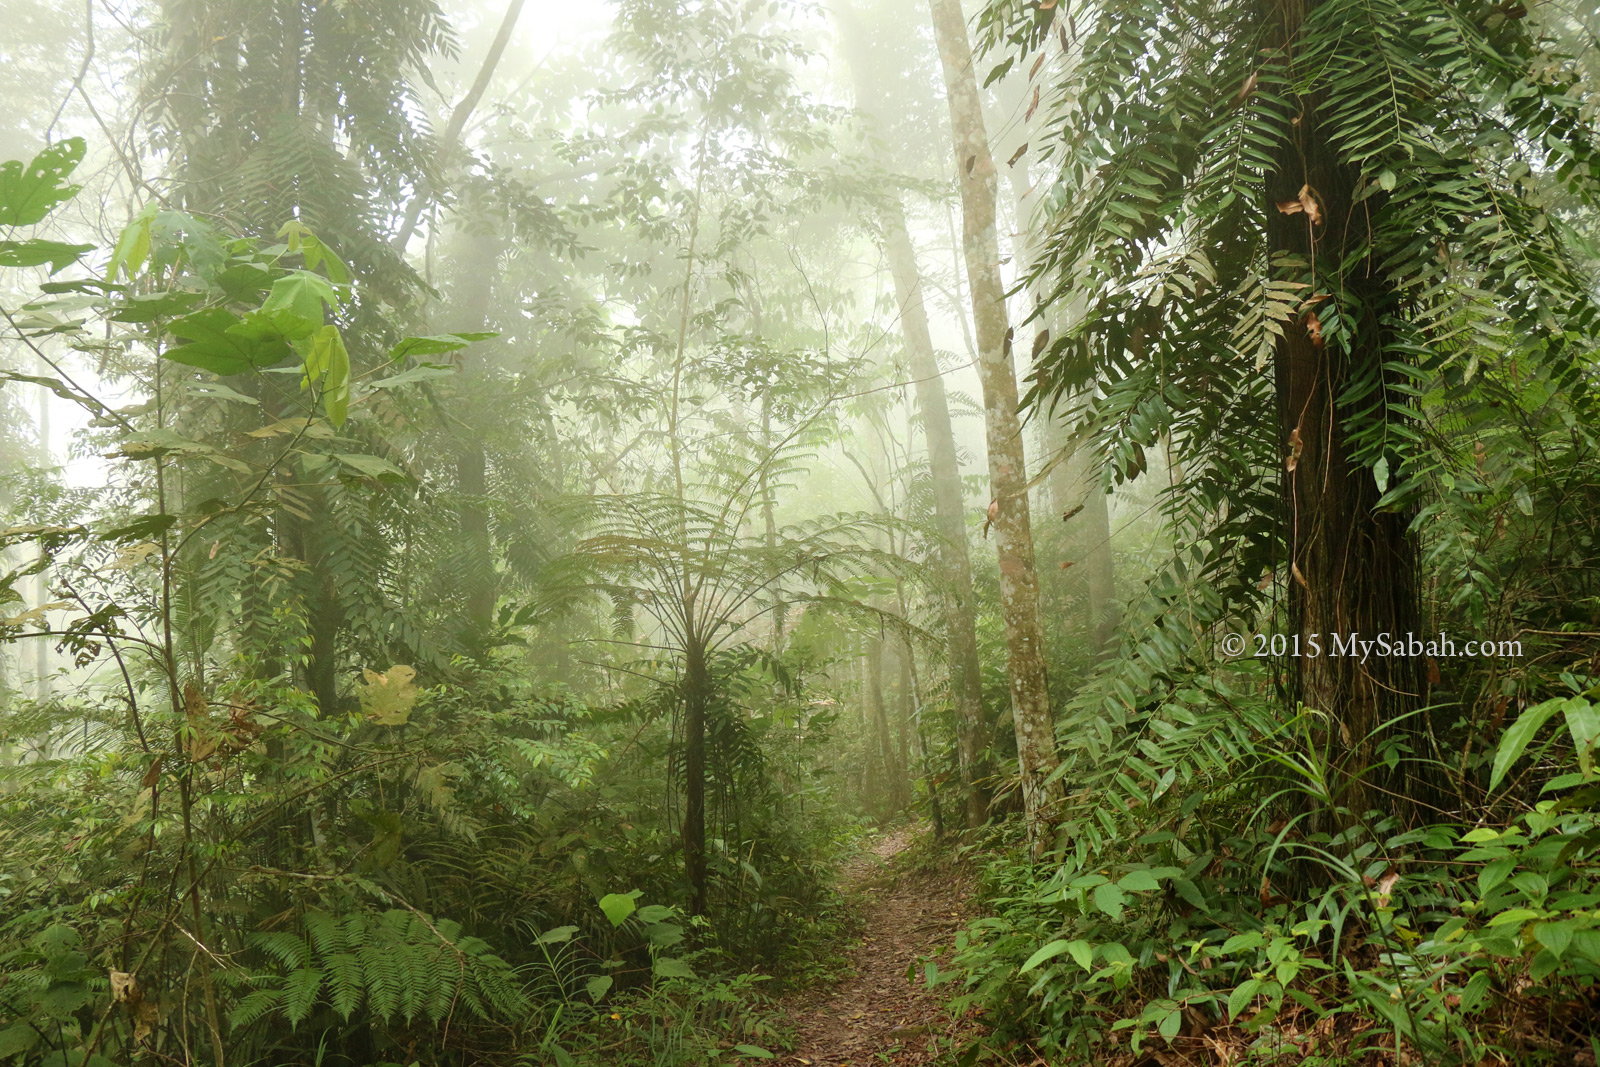
The popular version of Kinabalu Park is its mossy and foggy montane forest in cooling Kundasang highland. In Serinsim, you will see different face of Kinabalu Park, which is dominated by lowland rainforest and mixed hill dipterocarp abundant with tall trees under warm and humid environment.

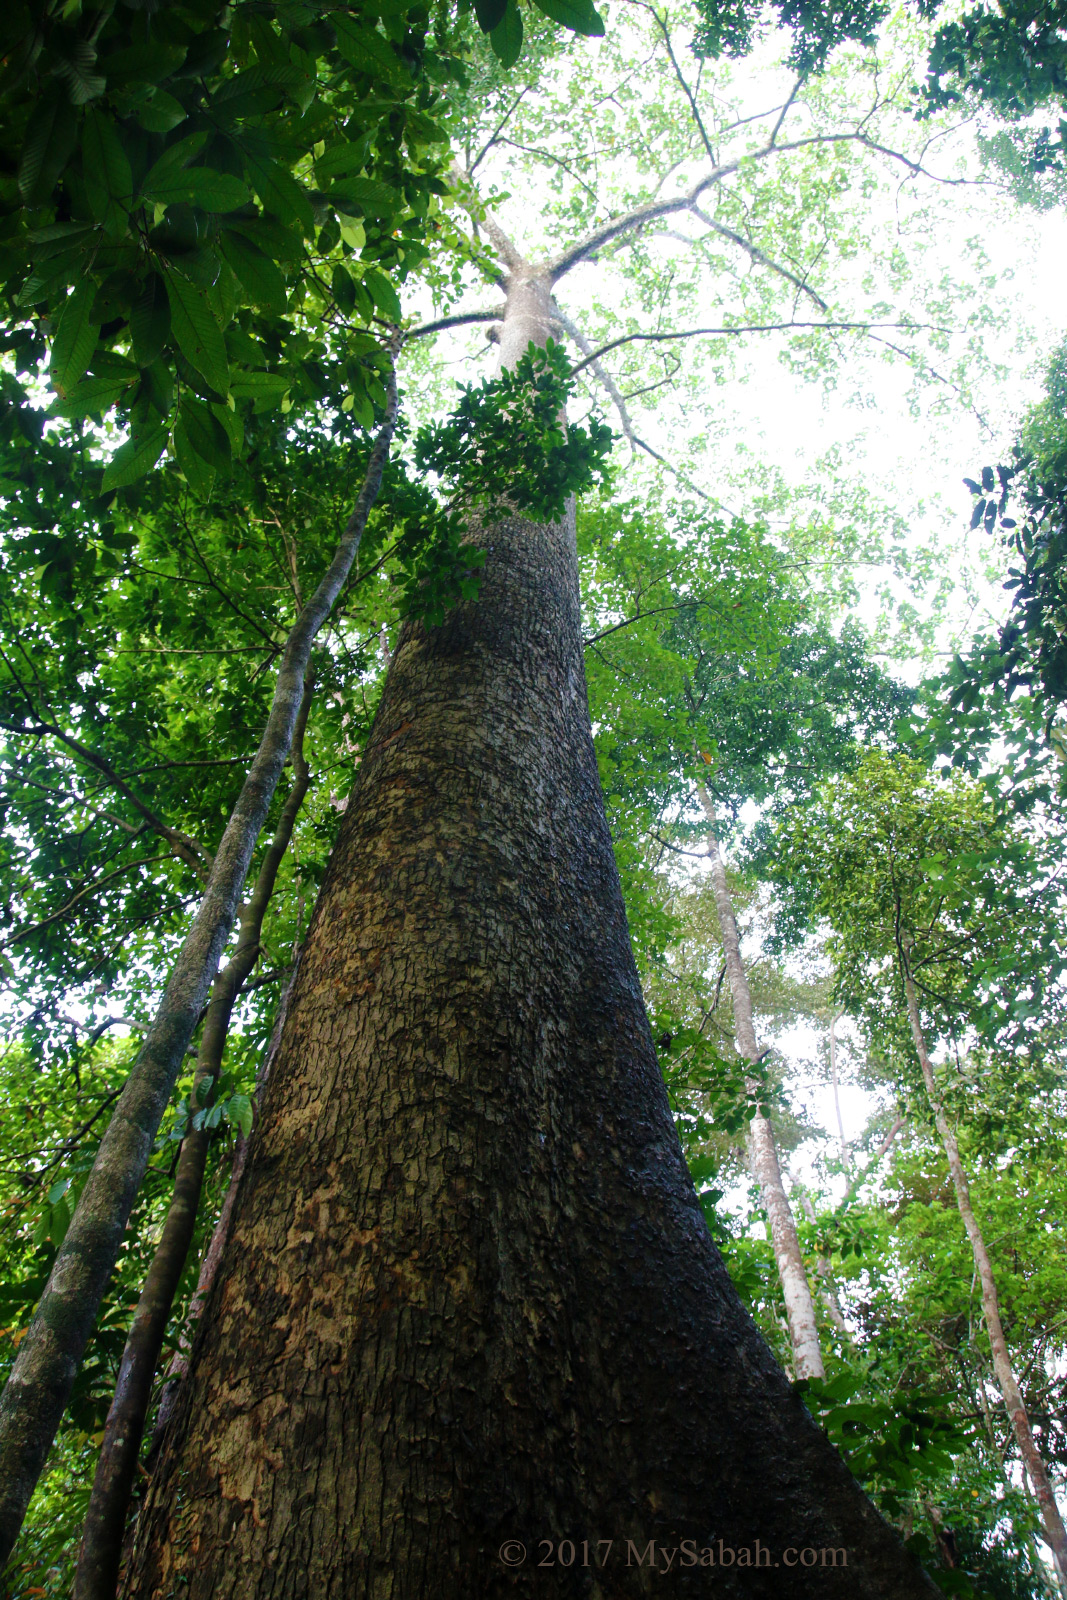
Tall tree is common in Serinsim Park

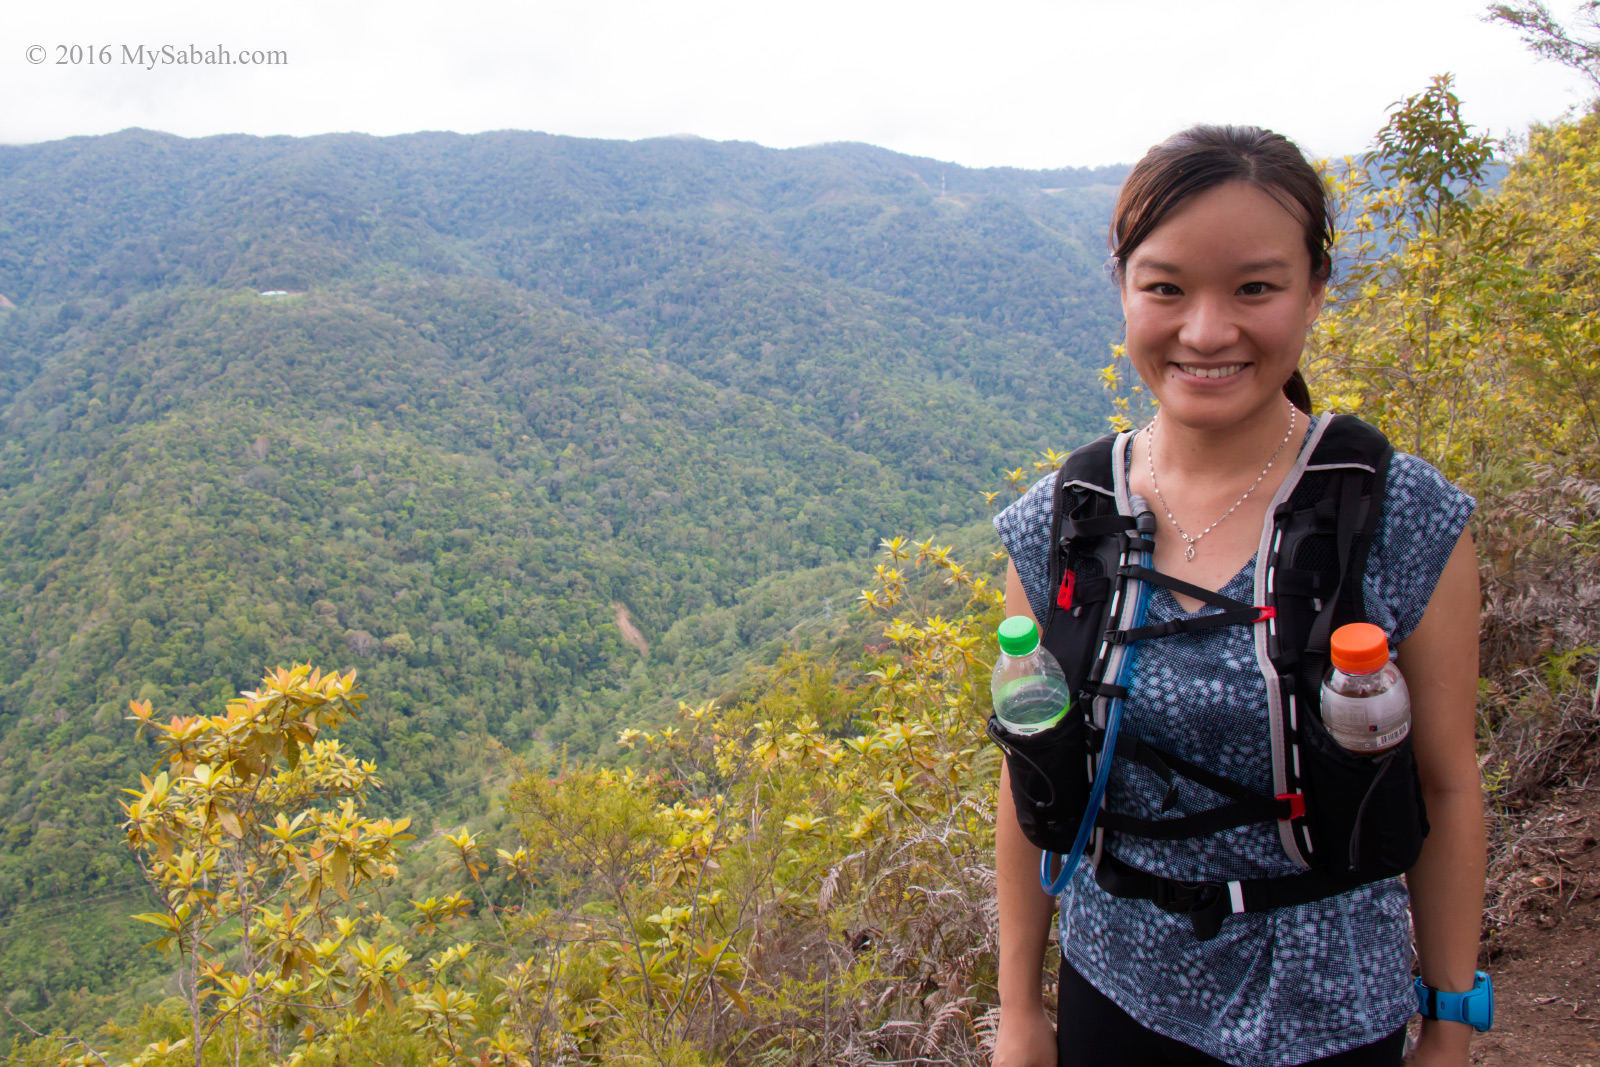
As we were in higher altitude, we were rewarded by soothing breeze and cooling air.

Gazebo No.3?Gazebo No.4

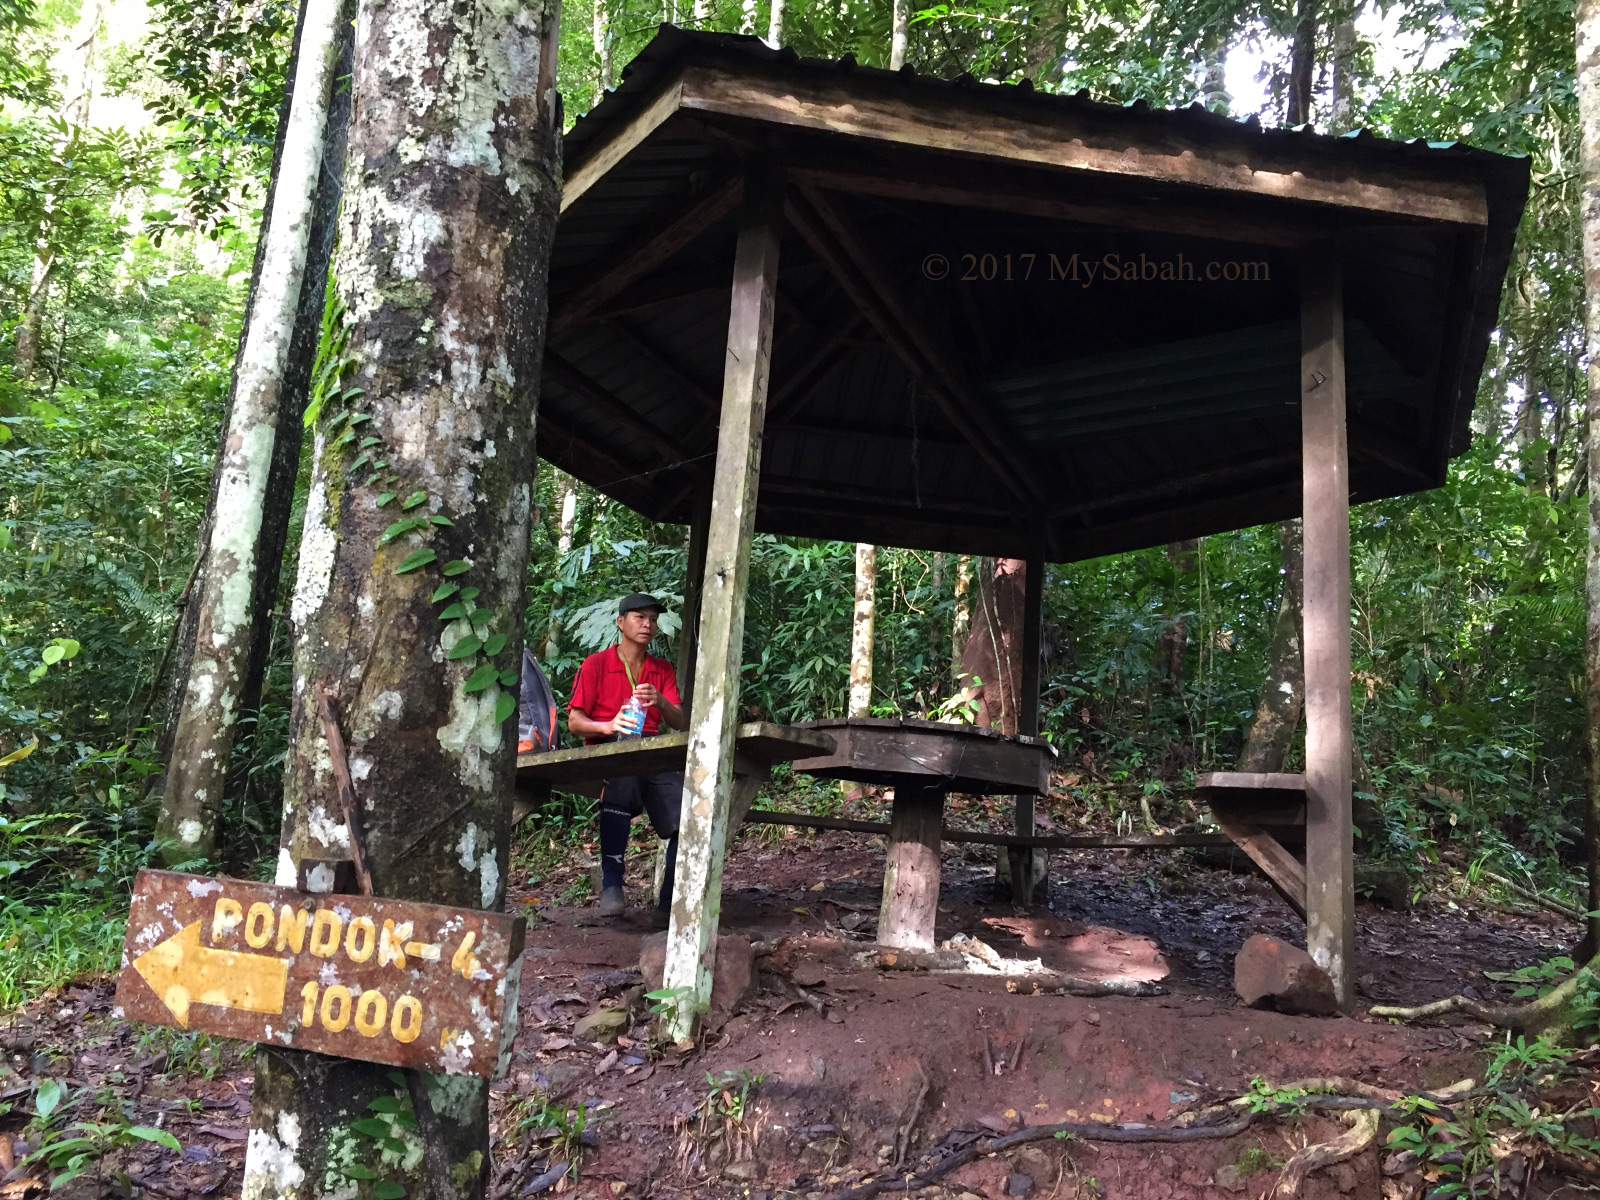
We reached Gazebo No.4 (Pondok Menggilan) at 9:50am. We were only 2.3 KM away from the summit now.

Gazebo No.4: Pondok Menggilan, 1,000 Meters to gazebo No.5

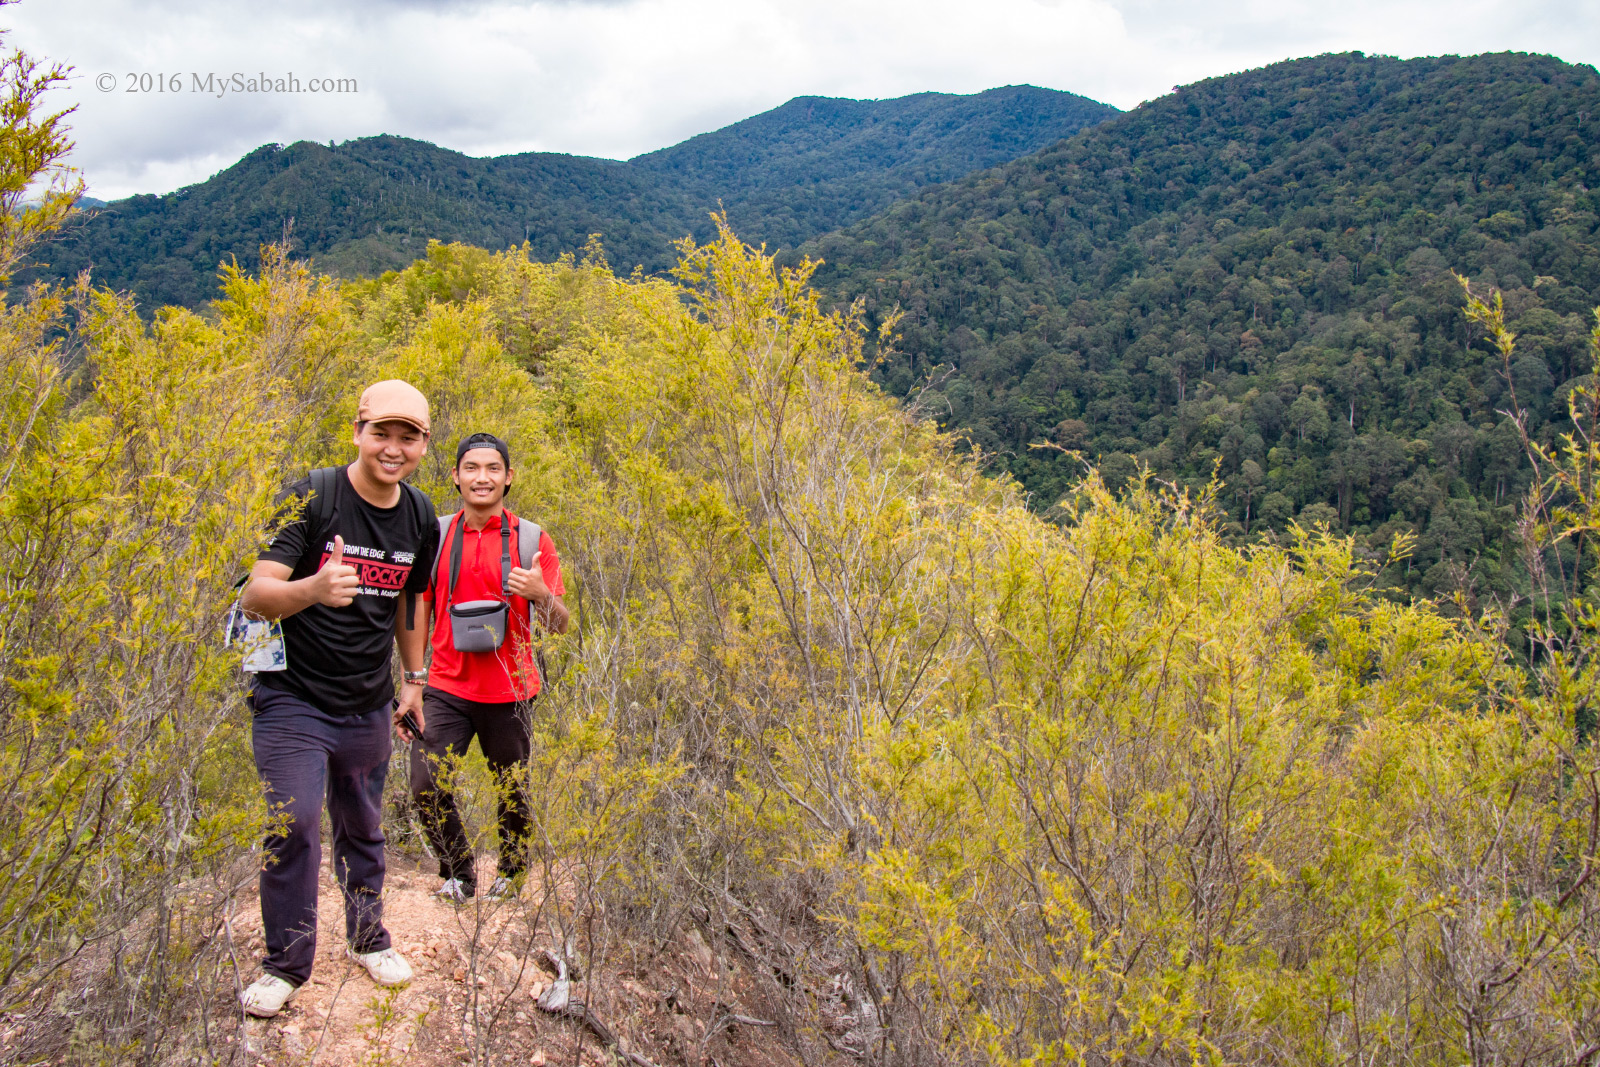
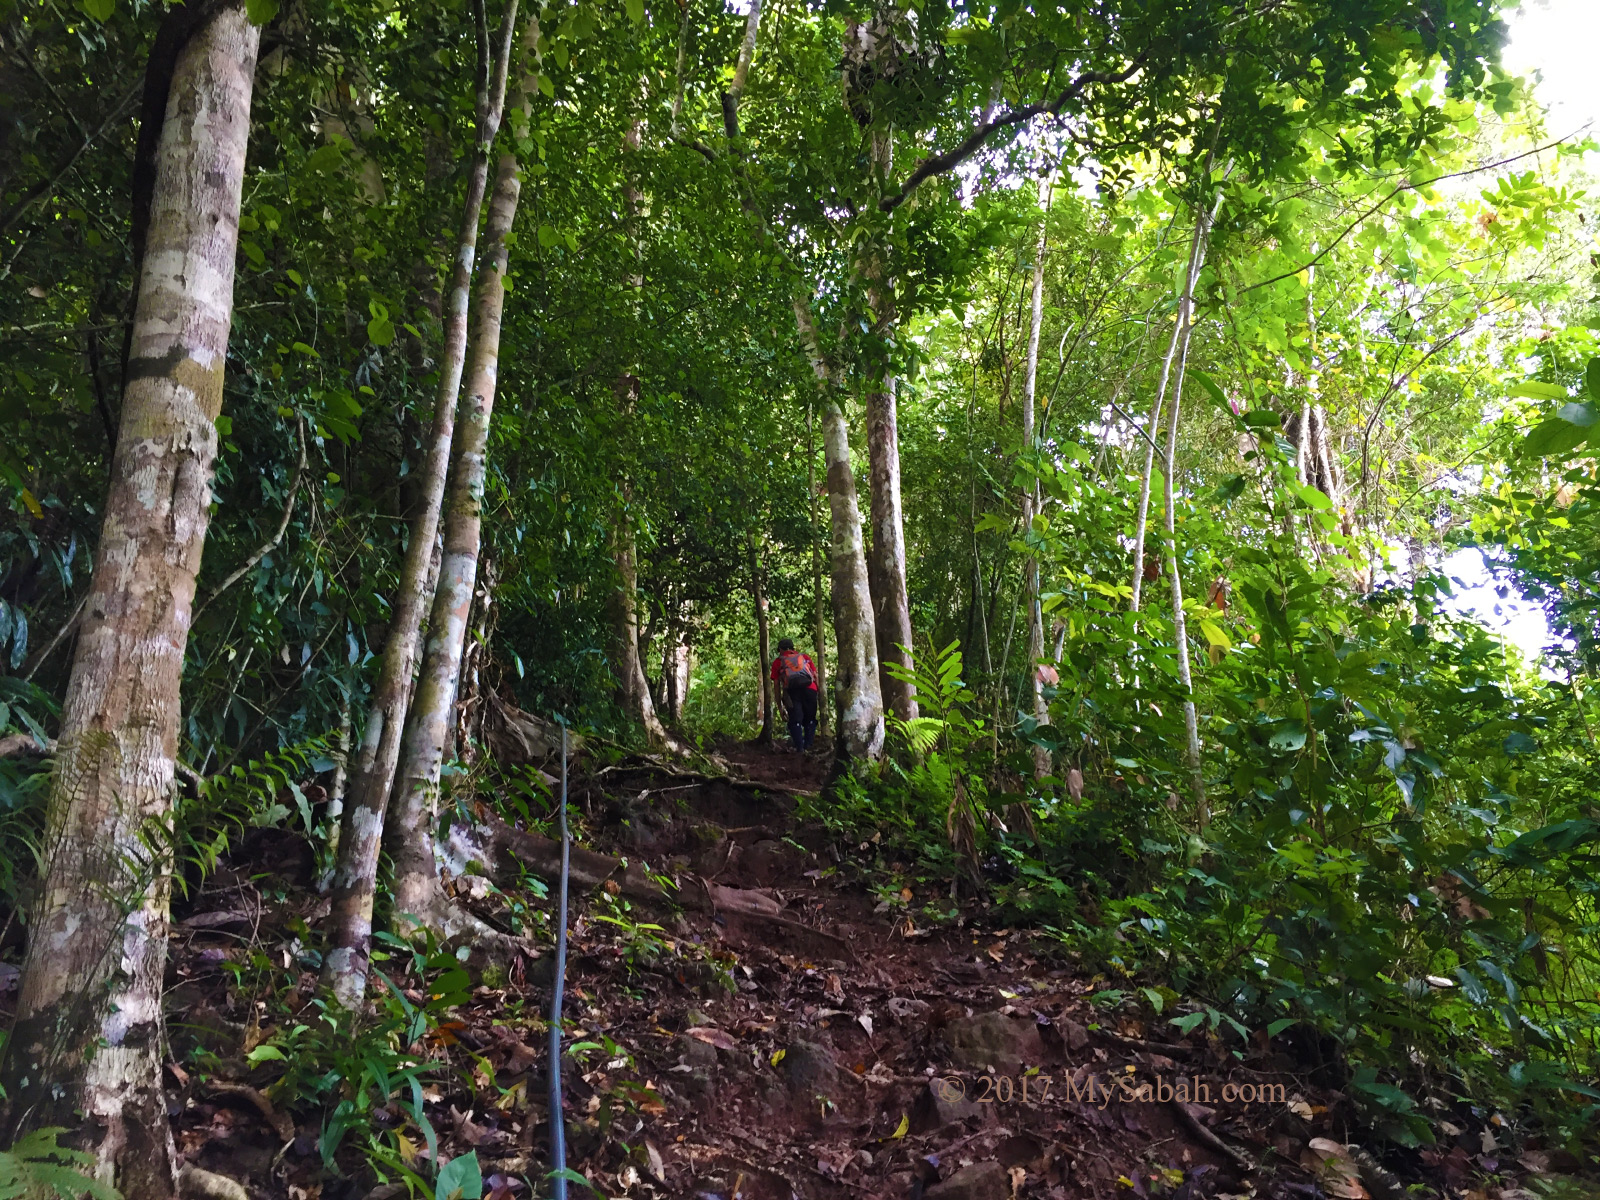
The trail was getting more undulating, and we started to feel like real climbing.

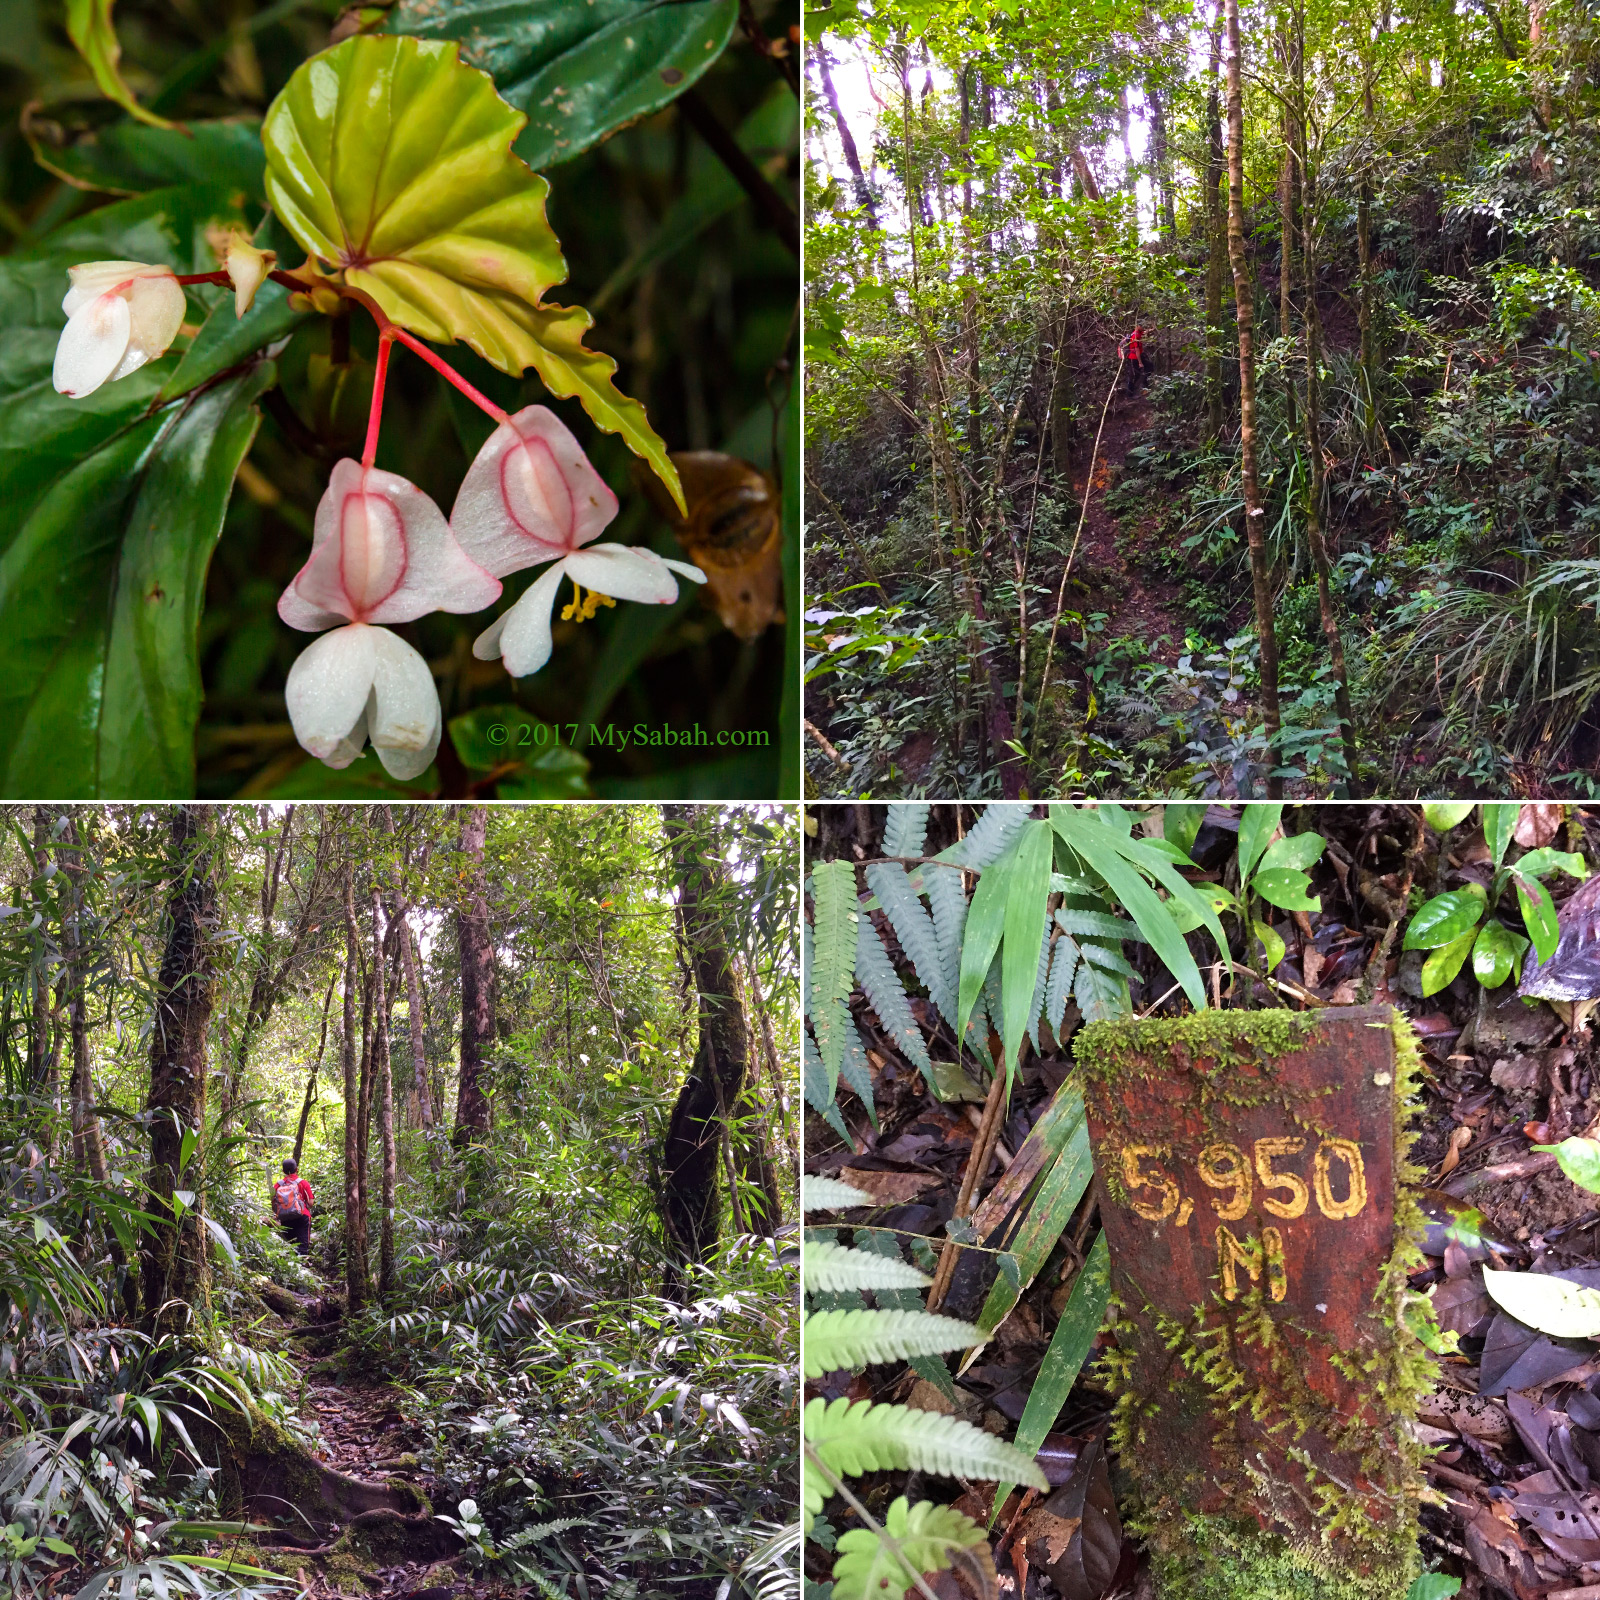
Trail after 3rd gazebo

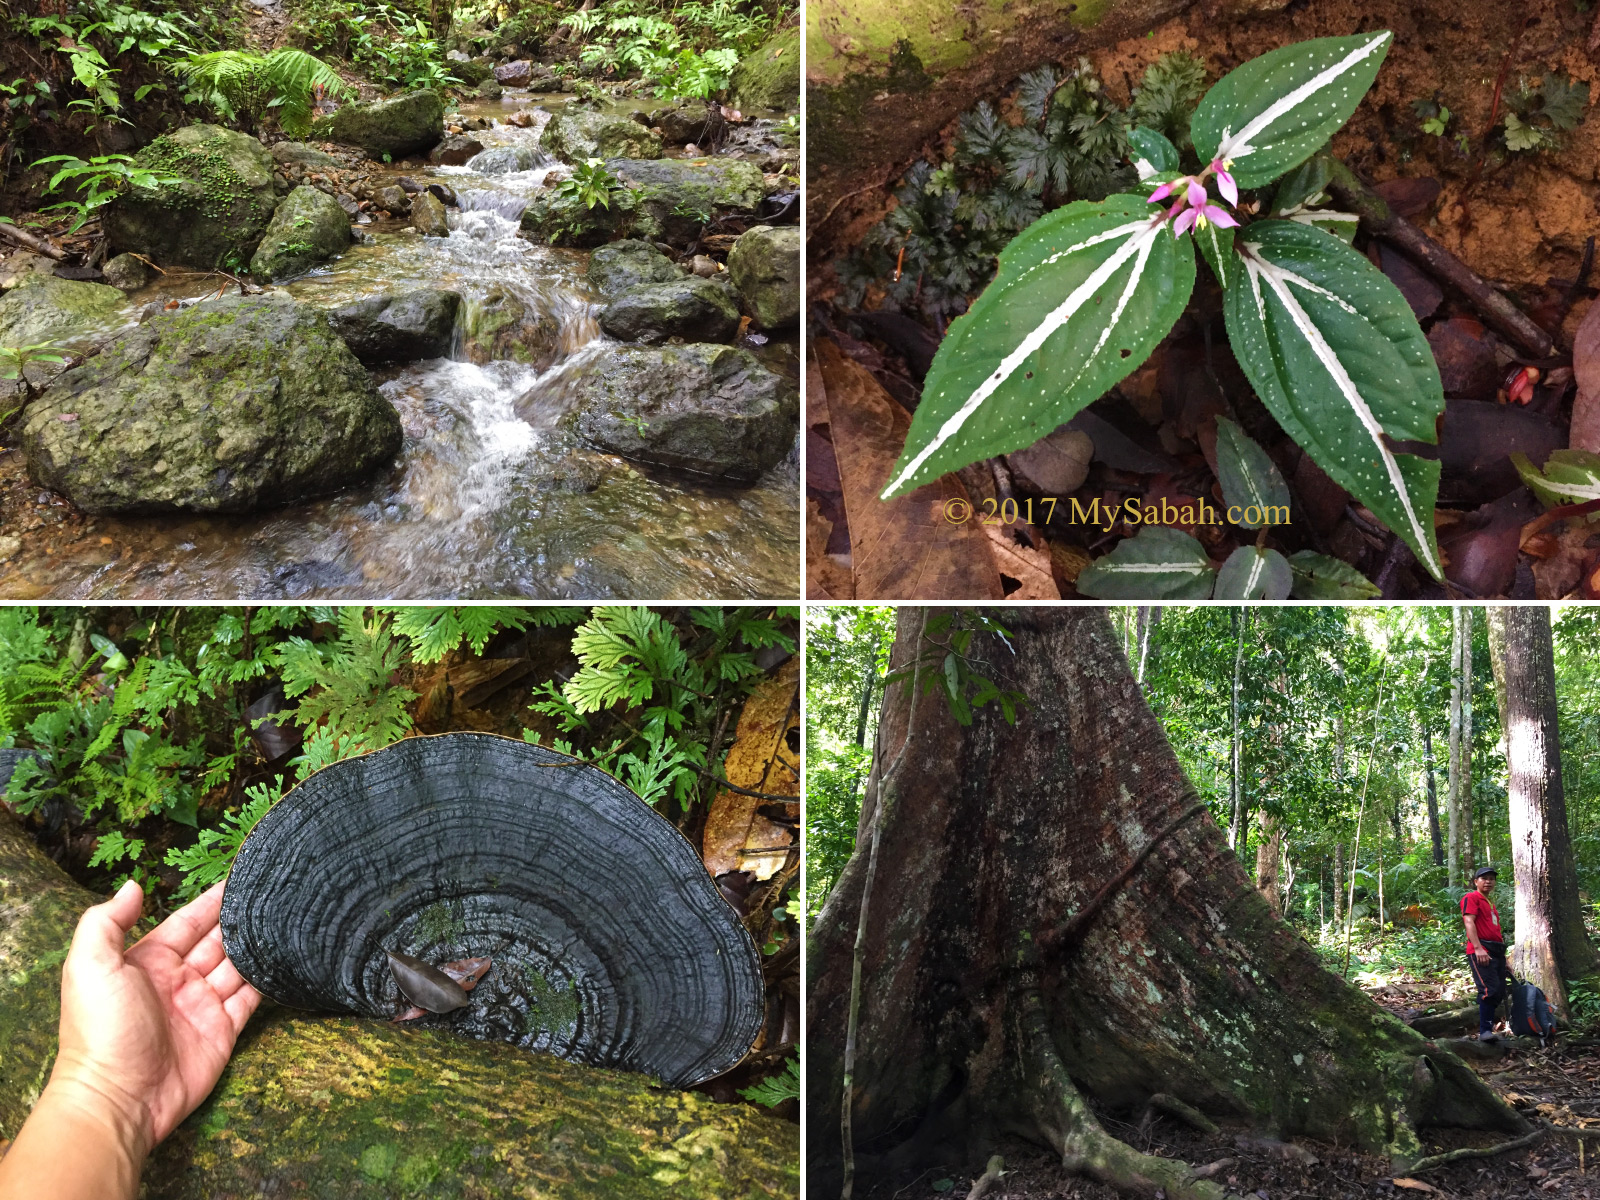
Things I saw between 3rd and 4th gazebo

From Serinsim Park, you also can walk two days to the Musang Camp about 18 KM away, the last campsite on Mt. Tambuyukon. The distance is longer but less challenging than the standard summit trail to Mt. Tambuyukon, according to Hendrick.

Gazebo No.4?Gazebo No.5

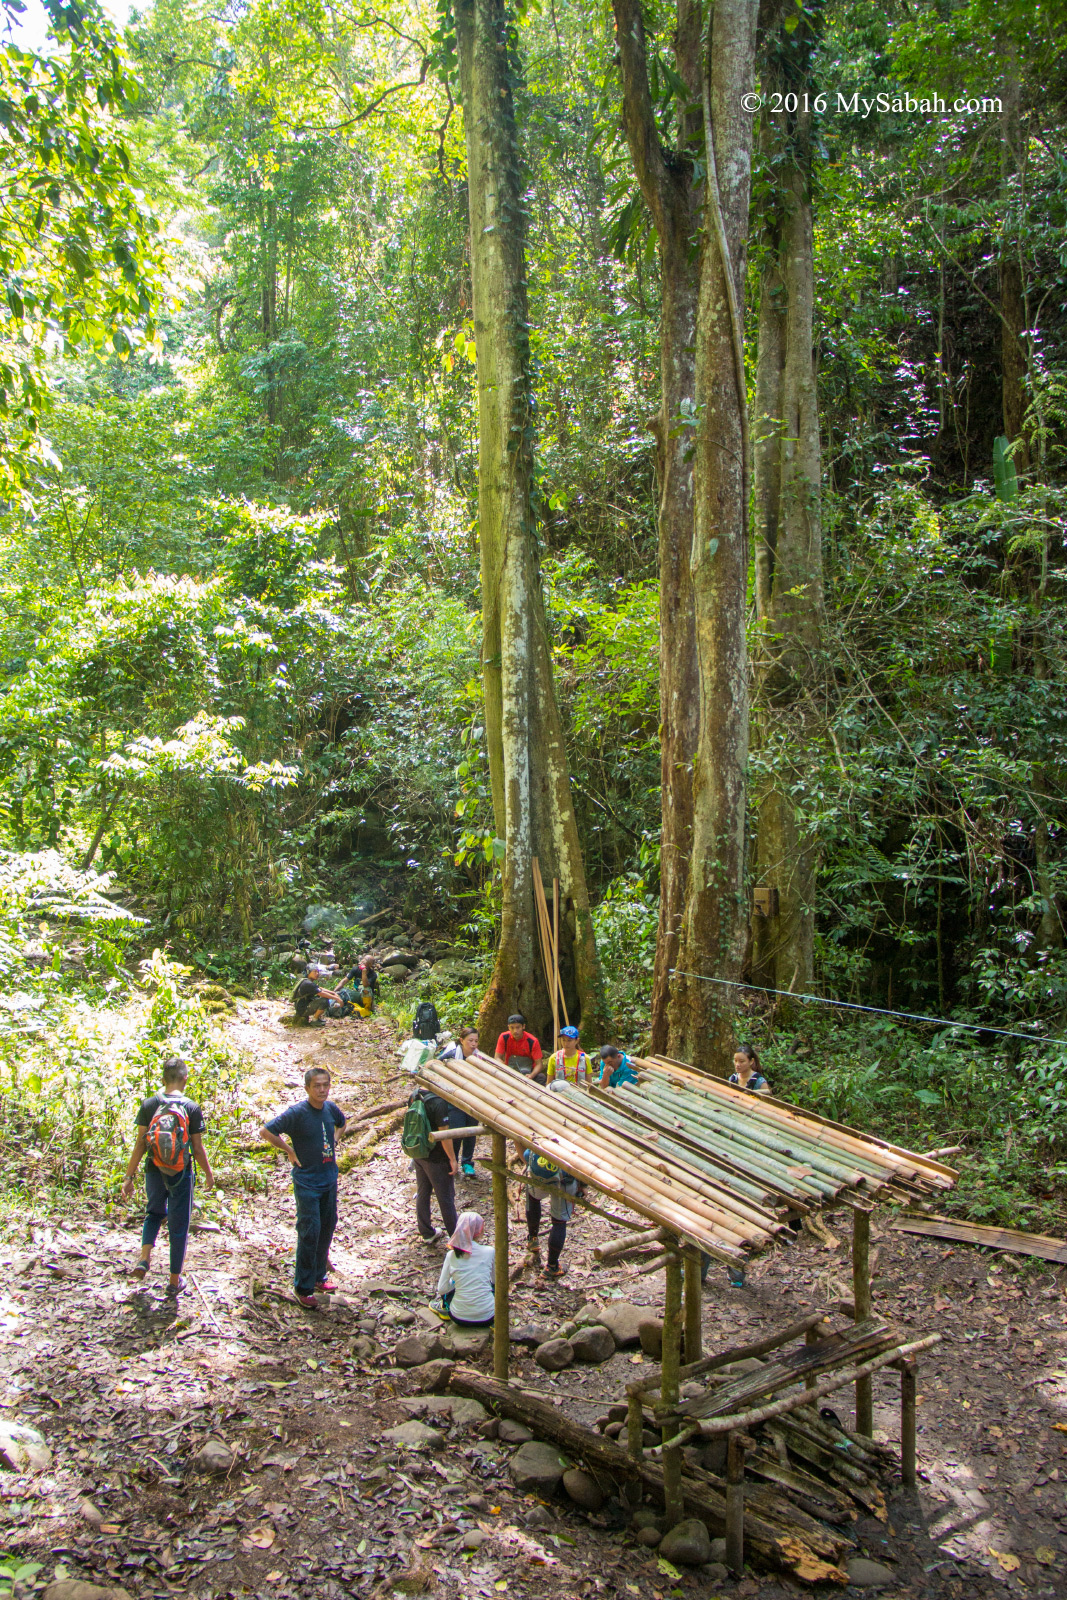
We reached Gazebo No.5 (Pondok Aru) at 11:03am.

Gazebo No.5: Pondok Aru, 1,000 Meters to the last gazebo

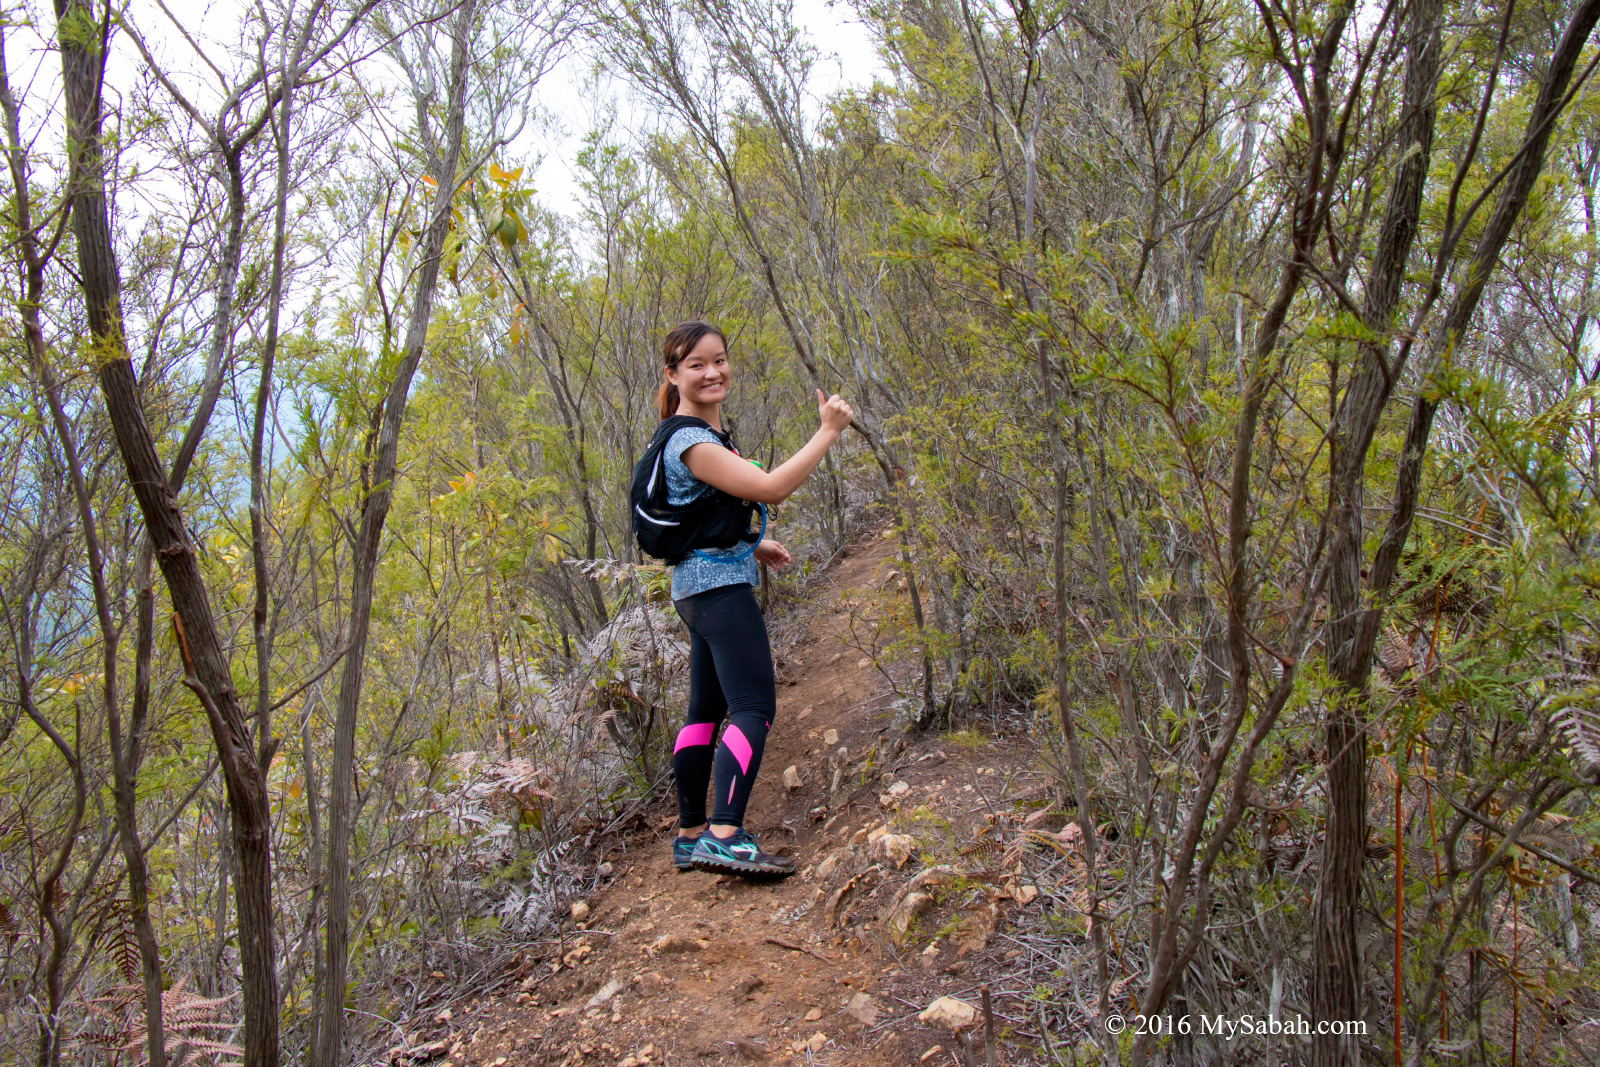
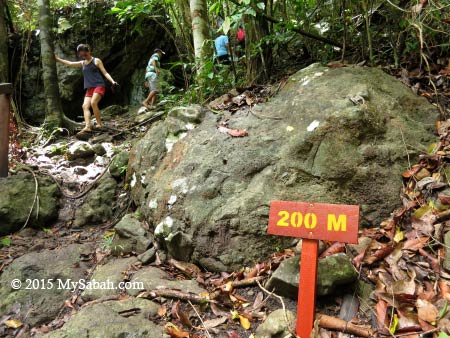
After 200 Meters of flat trail, we ascended on a gentle slope to the ridge. The trail 200 Meters before Gazebo No.5 is quite steep.

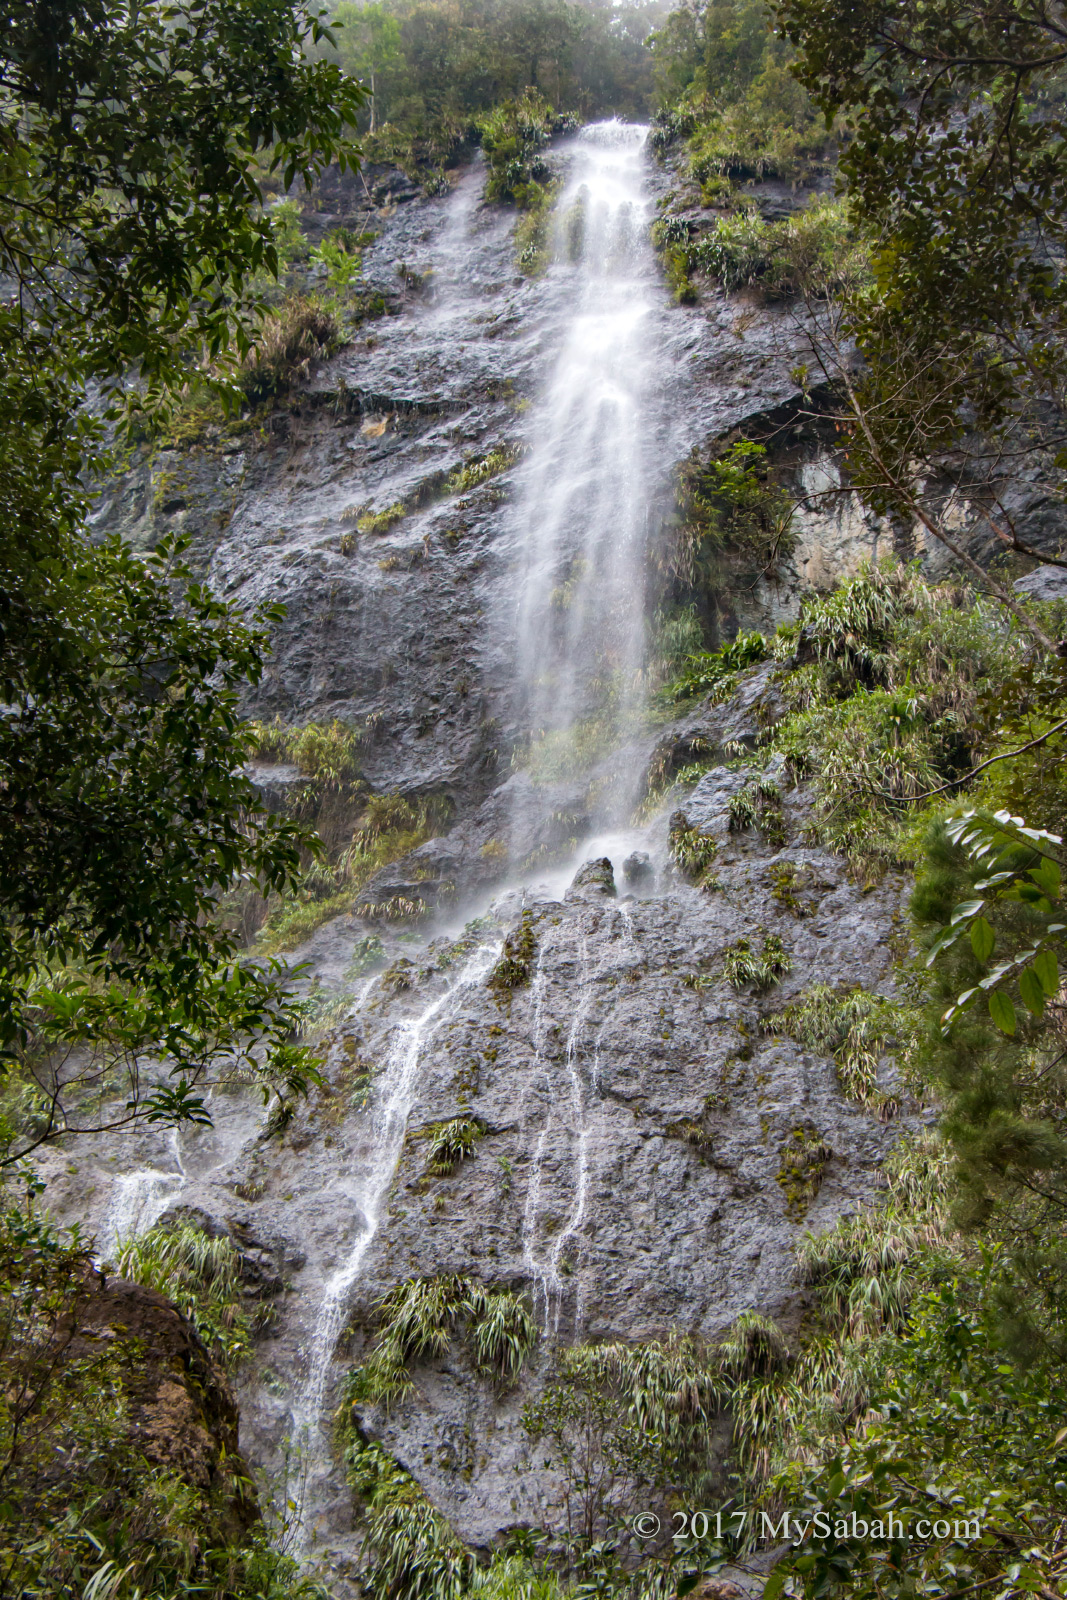
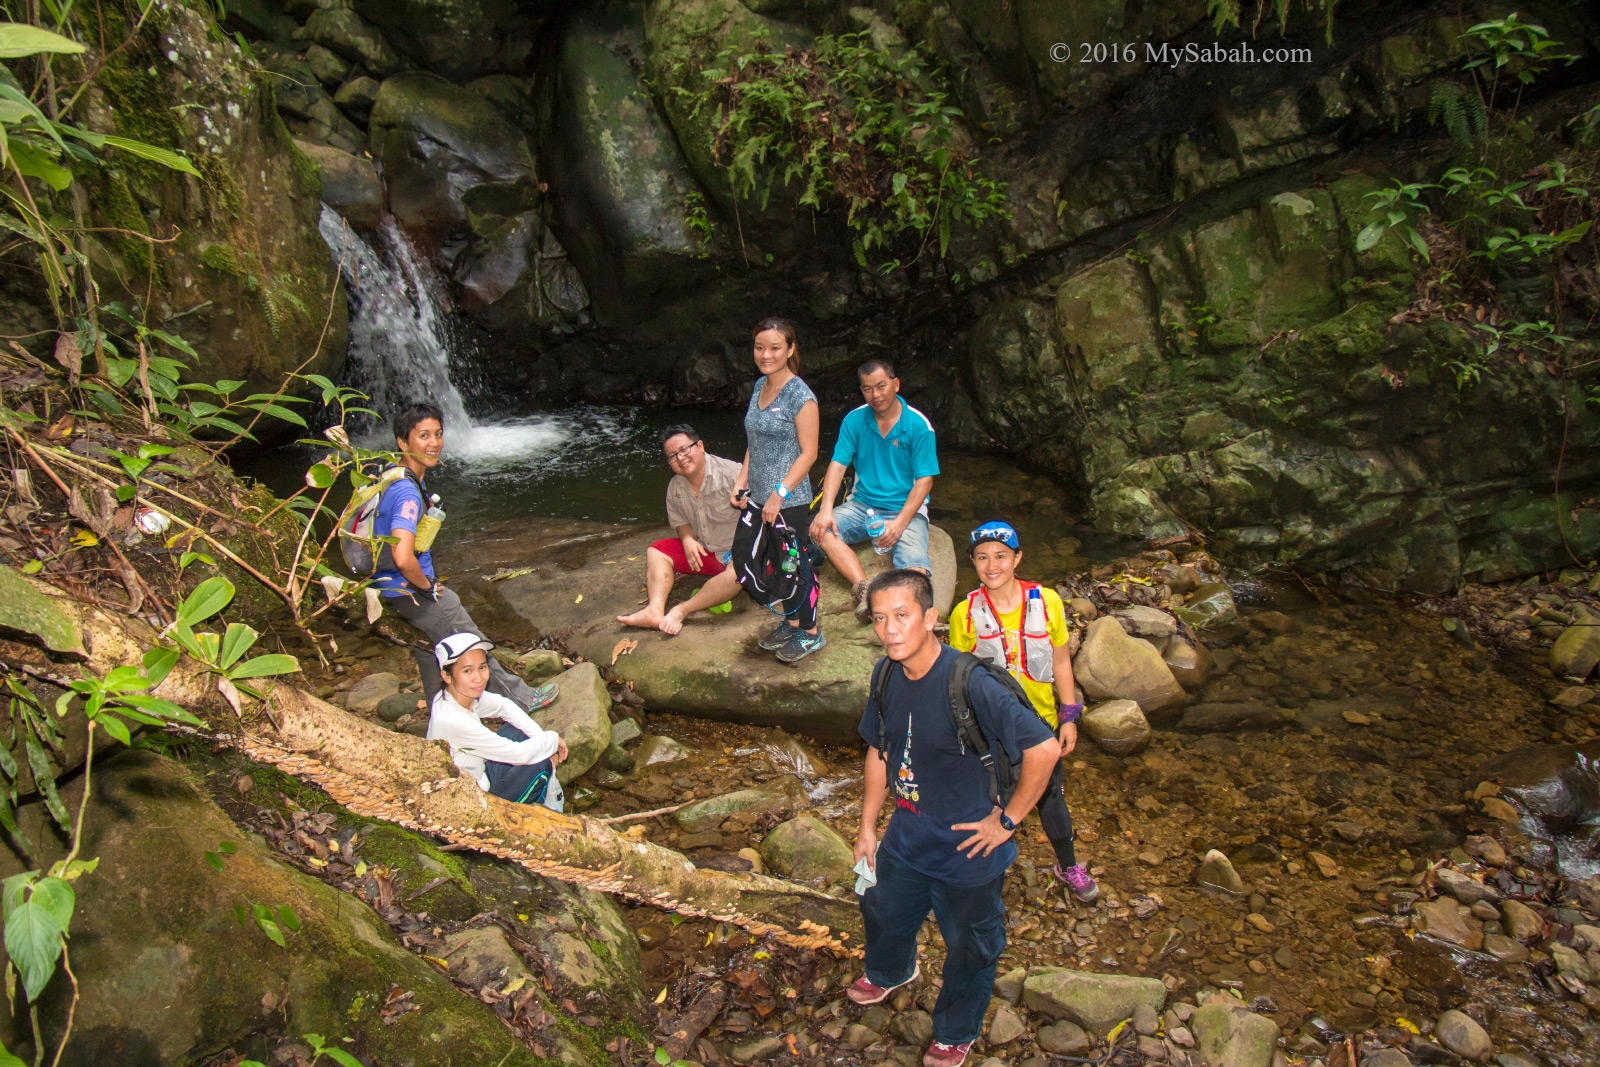
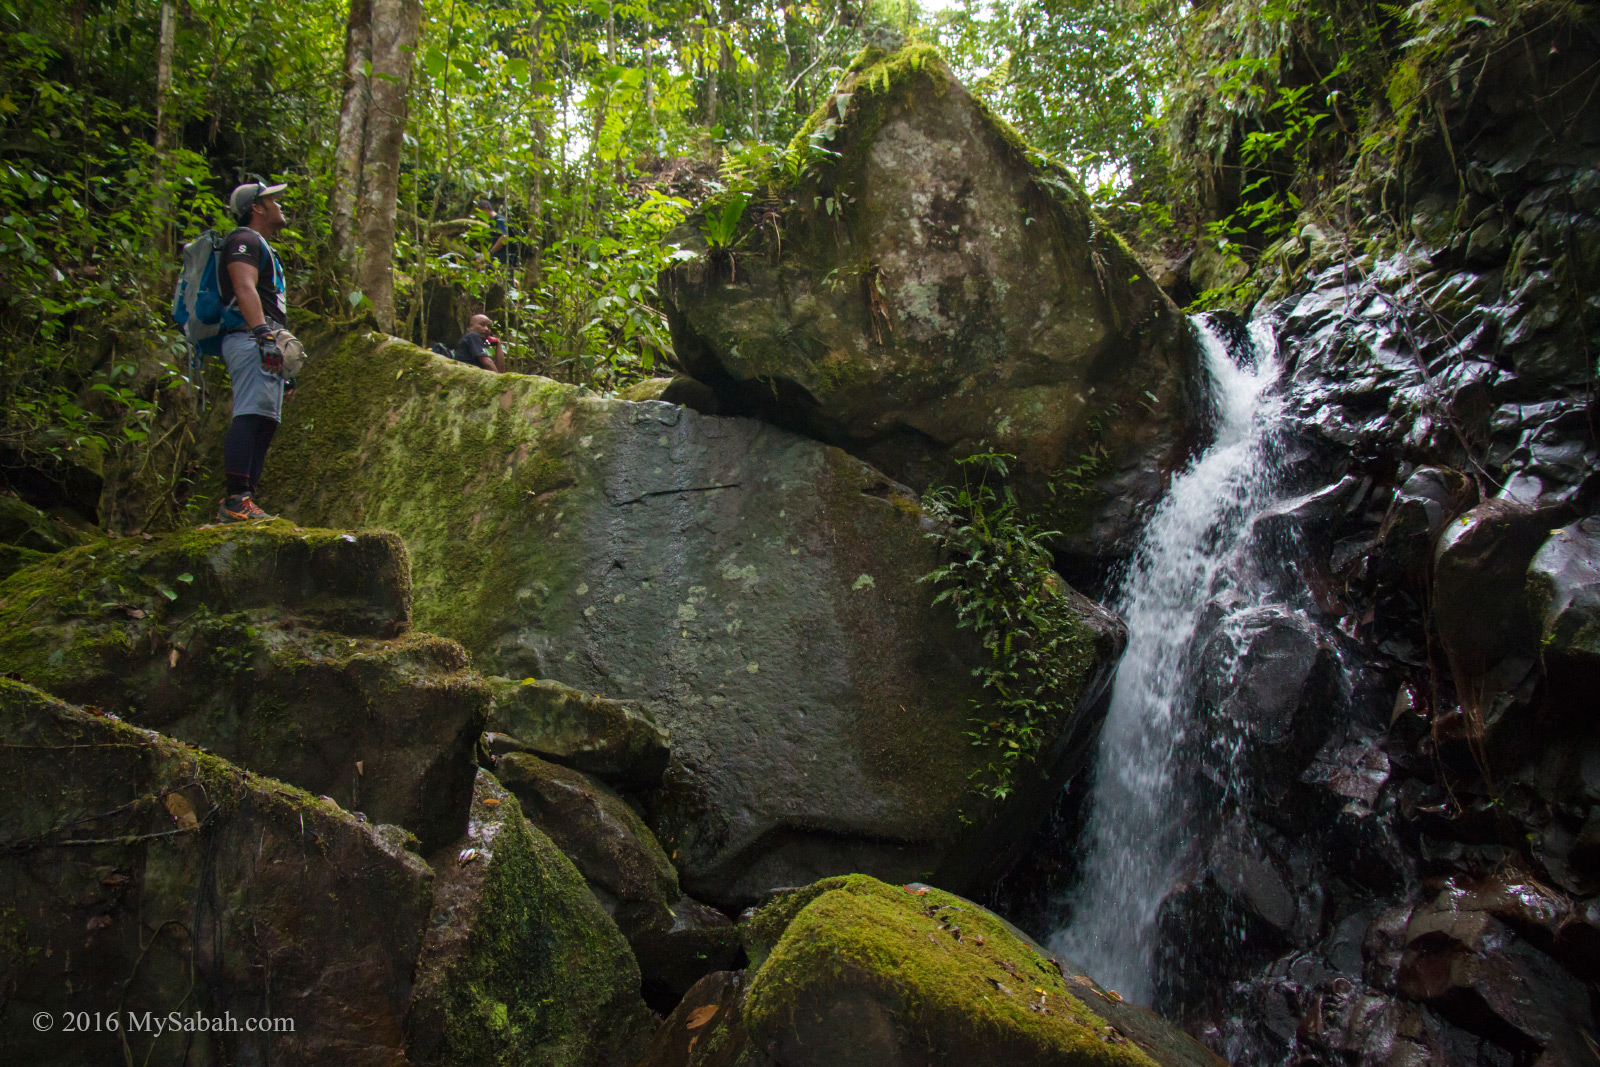
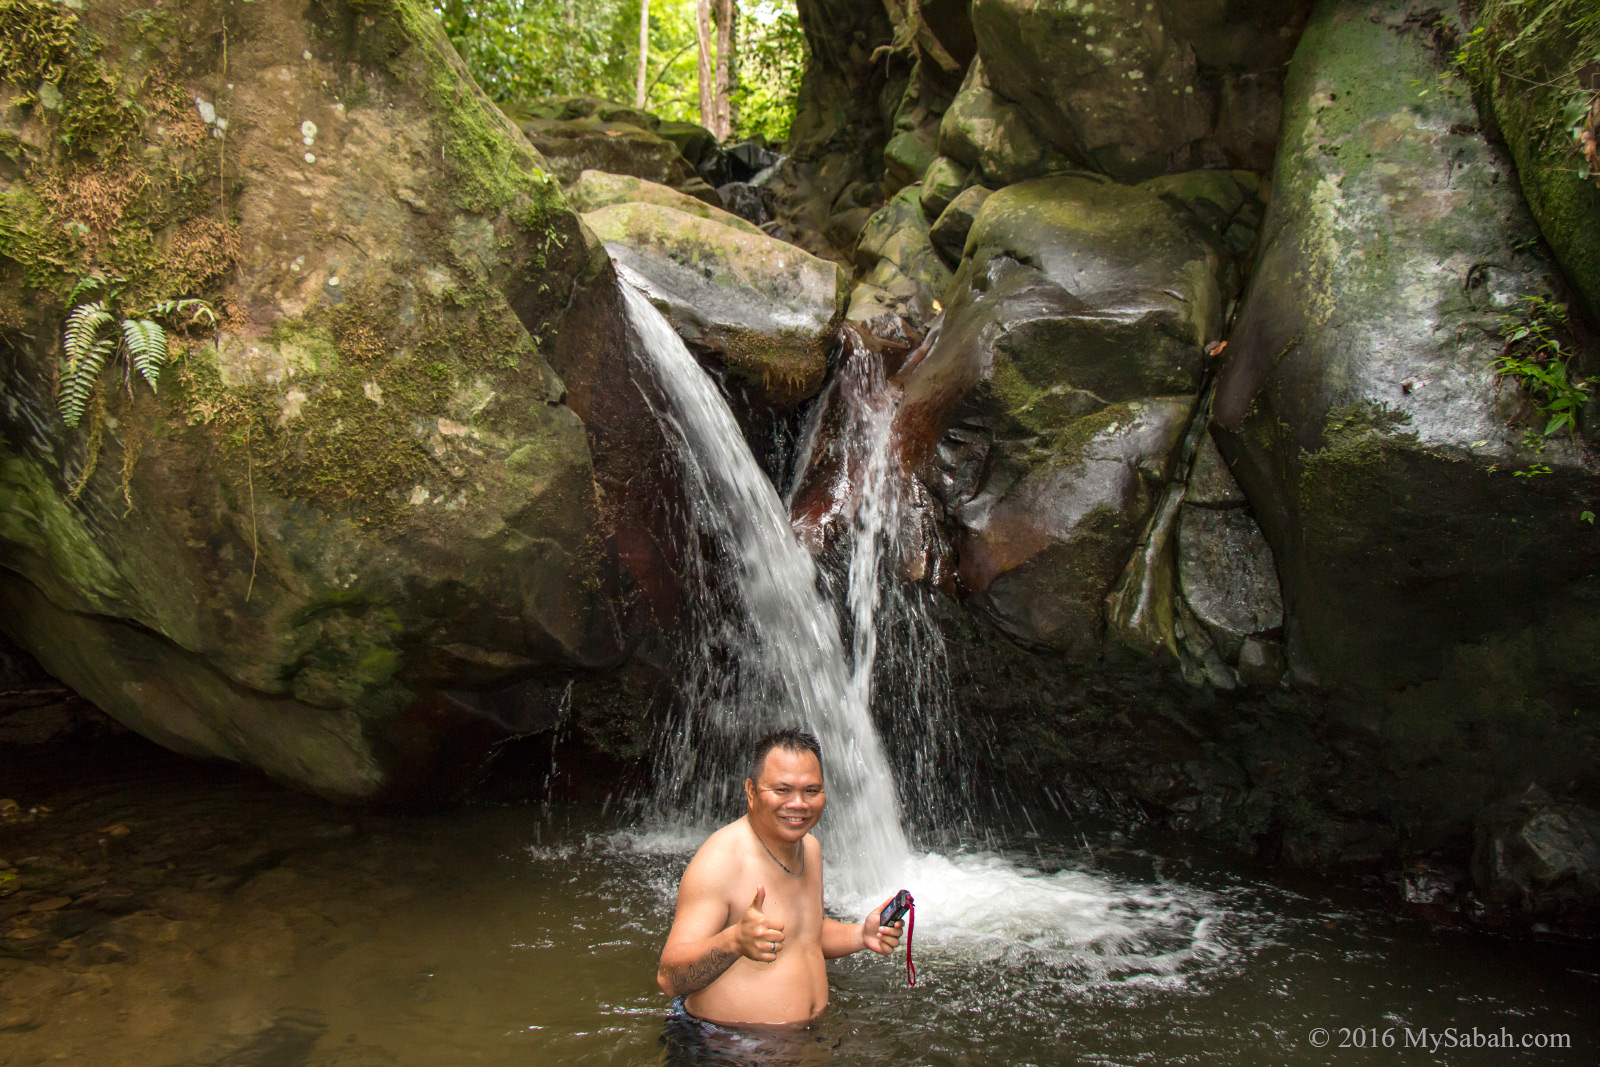
Big waterfall next to Gazebo No.5 (Pondok Aru)

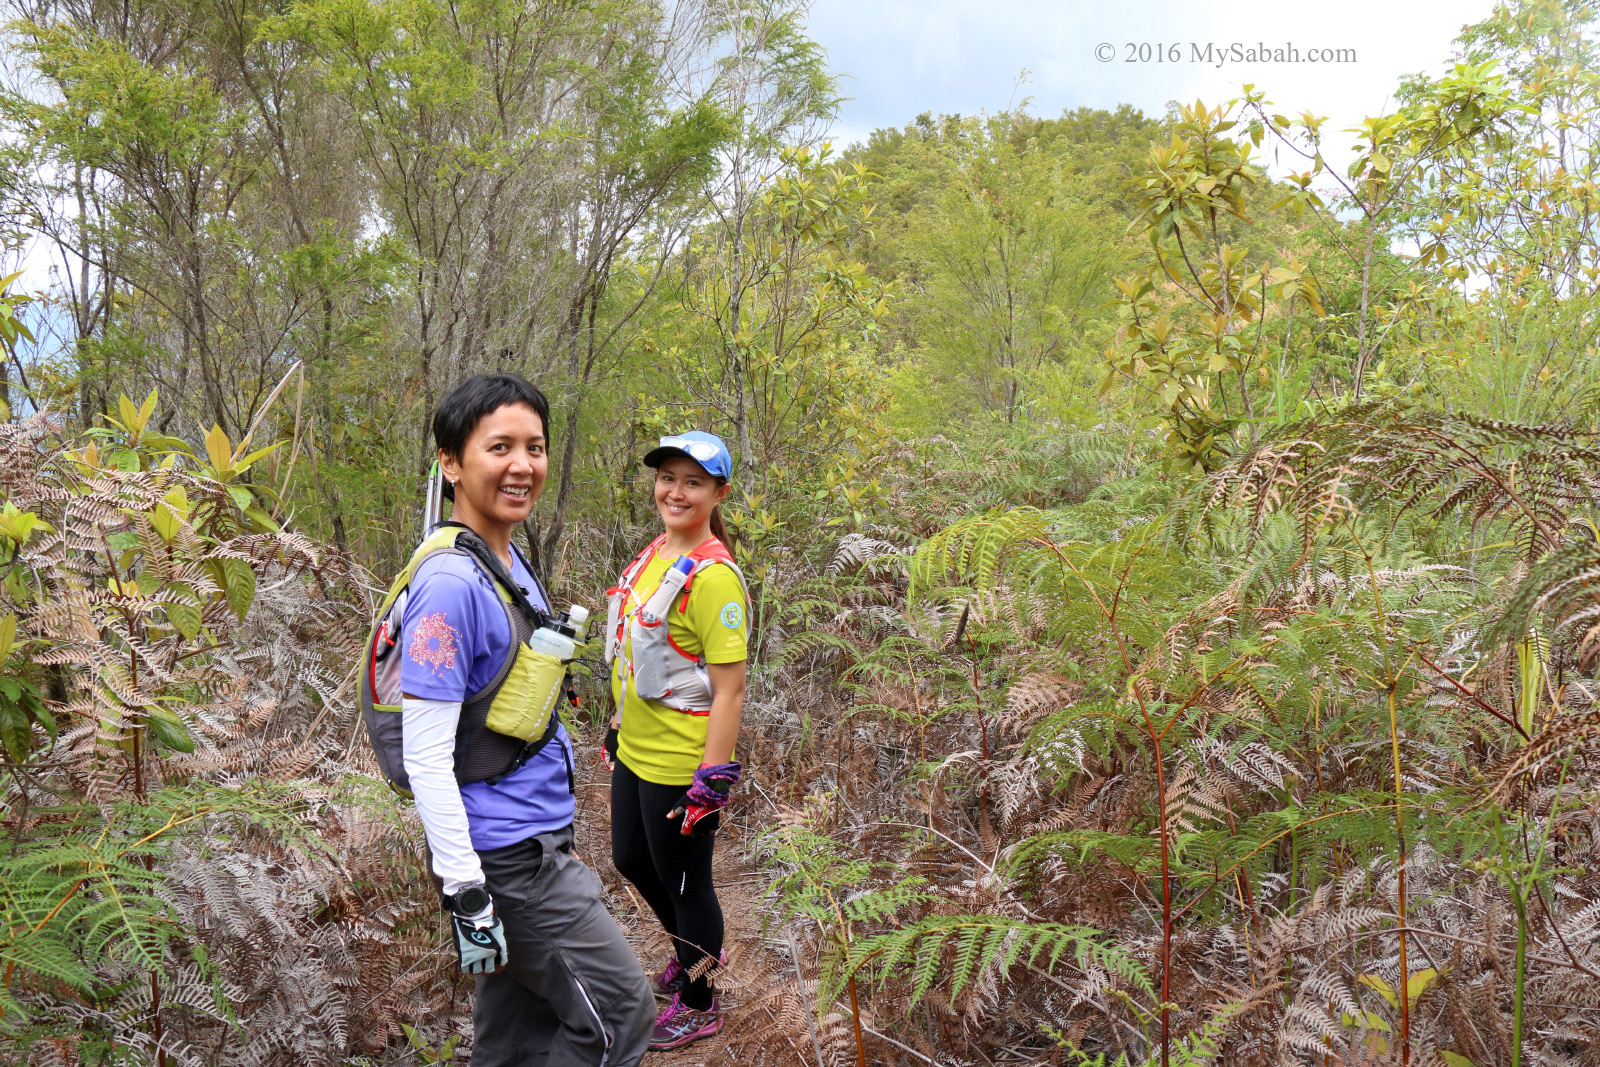
As we were deep inside the jungle, we saw the holes dug by wild boar, heard woodpecker pecking the wood, and spot a herd of red leaf monkey on the tree. This is a healthy rainforest, so inevitably there are some leeches. Just put on anti-leech socks and you shall be fine.

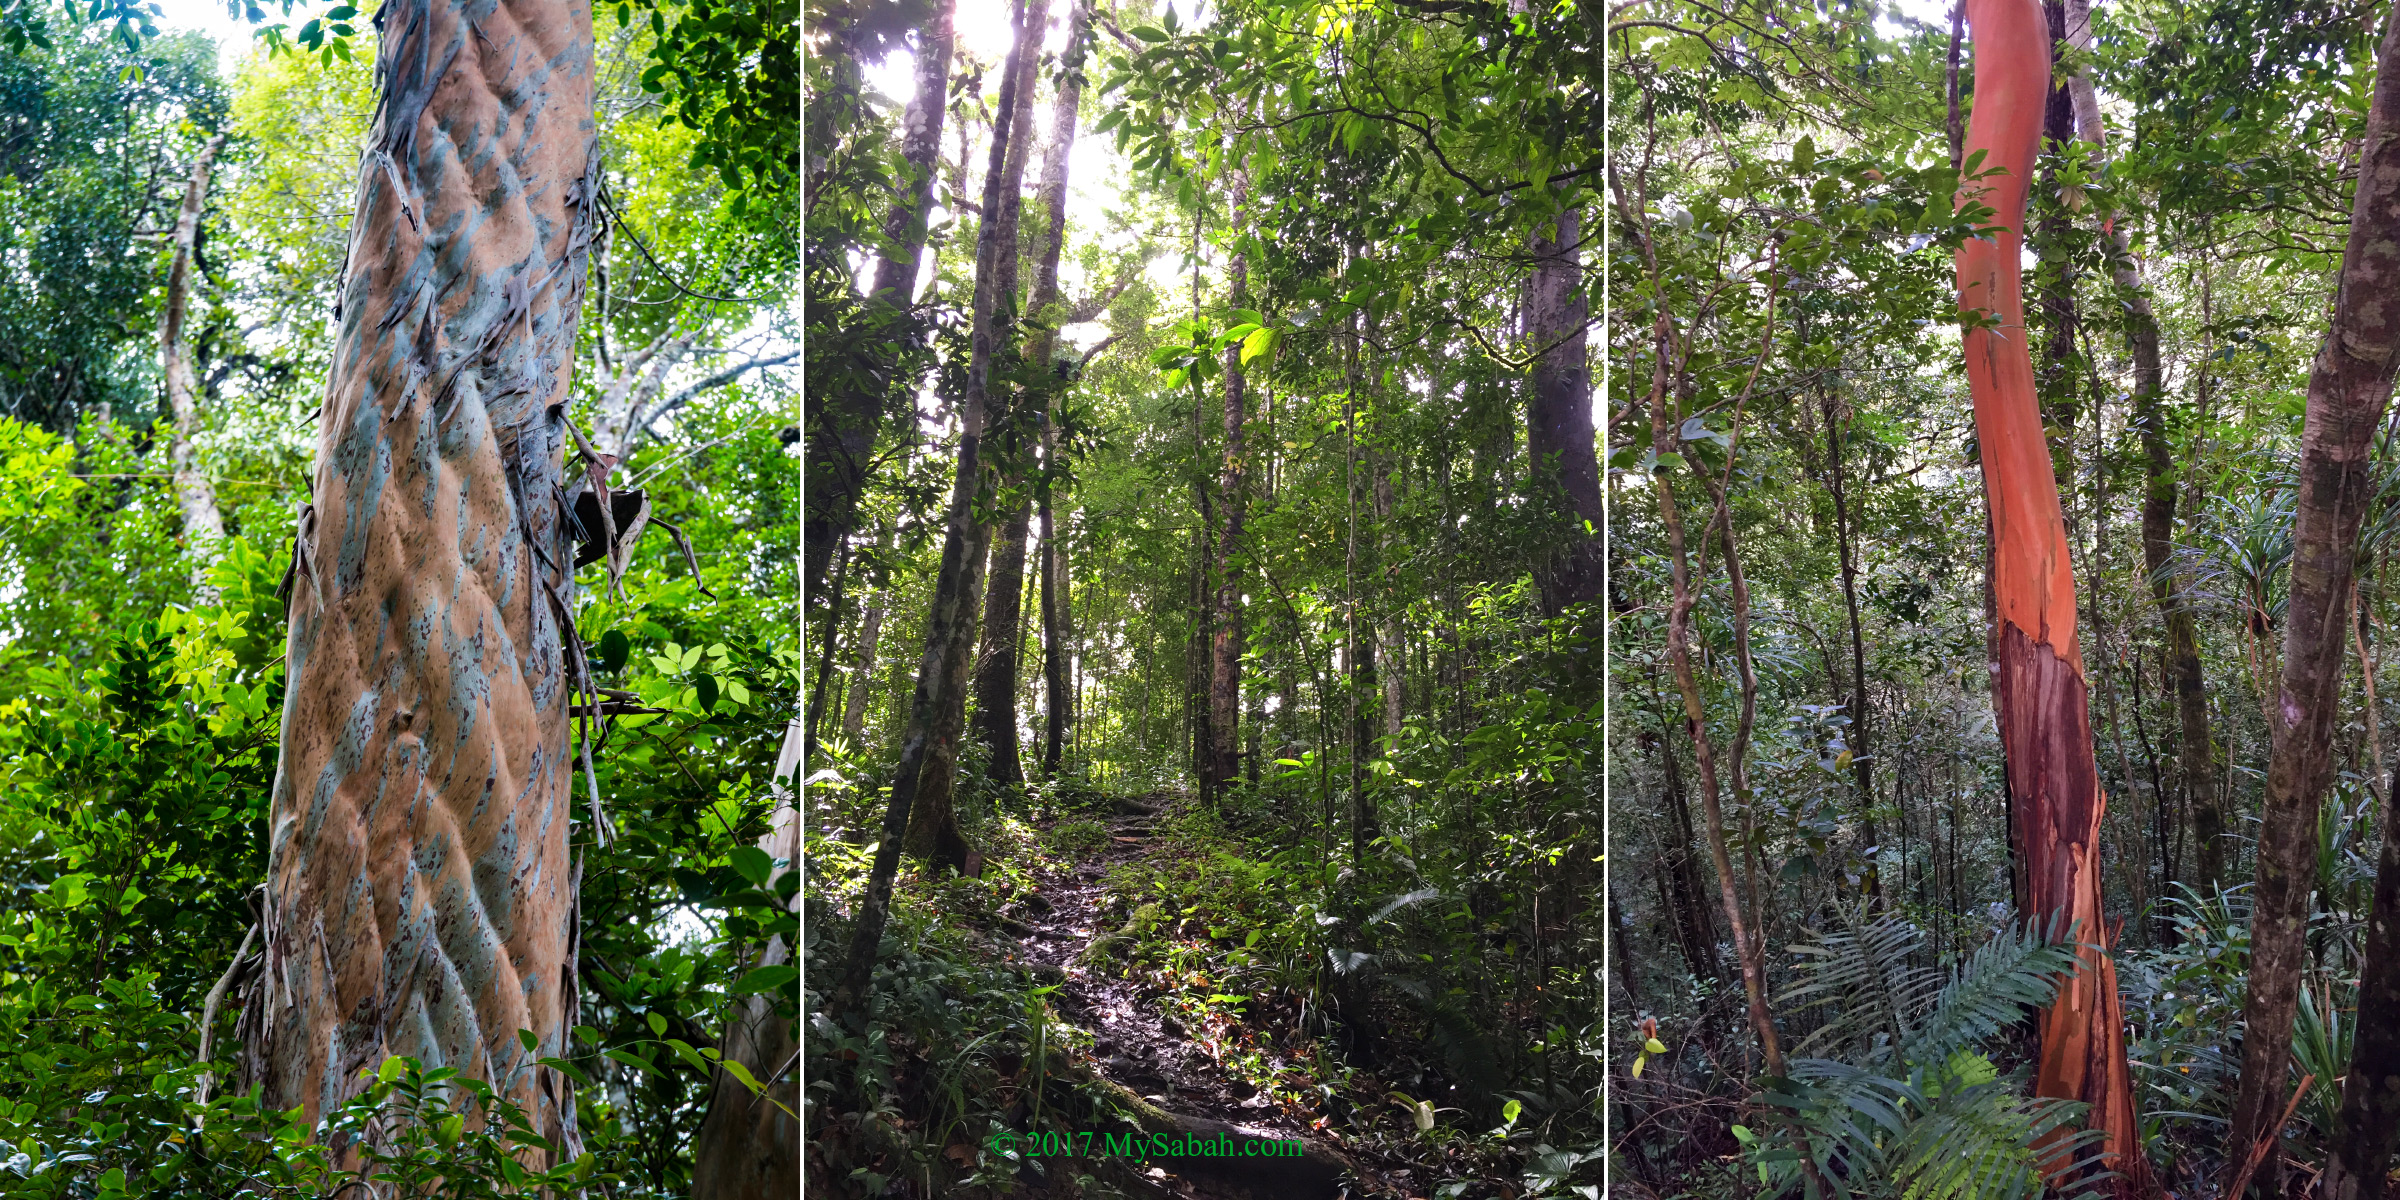
Beautiful trees and rainforest

Hendrick said if we were lucky, we would see Orangutan, Pygmy Squirrel, Clouded Leopard and Tufted Ground Squirrel.

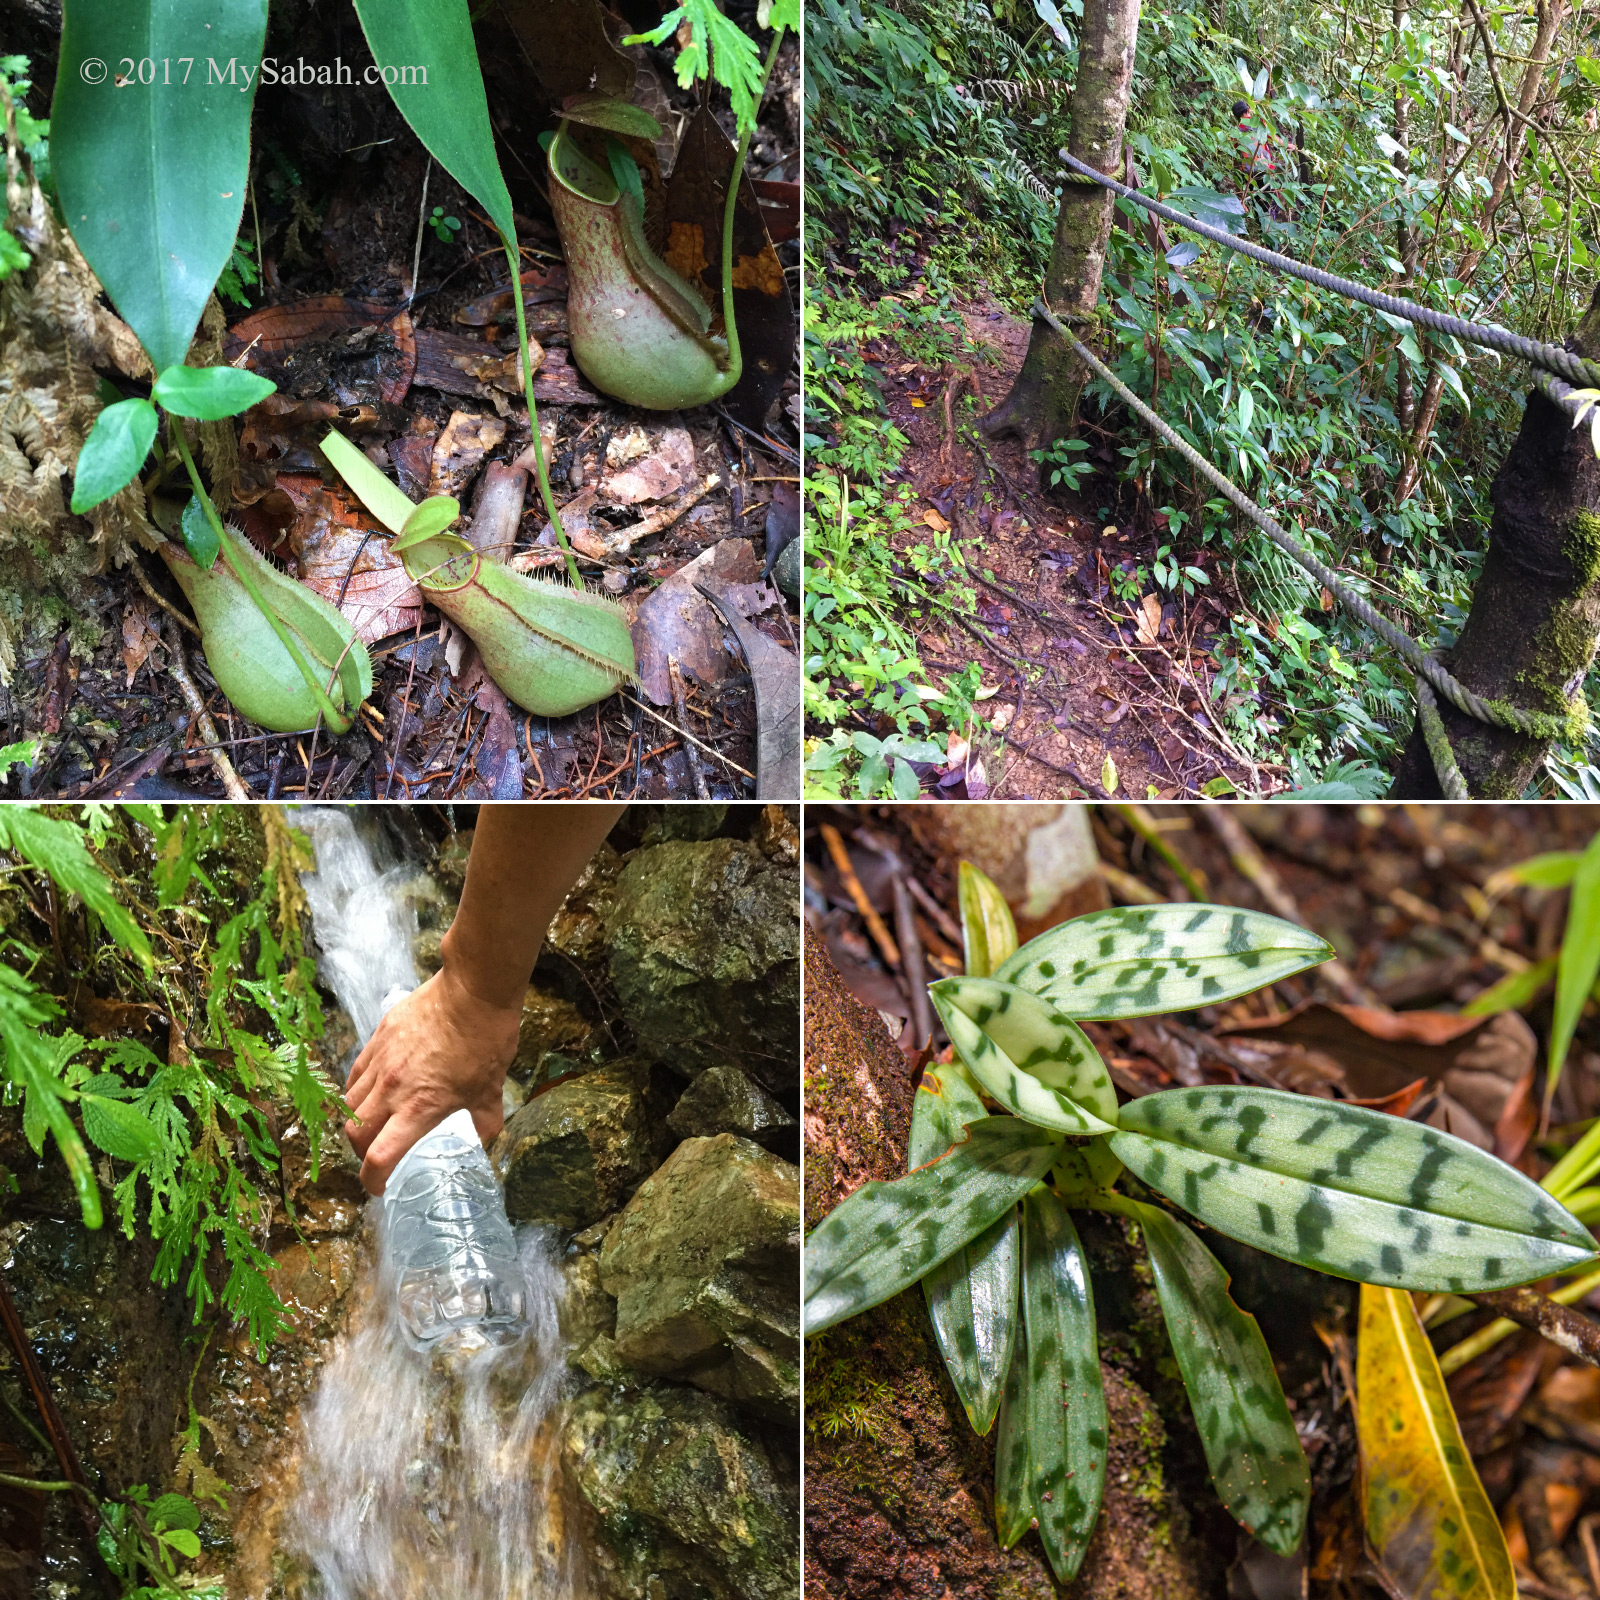
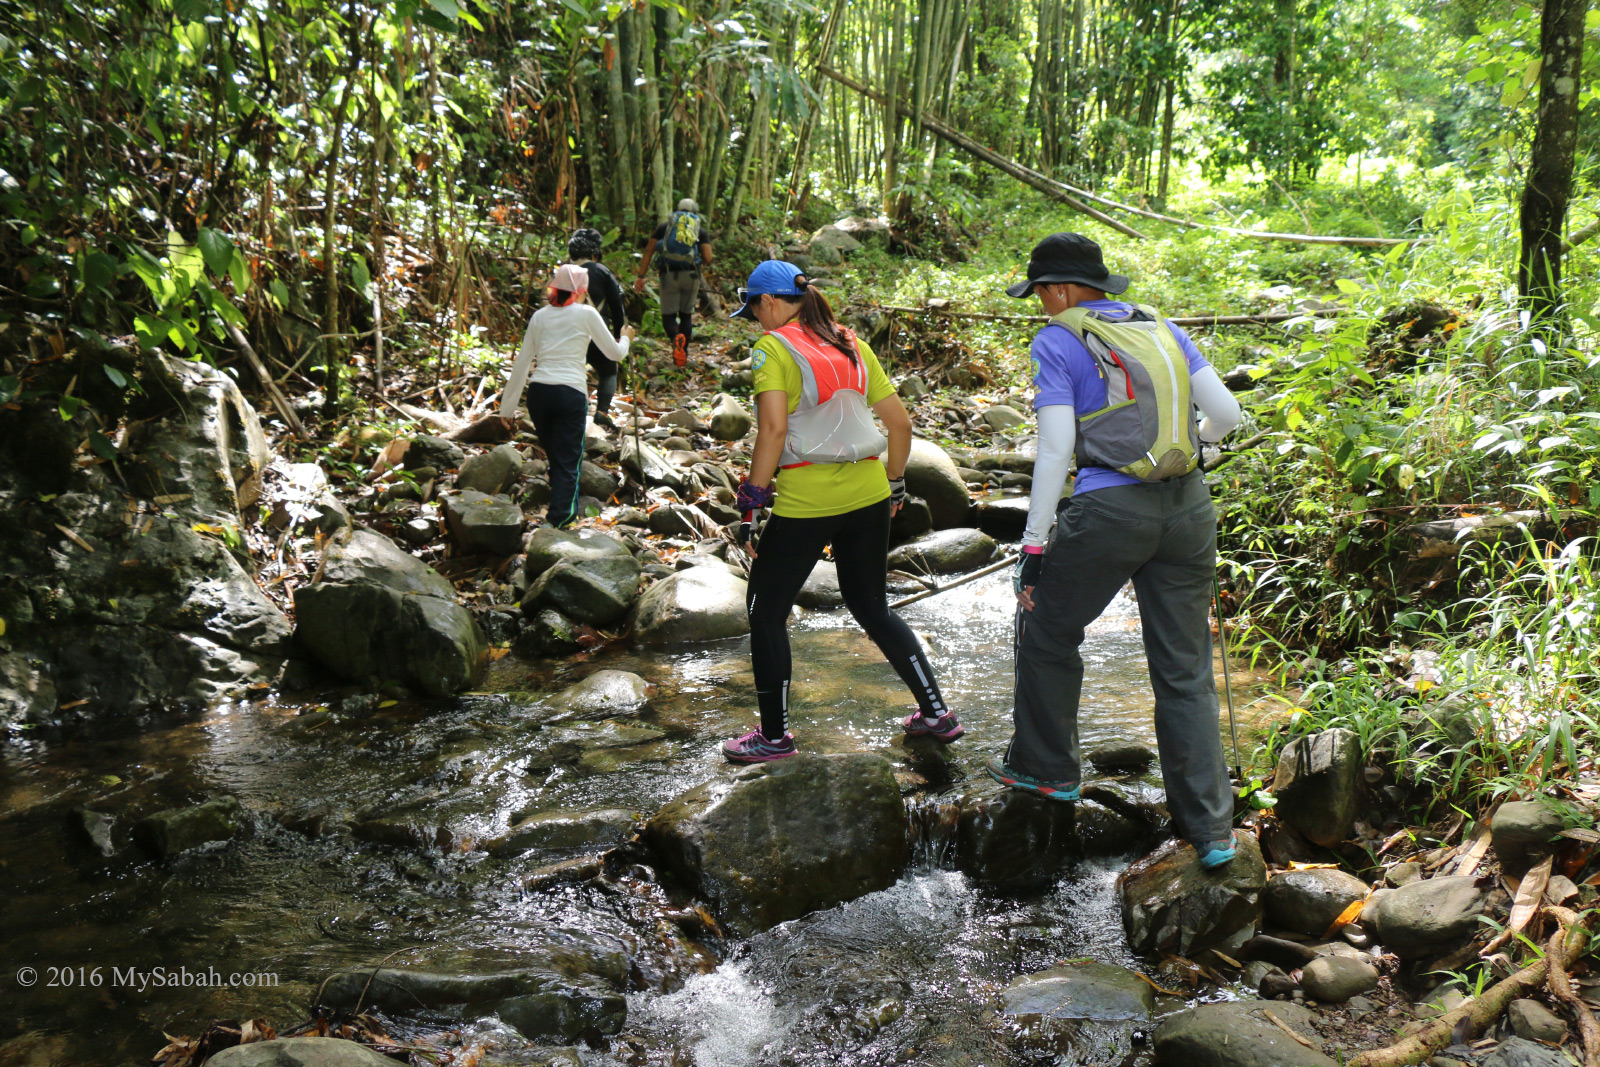
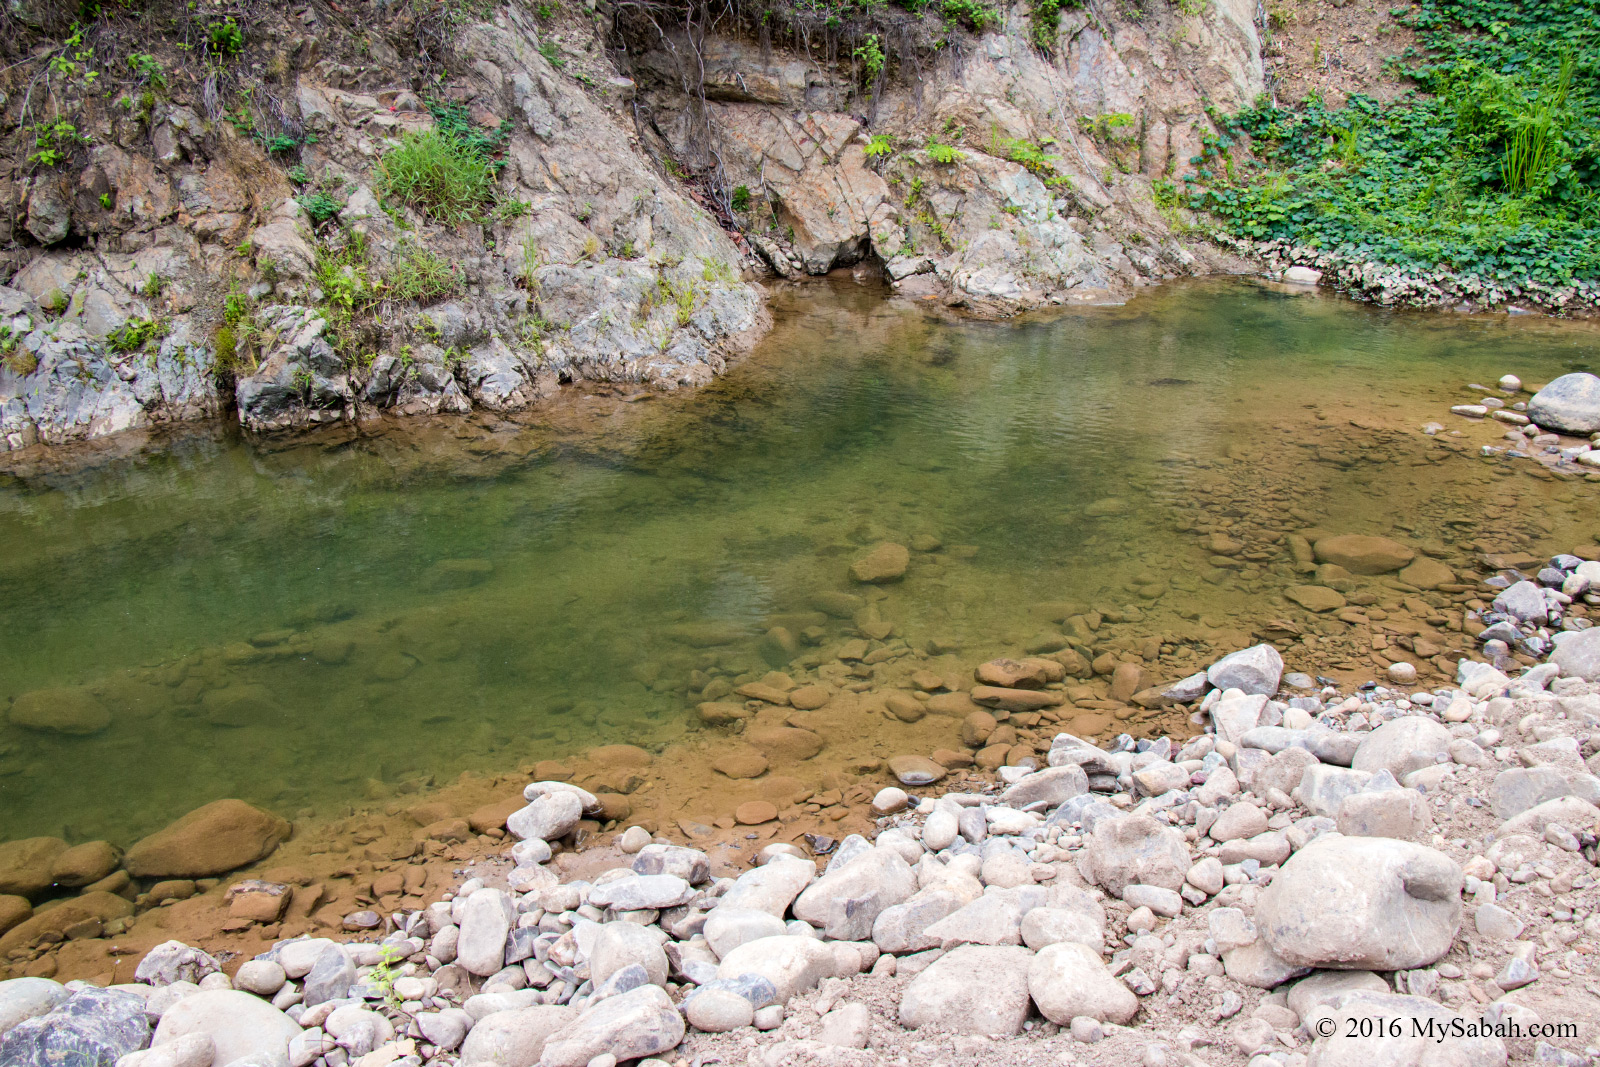
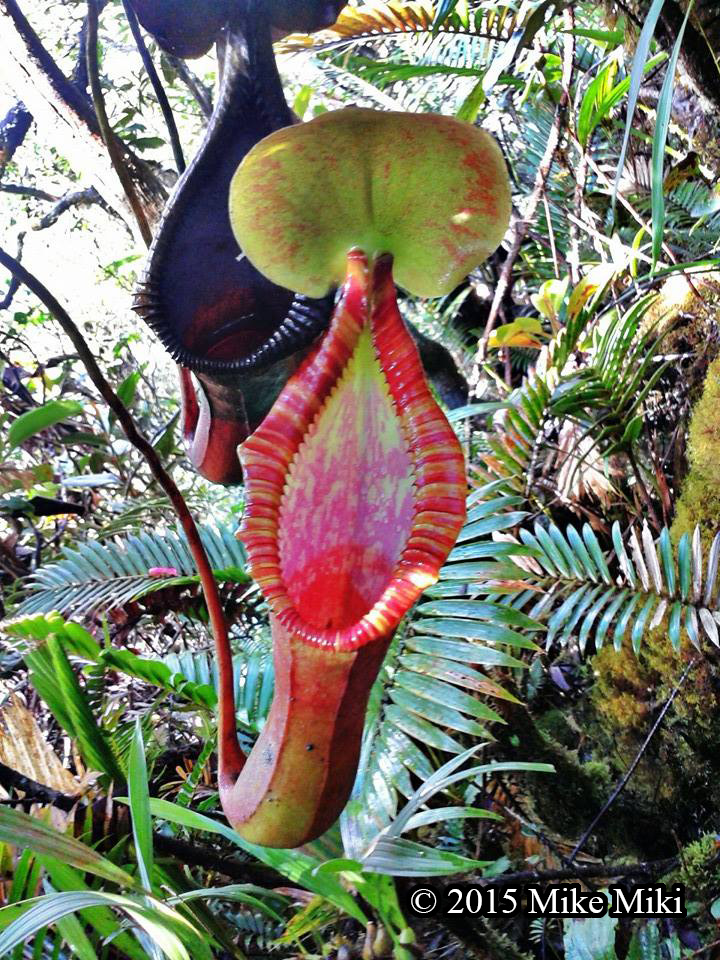
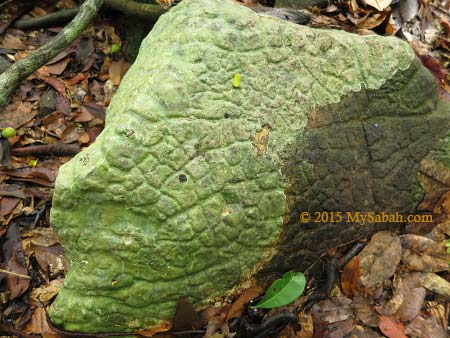
Interesting plant along the trail. The water of mountain creek is so cold and fresh to drink

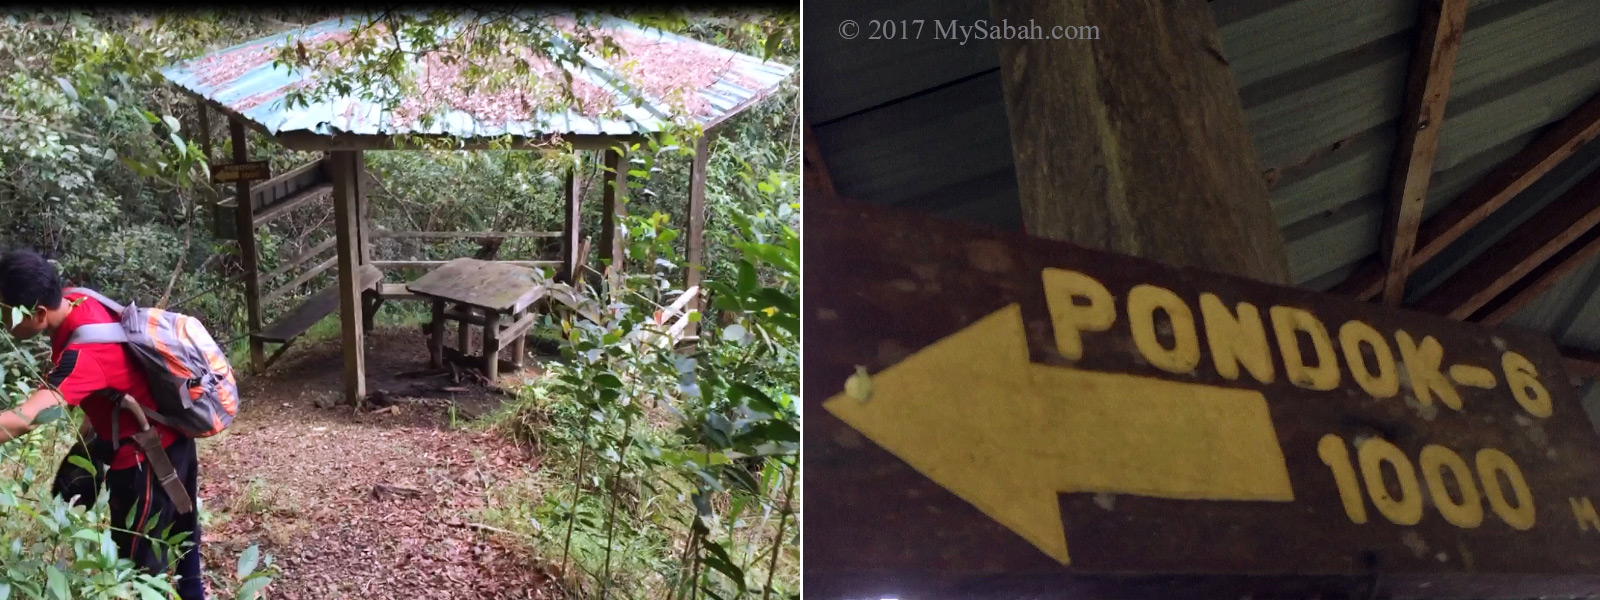
Gazebo No.5?Gazebo No.6

We reached Gazebo No.6 (Pondok Wasai) at 11:48am.

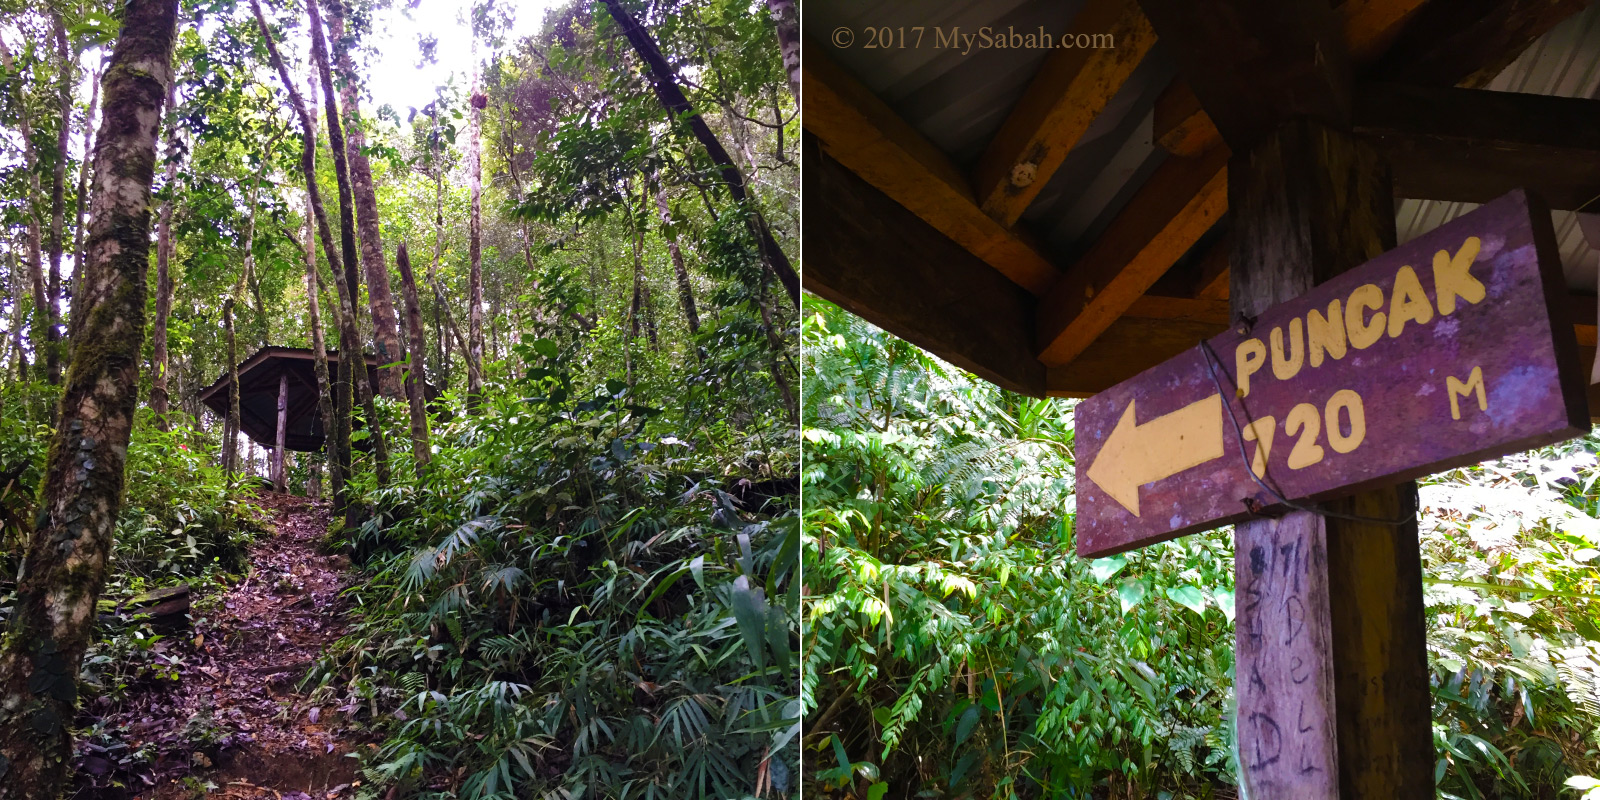
Gazebo No.6: Pondok Wasai, 720 Meters to the peak. (Puncak = Peak)

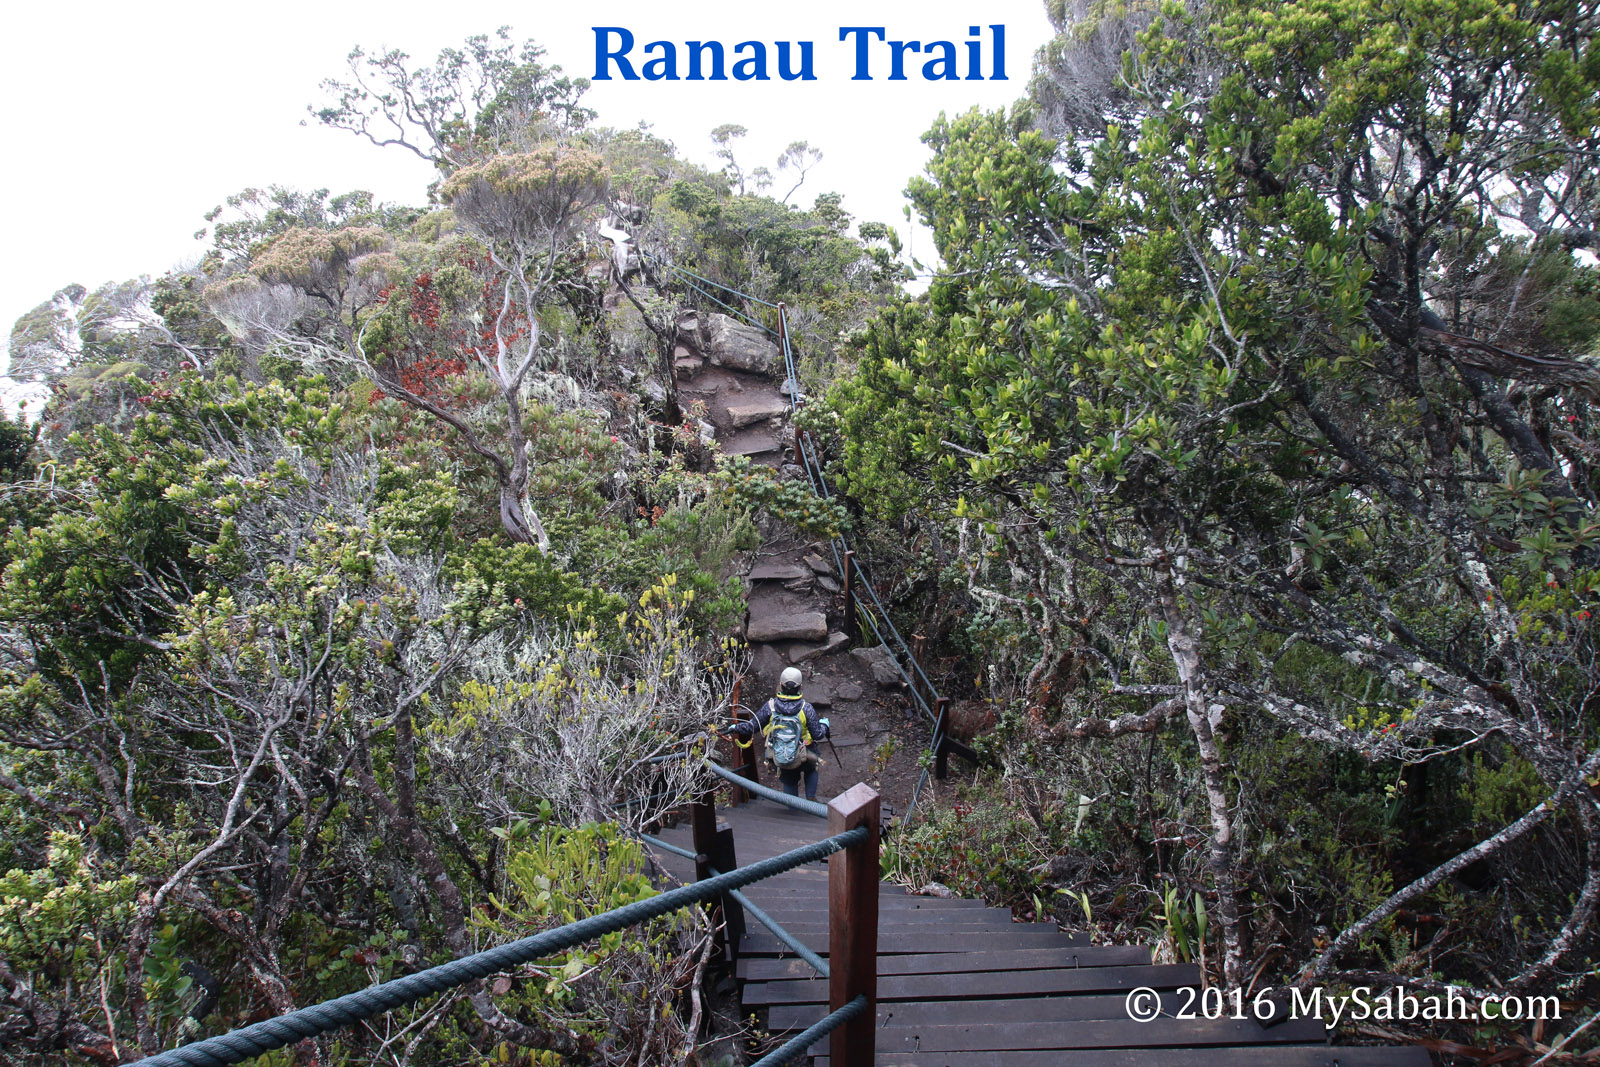
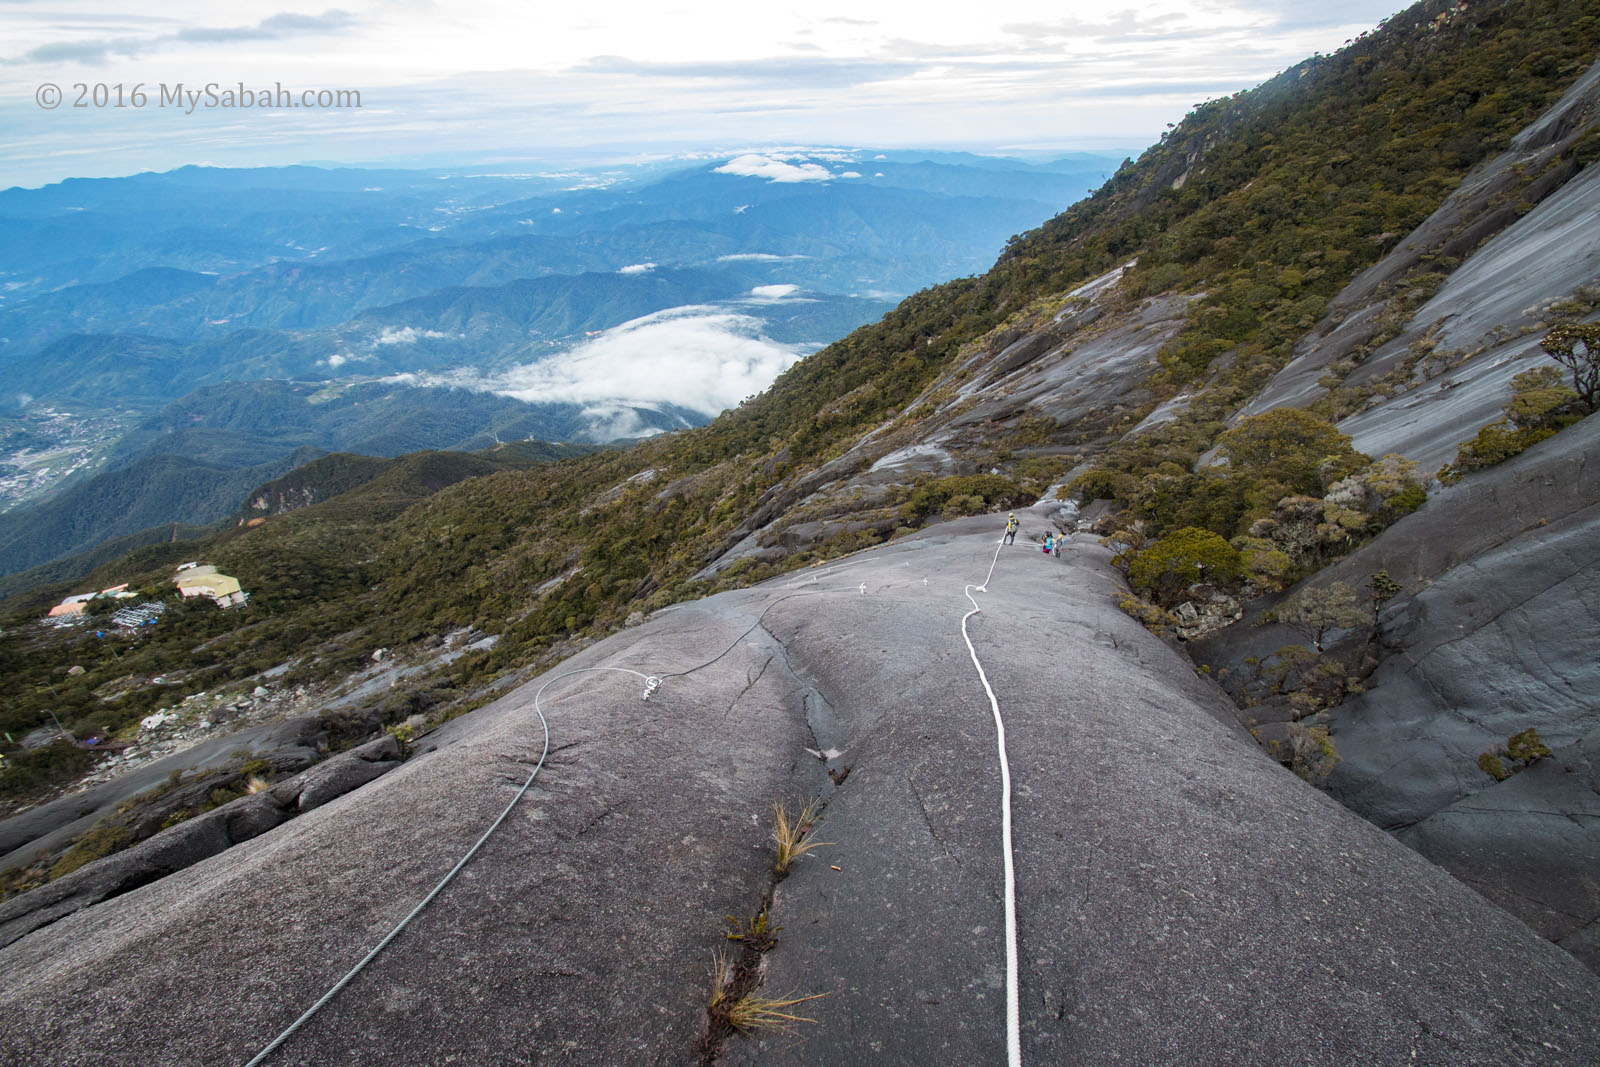
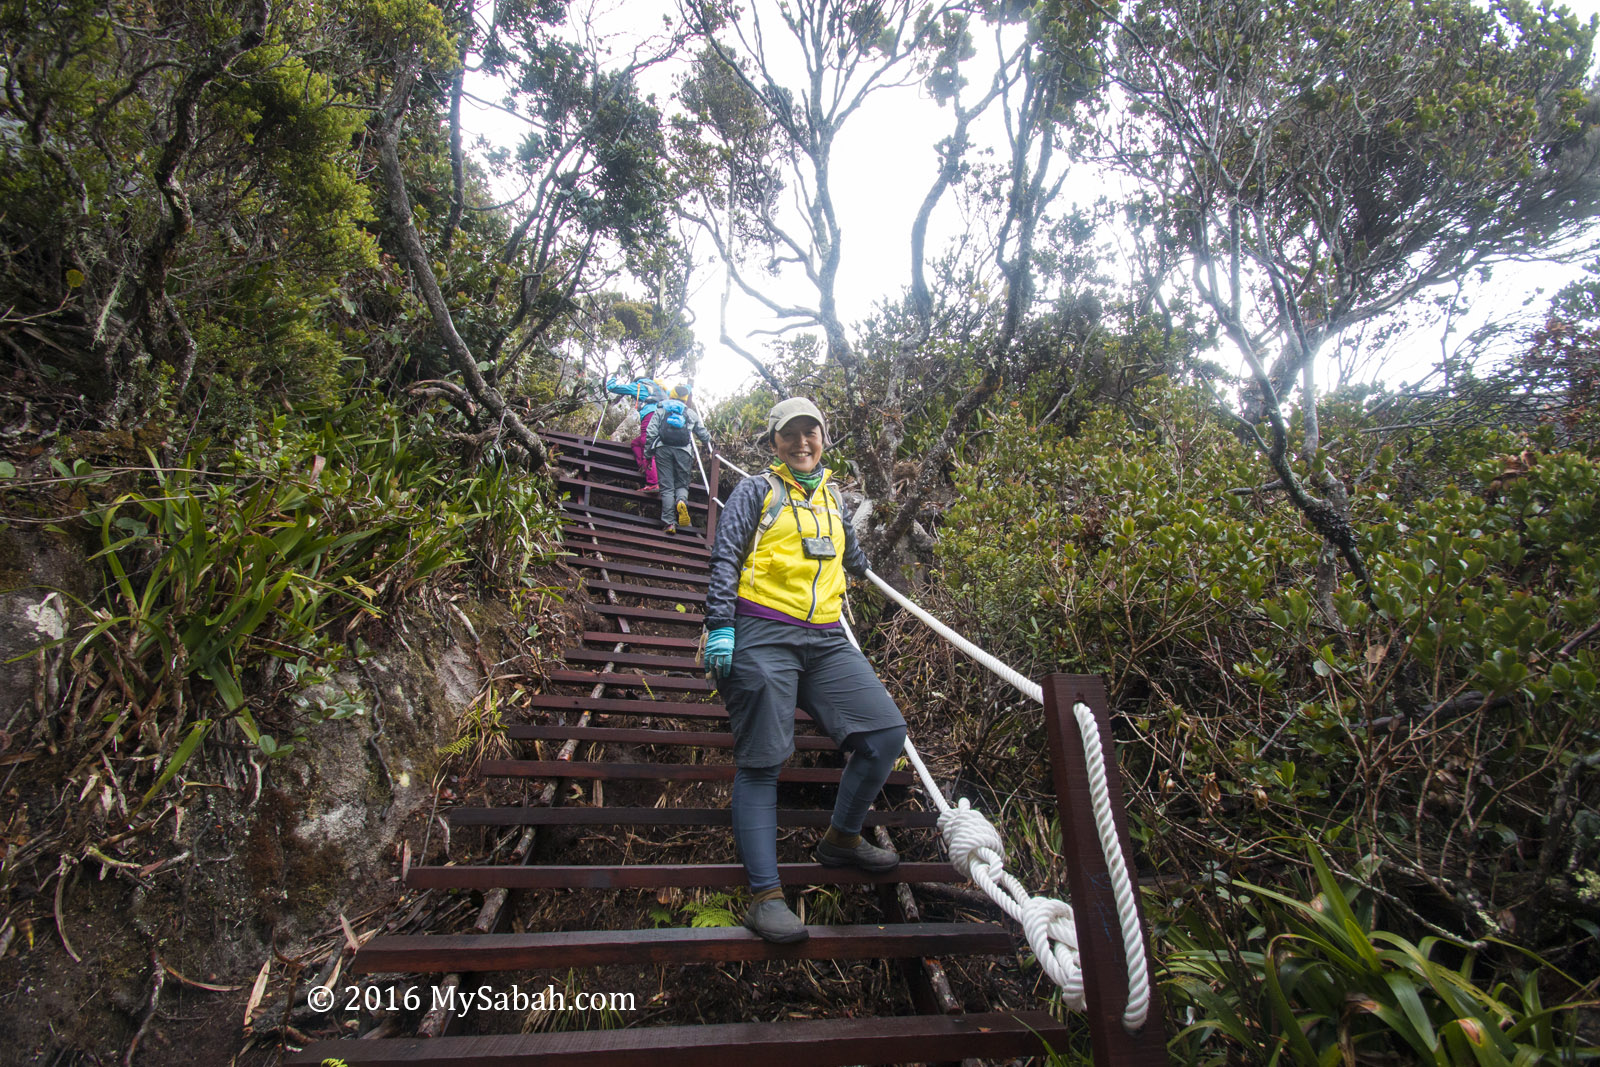
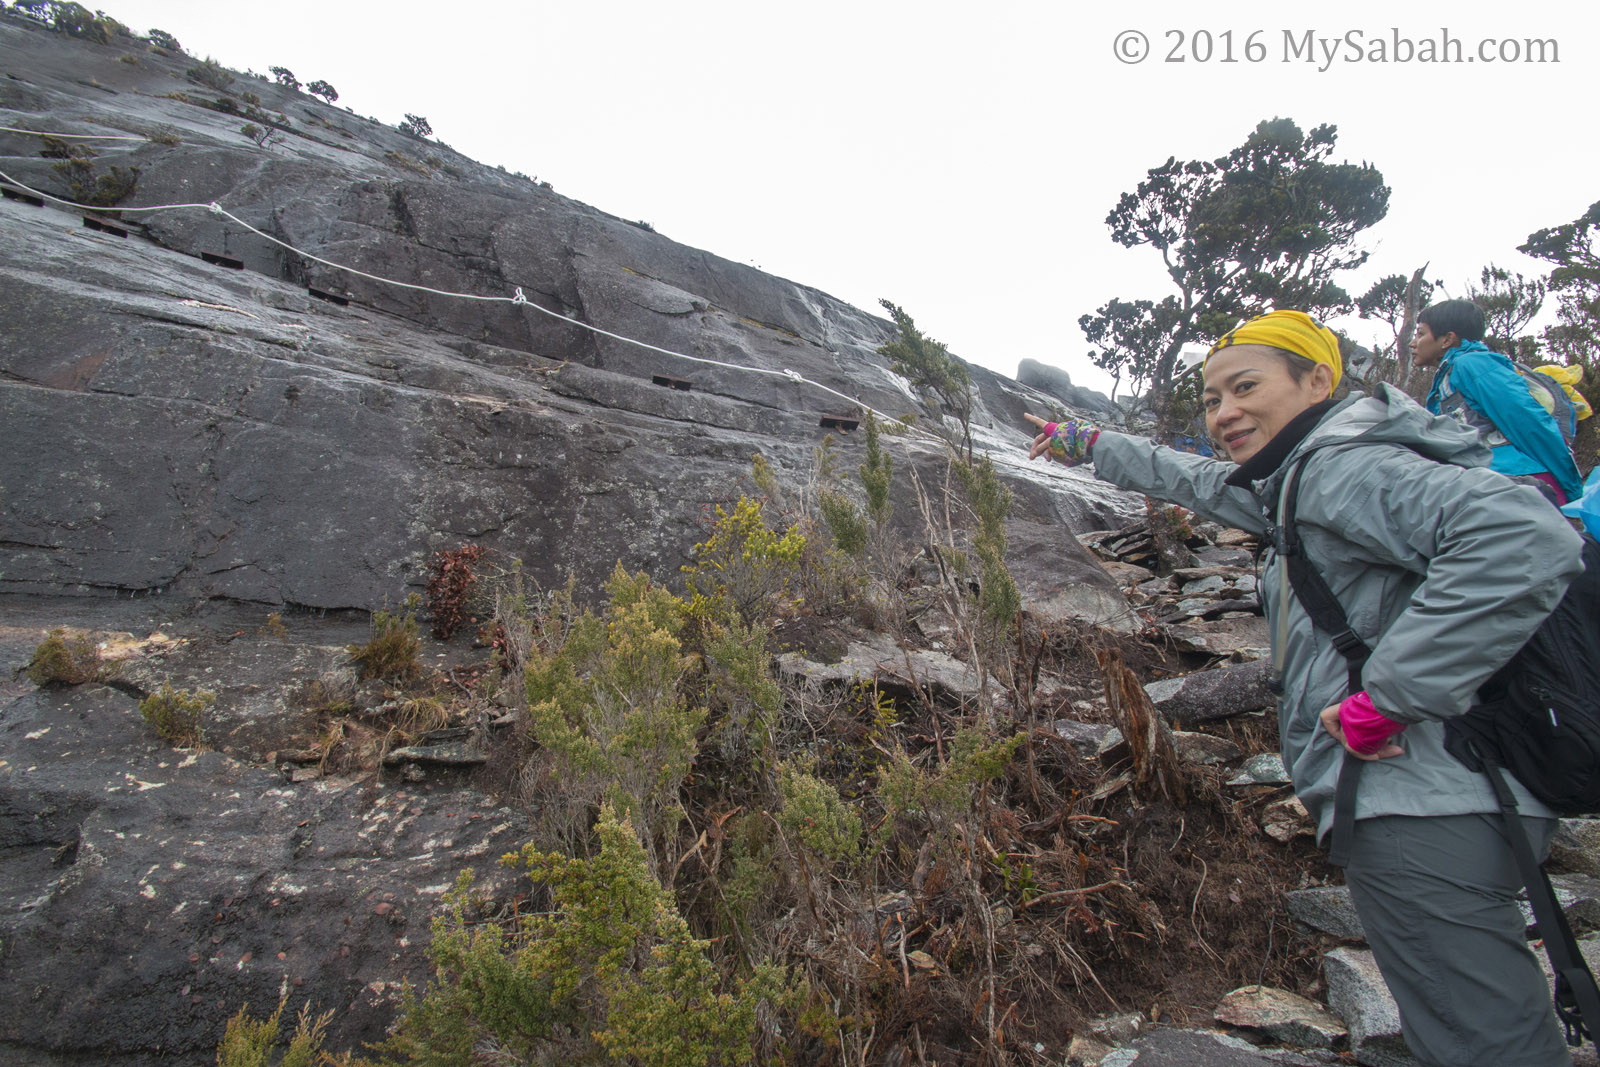
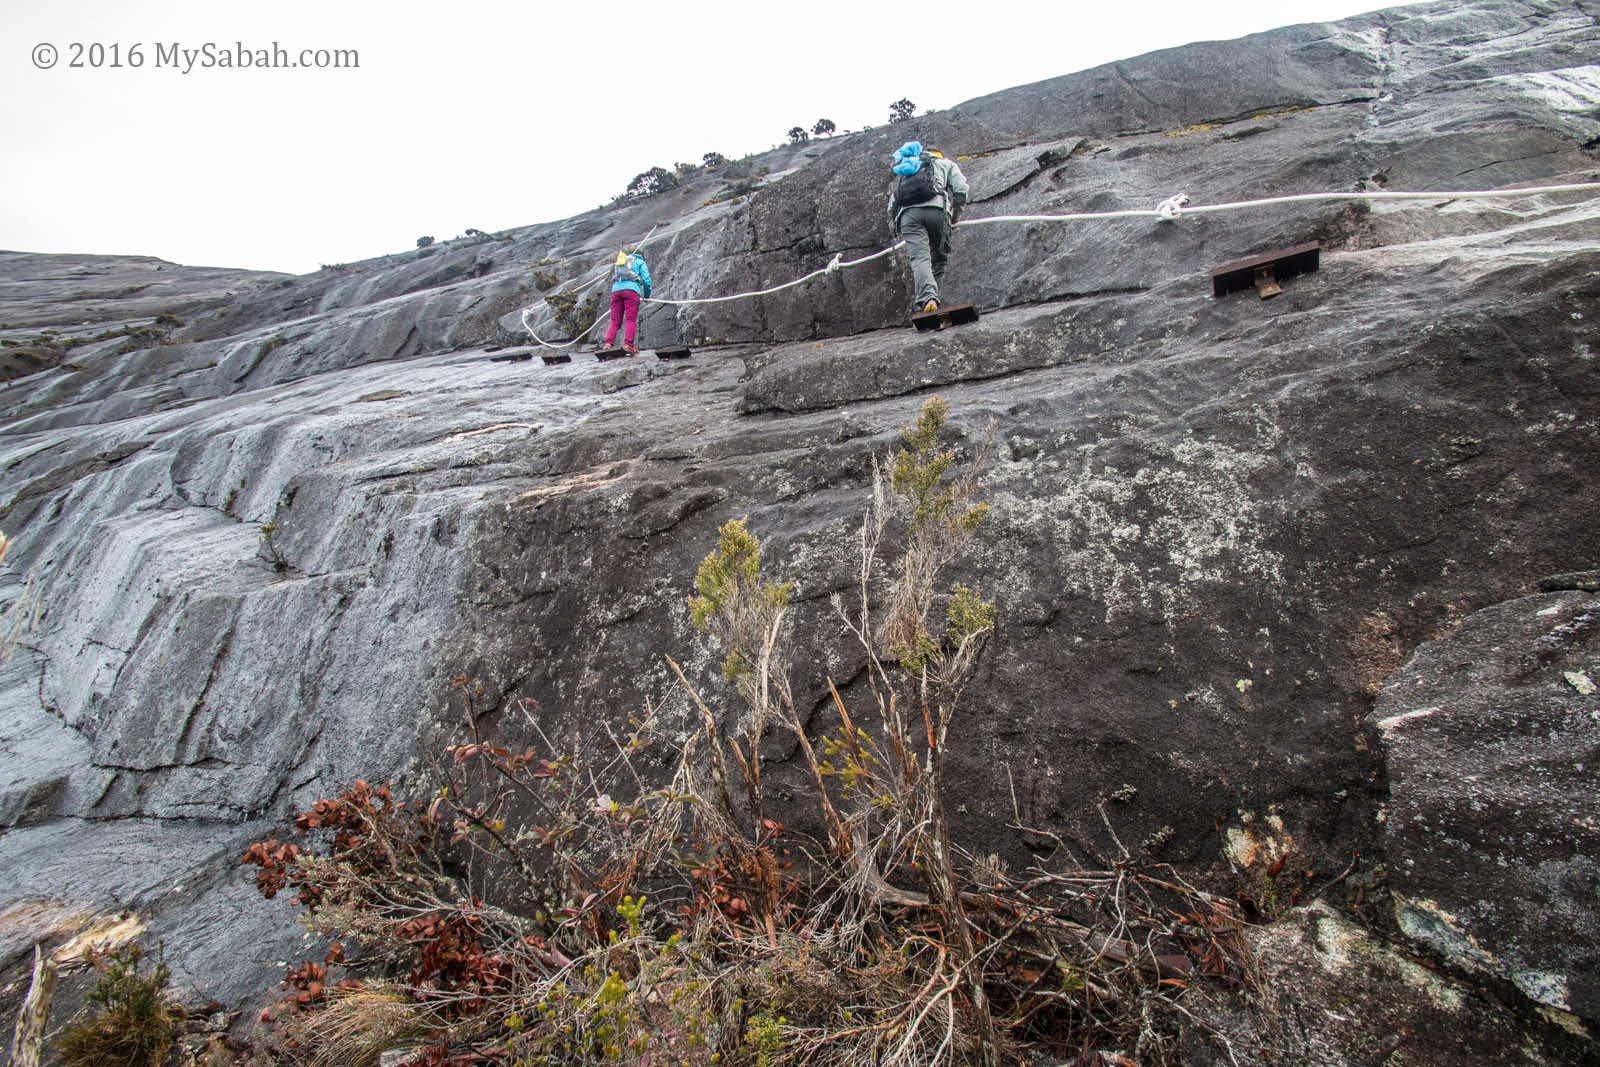
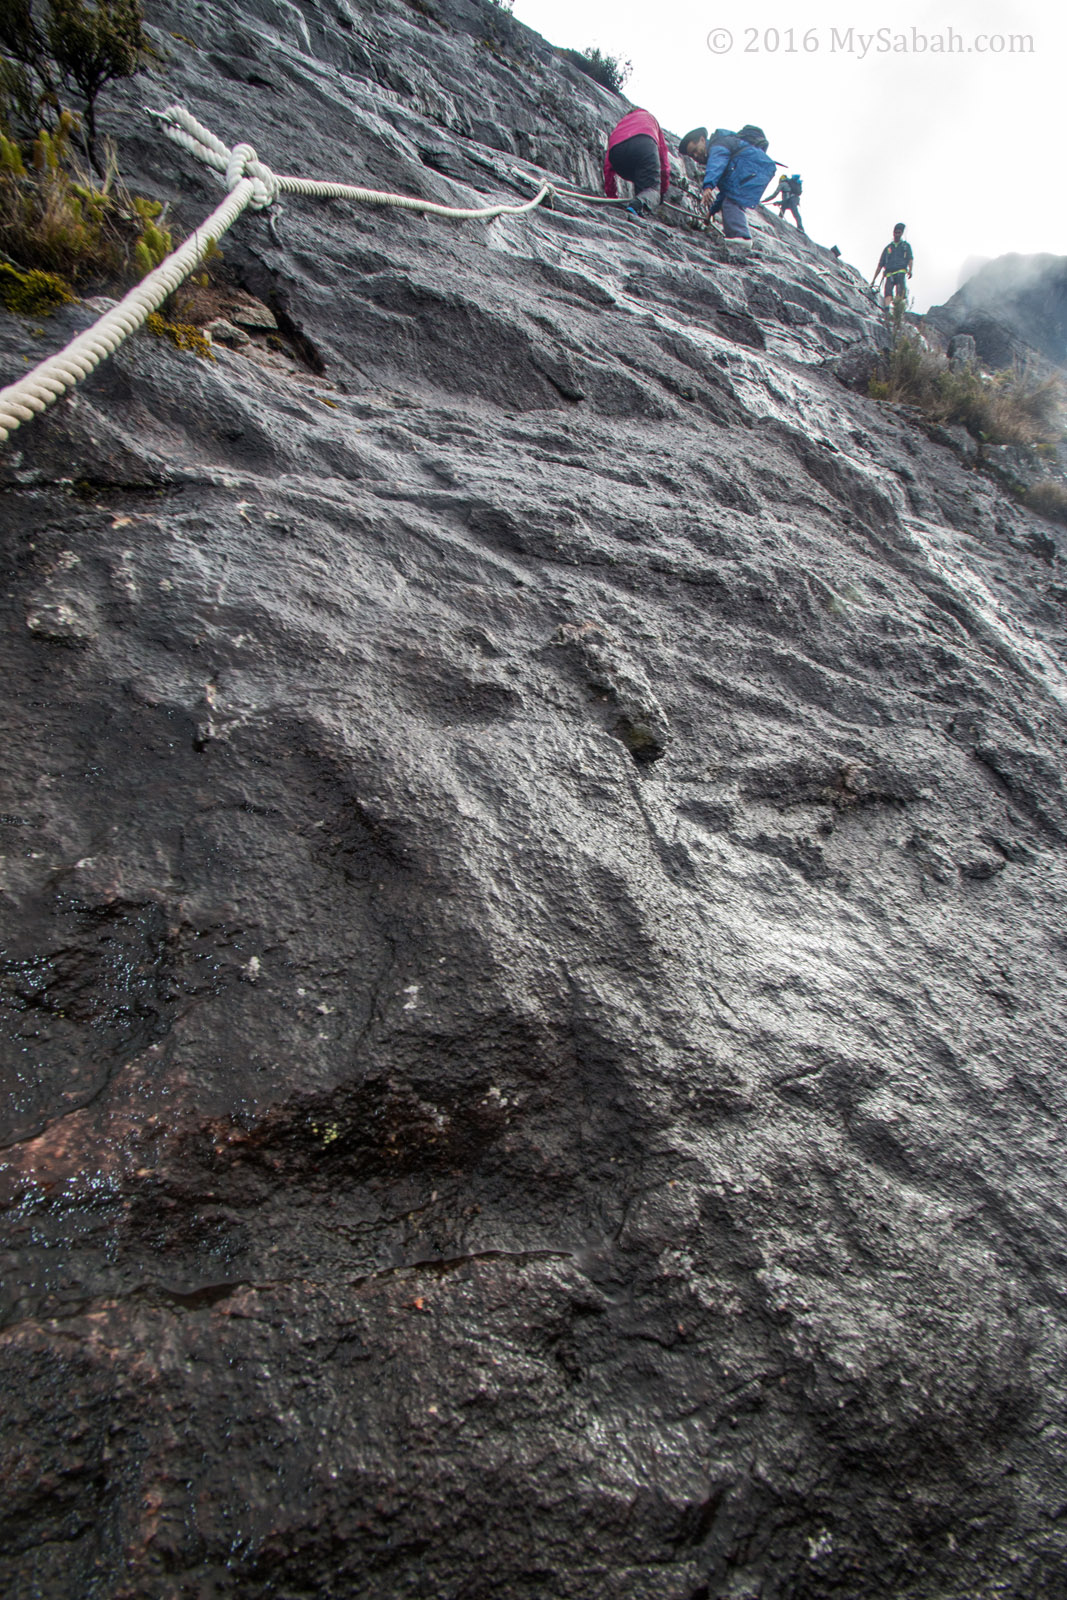
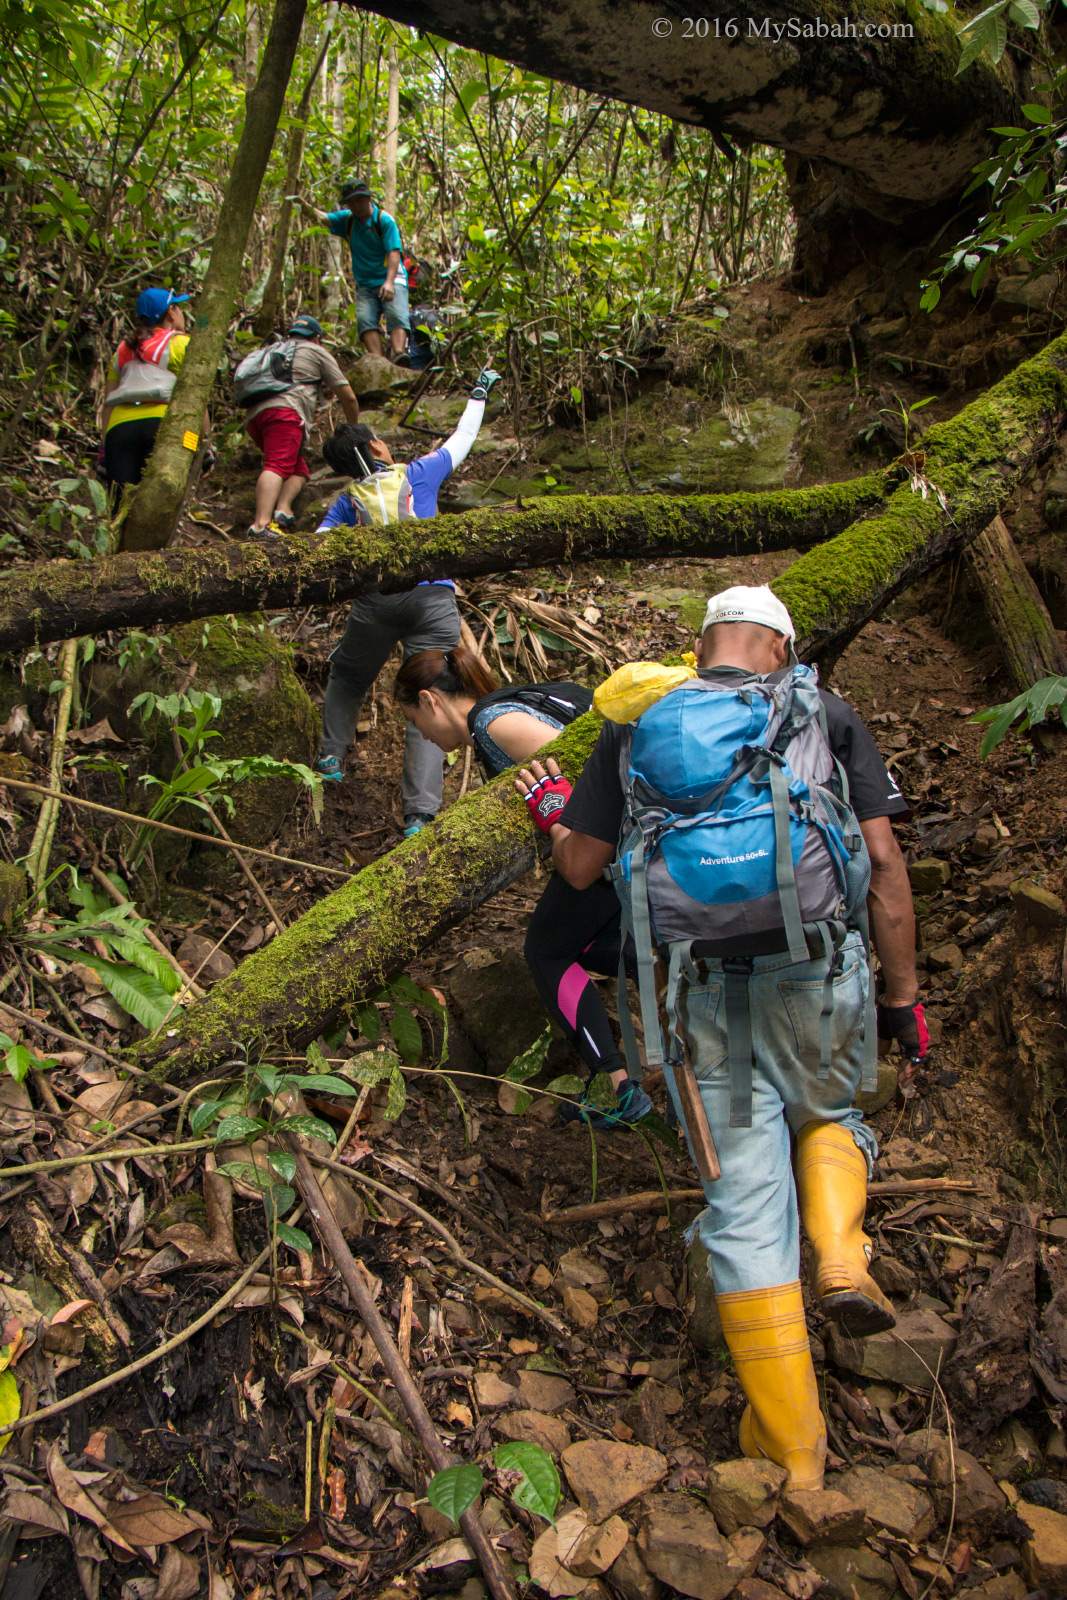
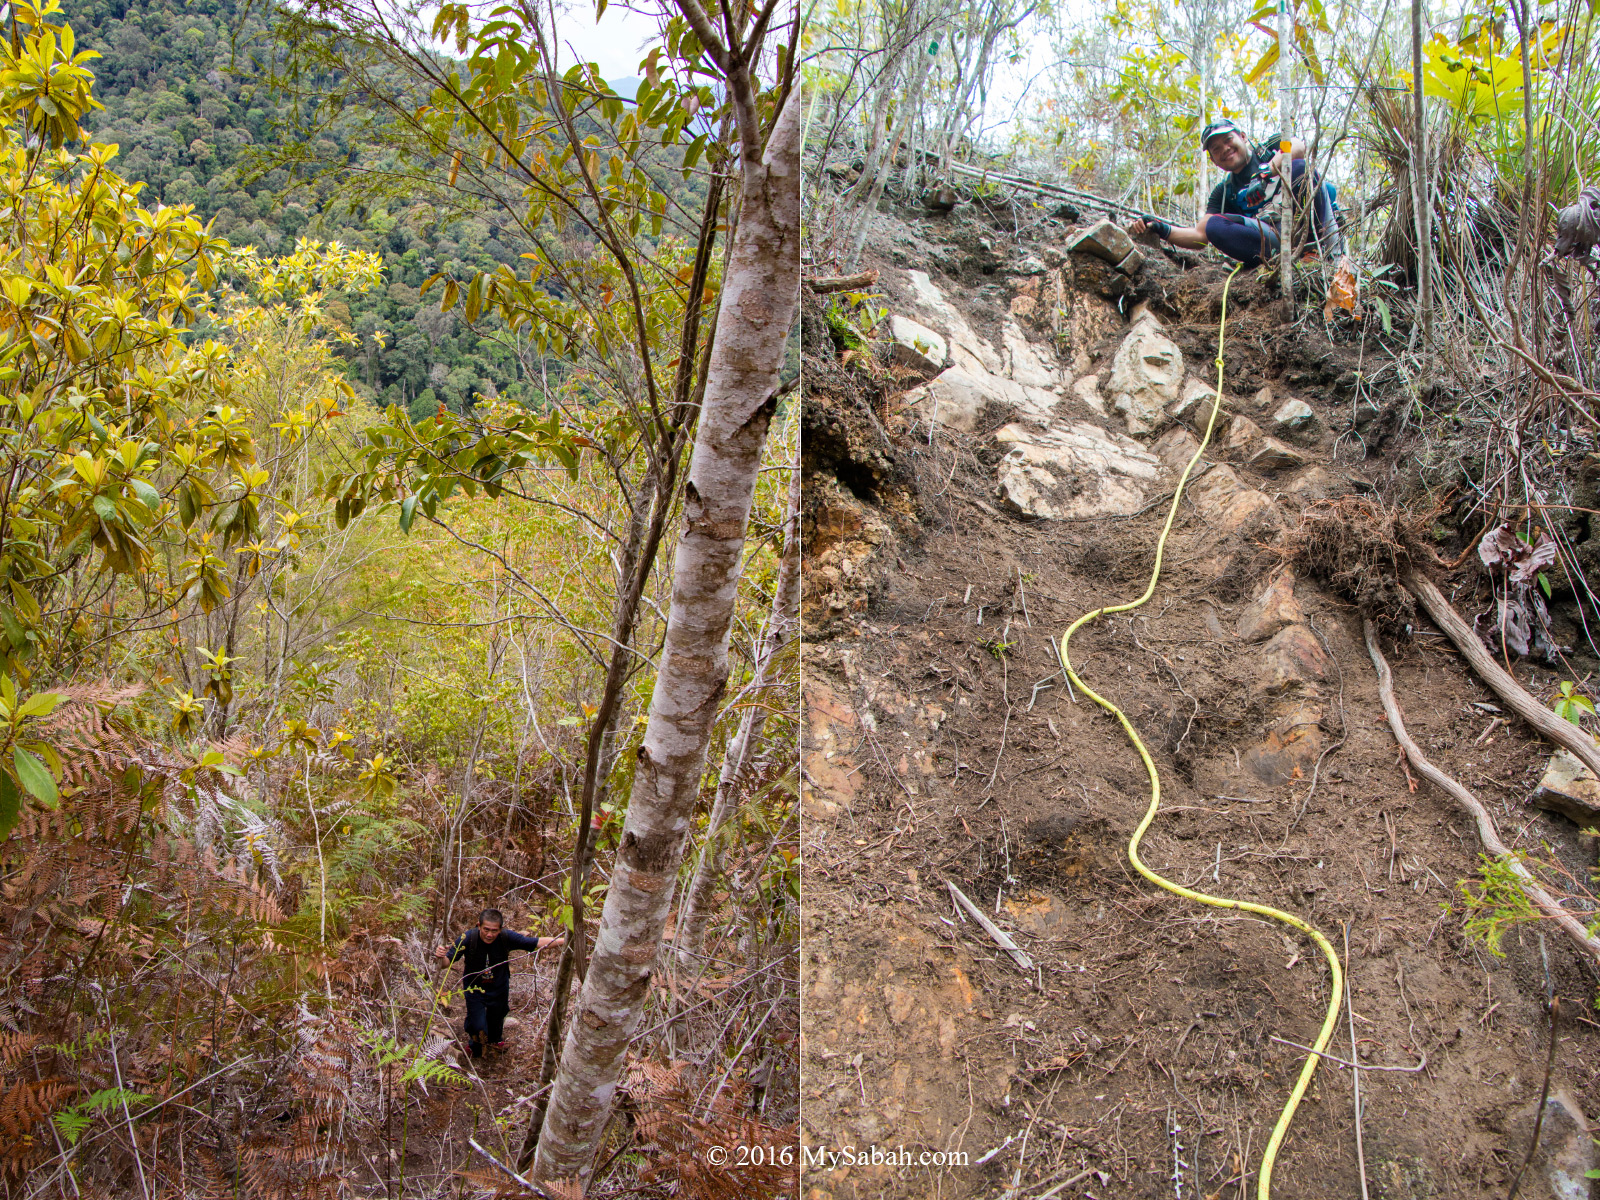
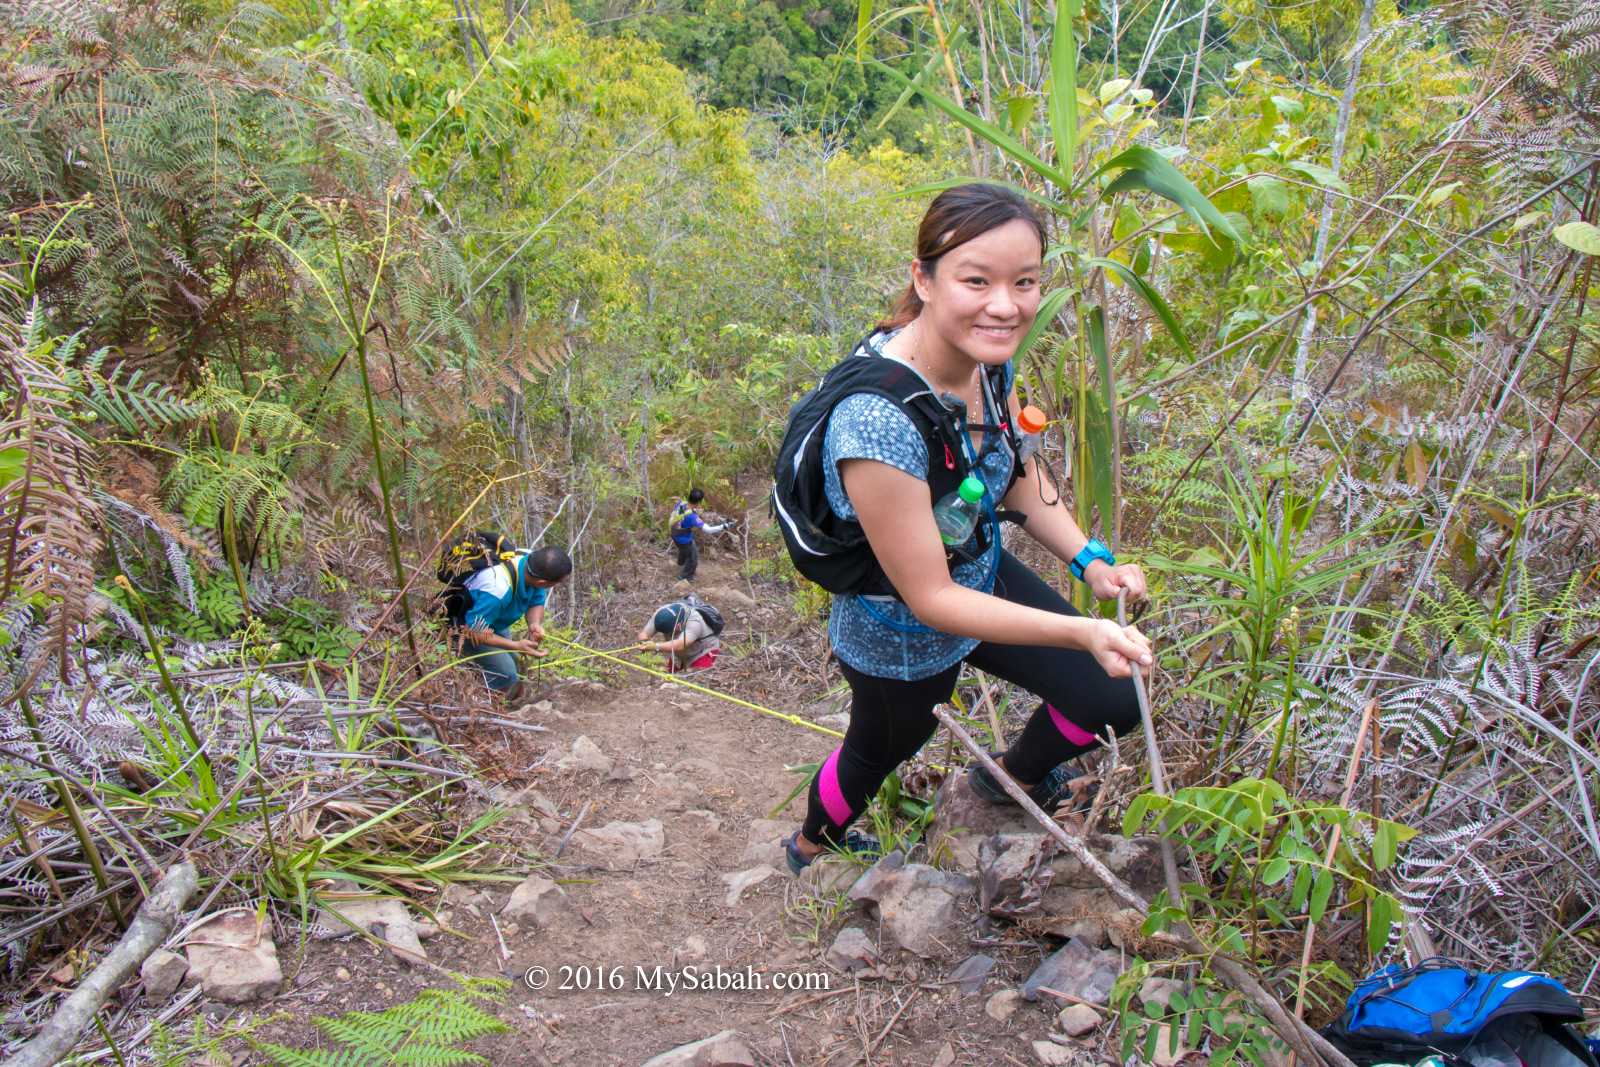
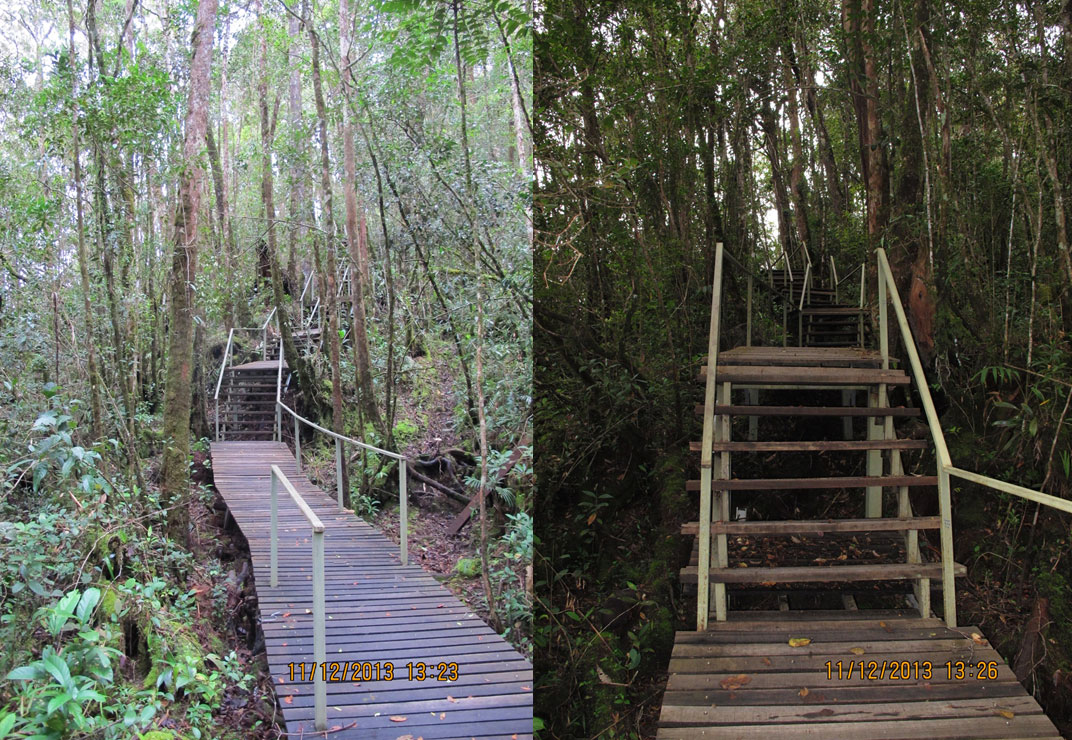
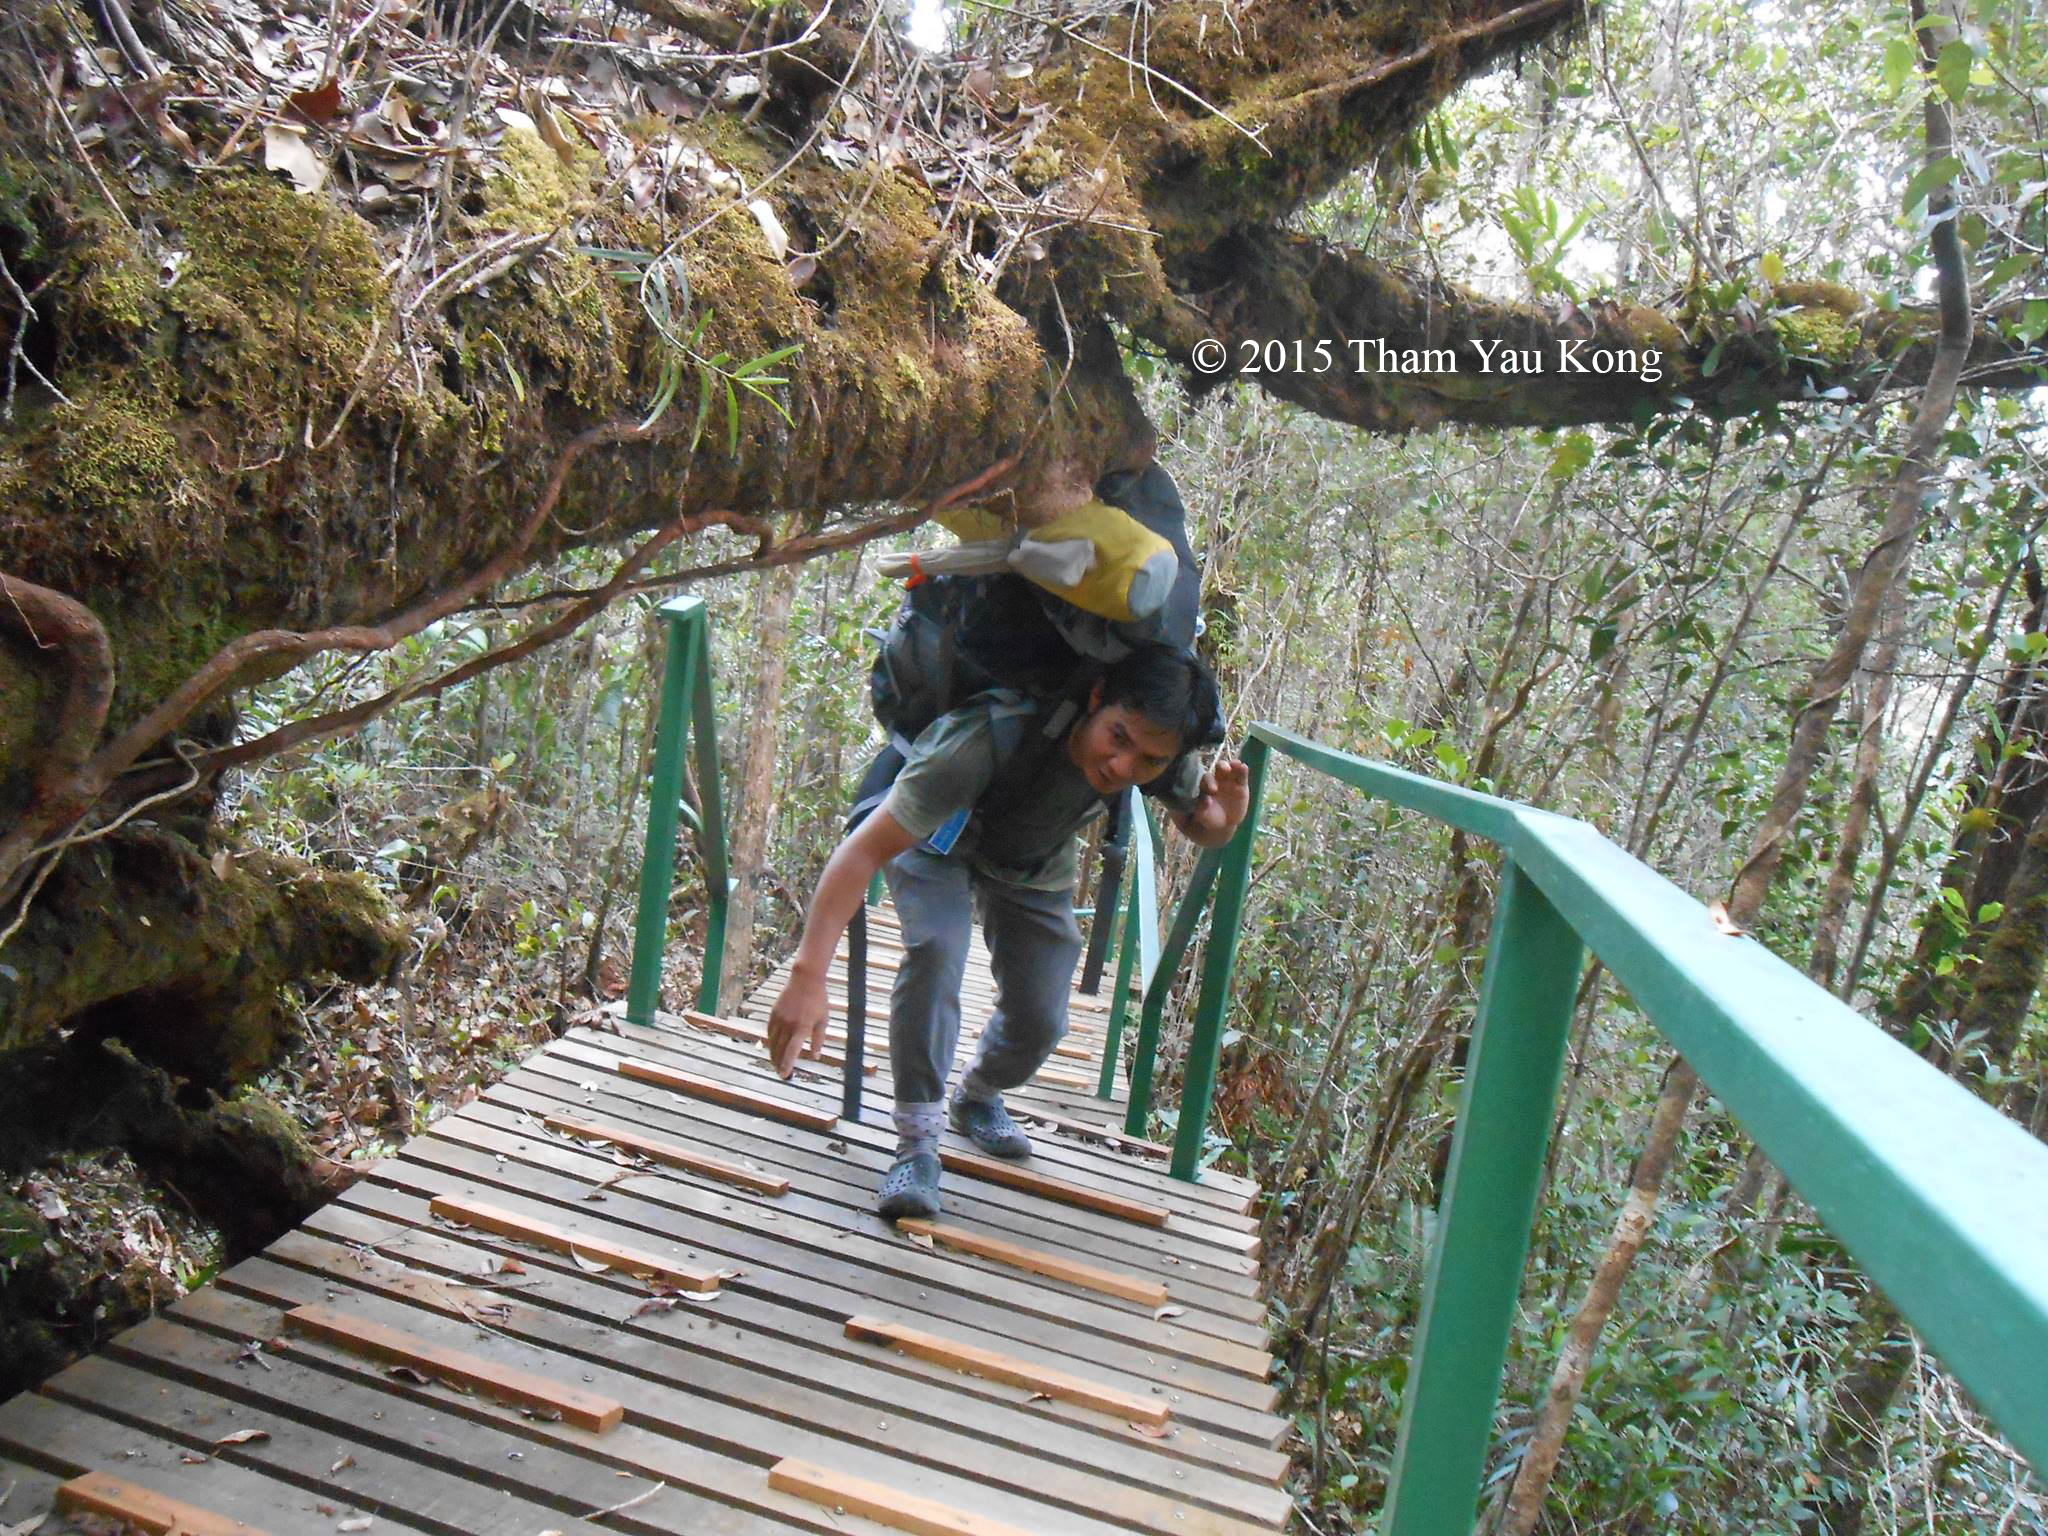
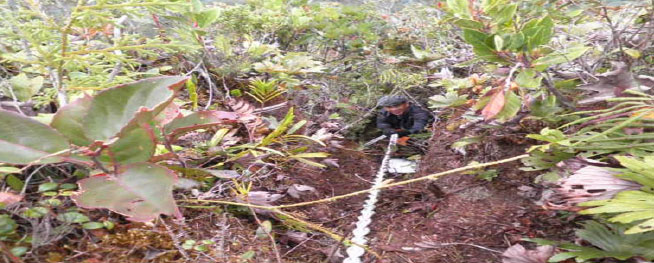
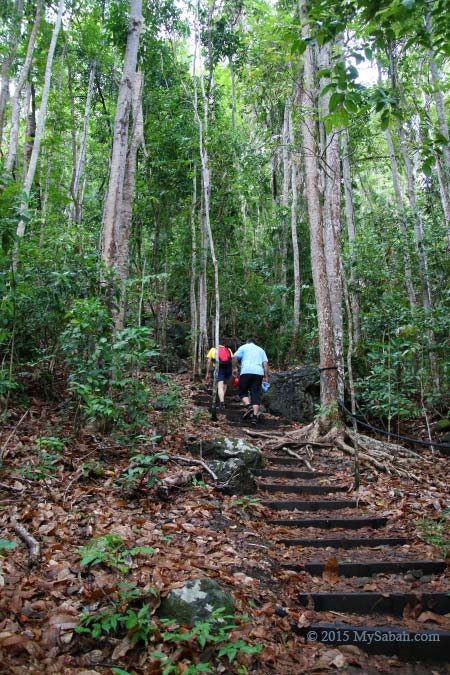
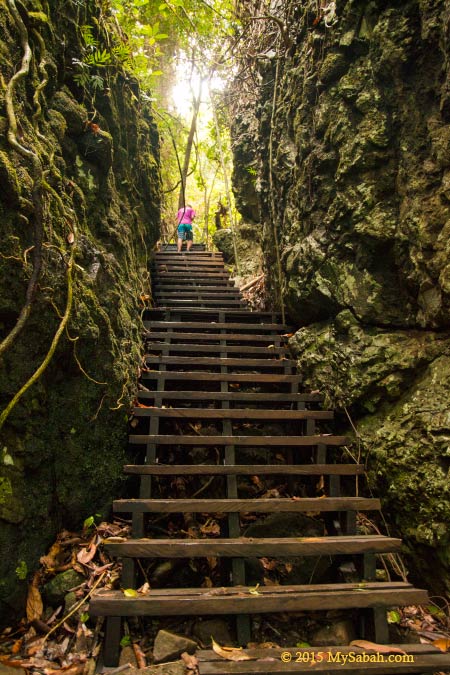
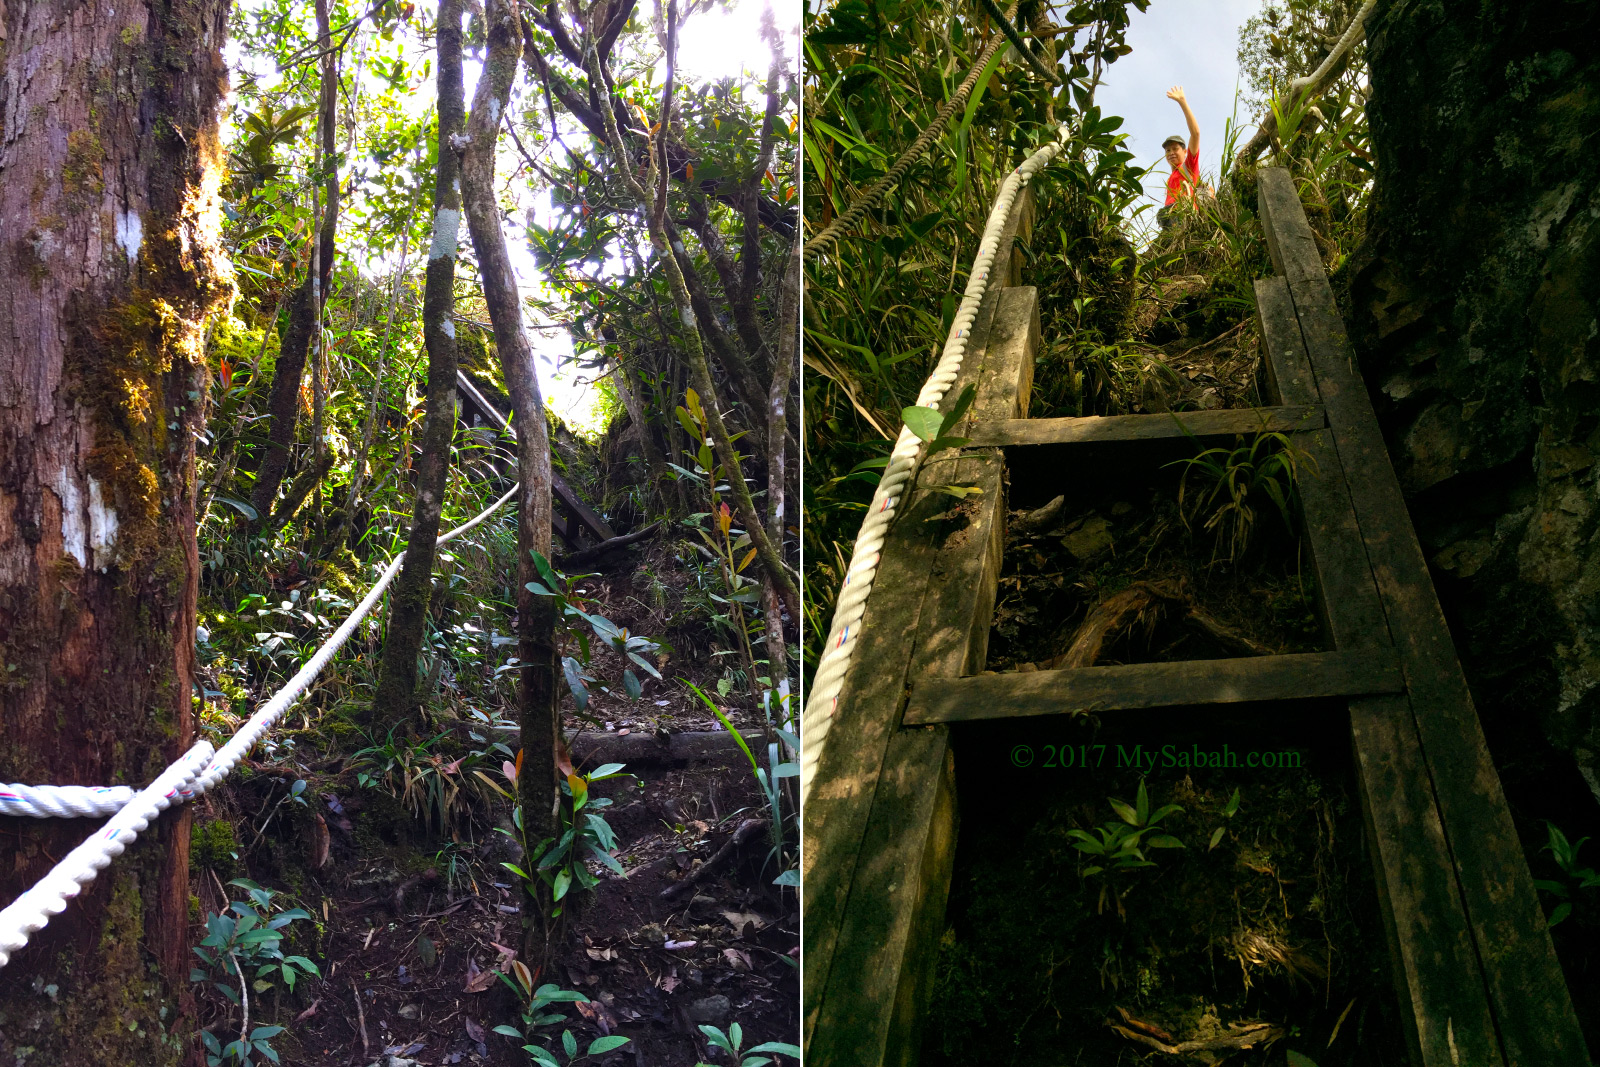
This section is the most difficult part of the climb. Minimal rope support is available along the steep or narrow trail.

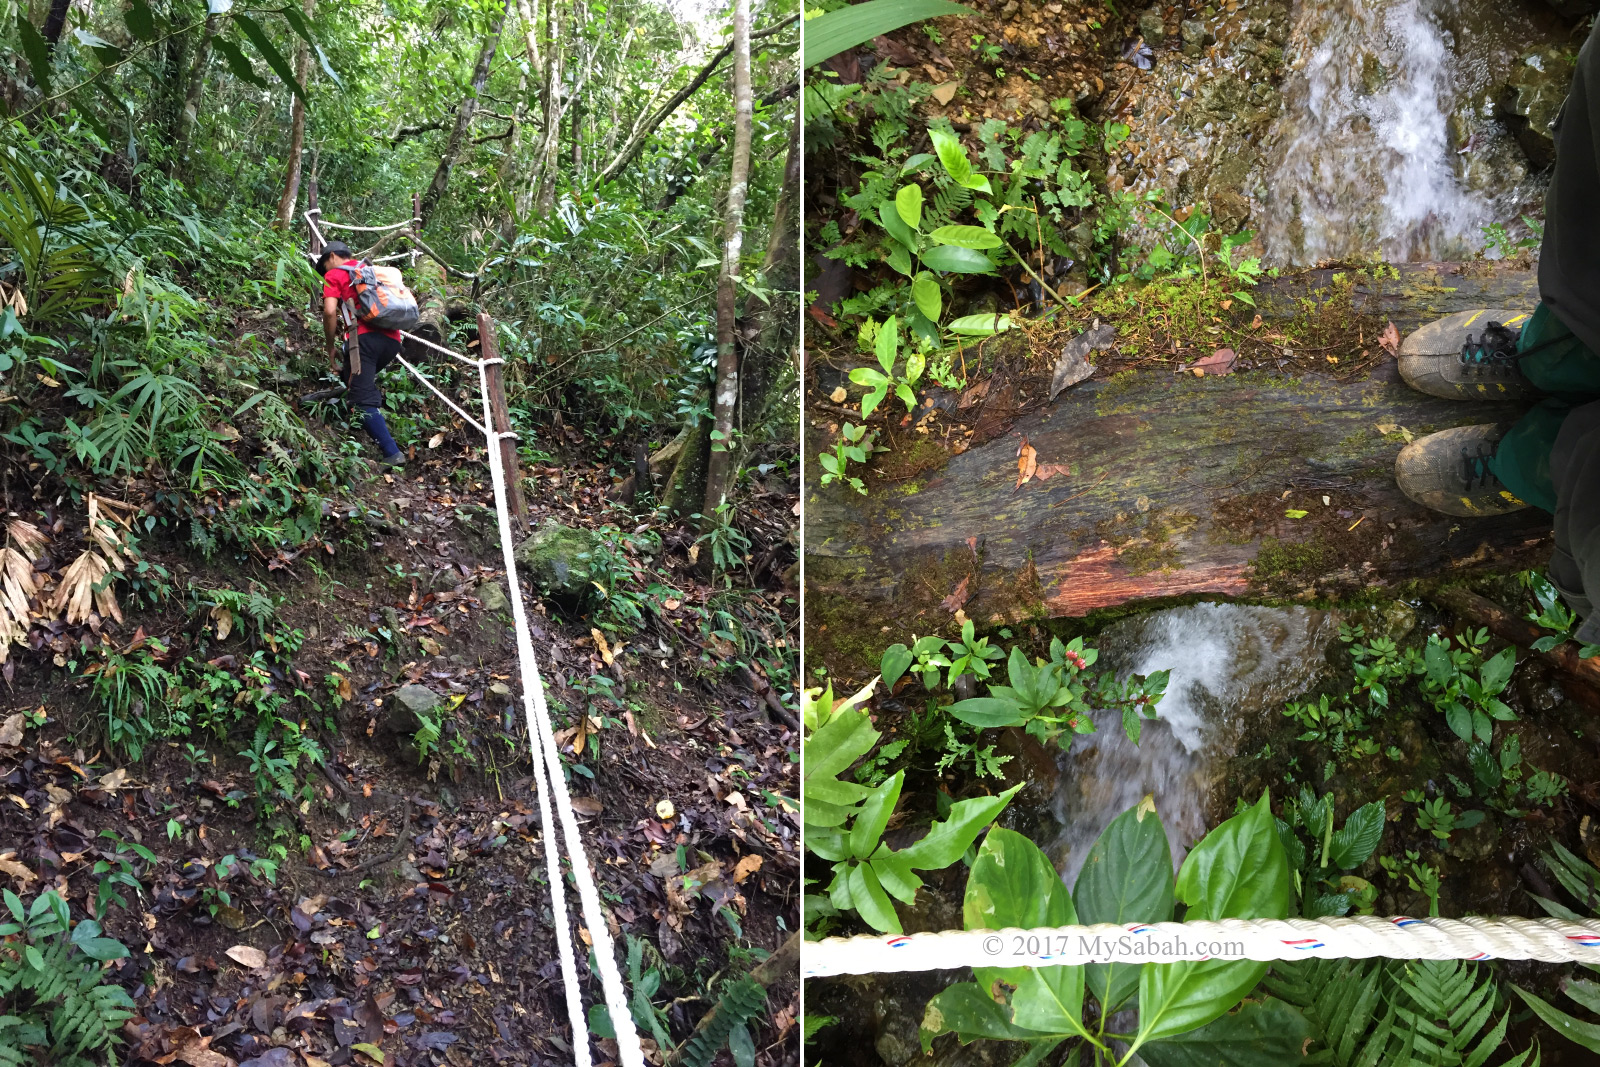
The hardest part of the climb begins

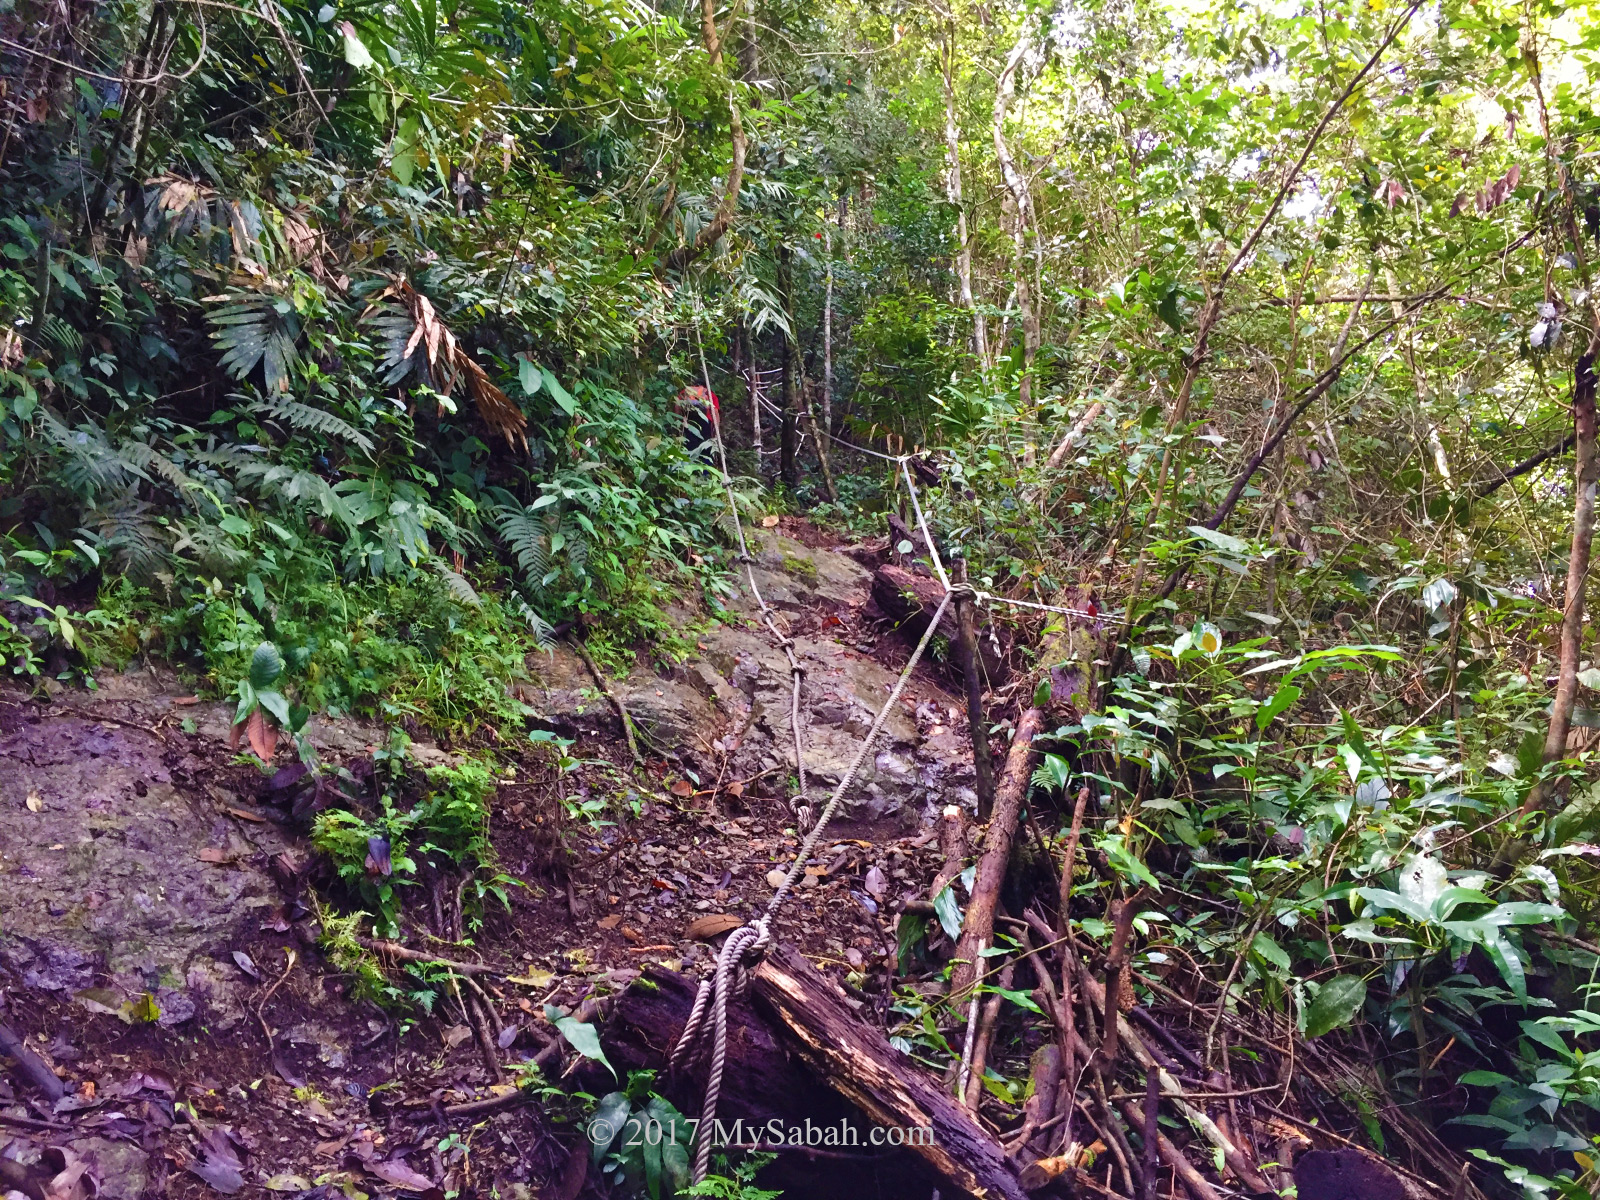
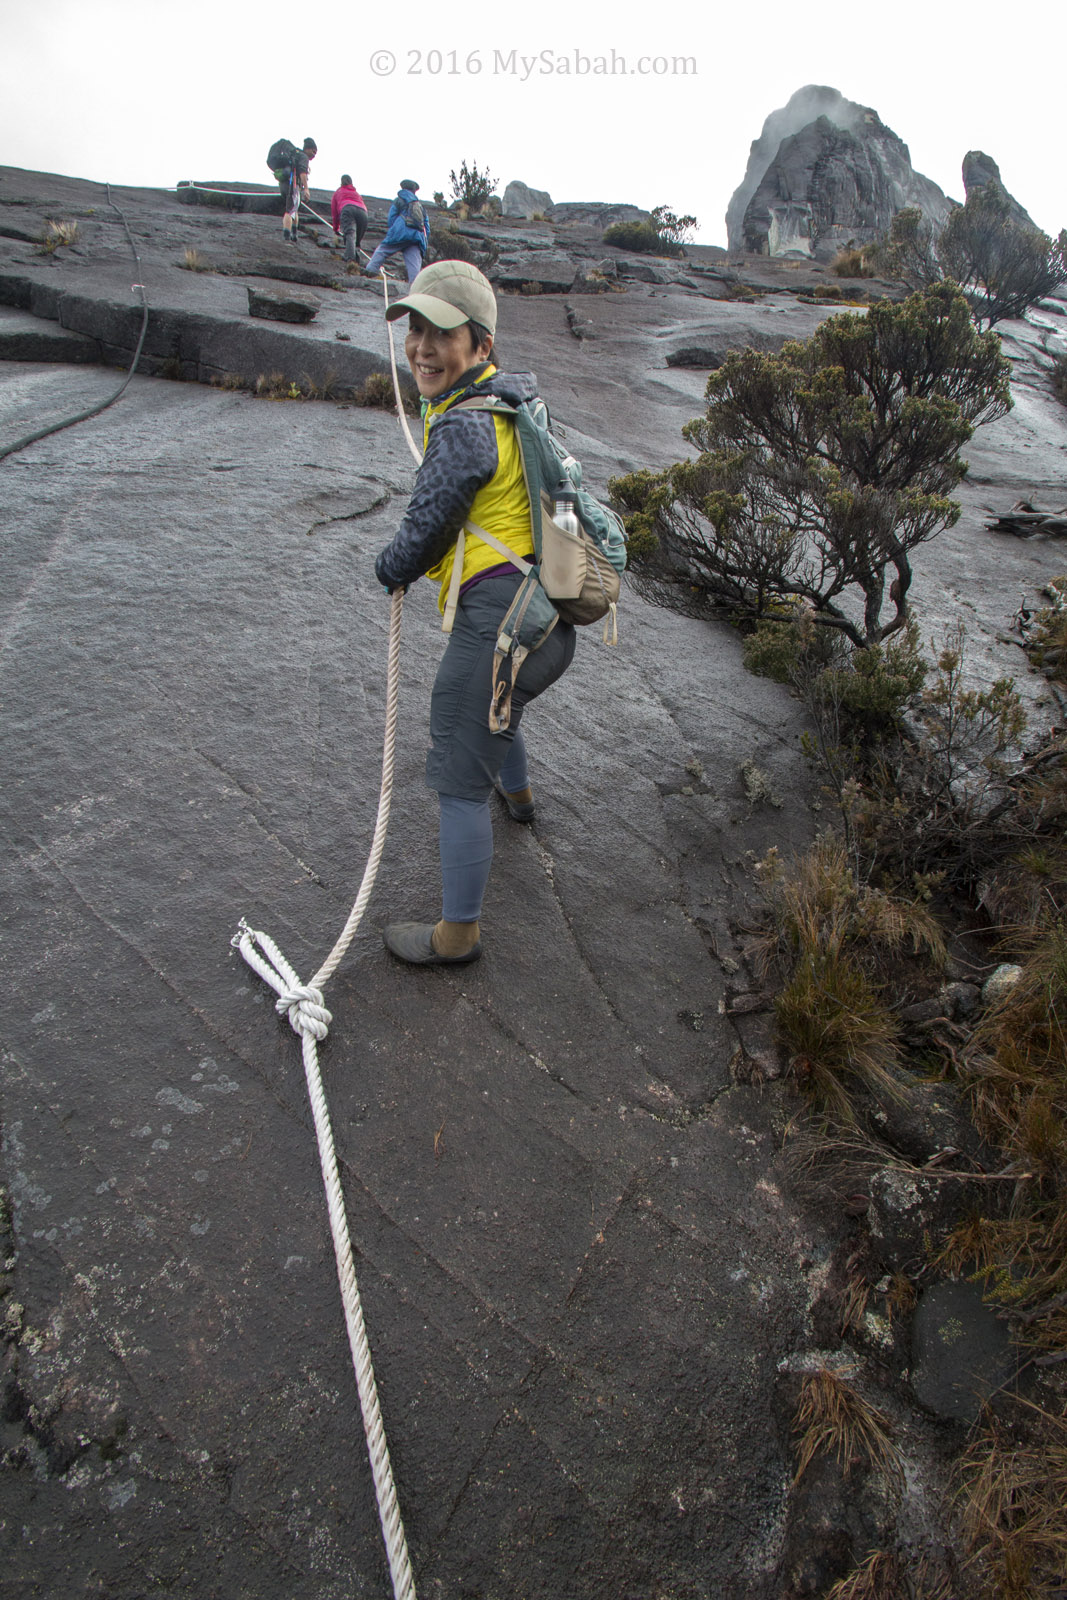
Summit trail with rope support

We started to see green moss, lichen and algae on the tree barks and ground, a characteristic of lower montane forest (cloud forest) in mountain region.

Gazebo No.6?Summit

We reached the summit at 1:15pm!
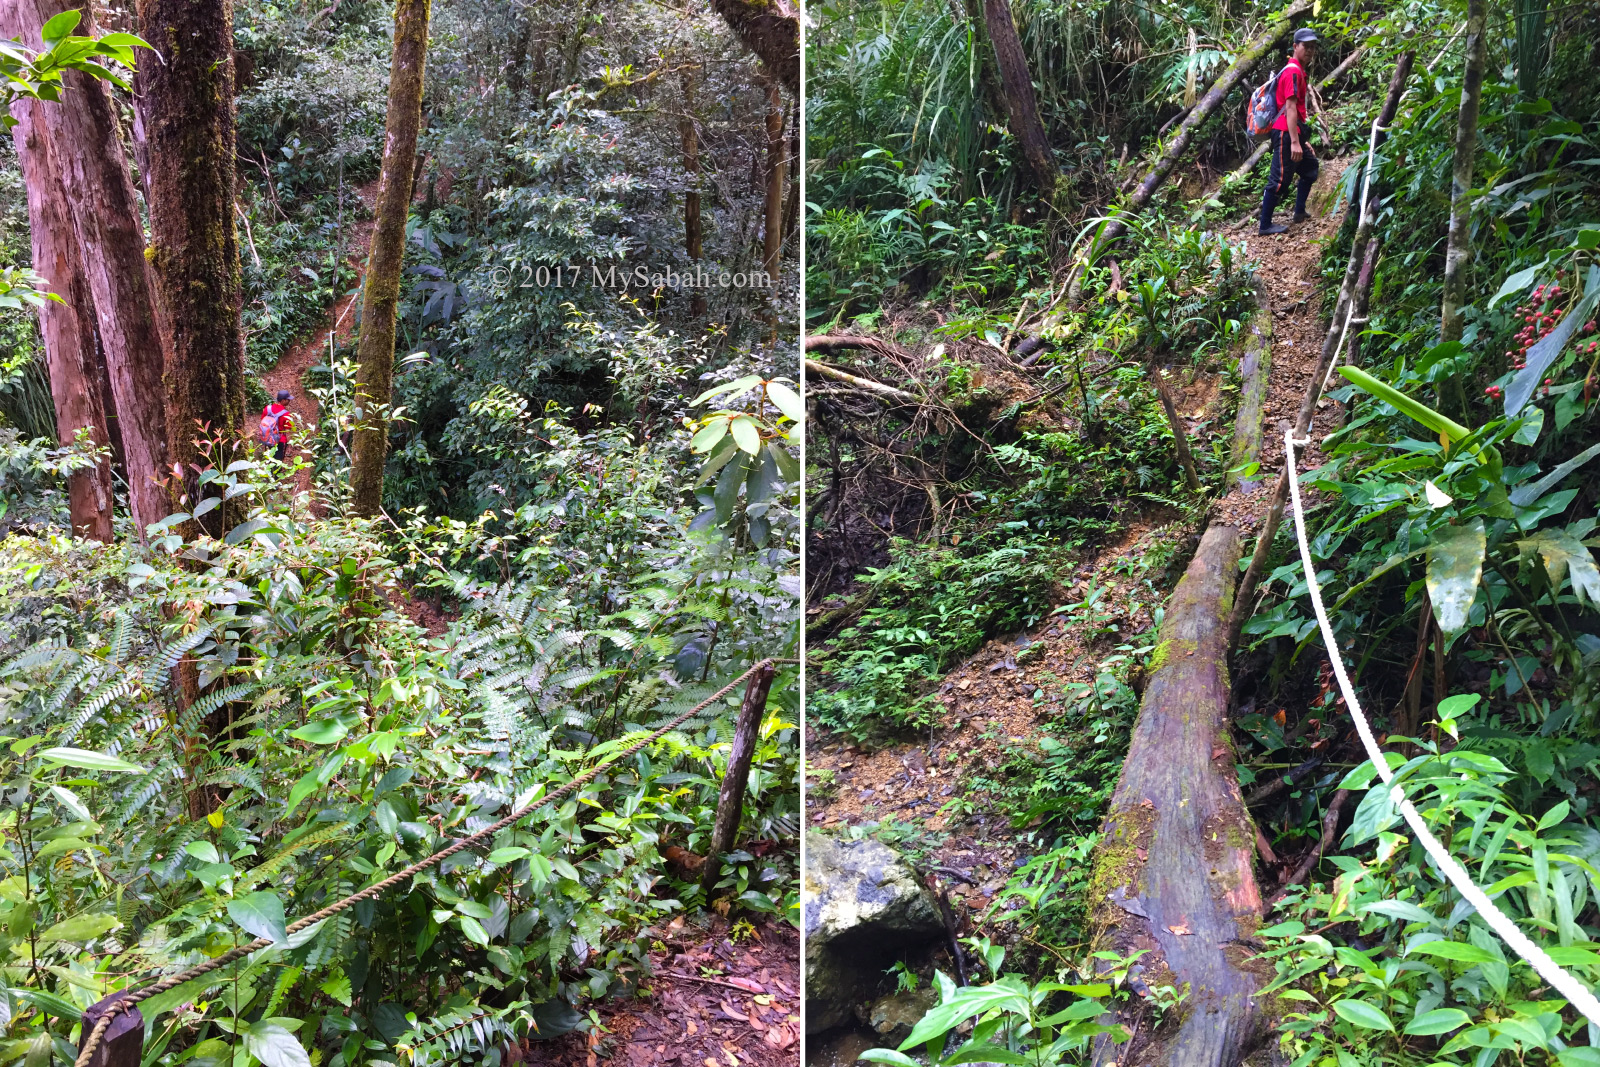
Steep gravel trail

The last 720 Meters to the summit is mainly steep trail with loose soil and gravel, and flanked by dense undergrowth.

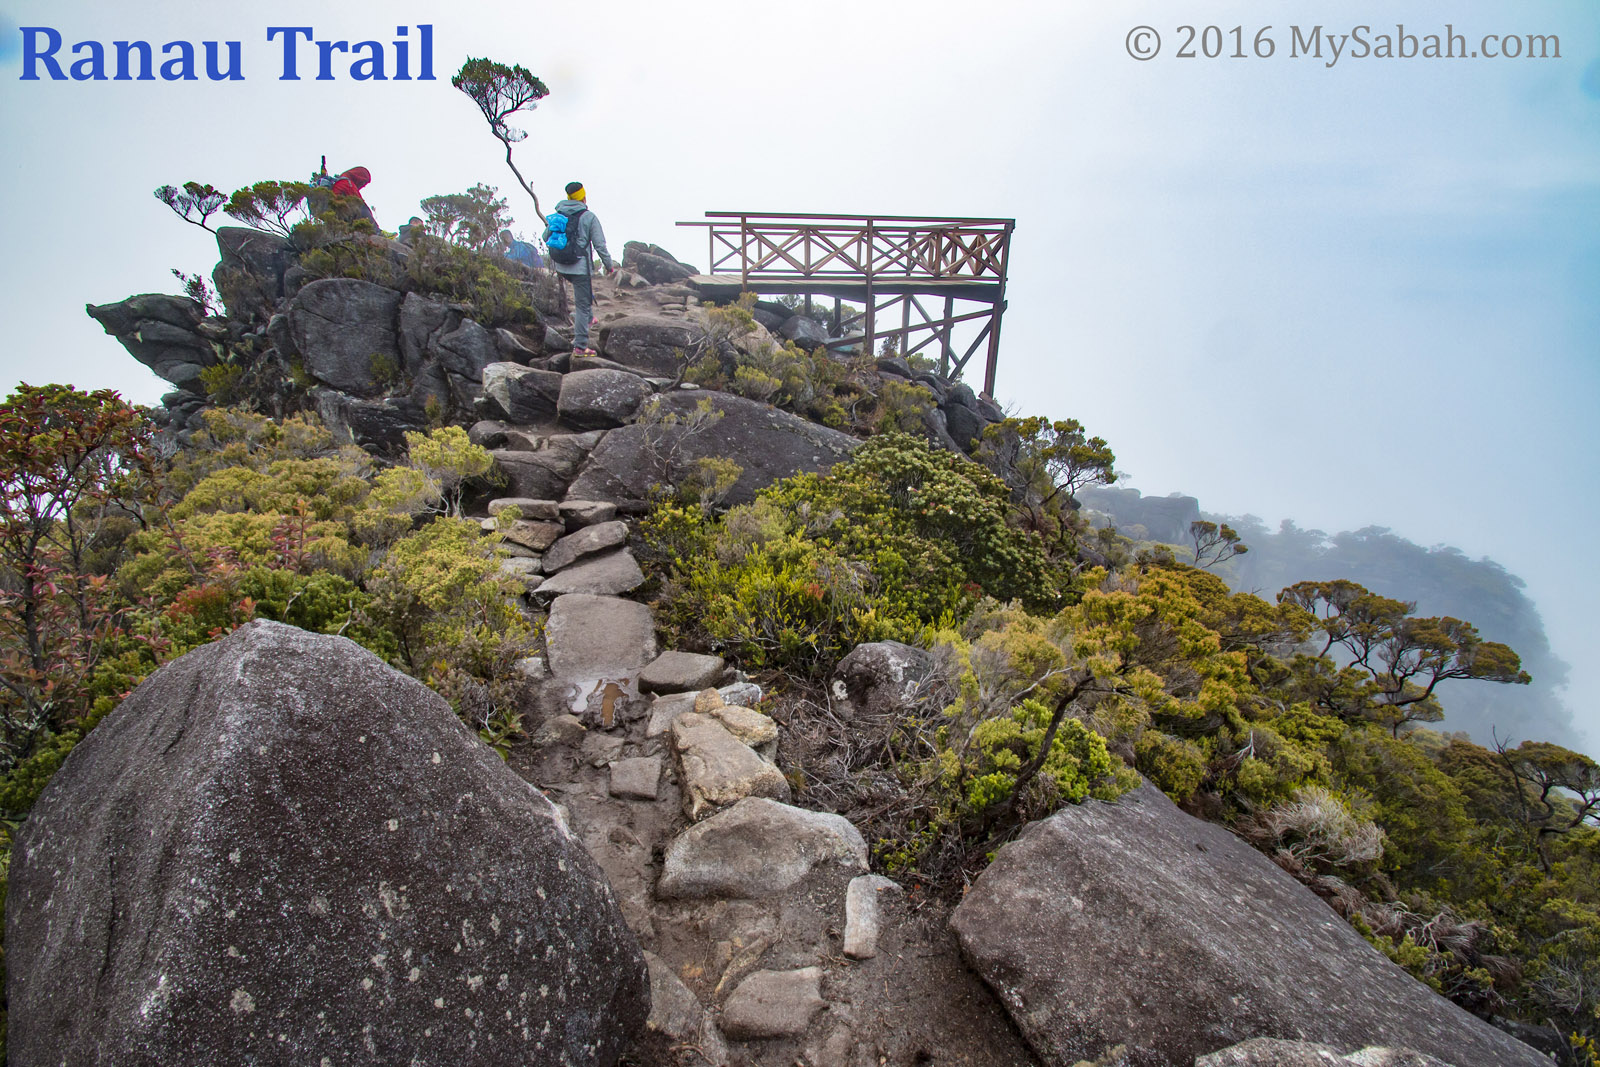
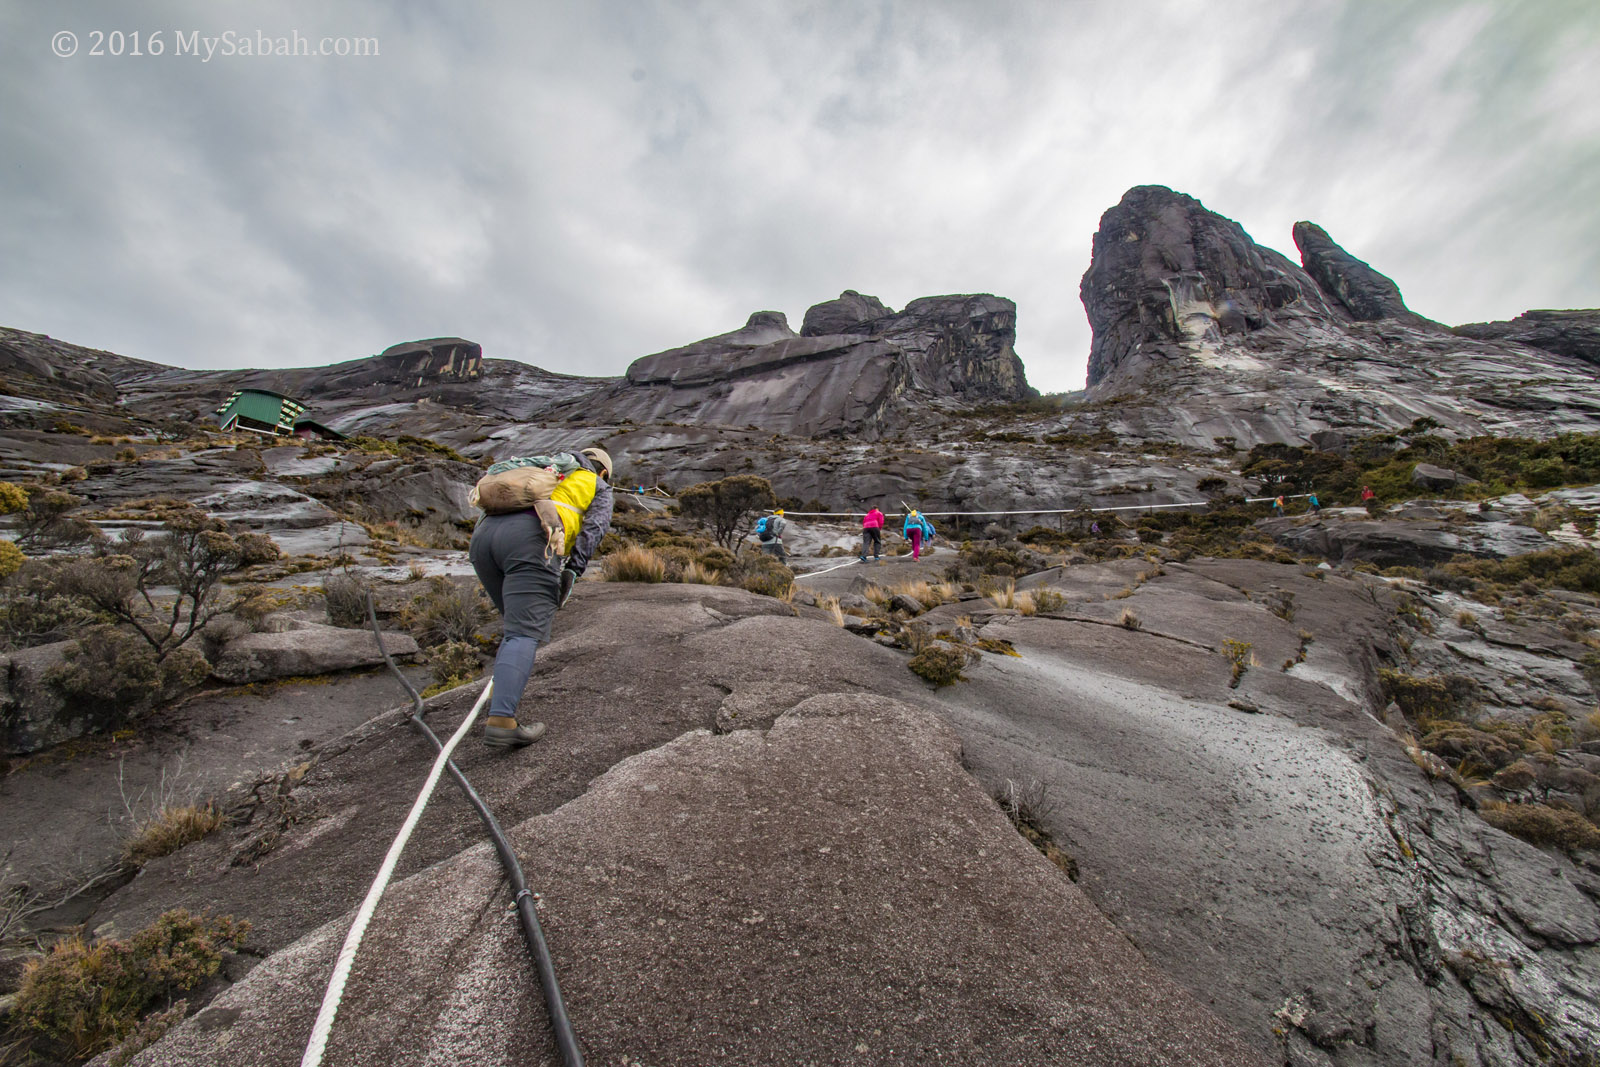
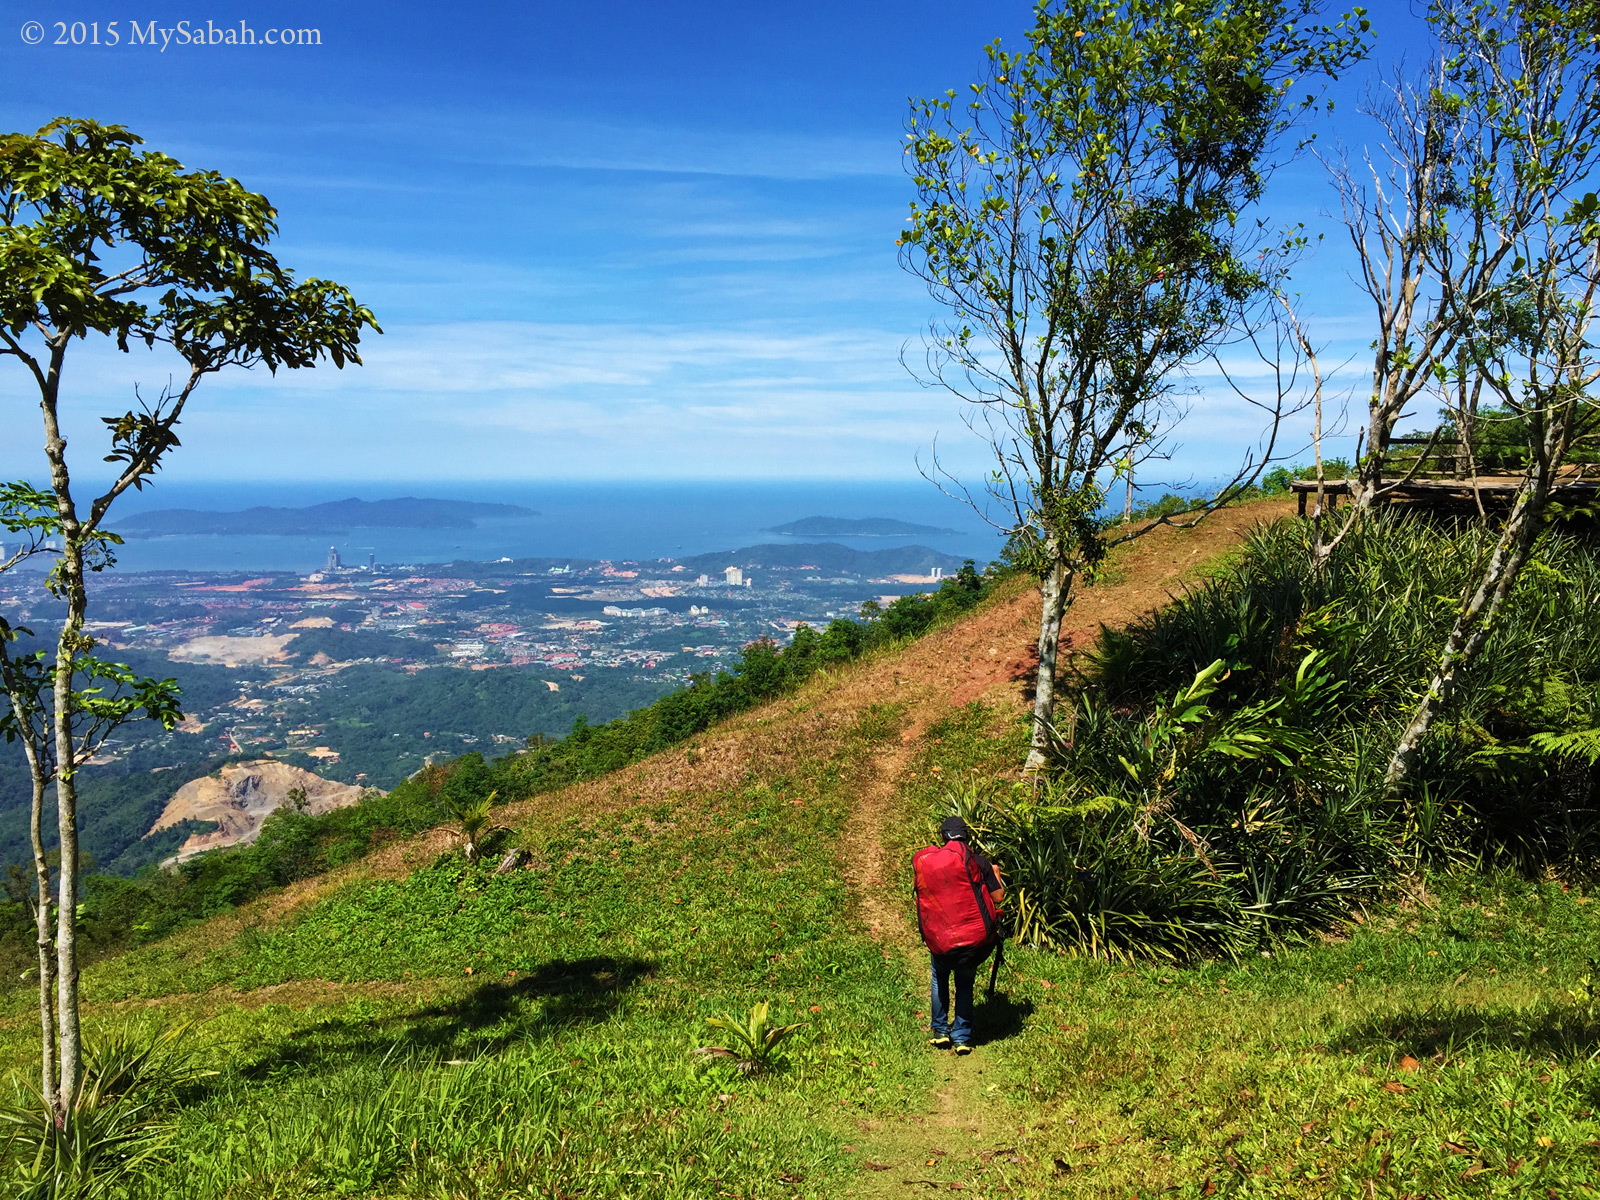
View after the last gazebo

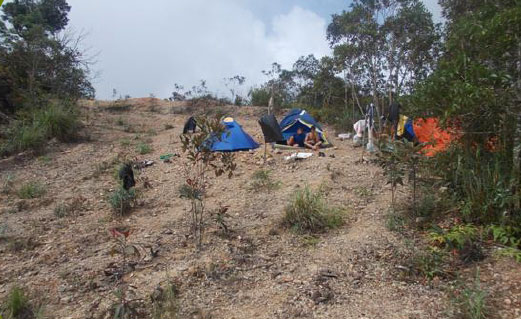
There is a camping ground about 200 Meters before the summit. Some climbers camped there so they could catch the sunrise next morning.

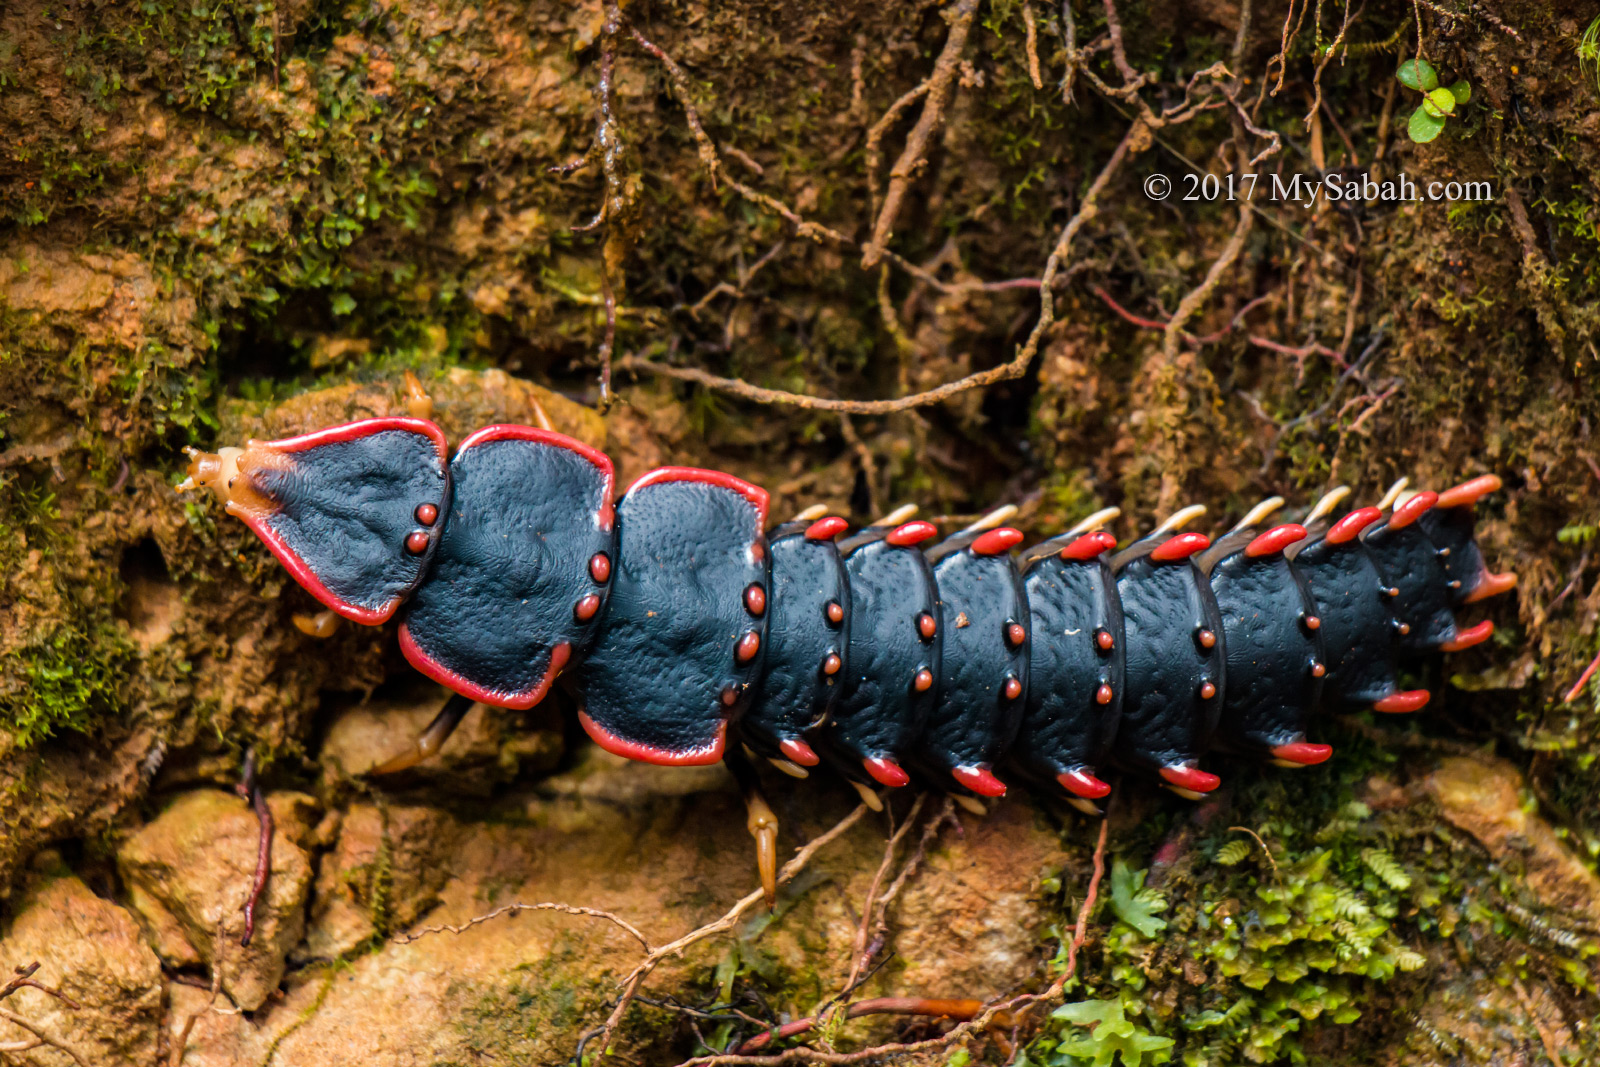
Trilobite Beetle (family Lycidae) feeds on rotten wood. Its bright color warns predators of its distastefulness.
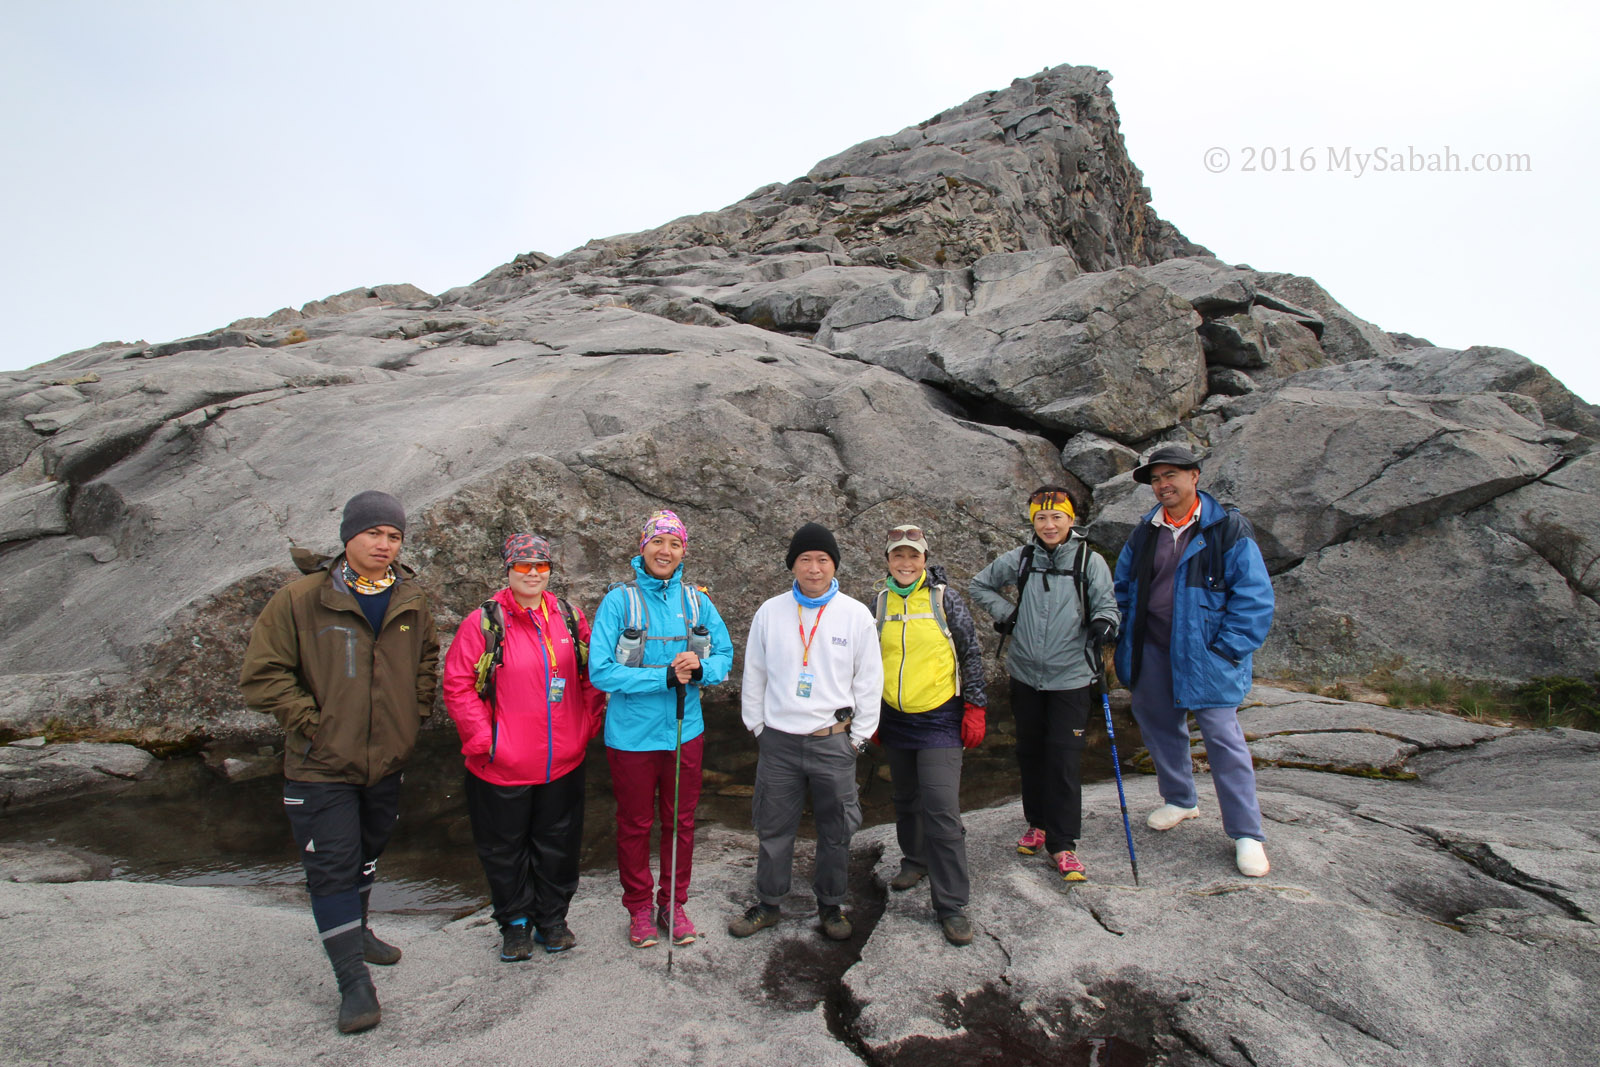
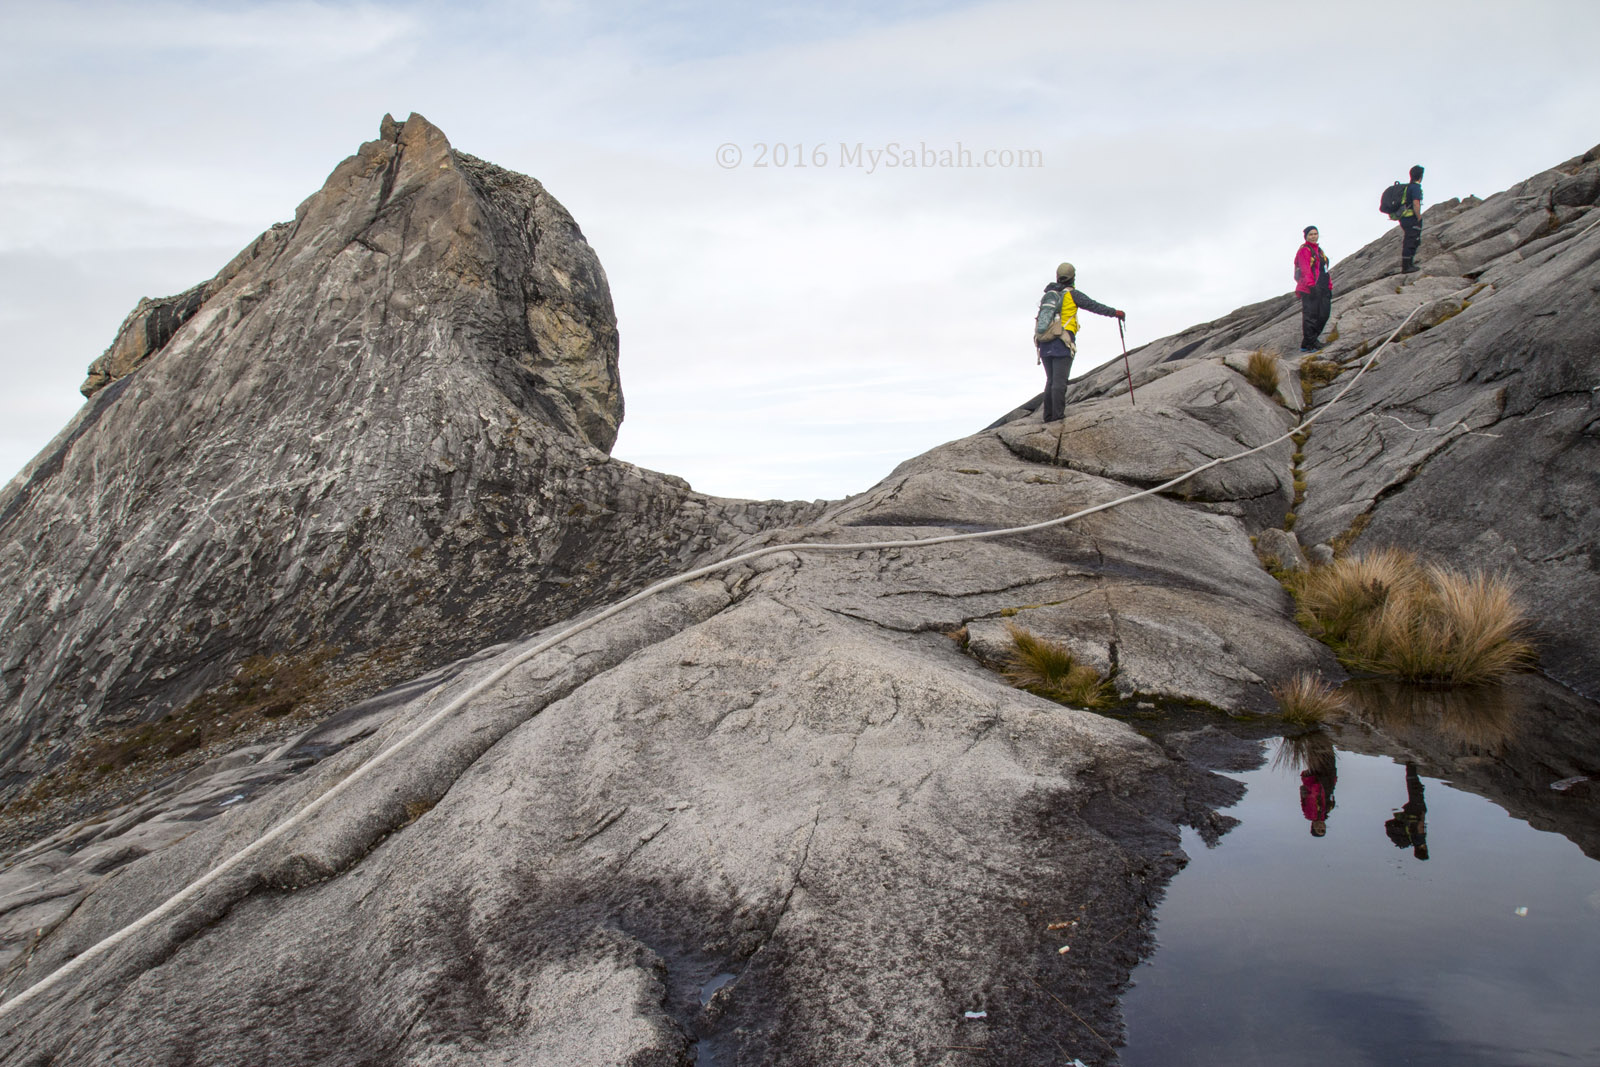
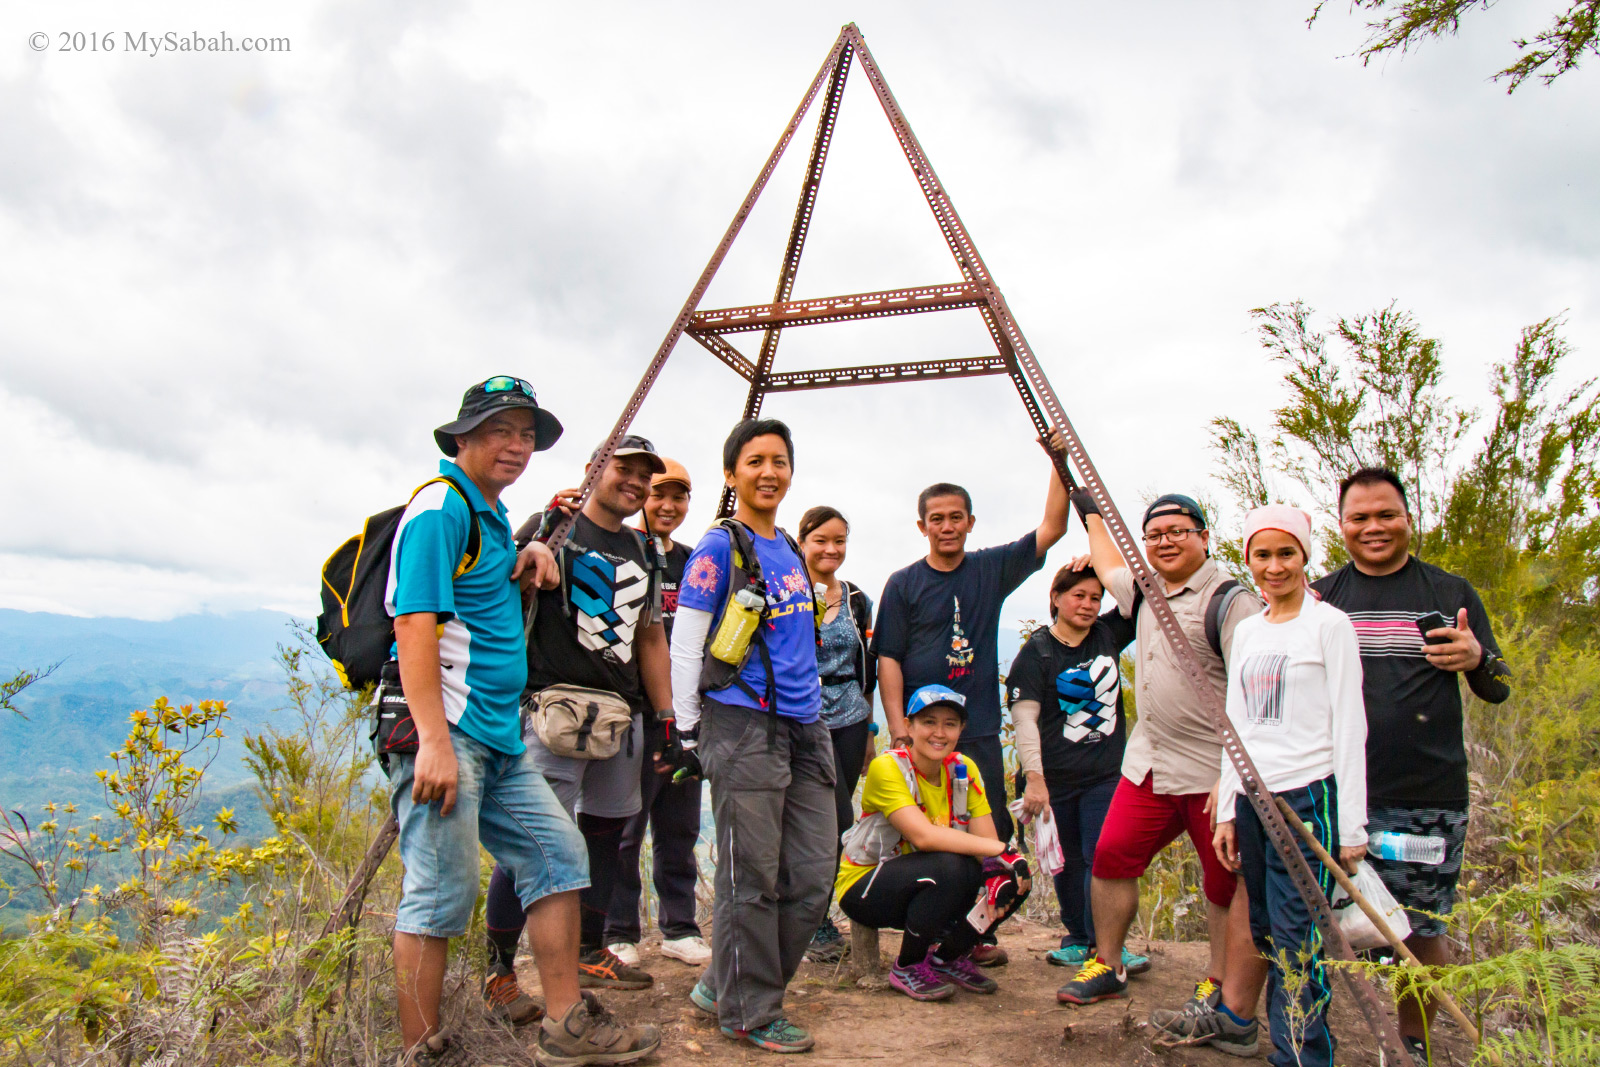
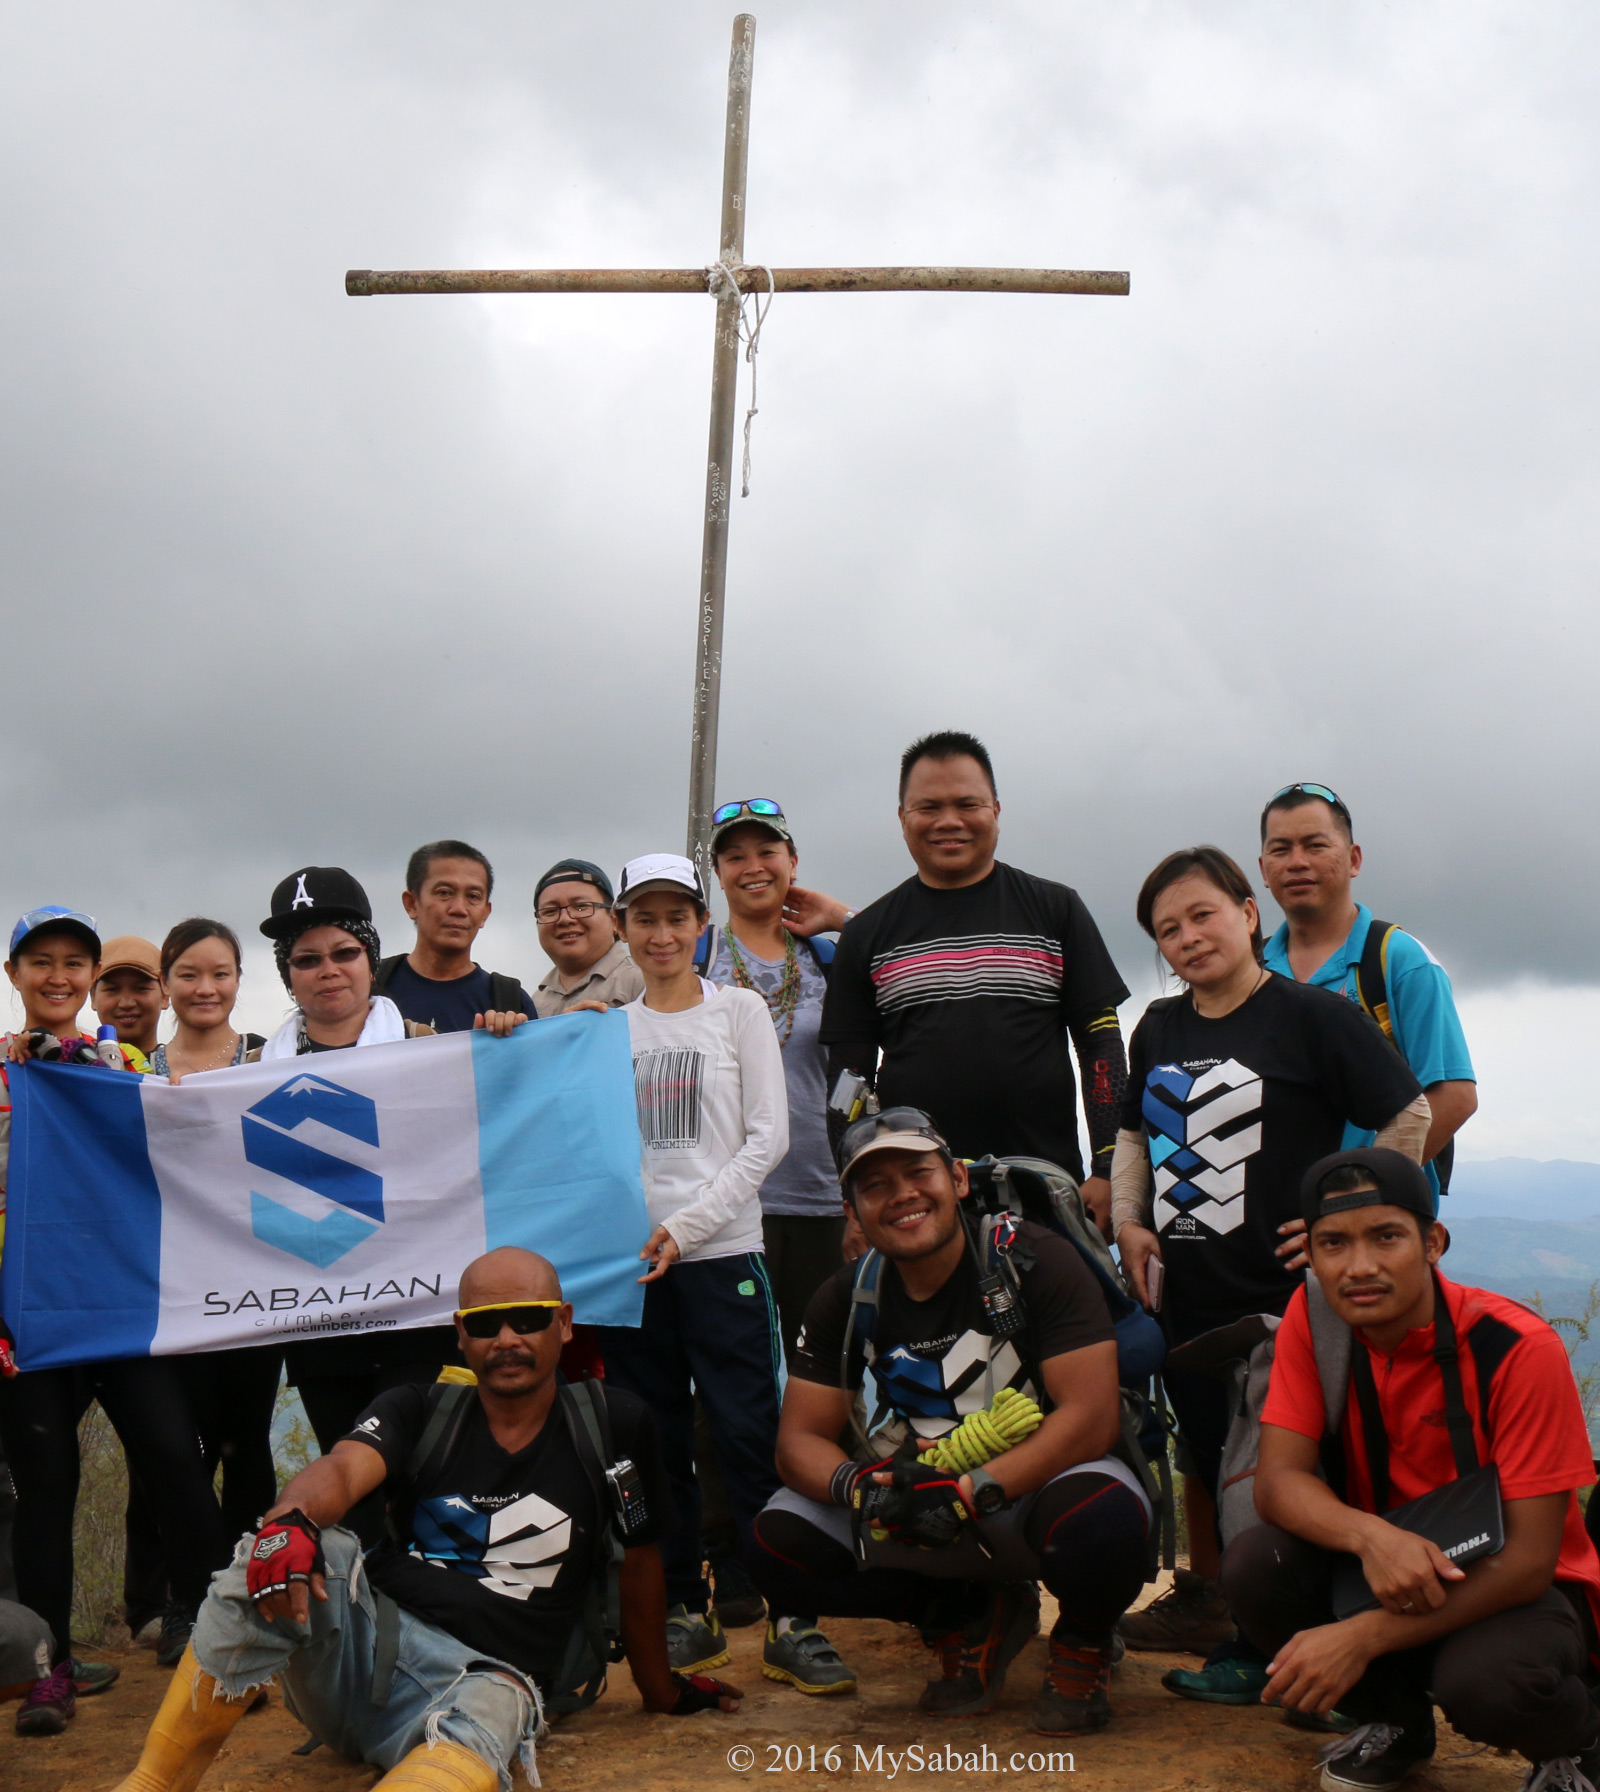
The Summit

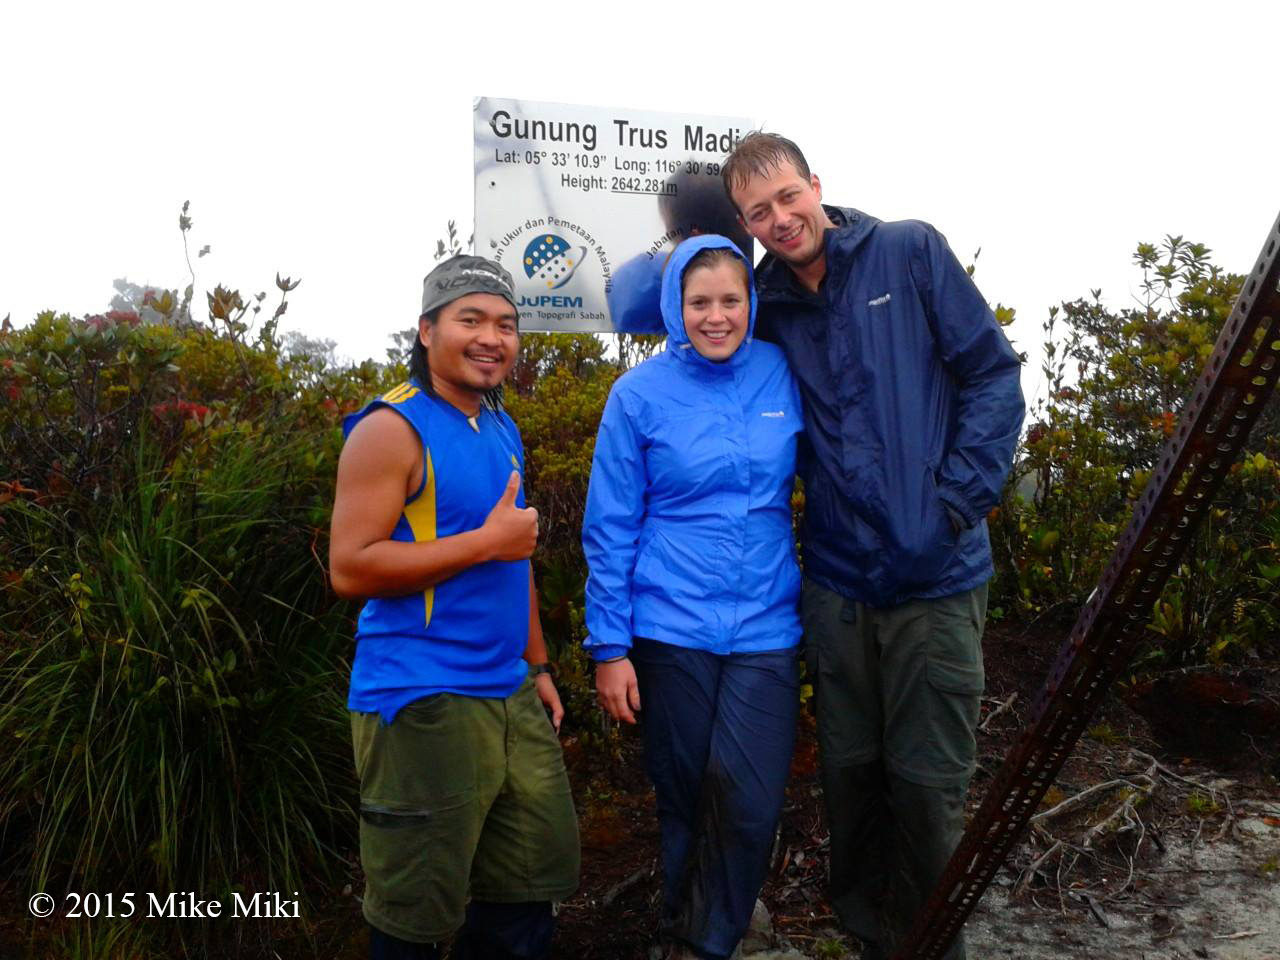
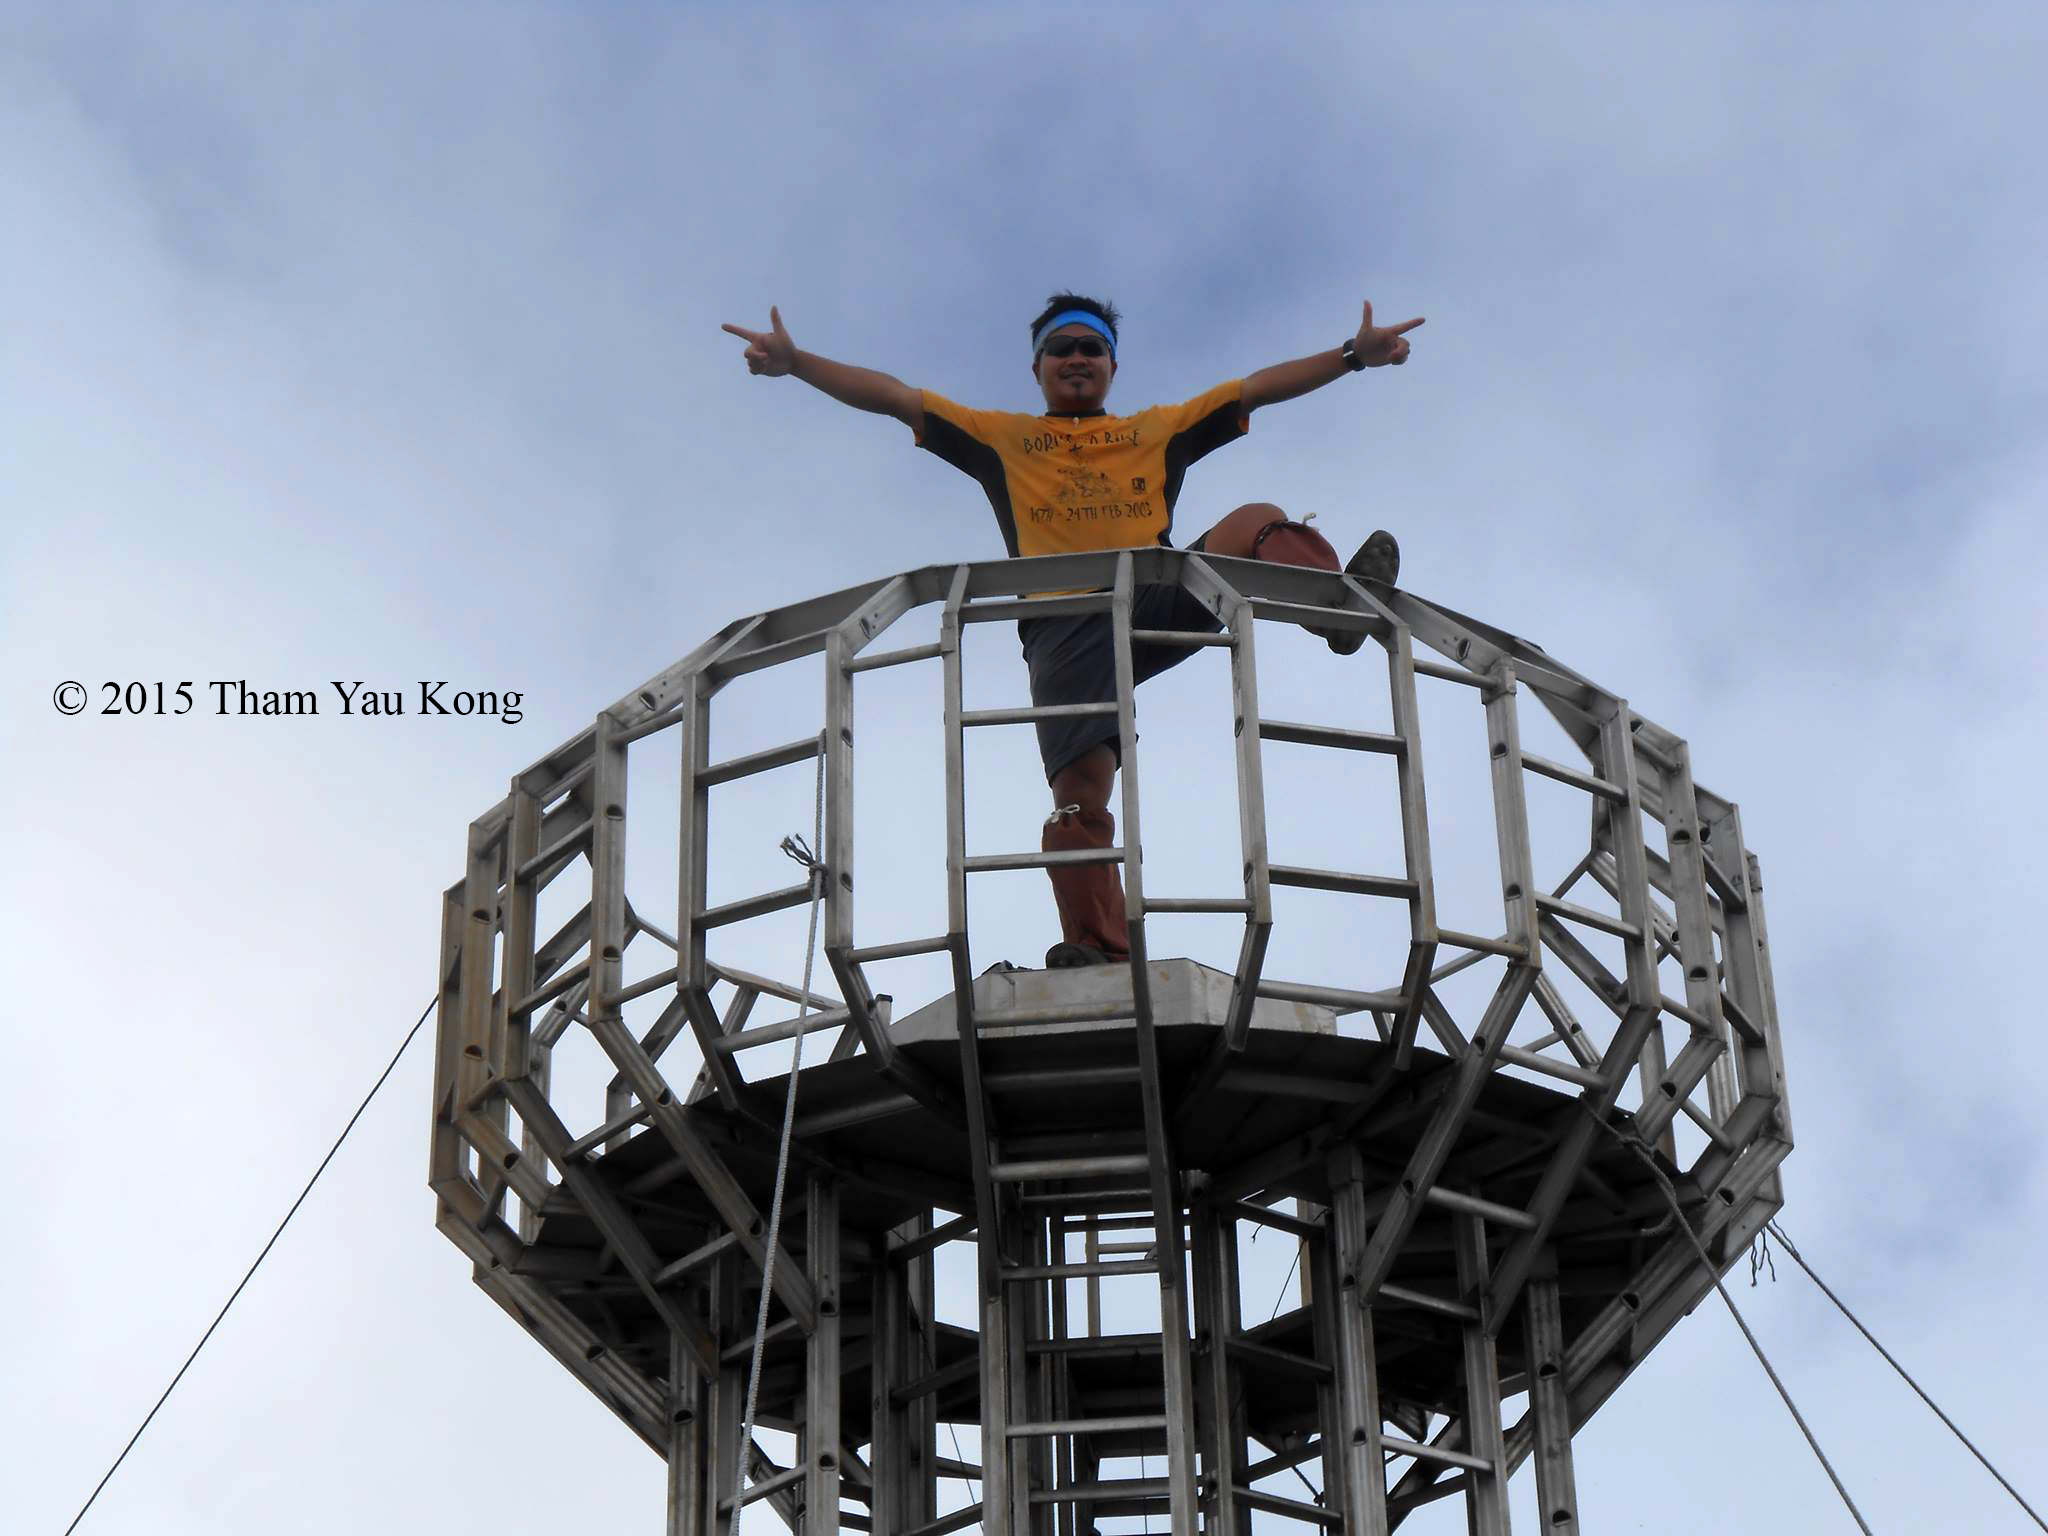
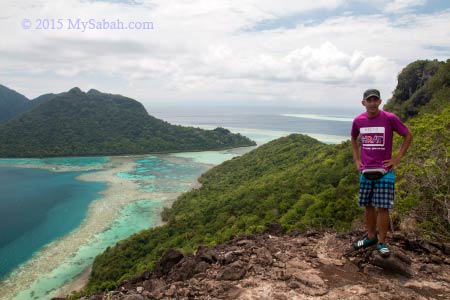
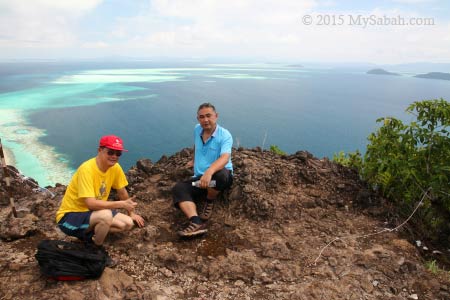
Finally we were standing on the peak about 1,603.57 Meters (5,261 feet) above sea level.

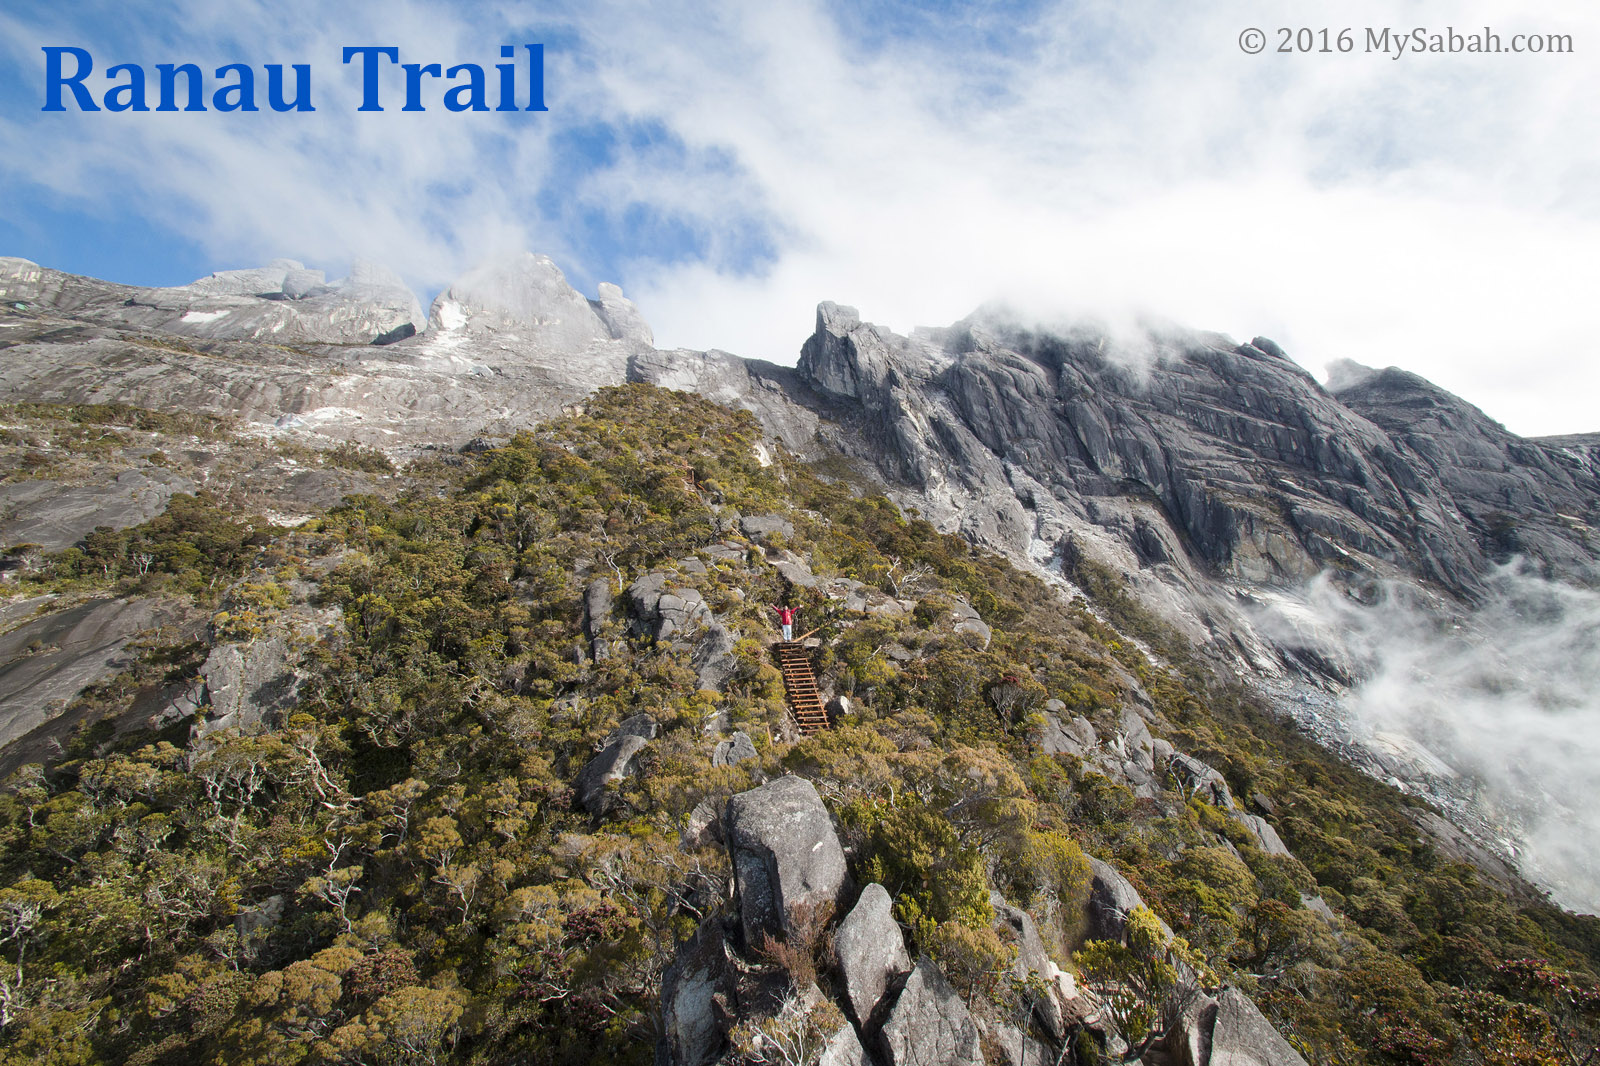
Approaching the summit

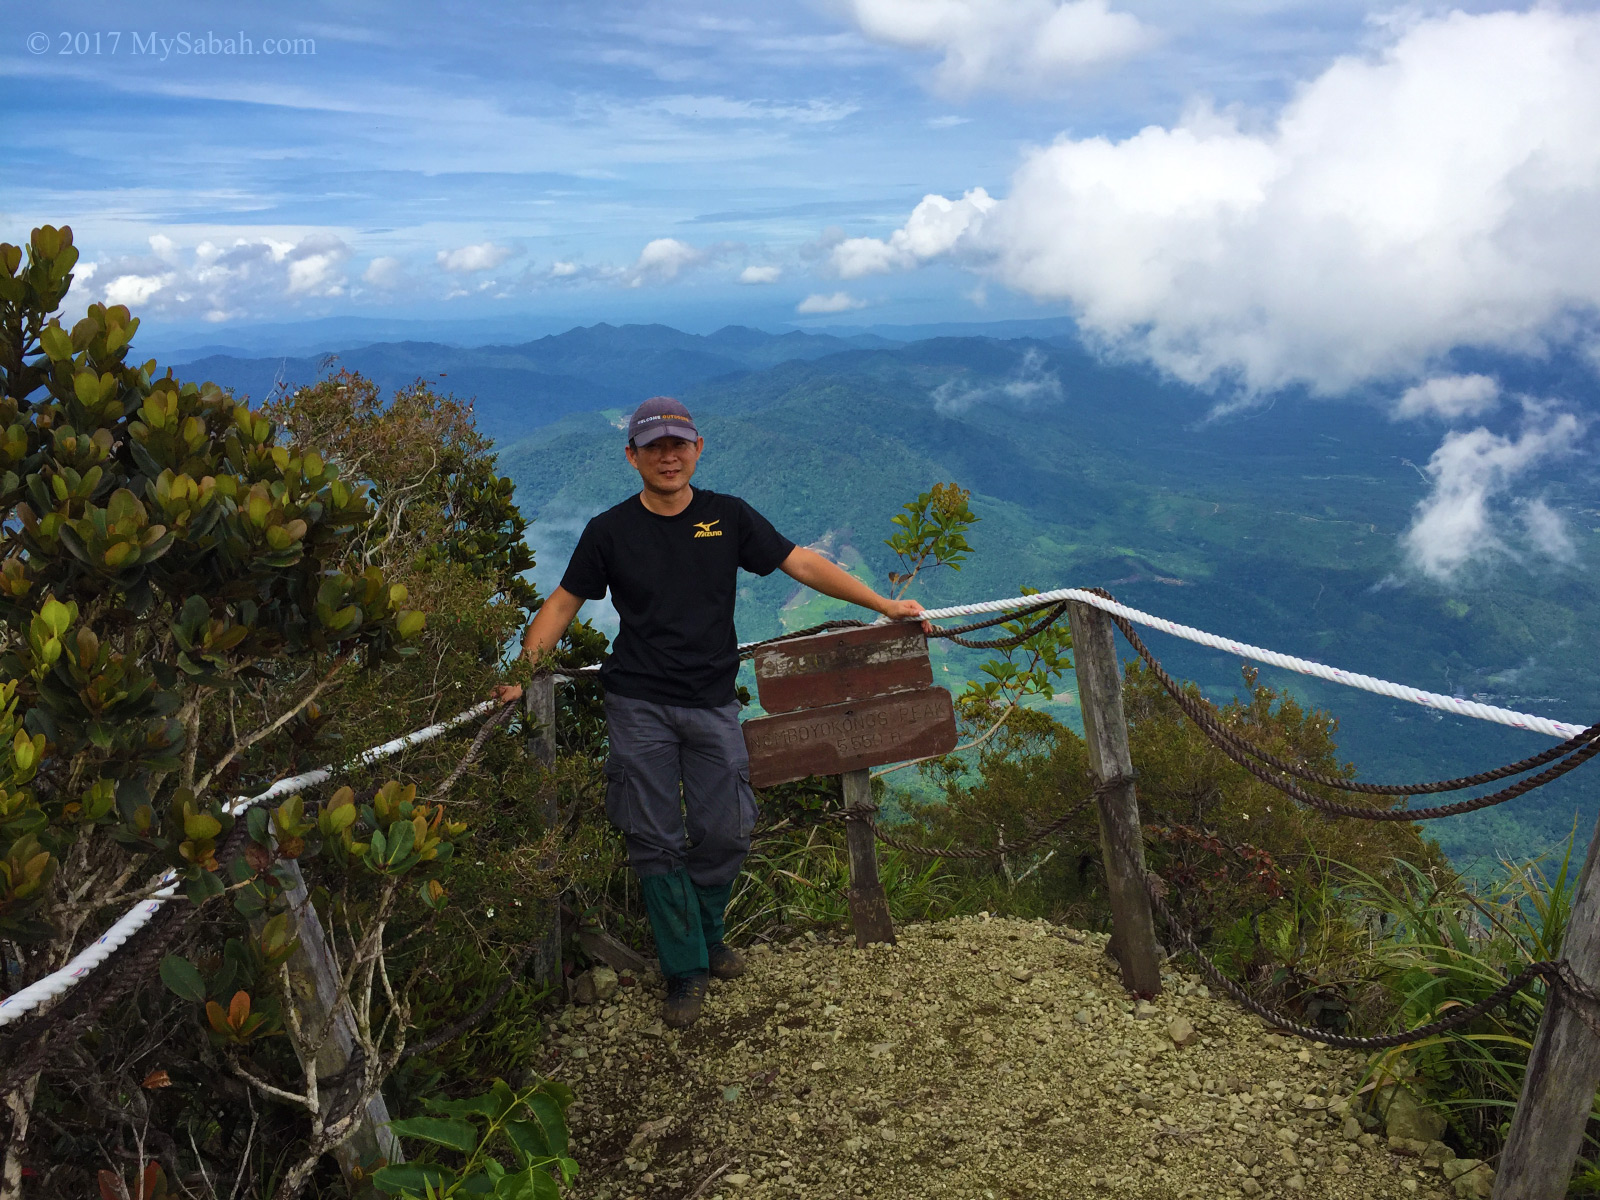
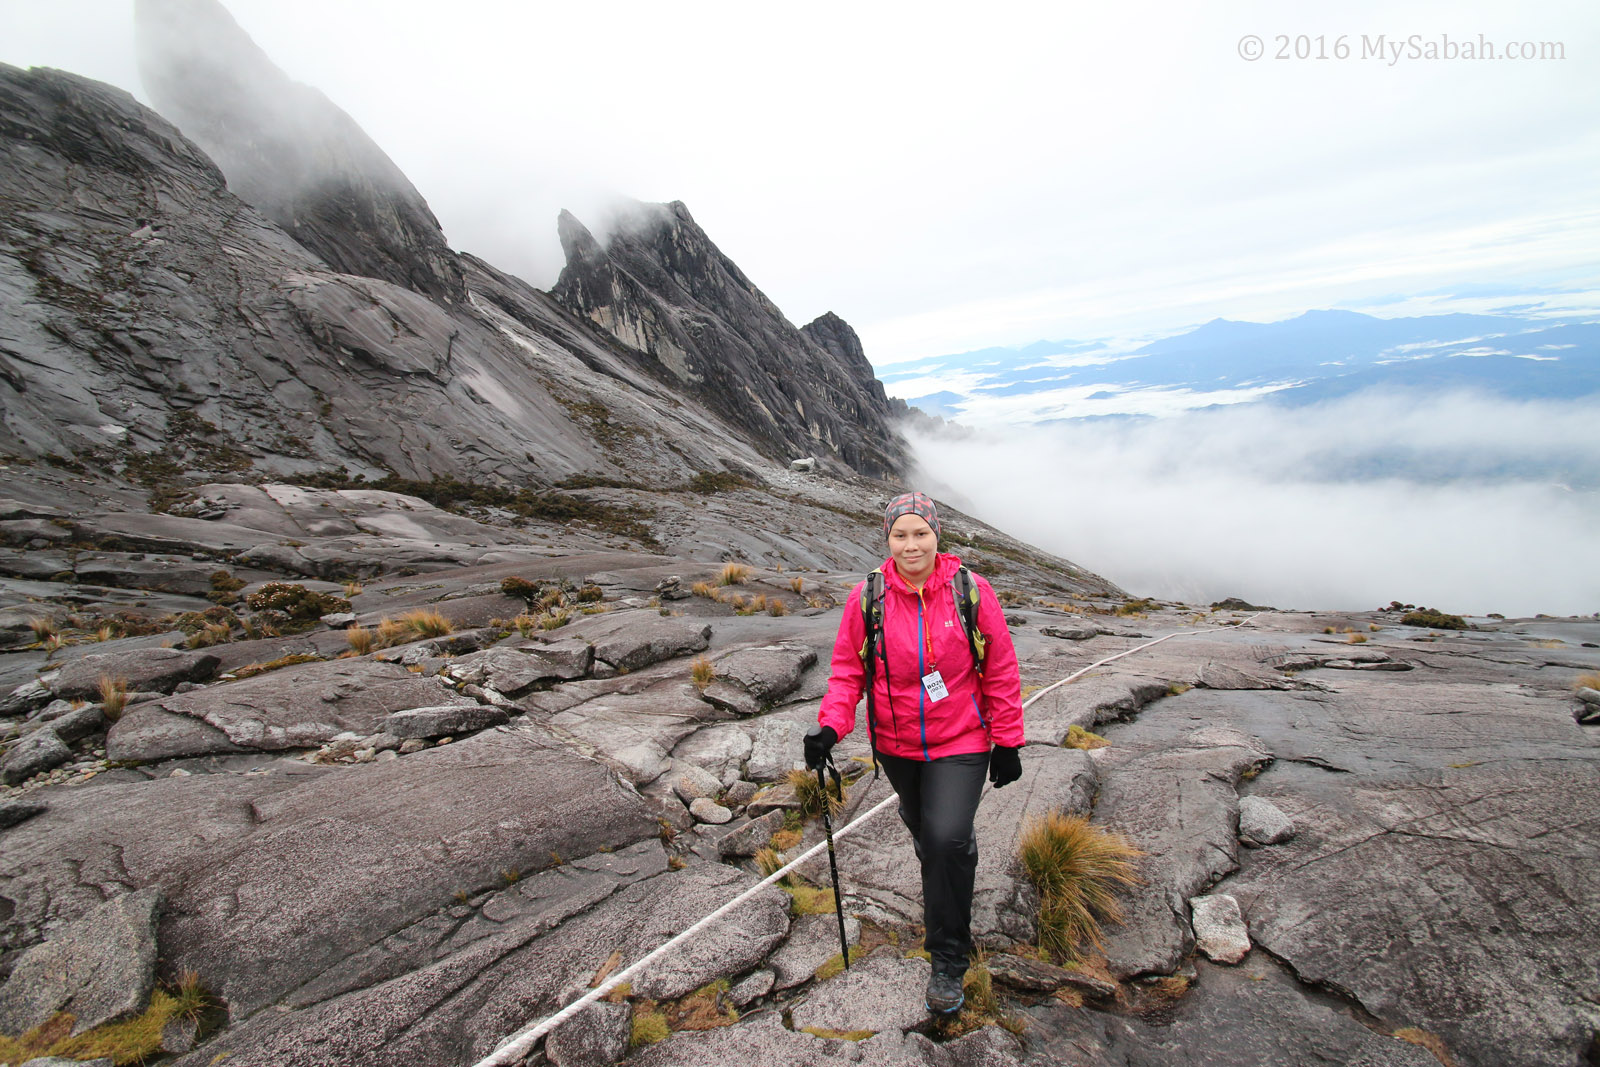
It’s me on the summit of Mount Nombuyukong

It was windy and cooling up there, with dense cloud passing by the peak swiftly.

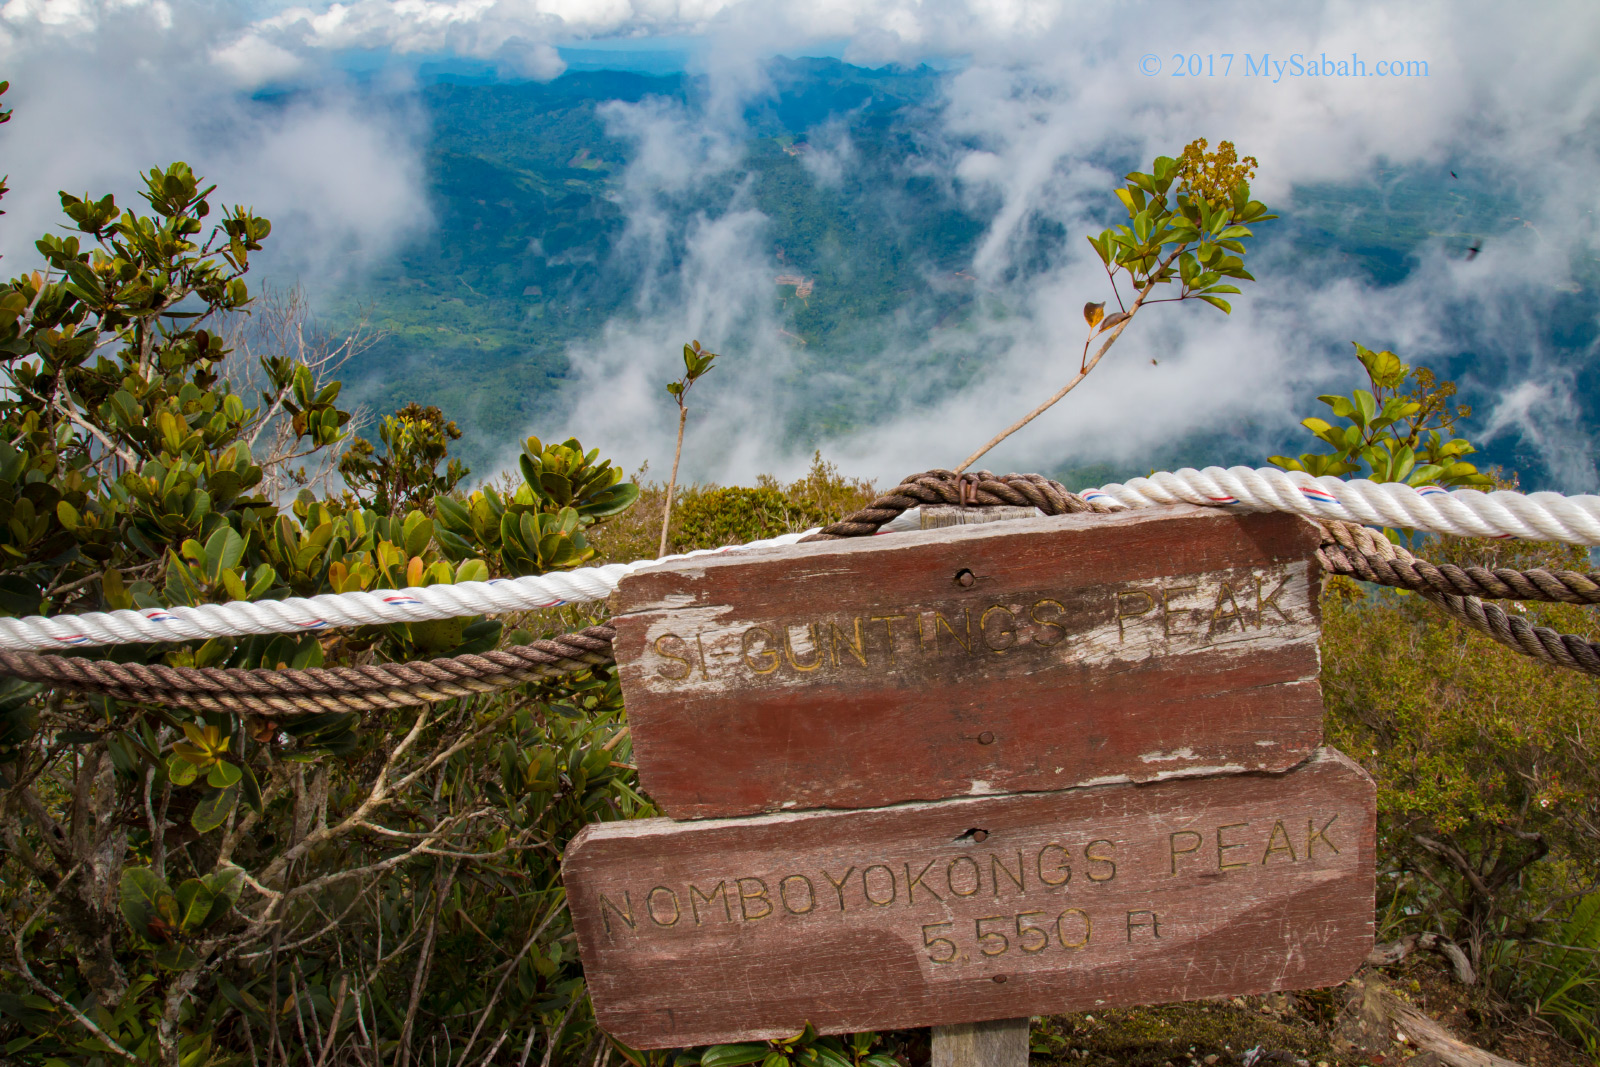
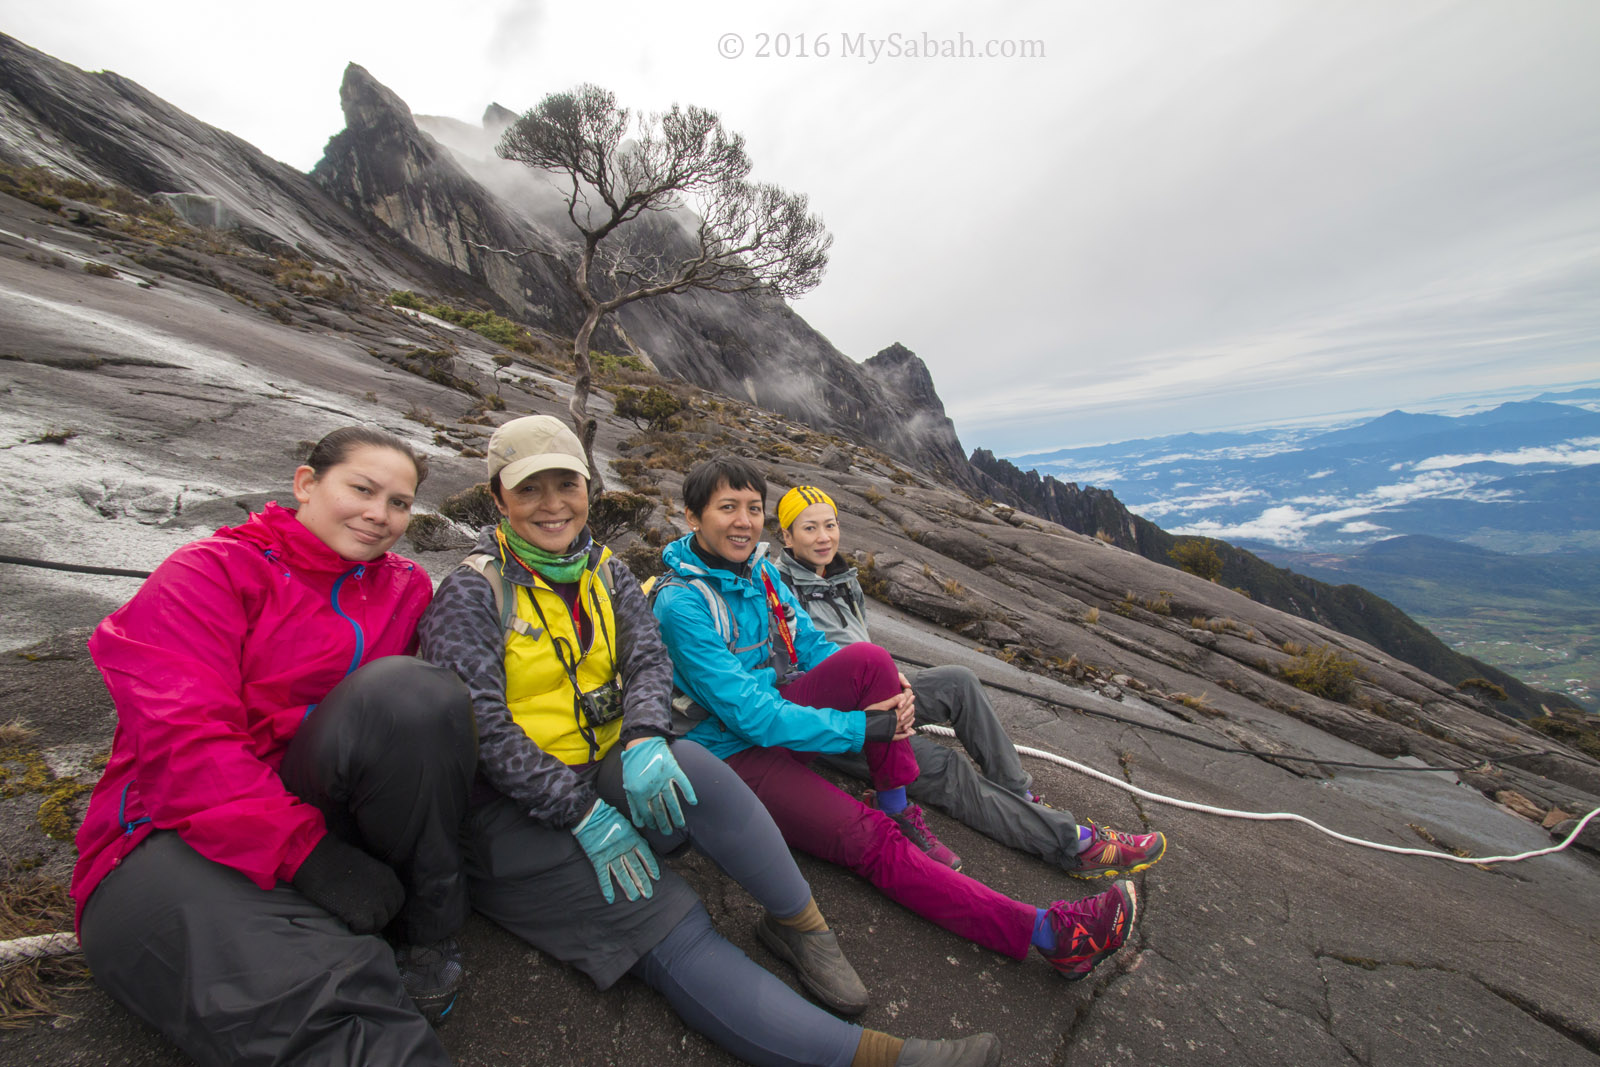
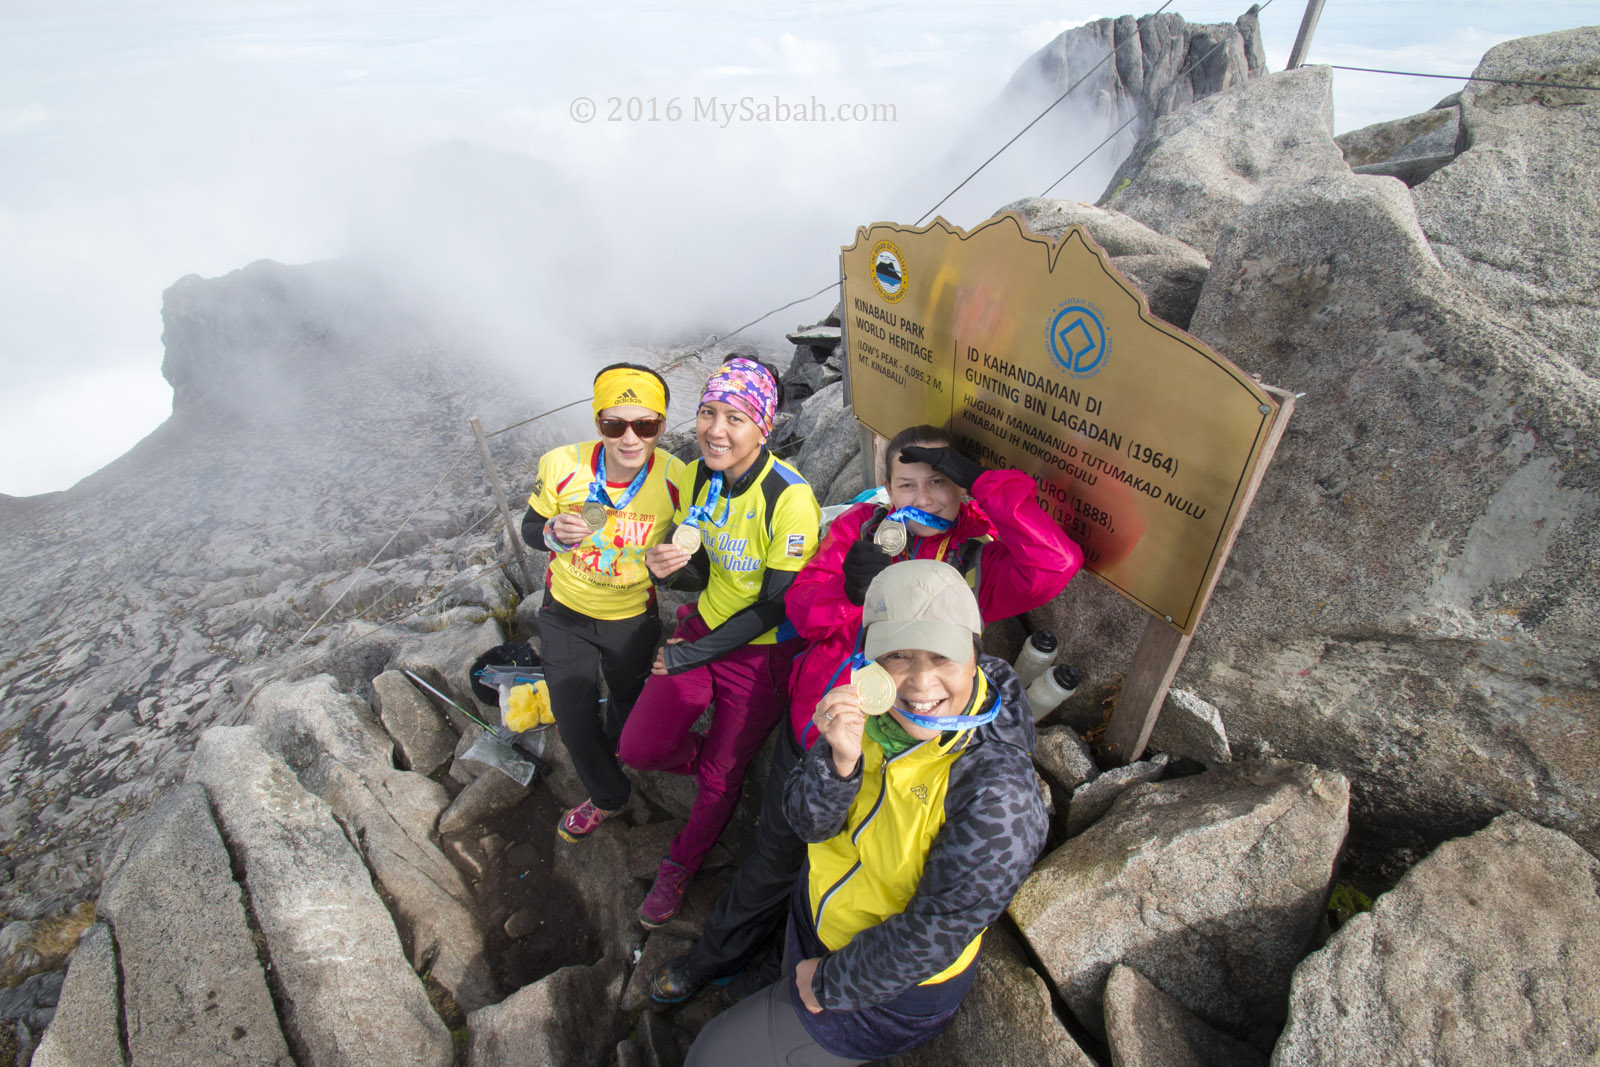
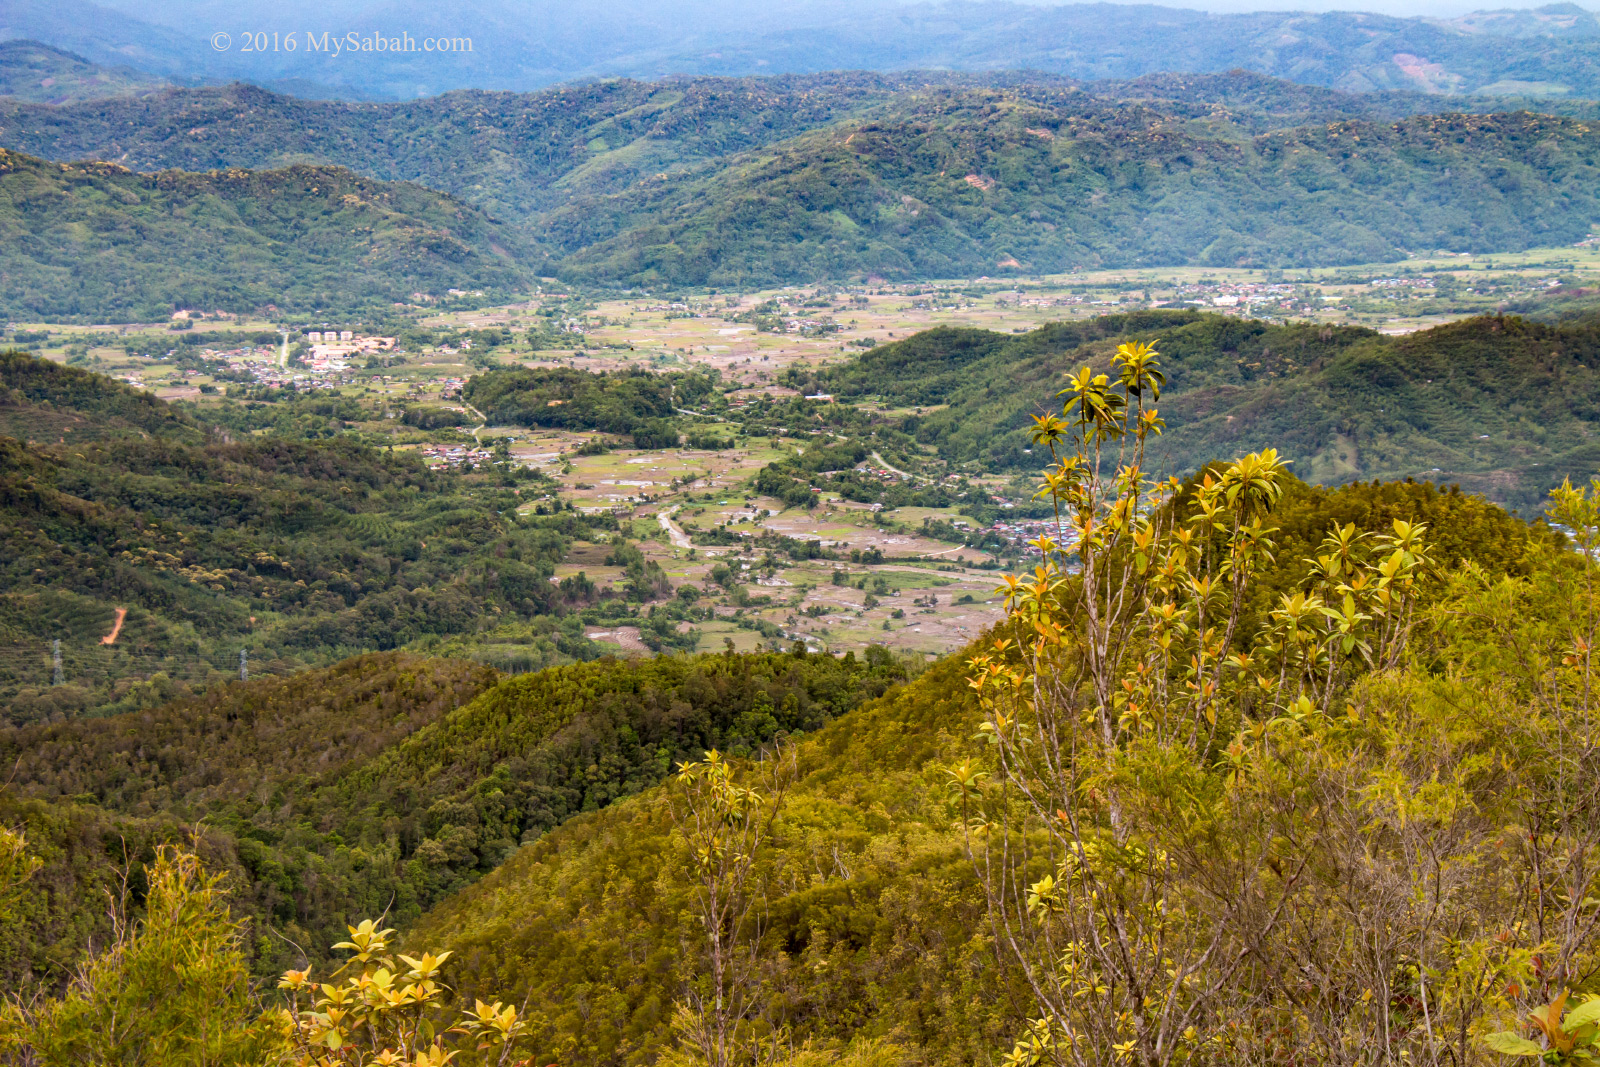
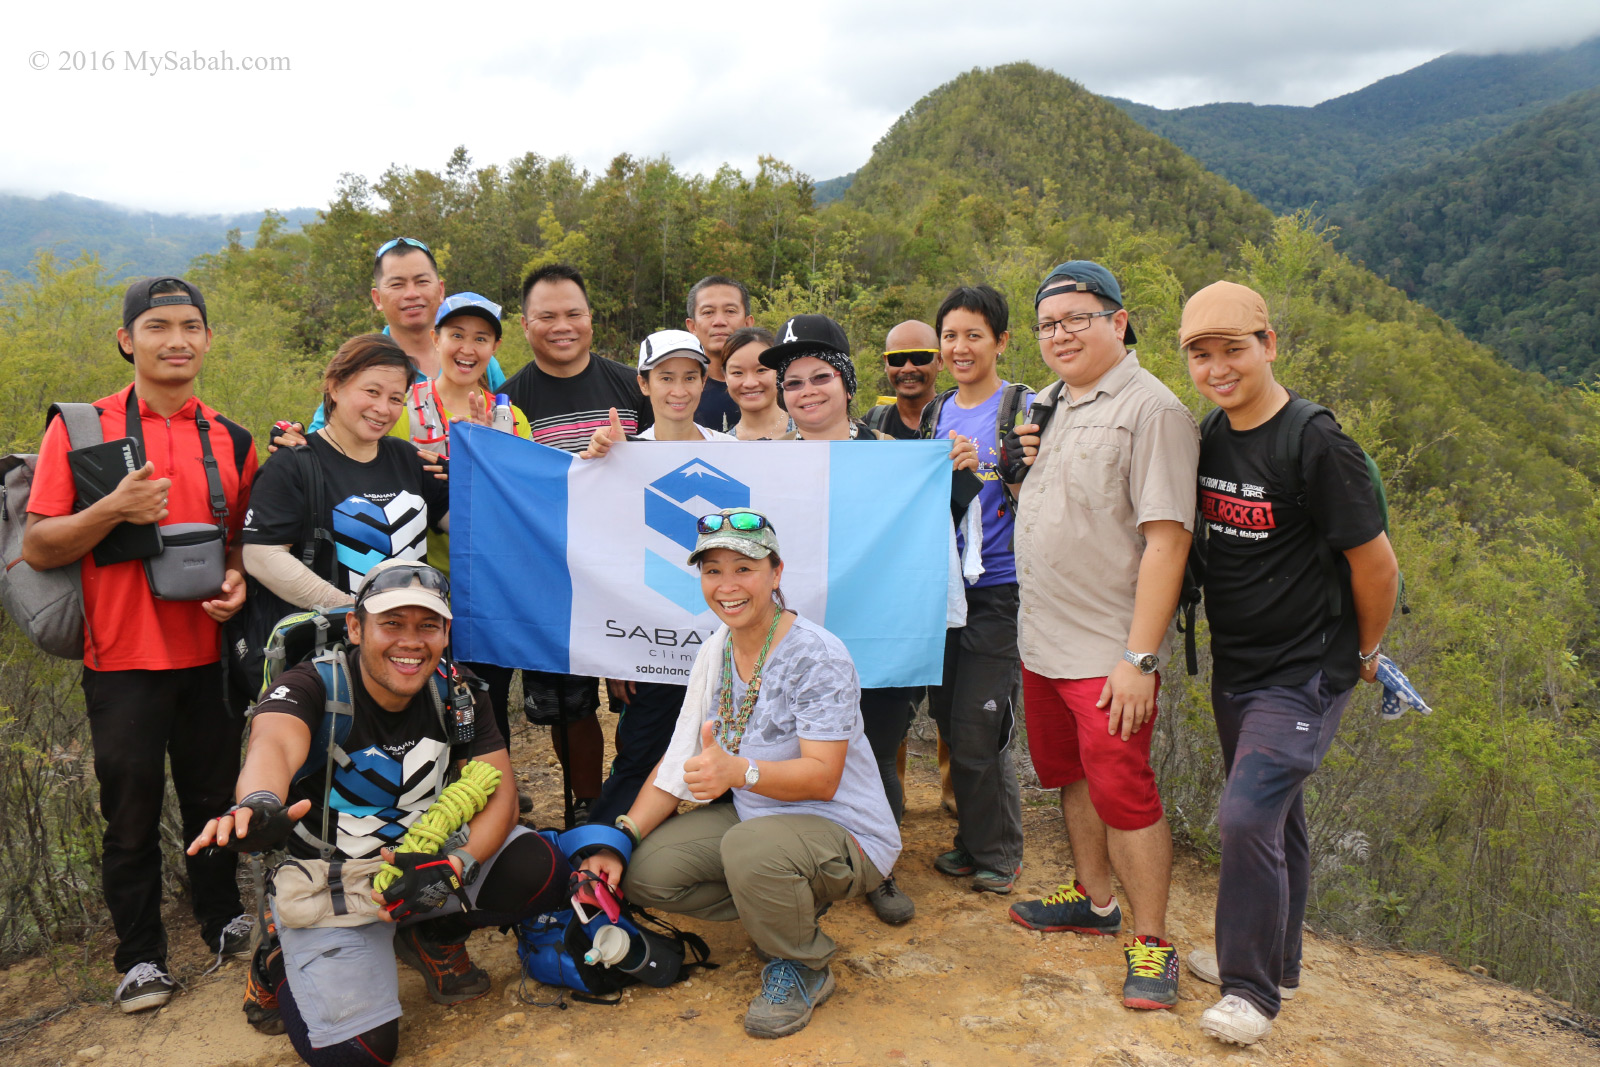
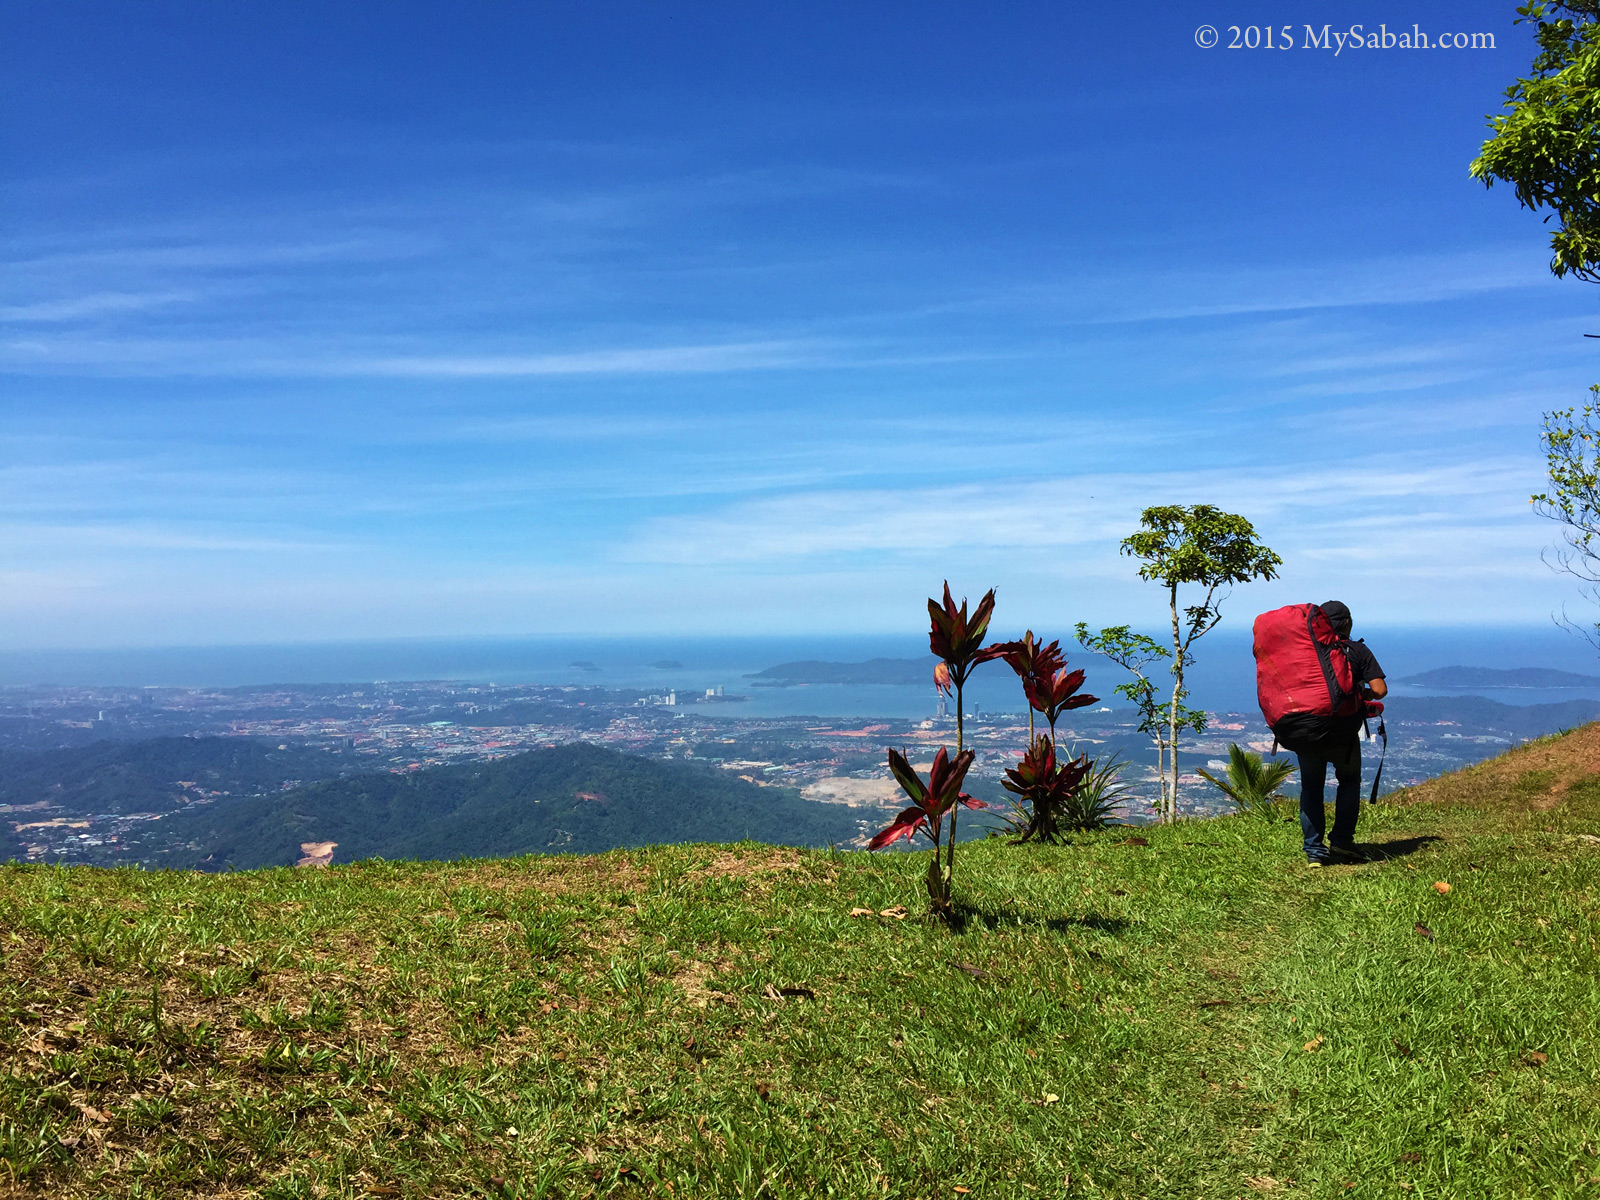
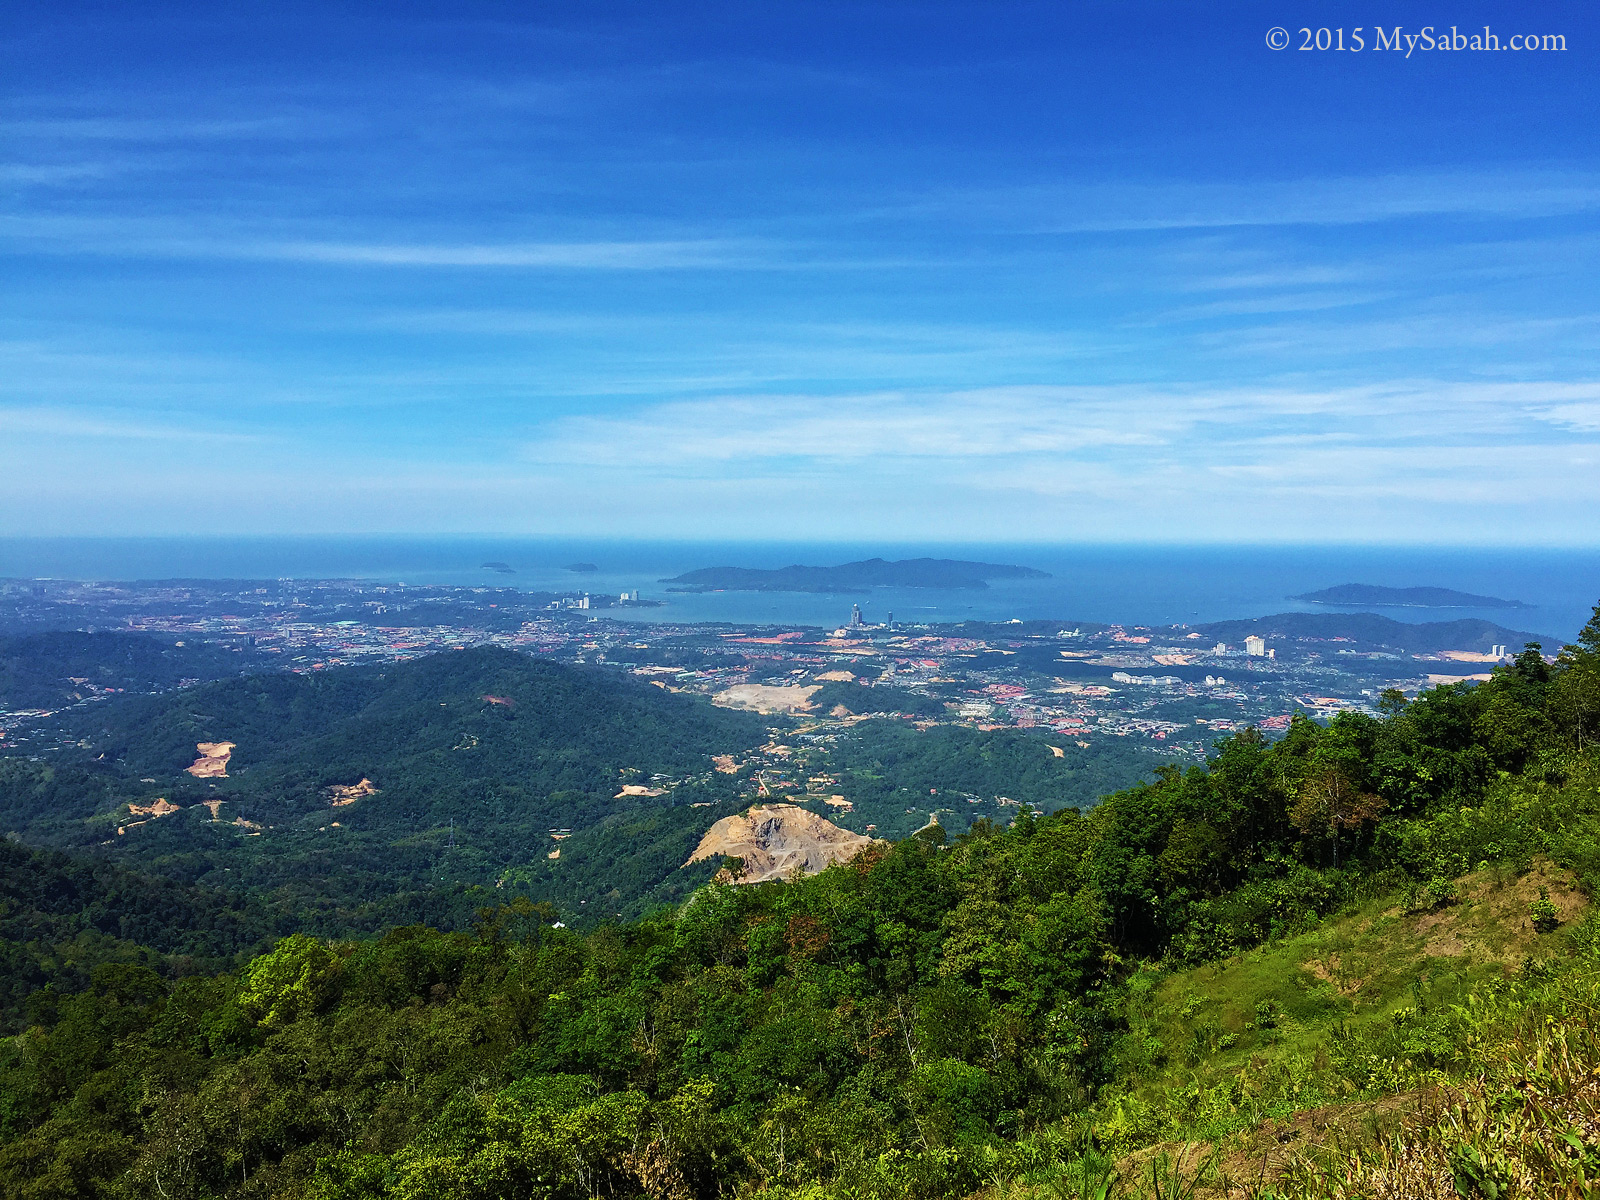
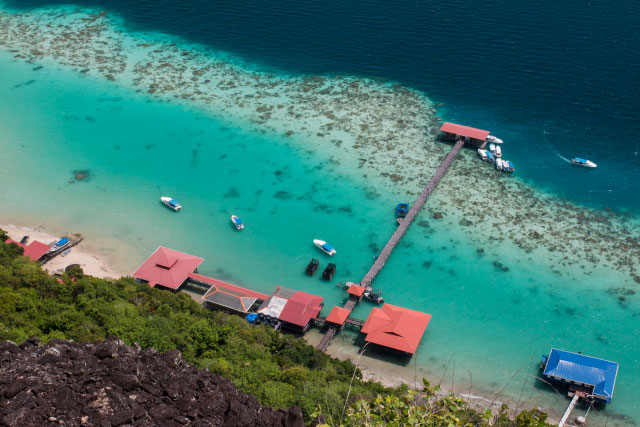
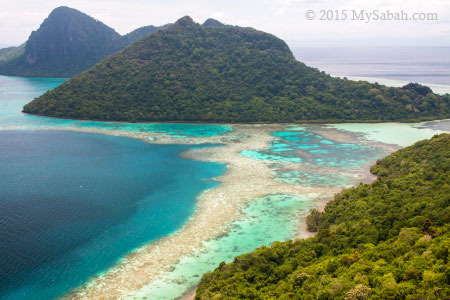
You can see Kota Marudu, Kota Belud and Poring from the peak

On the summit, you can have a bird-eye view of Kota Belud, Kota Marudu, and Poring. However, sometimes the peak is enveloped by fog then you would see nothing.

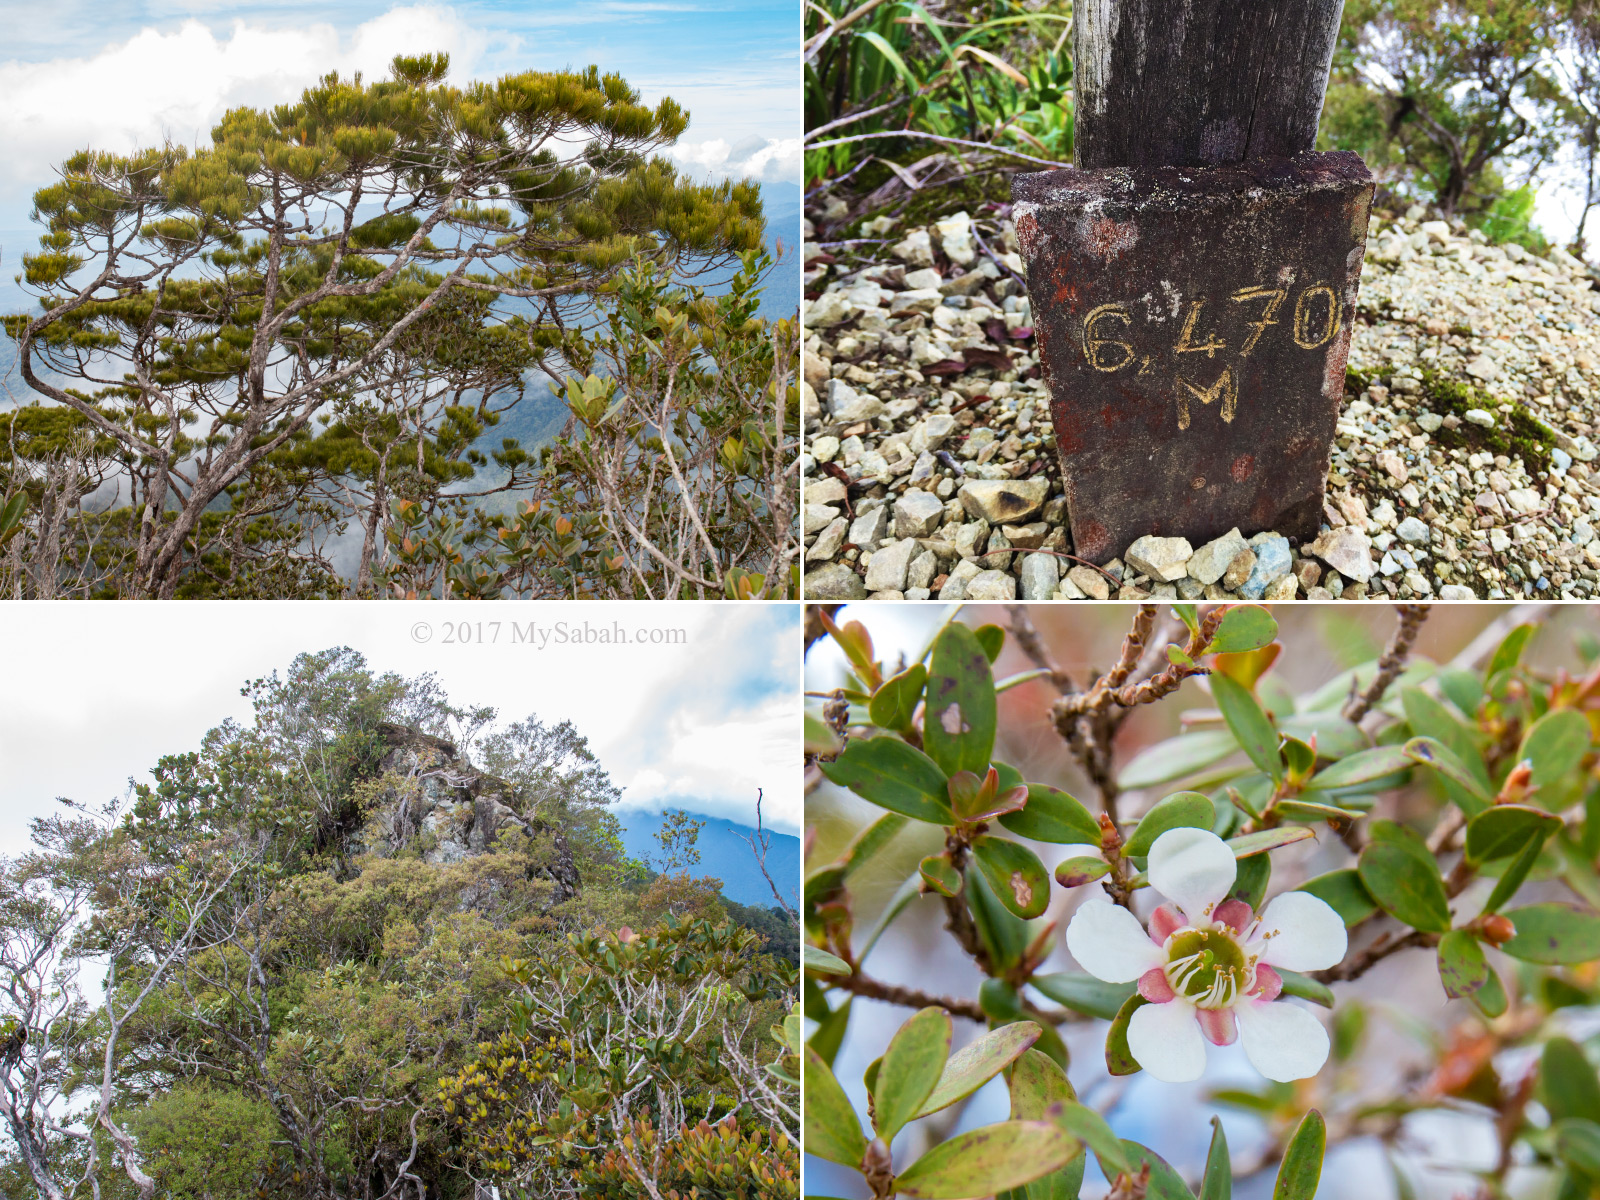
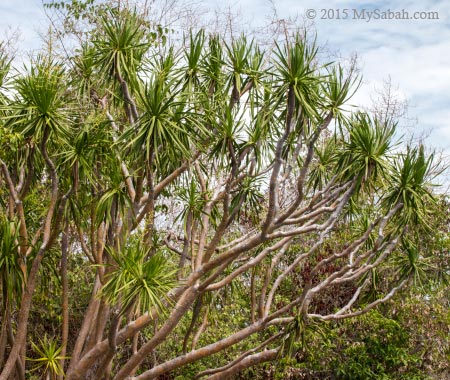
Upper Left: pine tree on the peak, Upper Right: marker of ending point, Lower Left: highest point, Lower Right: Sayat-Sayat flower

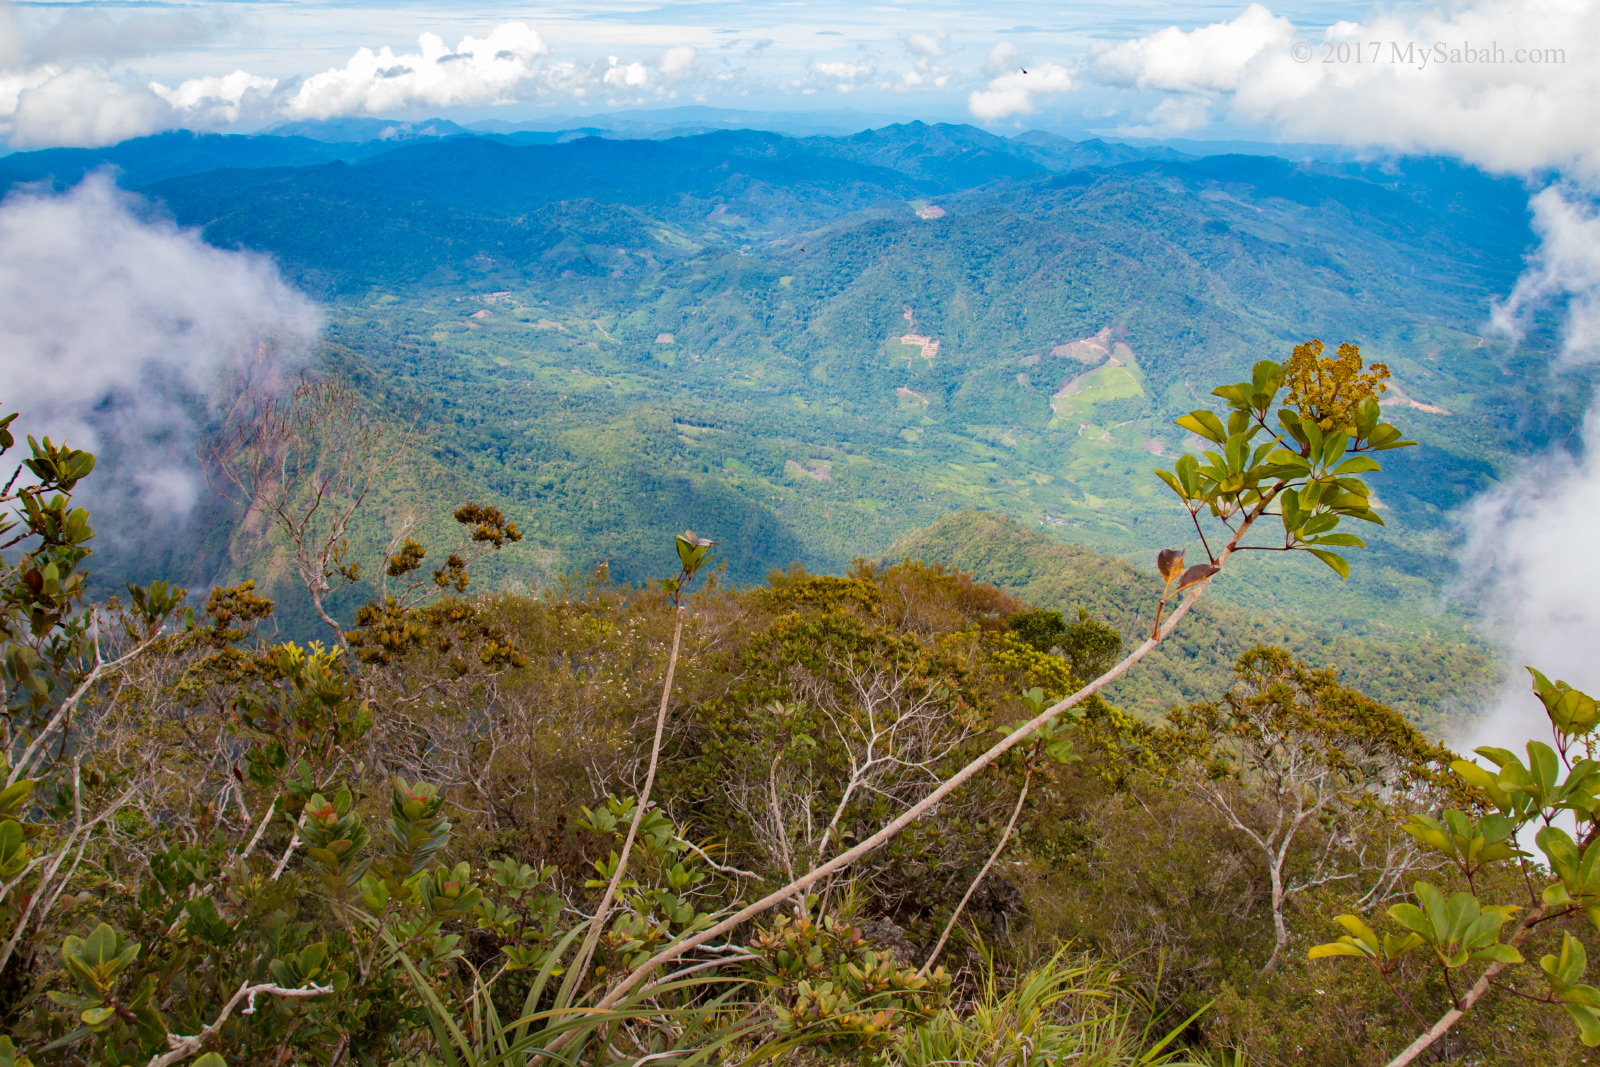
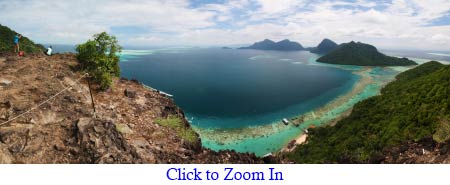
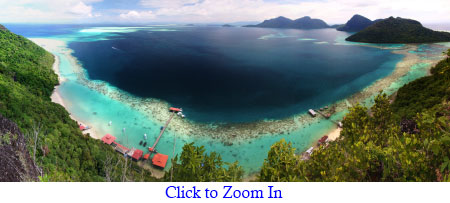
View from the peak of Mt. Nombuyukong

After taking enough photos and selfie, we descended at 1:53pm and reached the park at 6:20pm (a total of 4 hours 13 minutes).

How to Climb

Easy, just go to the Sabah Parks office in Serinsim Park, register and hire a guide one day in advance.

Item Fee / Rate
Climb Permit Malaysian: MYR31.80
Foreigner: MYR106
Student below 18: MYR12.75
Insurance MYR7.00
Certificate (optional) MYR5.30
Mountain Guide MYR90 (can guide up to 5 people)
Conservation Fee Malaysian: MYR3.00
Foreigner: MYR15.00
Below 18: MYR1.00 and MYR10.00 respectively

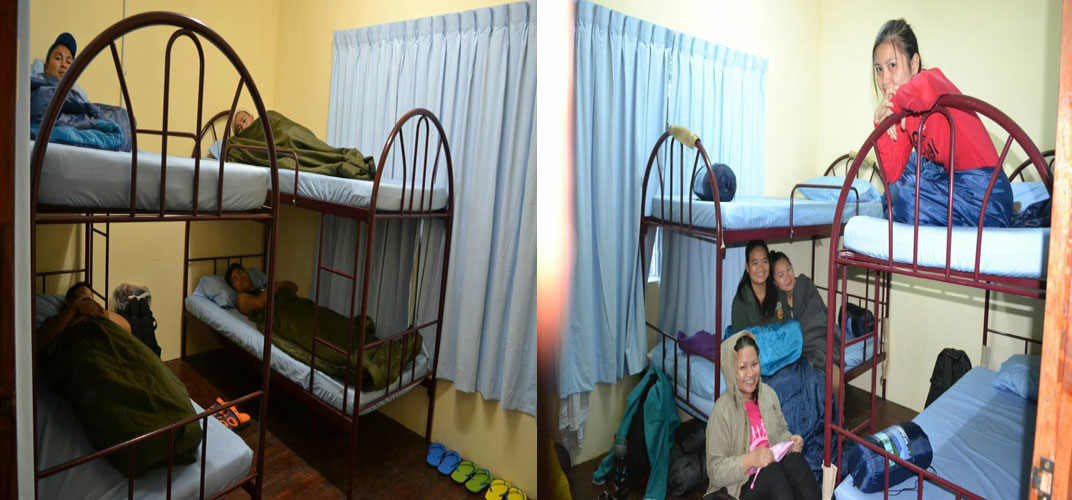
Since the Park requires climber to depart at 7:00am, it’ll be easier if you stay in the park. The accommodation fee for adult range from MYR42.40 (per bed in hostel) to MYR106 (per room of chalet) per night. I leave the math of final budget to you.

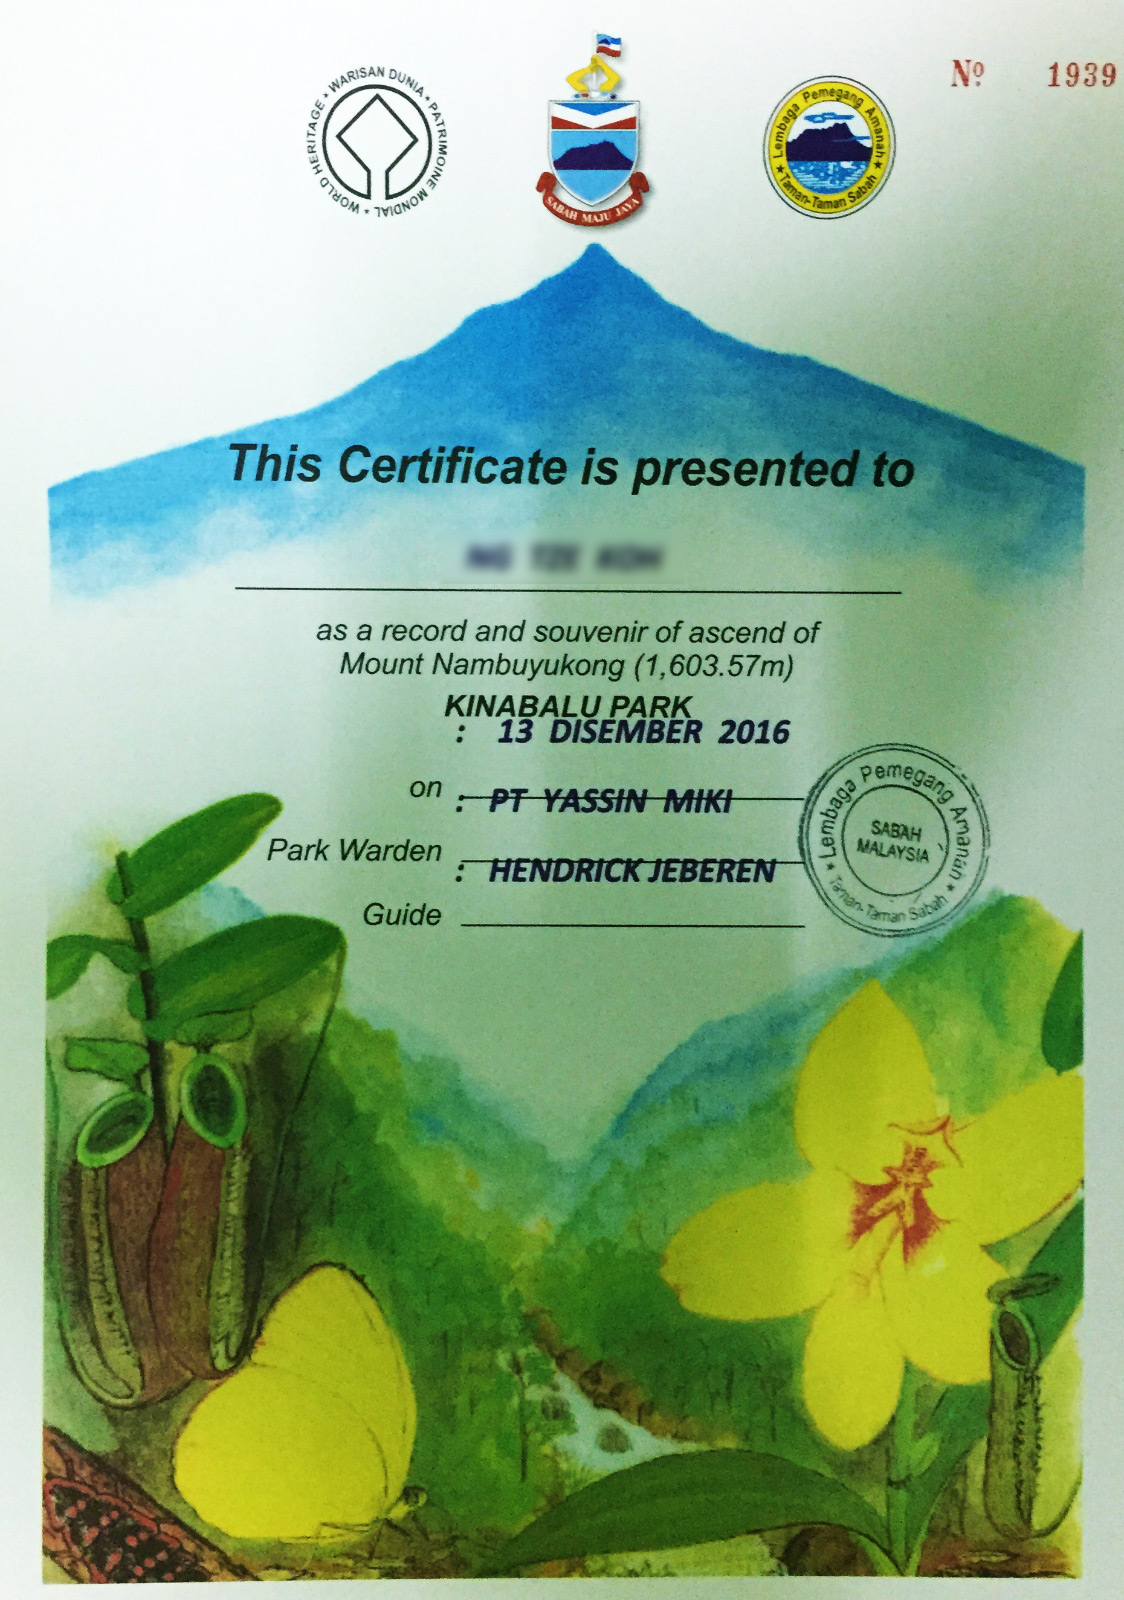
Certificate for climber who conquers Mount Nombuyukong

Contact of Sabah Parks

For further info, you may contact Sabah Parks:
Tel: +60 88-523500 (KK Head Office)
Website: www.sabahparks.org.my
E-mail: sabahparks@gmail.com / sabahparks@sabah.gov.my
Facebook: Sabah-Parks-122393837931233

If you plan to stay in the park, you should call in advance to check if the accommodation is fully booked, especially during school holiday.

What to Bring

The most important of all is to wear comfortable hiking shoes that work well for muddy and slippery trail.
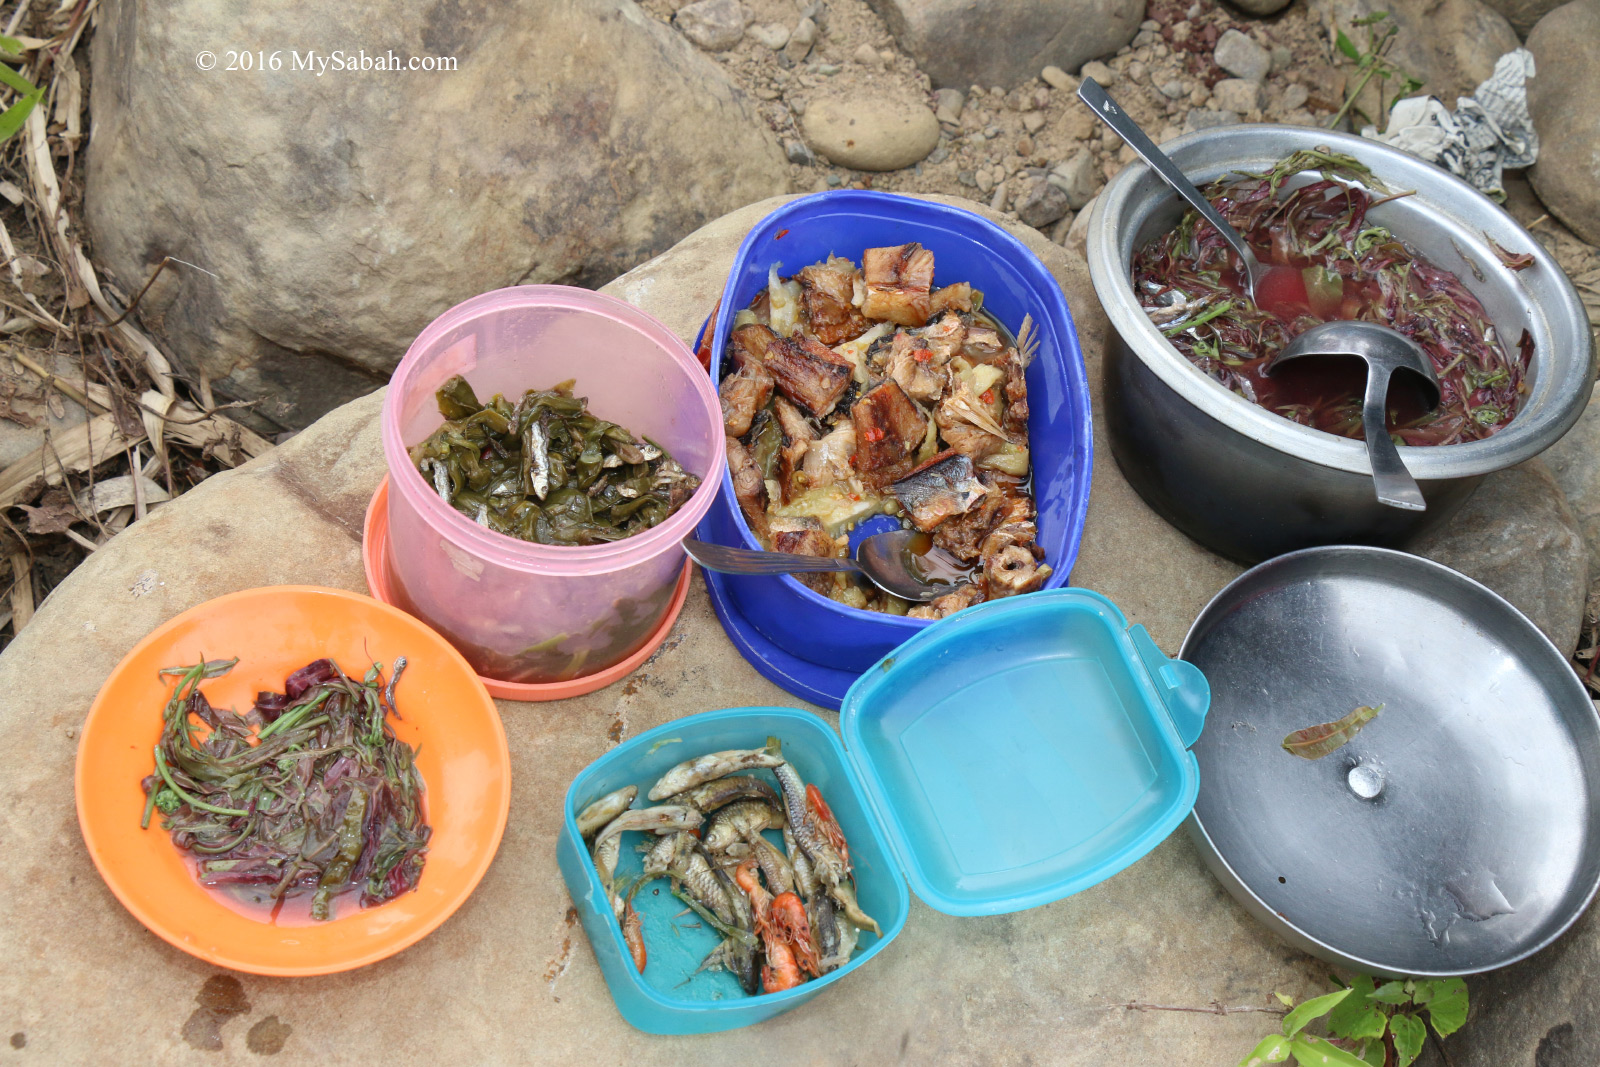
  • Packed lunch
  • Water
  • Raincoat / Poncho
  • Camera & spare batteries
  • Energy bar
  • Insect repellent
  • Anti-leech socks
  • Toilet paper
  • Walking stick
  • Torchlight (in case you come back really late)

When you go back to KK, you may try using the new highway (asphalt road in great condition) that takes 46 minutes to reach Poring. The view is scenic when you pass through small villages and mountain along the way.

Photos taken in Kota Marudu, Sabah, Malaysia Borneo

Climbing Mount Kinabalu via Kota Belud Trail

A 6.0 magnitude earthquake on 5 June 2015 destroyed part of the old summit trails on Mt. Kinabalu. On 1 Dec 2015, a new summit trail named Ranau Trail is open and becomes the Standard trail to climb Mt. Kinabalu until now, and I had covered this trail in detail in my article “How to Climb Mount Kinabalu and How Much it Cost?”.

Ranau and Kota Belud Trails (Click to Zoom In). Both start from Panalaban and meet at Sayat-Sayat (checkpoint 1.6 Kilometres before the summit)

Kota Belud Trail

The second new trail called Kota Belud Trail is open on 9 Dec 2016. I had climbed it three months ago (with special permit by Sabah Parks, as it wasn’t open to public that time), and this post will give you an overall of this new trail.

1. Kota Belud Trail is 170 Metres longer than Ranau (Standard) Trail

The one-way distance (from Timpohon Gate starting point to the Summit) of Kota Belud Trail is 8.97 KM, while Ranau Trail is 8.8 KM. The starting point of Kota Belud Trail is next to Gunting Lagadan Hut and Panar Laban Hut, while Ranau Trail is started behind the Pendant Hut.

Ranau Trail is less challenging than the old trail

Kota Belud trail doesn’t start at Kota Belud town, and Ranau Trail doesn’t start from Ranau town too. You can see these districts from the trails on mountain hence their names. Both trails start at Laban Rata and end at Sayat-Sayat checkpoint.

Descending via Ranau Trail

Though Kota Belud Trail is more challenging, the experience is more thrilling.

2. Kota Belud Trail is more Challenging than Ranau Trail

Ranau Trail is more tourist-friendly and safer because there are a lot of staircase and climbing aid. Kota Belud Trail is quite “raw” with limited support, so it is meant for adventurers who want to do real climbing. You need to be quite fit, and more upper body strength is required for climbing at the steep section.

Staircase on Ranau Trail

The most difficult part of Ranau Trail is still quite easy to climb

Rock climbing section on Kota Belud Trail

3. Kota Belud Trail is more Rocky

Most of the time you will walk on rock face and rocky ground, while Ranau Trail is flanked by dense vegetation most of the time.

Granite rock trail of Kota Belud Trail

Nice open view at Kota Belud Trail. You can see Aki Point platform far behind

Nature path of Ranau Trail

4. Both trails start at Panalaban (then Laban Rata) and meet at Sayat-Sayat

Sayat-Sayat is a checkpoint 1.6 KM before the summit. The following routes are unchanged (before and after the earthquake):

  • Timpohon Gate (Starting Point) → Panalaban (Laban Rata, the location of midway accommodation): 6 KM
  • Sayat-Sayat Checkpoint → Summit: 1.6 KM

Kota Belud Trail ends at Sayat-Sayat (see green building in photo), where it meets Ranau Trail too.

5. Both trails have very different scenery

Climbing via Ranau Trail is like walking in a garden because climbers will see many flora along the way. On Kota Belud Trail, you climb on bare rock face most of the time, but the panoramic view of the landscape is magnificent!

Panoramic view from Kota Belud Trail. You can see Laban Rata Resthouse from there.

Ranau Trail is flanked by dense vegetation

Aki Point on Ranau Trail

Ranau Trail: See the man in red?

Below is a table to summarize the differences between these two summit trails:

Ranau Trail (Standard) Kota Belud Trail
Distance (one way) 8.8 KM 8.97 KM
Difficulty Easy. Many staircases. Relatively less steep Steep and challenging. Limited climbing aid.
Features Dense and rich variety of summit vegetation along the trail Route on rock face and rocky ground. Beautiful panoramic view.

You know what. You can get better idea by watching the following video of Kota Belud trail. It shows our climb from the starting point to the summit. You can jump to 3:27 to see Kota Belud Trail:

The following is a photo walk-through of Kota Belud trail in chronological order:

Starting point of Kota Belud Trail

Kota Belud Trail is more challenging than Ranau Trail

The “waterfall section” not far from the starting point

Nice view at Kota Belud Trail

Beginning section of the Kota Belud Trail

Climbing along the slope of Kota Belud Trail

Resting on the rockface

Wide and long rockface section of Kota Belud Trail

Staircase on Kota Belud Trail

Starting point of the steepest rock climbing section

This is the most challenging part of Kota Belud Trail.

Steep slope of Kota Belud Trail. It’s no joke if you fall from there.

The most difficult part is almost over

Reaching the Sayat-Sayat Checkpoint (green building at the left). At the right are climbers on Ranau Trail.

Both Kota Belud and Ranau trails end and meet at Sayat-Sayat Checkpoint.

Relax after overcoming the hardest part

Walking on the rockface (about 1.5 KM before the summit)

Group photo in front of Wishing Pond at the foot of Low’s Peak

On the way to the summit of Mt. Kinabalu

Happy lady climbers on the summit

Group photo on top of Mount Kinabalu

At the moment, I’m not sure if we will need special permit or requirement to climb Mt. Kinabalu via Kota Belud Trail. If this trail is open to public, you can get the most fun by ascending via Kota Belud Trail and descending via Ranau Trail. I’ll update this post when I get the latest information.

Photos taken on Mount Kinabalu, Sabah, Malaysia Borneo

Climbing Mount Wakid (Gunung Wakid)

If you want to feel on top of the world and enjoy some breathtaking view, climb a mountain! For hikers who only want a day trip to conquer a mountain that is not too high to be overwhelming, but also not too low to be unexciting, Mount Wakid (Gunung Wakid in Malay language) in Tambunan is for you then. Even if you live in Kota Kinabalu City (KK), which is 80 KM away from Tambunan, you can finish the climb and back home on the same day.

You can see Mount Wakid (Gunung Wakid) at the roadside near Tambunan

Sabah is mountainous with over half of its land above 1,000 Meters above sea level, and Mt. Kinabalu is not the only beautiful mountain. No two mountains look the same. Standing at 1,372 Meters (4,501 Feet), Mount Wakid is distinctly different from other Sabah mountains that I climbed before. It’s also about the same height as Ben Nevis (1,346 Meters), the highest mountain on island of Great Britain and a popular destination that attracts about 100,000 ascents annually.

Wakid is a bamboo basket used by villagers to carry fruits & vegetables until today.

According to locals, in the past, an Odu-Odu (grandma) went to Mount Wakid to harvest some forest produces. She disappeared, so every villagers were searching for her on the mountain. However, villagers couldn’t find her except her wakid (a bamboo basket used by native to collect fruit & vegetables). That’s how Mount Wakid got its name.

View of Mount Wakid (Gunung Wakid) from the road

When you head to Tambunan town from KK, about 10 KM before the town, you could see Mount Wakid prominently at the left of the road. Its long and crooked crest running parallel to the hilly road, like the spine of a dragon. No wonder the locals believe a Tombuokar (dragon) is living in this mountain. Every time I looked at this “crouching dragon”, it was like calling me to have a ride on its back. The most unique characteristics of Mount Wakid is – it is chartreuse in color.

Climbing Mt. Wakid (Gunung Wakid)

Mount Wakid is located in the state land of Kampung Sunsuron (Sunsuron Village). Its hill forest is kept intact to protect this mountain as a water catchment area. The villagers see Mount Wakid as an important source of water to irrigate their crops. It is only in Nov 2015 that they started promoting their “backyard” mountain as an attraction.

Group photo of climbers (with Mt. Wakid behind us, note the red arrow)

Yes, 1,372-Meter is quite an enormous height for a day climb. But no worry, we started our climb from Sunsuron Village, which is located at 780 Meter above sea level, so we only need to ascend less than 600 Meters (1,969 feet) to reach the top. Sound easy but remember three rules of mountaineering, which state, “It’s always further than it looks. It’s always taller than it looks. And it’s always harder than it looks.”

Route map and elevation profile of our climb to Mount Wakid. You can download the KML (for Google Earth) or GPX (for GPS device such as Can-Am Garmin Montana 650T GPS 715002081) file of the route map to see full detail.

Here is the summary of the climb. The total distance of return trip is 9.75 KM. We hiked 5 KM via the new Jinkung Trail to the summit (GPS of the Highest Peak: 5.770667, 116.369209; see Location Map), then descend via the 4.75-KM Standard Trail back to Sunsuron Village.

Pass by the village on the way to the summit

We departed from Sunsuron Village at 8:30 AM, reached the summit at 12:30pm and came back at 4pm. If possible, you should move as early as 7am. Though Tambunan has cooling weather (about 25ºC / 77ºF), it’s still pretty warm in the afternoon.

Waving at the cute preschool children

In the beginning, we walked through the village houses and the local schools, before we entered the plantation at the edge of the village.

Awww….♥♥♥! These lovely local children will melt your heart

We passed by a preschool and the kids were so excited to see us. They screamed and waved at us, so adorable. Actually their smiles are the most memorable part of my climb.

Scenic countryside view along the way

After 10 minutes, we exited the residential area and passed through the farmland and grassland outside the village.

The clean river from Mt. Wakid

In the first 3 KM, we walked on flat ground most of the time. We only came across a few gradual slopes. It wasn’t challenging but we needed to be vigilant, especially at the narrow and slippery soil trail on the slope. We took a short break every 1 KM.

Mount Wakid is far ahead

When we walked in paddy fields and meadow in open space, the sun was baking us. It’s so warm and I saw no farmer working in the field. Luckily I brought an umbrella so I just used it. Other climbers may think that I’m a wuss. Anyway, I think it’s a good idea because the shade reduces the heat and keeps me comfortable.

Crossing the creek

We crossed a few creeks without getting wet. The water is cold and super clean. I saw some “salad rivers” because the water is planted with a lot of leafy green “Sayur Hong Kong” (Watercress), which is commonly used in salad and sandwiches. As we moved deeper to backcountry zone, the forest was getting denser.

Jingkung Trail

We arrived the starting point of Jingkung Trail around 11:15am and prepared for the last 1 KM push to the summit. Jingkung Trail is a new summit trail which is longer and more challenging than the standard trail. This route is thrilling for veteran hikers who want more adventurous experience.

The start of challenging Jingkung Trail

However, Jingkung Trail could be quite tough and risky for inexperienced climbers, though all our newbie team members made it with some efforts. The trail is fairly steep, and we have to use our hands to move up some near-vertical route. We joked with one another that this trail should be named as the “Spiderman Trail”.

Jingkung Trail to the summit

Mount Wakid is a new destination, so the trail is 100% nature and have no climbing aid such as ladder, handrail, boardwalk and trail signage. Our guide setup rope support in a few difficult spots. You would be happy to know that there is no leech all the way.

The last 1 KM trail to the top is quite steep. It’s Mr. Jingkung in the photo at the right

Someone says, “Climbing is action, it’s about doing, acting, trying. Words don’t get you up a vertical rock face or to a remote mountain summit.” That’s right, either you are up there, or you are not. Talking won’t take you there. I love the moment of keeping my mouth shut and fight my way up with crystal clear goal, as I believe action speaks louder than words.

Reaching the ridge

As I was approaching the top at crawling speed, the trees became shorter and sparser. I knew I was near when I saw light on top. Then we we were welcomed by a PVC banner which meant we had reached the ridge and the summit wasn’t far away. I was gasping for breath and glad that the hardest part was over.

View from the mountain (behind the PVC banner)

The Peaks

Here we were on the ridge of Mount Wakid. At this altitude, I expected to see lower montane forest with mossy environment. Instead, the top of Mt Wakid is dominated by a dwarf tree called Pokok Tagai locally. Its yellowish green leaves form the beautiful cap of Mt. Wakid.

The top of Mount Wakid is covered by these evergreen shrubs only 1 to 6 Meters high

Special Thanks to Dr. Arthur Chung, Dr. Reuben Nilus and John Sugau for the identification of the vegetation. According to them, these trees are Kerangas forest with berungis trees (Baeckea frutescens) and bracken fern (Pteridium esculentum), and part of the forest was burnt in 1983.

The color of Mt. Wakid is a big contrast with adjacent mountains

I googled and learned that the leaves and flowers of berungis tree can be harvested for medicinal uses and to make a refreshing herbal tea. All aerial parts of the plant are credited with antibacterial, anti-febrile and haemostatic properties. However, the local community doesn’t seem to use this plant.

You can see two distinct forest of Mt Wakid, the darker lowland rainforest and lighter heath forest (Kerangas) near the top

We walked along the narrow ridge. After 10 minutes, we arrived the summit of Mt Wakid marked by a trig station. There are six peaks on Mount Wakid, and the highest peak is called Peak No.3. We celebrated the moment by taking a lot of photographs.

Everyone made it to the highest peak of Mt. Wakid (Gunung Wakid)

Climbers are often asked why they climb. We would reply, “If you have to ask, you’ll never understand,” so you have to climb a mountain to find the answer. When asked “What is the use of climbing Mount Everest?”, George Mallory, an English mountaineer, said, “It is no use… What shall not bring back a single bit of gold or silver, not a gem… What we get from this adventure is just sheer joy… We do not live to eat and make money.”

View of Sunsuron Village from the mountain

Therefore, if money can’t buy you any happiness, go climb a mountain! I also can’t explain why it’s cheerful, probably mountain is nearer to heaven. From the ridge, I can see that we are surrounded by rolling hills, lush forest, gorge and valley, what a spectacular view.

You could see the dense undergrowth of Pteridium esculentum (Esculentum means edible), commonly known as Austral bracken or simply bracken.

We continued moving to the next peak along the spine of Mount Wakid. By the way, Mount Wakid has a secret that our guide doesn’t want me to share it online. You can ask them if you climb.

Group photo on Peak No.1

It’s an easy hike. Within 20 minutes, we reached Peak No.1, which has a big cross erected. Every year before Good Friday, the local Catholic paid homage to Jesus Christ by carrying a big cross to this peak, but now this annual activity is moved to Kolindasan Hill.

Another group photo on Peak No.1 but facing different side.

If treated well, mountains give us clean water and fresh air, or they will hit back with flood and landslide. I’m glad that the forest on hills and mountains of Tambunan are in good condition, making Tambunan one of the greenest districts in Sabah. It’s sad that the Signal Hill of KK, which was used to be a lively hill with dense jungle, now has became a “Condo Hill”.

The following video is a good overview of our climb.

Descending

Next we were on our way descending to Sunsuron Village via the Standard Trail, which is about 4.75 KM in distance. Climbing up a mountain isn’t easy, but climbing down is more difficult. It’s advisable to bring packed lunch to the peak, so you can restore your energy level after eating.

Descending to Sunsuron Village

Though the Standard Trail is less challenging than Jingkung Trail, there are a few steep sections that need rope support, which our mountain guide has provided. Even if it was drought season and the soil was fairly dry, I still found it hard not to slip.

Small Kolopis Waterfall

The descending wasn’t easy, but it was faster and less tiring. We arrived Kolopis Waterfalls near the foothill after an hour. It’s a cascading waterfall with the small and deep waterfall in upstream and the big one 10 Meters downstream.

Big Kolopis Waterfall

The big Kolopis Waterfall is a great spot for abseiling. A few of us couldn’t resist the temptation of clean mountain stream and decided to take a dip in the cold water.

Swimming under Kolopis Waterfall

Mountains are water towers of the earth because they provide 60 to 80% of the world’s fresh water. It’s quite amazing that Mount Wakid has flowing water after many dry months. Forest can do the magic of holding and releasing the water slowly.

Camping site at the foothill

Not far away from the waterfall is a camping site next to a stream. For those who want to enjoy the nature more, they can join the 2-day camping tour which includes mountain climbing, camping, abseiling at waterfall (by certified climbers) and night walk. A toilet is constructed for this campsite recently.

Tambunan is also known as the Valley of Bamboo

During the climb, you would see bamboo everywhere, that’s why Tambunan is called the Valley of Bamboo. In Malaysia, there are 80 species of bamboo, and some can grow more than 20 Meters high.

Picnic next to Sunsuron River

Finally we arrived the farmland of Sunsuron Village at the end of the climb.

Crystal clear water of Sunsuron River

There were a few local farmers having their lunch at the riverside. They are so friendly that they even invite us to join them. Their food is really fresh and yummy.

River side picnic with local food

In this trip we see not only the beauty of mountain, but also the beauty of clean rivers. Tell me, how often you see river as clean as the one shown in photos here?

Enjoying drink with the villagers at the river side

A toast to Tambunan, a land free of pollution.

How to get there

To climb Mt. Wakid, you can appoint a mountain guide to bring you to the summit. The guide fee is RM70 (≈USD$17) per head. A certificate costs RM10 (≈USD$2.50). You can get a guide through the following contact, or hire one via Sunsuron Homestay.

E-mail: jingcom2004@yahoo.com
Tel: +60 13-8991857 (Mel)
Facebook: GunungWakid
Instagram: @gunungwakid
See More Photos of Mt. Wakid

For safety, you should get a guide to follow you. The trail is not well-marked, so you can lose your way easily like the grandma. There was a Korean who lost in the mountain. Luckily he was found and saved. If we only found his iPhone, we would have to rename this mountain to Mount iPhone.

Things to Bring

It’s warm during daytime, so you don’t really need extra warm clothing. The most important thing is to wear a pair of good hiking shoes. Below is a list of recommended items to bring:

  • Bottle of Water (min. 1 Litre)
  • Raincoat / Poncho
  • Snack / Energy Bar
  • Packed Lunch
  • Climbing Rope
  • Walking Pole
  • Optional: Swimwear

Photos taken in Tambunan, Sabah, Malaysia Borneo

Paragliding at Kokol Hill (Kota Kinabalu City)

Stop singing “I believe I can fly” because you can do it. Forget about the noisy plane that put you in an enclosed space where you can’t even fully stretch your legs. Paragliding gives you the closest experience as a bird, as there is nothing between you and the sky and cloud, so you can enjoy the breeze and a sense of freedom.

Paraglider taking off from Kokol Hill

If you live or travel in Kota Kinabalu City (KK), the nearest place where you can try paragliding is Kokol Hill (Bukit Kokol) in Menggatal, about 40 minutes away by car from KK. It’s ok if you don’t have any paragliding gear, you can book a “pilot” to give you a tandem flight. More on this later.

Tandem paragliding at Kokol Hill

At a height of about 800 Meters and cooling temperature of 24C, Kokol Hill is fast becoming the favorite getaway place of KK people to escape the hot weather. Besides, Kokol Hill is one of the best spots to see sunset and panoramic view of KK.

Tandem paragliding

The following is a 3-min video for you to see why paragliding at Kokol Hill is super fun and exciting.

Paragliding Site of Kokol Hill

After hearing many positive comments about paragliding on Kokol Hill, I contacted Richard via his Facebook on Kokol Paragliding, to arrange for a tandem flight. Richard is a very experienced paragliding tandem pilot who has worked in Nepal and Korea for 4 years. After he checked the weather and wind conditions, we set the date for the flight.

Short nature trail to paragliding site

The take off base is not far away from the Celcom tower near Kokol Haven Resort. We parked our car near the tower and passed through a forest to the site. The forest can be misty during cool day.

Panoramic view of Kota Kinabalu City from Kokol Hill

After 5 minutes, I came to an open space on a ridge with breathtaking view of KK and surrounding hills. “Today’s weather is perfect! We got good wind too,” Richard said. Sometimes he needs to wait some time for the right wind.

It’s Richard in front carrying 20Kg of paragliding gear

The take off base is located at 822 Meters above sea level, so the air was cooling and refreshing.

Take off base of Paragliding on Kokol Hill

Usually paragliding here is started around 11am when the sun heat up the land and creates upward thermal current and wind, the forces that lift the paraglider.

You can see Kota Kinabalu City and its nearby islands in clear day

You are good to go if your body weight is less than 120 Kg (264 lbs), the limit of tandem paraglider.

Tandem Flight

Before the flight, Richard demo some simple steps on what to do during take off, flight and landing. Guess what? To make this paragliding a bit special and crazy, both of us were wearing office attire. It’s so funny LOL.

Paragliding in office attire

We put on our harness and get ready to take off. Richard observed the wind direction and cycle, to time the take off.

Ready to take off

After a while, he pointed at the trees far ahead and said, “See the rustling foliage over there? The wind is coming this way. Let’s get ready.”

“Making the wall” to catch the wind

Then he shouted, “RUN!” Though the runway in front is a steep slope, I have to be brave and sprint without any hesitation, like what he told me to. After 4 or 5 steps, I was already kicking in the air. I was flying!

Office guys go paragliding

The ride is surprisingly steady, like a boat sailing smoothly on the calm sea. First we cruised at an average speed of 40 Kilometer/Hour along the ridge of Kokol Hill, which is part of Crocker Range Park, the largest terrestrial park of Sabah. We can see Mt. Kinabalu if we are lucky.

Lush forest of Kokol Hill

The vast greenery of lush forest relaxed my mind, and I didn’t feel scared at all. At some points, we were so close to the trees that I could hear the call of cicada.

Flying high on Kokol Hill

Richard took a ride on an upward thermal current, so we soared high up to 1,000 Meters, until the birds and hill were under our feet.

Stunning view from the sky

During the flight, all passengers will naturally open their arms like bird spreading its wing. It must be feel like dreaming.

Flying on top of Kokol Hill

Now I can fly

Next we turned to west and headed to Menggatal town. In clear day, you can see Labuan island at the left and Kuala Abai (Kota Belud) at the right, that’s more than half of Sabah’s west coastline.

View of Kota Kinabalu City

In normal life, the space around us is so confined, and we are like living in a “2D” world. It’s an amazing feeling to be able to see and feel how big our world is from the sky.

This is the view you only can see in paragliding

My favorite view is KK city and islands of Tunku Abdul Rahman Park in South China Sea. My hometown is such a beautiful city.

Paragliding is awesome!

My paragliding was getting near the end when we approached Menggatal town. As we were descending, everything seemed to move faster. We flied over villages, plantations, houses, and finally landed safely on the field next to Menggatal Community Hall (Dewan Masyarakat Menggatal).

Flying on top of Menggatal town

This 6-KM journey took about 20 minutes, but it felt like an hour. FYI, paraglider can fly over 300 KM under the most ideal condition.

The Fees

The fee of tandem flight is RM250 for Malaysian and RM350 (?US$87) for non-Malaysian. Add RM50 (?US$12.50) if you want photos and video. They can pick you up at Menggatal town. If you want them to fetch you at hotel or other locations, the transport fee is RM100 (?US$25).

Group photo before paragliding

They also do sunset flight for RM500 (?US$125) (after 5pm, only if conditions allow). You also can bring your friend to fly together next to you (a great idea for coming Valentine’s Day?).

Booking

For safety, you must hire only certified tandem pilots. The following is a list of professional paragliders whom you can trust.

Stop dreaming and imaging about flying. Try it at least once.

1. Cliff Man

Mobile Phone: +60 16-8471255

2. Chris Lammert

Mobile Phone: +60 13-8645606
E-mail: chrislammert@hotmail.com
Website: borneogl.blogspot.com
Facebook: Chris Exotic Sports

Happy Flying! Remember to apply sunblock lotion because you will be closer to sun

Soar High and See the World like an Eagle. Enjoy the Freedom like a Bird. This is Paragliding.

Photos taken in Kota Kinabalu, Sabah, Malaysia Borneo

Street View (Google Maps) of Sabah

Google Maps makes our liveseasier. Even as a local, there are so many places that I don’t know in Sabah. Now I can locate any unfamiliar places by looking up its exact location in Google Maps, without asking anyone for direction (and to avoid being embarrassed by friends who like to tease, “Huh? You don’t know where is this place meh? Are you really from Sabah?”)

Google Car coming to Sabah (me at the left)

In Oct 2014, many people saw a strange car topped with ball-shaped equipment and navigated every corner of our street. Its photos were widely shared and discussed on local social media but few people knew what it did exactly.

Drag and drop “pegman” for Street View on Google Map

It was a Google Car that recorded 360° view of Sabah streets, and it has covered 80 percent of East Malaysia’s public roads. The Street View Imagery of Sabah is available since July 2015 in Google Maps. Just drag the orange “Pegman” icon on the bottom-right of the map (see picture above) onto a blue highlighted street. I can even see my house and dog in this 3D map, so cool and fun!

Recording 360° Street View of Mt. Kinabalu. This photo went viral on Facebook.

For locations that were inaccessible by car, Google team sent someone to record the view on foot by Google Trekker, a wearable backpack mounted camera system. The Google Trekker team only captured 15 popular attractions of Sabah, and their 360° view are now available online too. To save your time, I list these destinations and link to their Street View below:

1. Mount Kinabalu

Mount Kinabalu is the highest mountain of Malaysia and situated in Kinabalu Park, an UNESCO World Heritage Site.

Street View of Mt. Kinabalu ? View 360 Imagery

Note: This Street View was created before the earthquake on 5 Jun 2015, which damaged the Mesilau trail and part of the old summit trail. The map may be outdated but the scenery and trail remain quite the same near the summit area.

2. Sepilok Orangutan Rehabilitation Center

Sepilok Orangutan Rehabilitation Center is one of the oldest and most established orangutan nurseries in the world. It’s the No.1 tourist destination of Sandakan.

Street View of Sepilok Orangutan Rehabilitation Center ? View 360 Imagery

3. Sapi and Gaya Islands

Sapi and Gaya Islands are only 15 minutes away by boat from Kota Kinabalu City (KK), and the top island destination near KK.

Street View of Sapi Island ? View 360 Imagery

4. Tip of Borneo

Located at most northern spot of Sabah, Tip of Borneo is a meeting place of South China Sea and Sulu Sea. People visit this place for its scenic view and nice sandy beach.

Street View of the Tip of Borneo ? View 360 Imagery

5. Kapalai Island

When talking about honeymoon in Sabah, Kapalai Island is always one of the best choices for a romantic holiday.

Street View of Kapalai Island ? View 360 Imagery

6. Mabul Island

As Mabul Island is near to Sipadan Island, it’s viewed as an “Accommodation Island”, but avid underwater photographers know that Mabul is an excellent spot to look for interesting and rare macro sea lives.

Street View of Mabul Island ? View 360 Imagery

7. Mantanani Island

Mantanani Island is also known as Mermaid Island. It is one of the favourite islands of tourists because of its crystal clear sea water and white sandy beach.

Street View of Mantanani Island ? View 360 Imagery

8. Mataking Island

Mataking Island is popular among Europeans as a destination for making baby. Everything seems so perfect on this island of romance.

Street View of Mataking Island ? View 360 Imagery

9. Turtle Islands Park

Turtle nesting happens every day on this island, so its chalets are always fully booked. Anyway, you still can visit Turtle Island “virtually”.

Street View of Turtle Islands Park ? View 360 Imagery

10. Mari-Mari Cultural Village

Mari-Mari Cultural Village allows you to experience the culture, food and lifestyle of 5 indigenous groups in Sabah.

Street View of Mari Mari Cultural Village ? View 360 Imagery

11. Bohey Dulang Island

Bohey Dulang Island is the remnant of an ancient super volcano erupted 2.5 million years ago.

Street View of Bohey Dulang ? View 360 Imagery

12. Rainforest Discovery Center

The canopy walkway of Rainforest Discovery Center is great for bird watching and sighting of wildlife lives in Borneo rainforest.

Street View of Rainforest Discovery Center (RDC) ? View 360 Imagery

13. Kinabatangan River

Kinabatangan River is the longest river of Sabah and the best wildlife sanctuary of Borneo’s endemic animals.

Street View of Kinabatangan River ? View 360 Imagery

14. Pom-Pom Island

So you want a holiday with blue sky, sandy beach and turquoise sea huh? Go to Pom-Pom Island then.

Street View of Pom-Pom Island ? View 360 Imagery

15. Bukit Tengkorak (Skull Hill)

Bukit Tengkorak is the largest pottery making site in Southeast Asia during the Neolithic period. You can get a panoramic view of Semporna town from the top (or by Street View).

Street View of Bukit Tengkorak ? View 360 Imagery

Street View Project in Sabah

Sabah Tourism Board was working with Google led by Nhazlisham Hamdan for roads and trails mapping in Oct-Dec 2014. I was in the project team and received basic training on Google Trekker. Google Trekker consists of hard disk, batteries, GPS device and dozens of camera shooting at different angles.

On the way to map the trail to Mt. Kinabalu

The highlight of this project is to record the imagery of summit trail to Mt. Kinabalu. The Google Trekker weighs nearly 20 Kg. There is no way normal person can carry this heavy gear to the top of the highest mountain of Malaysia, so we hire a few mountain guides for the job. It was early Nov but rainy season started a month earlier than expected. We captured both Timpohon and Mesilau Trails. However, due to heavy rain and fog, part of the imagery along these trails isn’t the best view.

Google Trekker on the summit of Mt. Kinabalu

Luckily the weather was perfect when we recorded the area near the summit in the morning. On 5 June 2015, a 6.0-magnitude earthquake destroyed part of the summit trails. Mesilau Trail is closed until now. Half of the the trail from Laban Rata to the summit has been replaced by a new route named Ranau Trail. I think Google will come back again to record the new trail.

Demo Booth for Sabah Google Map Street View

After a year of waiting, finally the Street View of Sabah was ready for launching by Datuk Seri Panglima Masidi Manjun (Minister of Tourism, Culture and Environment Sabah) on 29 Oct 2015 at Le Meridien Hotel, KK. The following are some photos of the event.

Backdrop of Sabah Street View launching day

The street view of our landmark attractions is a boon to our tourism because tourists can “preview” important Sabah destinations.

Launching of Sabah’s Google Map Street View

Mt. Kinabalu is the highlight of Sabah’s Google Map Street View

The project doesn’t stop there. Google will come back to Sabah to record updated imagery whenever necessary.

Below is a video taken on Mt. Kinabalu for the launching:

Photos taken in Sabah, Malaysia Borneo

Highest Post Box of Malaysia

Welcome to the digital era, now we can write an e-mail to reach anyone within seconds. Social media even allows us to chat in real time. Handwritten letter is dying. Decades ago, it was exciting to see postman dropped something in our mailbox because there could be a letter from our loved one. Nowadays? What we see in mailbox are just ugly white envelopes containing bank statements and bills.

It’s a great feeling to write postcards above the cloud

Anyway, people still appreciate handwritten notes today. However, your friends may not get the point if you suddenly send them a snail mail. To make it special and exciting, you can send them a postcard from the highest post box of Malaysia, which is located on Mt. Kinabalu, the highest mountain of Malaysia.

Pendant Hut on Mt. Kinabalu

To reach this post box is no easy task though. You need to hike 6 KM to 3,289 Meters above sea level, but this effort adds more sentimental value to your postcard. Once you arrive Laban Rata Resthouse, the main accommodation for climbers of Mt. Kinabalu, you still need to climb 100 Meters of staircase behind the resthouse to Pendant Hut, where the post box sitting next to.

The Highest Post Box of Malaysia is just next to Pendant Hut

Pendant Hut is the training center and accommodation operated by Mountain TORQ for Via Ferrata and alpine sport climbing courses. They are also appointed by POS Malaysia as its licensed agent to handle its post box.

The Highest Post Box of Malaysia (and South East Asia)

The record is certified by Malaysia Book of Records

This post box is installed next to Pendant Hut on 14 Feb 2015, and certified as the Highest Post Box of Malaysia (and probably Southeast Asia too) by Malaysia Book of Records. You can buy postcard and postal stamps from the office of Mountain TORQ in Pendant Hut. If you have prepared your postcard with stamp, do not drop it to this post box before you get the special Mt. Kinabalu post office ink-stamp (chop) from the same office.

Postcards of Pendant Hut

There are a few special postcards printed with message “Sent from Pendant Hut”, which are ONLY available at Pendant Hut. Their postcards come with big (6.85 x 4.85 inches or 17.5 x 12.3 cm) and small (5.8 x 4.1 inches or 14.7 x 10.5 cm) sizes. Both cost the same (RM2.00 or USD0.60) so I recommend you to buy the big one.

Special postcards of Pendant Hut

To be honest, personally I think their postcards look a bit boring. Hope they will have better design and more variety of postcards in future. You can use other postcards you buy somewhere else too (Laban Rata Resthouse have some standard Sabah postcards for sale).

Special postcards collection (only available at Pendant Hut)

Different kind of self ink stamps that can be used for stamping your postcard

The reason to use the bigger postcard is to get more space for other ink stamps (see photo above). The Mt. Kinabalu official stamp by POS Malaysia should be your first choice. You can add other stamps just for fun (no extra fee). If you use small postcard, there isn’t much room for more than two stamps.

Writing postcards in Pendant Hut

It’s the coldest month (usually Nov – Dec) during my visit, the temperature at Laban Rata was only 10°C, so freezing cold that my fingers turned stiff and unable to write the words beautifully. Anyway, I enjoyed visualizing the happy faces of my friends who received my special postcards. It brought back my memory and feeling of writing a letter in the past.

Correct way of writing postcard (Click to Enlarge)

It’s very important that you write the postcard in proper layout (see picture above). You should leave two inches (5 cm) of space on top of postcard. It’s a post office requirement to stamp the official Mt. Kinabalu ink stamp on top. If you start writing on top, this stamp will be pressed over your writing and that doesn’t look so good. Another reason to use bigger postcard if you need a lot of space for your message.

Postal fee rate of Malaysia (as of Nov 2015)

After writing your postcard, you need to buy postal stamp (RM0.60-RM2.00, depending on destination country). The staff of Mt. TORQ will add the Mt. Kinabalu ink stamp (and other stamps of your choice) on your postcard, then they will seal your postcard(s) in a clear plastic bag, to protect them from moisture of rain and fog on Mt. Kinabalu.

Sending postcards from the Highest Post Box of Malaysia

The last step is to drop your postcard into the post box. The photo above is just a demo. The postcards will be stored inside a plastic bag. Do prepare some cash for buying postcard and postal stamp. It already costs you at least RM26 by sending 10 postcards. They accept no credit card.

The Highest Post Box of Malaysia

There is a postman to pick up the postcards and letters from this post box at 11:30am during weekdays (Mon-Fri, except Public Holiday). The postcards will be sent to Ranau Post Office first, before they are delivered to their destinations.

The label says the pick-up time is 11:30am from Mon to Fri (except Public Holiday)

The delivery is not fast. It took a week or more for my postcards to reach different locations near Kota Kinabalu City (KK), one of the addresses is only 200 Meters away from KK Post Office. It’ll definitely take longer time to reach destinations outside KK and Sabah.

Holding the postcards to be sent to my friends

Besides postcard, you also can send letter. The Mountain TORQ office in Pendant Hut closes at 5pm, so it’s better that you prepare the written letter in advance instead of writing it on the mountain. I also sent myself a postcard. Below is the photo of the postcard after delivery by post office. Note the cancellation mark (on the stamps) has the mailing date, name, icon and height of Mt. Kinabalu.

Postcard after delivery by post office

POS Malaysia has installed the deepest post box (40 Meters) at Layang-Layang Island. In future, they would install post boxes in other popular tourist destinations such as Sipadan Island and Tip of Borneo.

You also can buy and send postcards from Laban Rata Resthouse

“I’ve always thought that receiving a handwritten letter is like getting a hug in the mail.” -Christine French Cully (Huffington Post)

Message sent from keyboard, no matter how well-written, still can’t replace the personal touch of a handwritten message. A postcard will be a delightful surprise to the people you care. I may forget 1,000 messages that you sent to me by smartphone, but I’ll never forget the single postcard that you write for me.

Here is a video to see the launching of this post box:

Photos taken in Laban Rata, Sabah, Malaysia Borneo

Guide to Climbing Mt. Trusmadi (Mt. Trus Madi)

Mount Trus Madi (or Mt. Trusmadi) is the second highest mountain (2,642 Meters or 8,668 ft) of Malaysia. Albeit 1,453 Meters lower than Mount Kinabalu (4,095 Meters), climbing Mt. Trusmadi is more challenging, so it offers a thrilling experience for adventure seekers. Many tourists who have conquered Mt. Kinabalu are also keen to give it a try. If you are physically fit and exercise regularly, you would find Mt. Trus Madi is very climbable even though the trail is less tourist-friendly.

The peaks of Mt. Trus Madi

The facilities of Trusmadi have improved tremendously in past few years (especially the Tambunan side), so it has become a hot destination. Mt. Trus Madi is located in Trus Madi Forest Reserve (Code: FMU-10 = Forest Management Unit No.10), so you need to apply entry permit from Sabah Forestry Department for the climb. This article provides the most complete and updated information to help you planning the climb.

Overview of 3 Summit Trails to Mt. Trus Madi

Climbing Mt. Trus Madi can be done in 2 to 4 days, depends on the trail you pick. There are three summit trails that lead to the highest peak of Mt. Trus Madi, i.e.:

  1. Kaingaran Trail in Tambunan
  2. Mannan Trail in Keningau
  3. Mastan Trail in Sook

Location map of Mt. Trus Madi & starting points of 3 summit trails

These trails have different climbing distance, starting point, road accessibility, level of difficulty and facilities on the mountain. Picking the trail is your first step to plan the climb. Kaingaran Trail (Tambunan) is the most popular choice because its climbing distance is shorter (4.9 KM) and the facilities are the most developed. Mannan Trail (Keningau) is the second best choice. Though the climb takes 4 days, the view along the trail is more beautiful and you don’t need a 4-Wheel Drive.

The following table is a comparison of three trails (can click to enlarge):

Table: Comparison of 3 summit trails to Mt. Trus Madi

Since these three summit trails are connected to one another on the summit, you also can choose to ascend and descend to different points for more fun. For example, you can climb up the mountain via Kaingaran Trail from Tambunan, but climb down via Mannan Trail to Keningau, if you are able to arrange your return transport waits at other end.

Below are more detail reviews of three summit trails to Mt. Trusmadi:

1. Kaingaran Trail

Kaingaran Trail is the oldest and most developed trail. I climbed Mt. Trus Madi via this trail in year 2010. However, the climb is much more enjoyable and easier nowadays because of upgraded trail and accommodation.

Kaingaran Trail of Tambunan

Climbing Distance: 4.9 KM (require 2 day 1 night)
Location: Tambunan District
Starting Point: 27 Km (2.5 hours drive) from Tambunan Town (mainly gravel road. The last 6 KM road trip needs 4-Wheel Drive)
Accommodation: Mirad Irad Base Camp (foothill), Rest House (at 2.9 KM of mountain trail)

Mirad Irad Base Camp of Mt. Trus Madi in Tambunan

You can spend one extra night at Mirad Irad Base Camp of Mt. Trus Madi (7 KM before starting point (20 min drive) and 900 Meters above sea level), if you want to start your climb very early in next morning. The accommodation at Base Camp can accommodate 24 people, and camping (Fee: RM10) is allowed. The room rate is RM20 per night per person. Please note you MUST book 1 month in advance.

Taman Kitingan: Starting point in Tambunan (Kaingaran Trail)

If you start your climb on day 1 from Kota Kinabalu City (KK), you need to drive about 4 hours from KK to starting point in Tambunan, very likely you will start your climb around noon, which is kind of late. That’s why some climbers prefer to stay an extra night in Mirad Irad Base camp or hotel in Tambunan.

Plank walk & boardwalk in summit trail at Tambunan (Kaingaran Trail)

The first 3 KM of Kaingaran Trail is boardwalk. It’s leech-free and makes climbing more like hiking.

Taliban Point, which is named after OKK Taliban, the 1st native chief of Tambunan and has nothing to do with terrorist.

Toilet in summit trail to Mt. Trus Madi

One of the shelters in Kaingaran Trail (Tambunan)

Summit trail to Mt. Trus Madi (Kaingaran Trail, Tambunan)

Mt. Trus Madi Rest House (only available for Kaingaran Trail)

There is only one accommodation on Mt. Trus Madi and about 2.9 KM away from the summit. The Rest House has 5 rooms, each with 4 bunk beds, and able to host 20 people at a time. The fee per person is RM20-RM100 per night per bed. The amenities are quite basic, water supply and lighting are available.

Mt. Trus Madi Rest House looks like a long house

Accommodation on Mt. Trus Madi. Guide and Porter camp under the Rest House if the rooms are full.

Bunk beds in Rest House. It costs RM20-100 per night per person.

Kitchen of the Rest House. only tour operator can cook.

Toilet of the Rest House

Rest House on Mt. Trus Madi

The following video gives a good overview of Kaingaran Trail, with a lot of aerial views of Mirad Irad Base Camp, Mt. Trusmadi Rest House and the summit:

The next two trails are relatively new and located in Keningau District (Sook is a sub-district of Keningau).

Mastan (left) and Mannan (right) Trails at Keningau District

There is no accommodation in Mastan and Mannan Trails, so you will need to bring your own camping and cooking gears. This means you need to carry more weight, making the climb tougher. You can hire porters to share your burden. The camping fees are RM3 and RM5 for Malaysian and foreigner respectively.

2. Mannan Trail

Though Mannan Trail takes the longest time (4 day 3 night), many adventurers love its scenic view and pristine route. Another advantage is – you don’t need a 4-wheel drive to travel to the starting point.

View of Mt Trus Madi from Kg. Sinua (KM2.4 point to summit)

Climbing Distance: 11.6 KM (require 4 day 3 night)
Location: Sinua Village (Kampung Sinua), Sook (Keningau District)
Starting Point: 103 KM of paved road (3 hours drive) from Keningau Town. Good road condition. No need 4-Wheel Drive.
Accommodation: Camping and Resting Platform only

K.S. Khiong Point (4,200M) of Mannan Trail, one of the camping sites

The GoPro video below gives you a good idea of trail condition in Mannan Trail:

If you want the most detail video walk-through, you may check out the 56-minute video below:

3. Mastan Trail

Mastan Trail is very “raw” and the least developed. I have very little information about this trail. Judging from the map, Mastan Trail is the shortest (4.3 KM) but the steepest. You see, Mastan Trail is only 600 Meters shorter than Kaingaran Trail (Tambunan), which has far better trail and facilities, of course most climbers will go for the more relaxing option.

Taman Bunga (Garden Peak) of Mastan Trail

Climbing Distance: 4.3 KM (require 2 day 1 night)
Location: Apin-Apin, Keningau District
Starting Point: 76 KM (4 hours drive) from Keningau Town. Bad road, accessible only by 4-Wheel Drive.
Accommodation: Camping

Toilets in Mastan Trail

Some village folks there have been doing day climb via this trail. Anyway, if you have only 2 days and want to see the most of Mt. Trus Madi, you may ascend via Kaingaran Trail on day 1 and descend via Mastan Trail on day 2.

The Summit

The flora of Trusmadi is very diverse and fascinating, where almost 600 species of 160 families of plants have been recorded here. Remember to get your certificate if you make it to the top (RM10 fee applies).

Nepenthes Trusmadiensis is a pitcher plant endemic to Mt. Trus Madi

Nepenthes trusmadiensis is the natural hybrid between Nepenthes lowii and Nepenthes macrophylla, you would see it when you are close to the summit.

The highest point of Mt. Trus Madi (2,642 Meters)

You can see Mt. Kinabalu clearly on Mt. Trus Madi

When you reach the summit of Mount Trusmadi at dawn, if the weather is good, you will be mesmerized by a breath-taking view of Mount Kinabalu, which lies about 40 KM to the north.

New! 5-Meter Viewpoint Tower 100 Meter from the summit of Mt. Trus Madi (at Jiran Point)

How much does the climbing trip cost?

The total fee varies greatly, depending on the trail and services that you select. Below is a list of basic fees (in Malaysian Ringgit (MYR)).

Malaysian Foreigner
Climb Permit 30 80
Entrance Fee 5 15
Vehicle Permit 100 100
Accommodation (1 night)* 100 100
Forestry Guide (2 days) 100 200
TOTAL: 335 (≈USD$95) 495 (≈USD$140)

*For Rest House only. Replace this with camping fee if you don’t use Tambunan trail

The final cost can range from RM400 to RM800 per person, after you include other variable and optional fees such as rental of 4-Wheel Drive (RM800/day per car), insurance, transport (gasoline), food & personal supplies, porter, certificate (RM10), etc. You can save more money by going in group, so you can split the cost on transportation and guide fee.

Enjoying the mountain view from the tower

If you have more questions, you may contact the Forestry Officers listed below:

1. Tambunan

Contact Person: Mr. Saleh Intang, District Forestry Officer (“DFO”) of Tambunan
Address: Pejabat Perhutanan Daerah Tambunan, Peti Surat No 64, 89657, Tambunan, Sabah, Malaysia
Tel: +60 88-899589
Fax: +60 88-899588
E-mail: saleh.intang@sabah.gov.my

2. Keningau / Sook

Contact Person: Mr. Azman Said, District Forestry Officer (“DFO”) of Keningau
Address: Pejabat Perhutanan Daerah Keningau, Peti Surat No 88, 89007, Keningau, Sabah, Malaysia
Tel: +60 87-331203
Fax: +60 87-338721
E-mail: azman.said@sabah.gov.my

Tour Operators

If your budget permits, you should consider hiring a tour operator to arrange the climbing trip for you. The cost will be higher, but they will save you the problems on paperwork (permit), 4-wheel drive transport, camping, cooking, etc. I strongly recommend the following tour operators, who are experienced in adventure trips:

1. TYK Adventure Tours

Address: Block E, Lot 38, 2nd Floor, Damai Plaza IV, Luyang, Kota Kinabalu, Sabah, Malaysia
Tel: +60 88-232821
Website: www.tykadventuretours.com
E-mail: thamyaukong@gmail.com
Fax: +60 88-232827

2. Mount Trusmadi Travel & Tour Tambunan

Address: Lot No. 5, Kedai Tepi Sungai Tondulu, Majlis Daerah Tambunan, 89657 Tambunan, Sabah, Malaysia
Tel: +60 87–771312
Mobile Phone: +60 19-8831568
E-mail: widuresorttbn@yahoo.com

By the way, currently Sabah Forestry Department only has 16 mountain guides. During peak season, they may not have enough manpower to guide the climbers. They would disapprove your climb in that case. Therefore, I advise you to register a few months before the climb, to secure the limited capacity.

Useful Slides

Most of the information here is extracted from the following slides by Sabah Tourism Board and Sabah Forestry Department. You may download them for further reading. Also special thanks to Mr. Tham Yau Kong and Mike Miki from TYK Adventure Tours for contributing the photos. (Note: some info is inconsistent in different slides. I’ll correct them once I confirm the details).

Overview of Mt. Trusmadi, e.g. photos of road condition, starting points, accommodations, facilities, itineraries.

Useful info for planning the tour, e.g. booking and reservation procedures, various fees (permit, entrance, forestry guides), application forms and checklist of Things to Bring.

This slide contains some latest photos of the trails.

Please feel free to leave your question in comment section below, I’ll try my best to answer.

Photos taken in Sabah, Malaysia Borneo

Bohey Dulang of Semporna Islands Park

My urge to visit Bohey Dulang Island started with a photo seven years ago. “Nice painting!” I praised a big drawing of islands hanging in the office of my friend. “Actually it’s a PHOTO taken in Sabah,” he replied. I was stunned. The islands look so surreal, such place doesn’t even seem exist. After some lookup in local bookstore, I found that it is the photo of Tun Sakaran Marine Park (or Semporna Islands Park) taken by Michael Patrick Wong.


Pic: aerial photo of Tun Sakaran Park by Michael Patrick Wong

Tun Sakaran Marine Park (TSMP) is located off Semporna at east coast of Sabah and comprises of eight islands – Bohey Dulang, Bodgaya, Tetagan, Sebangkat, Selakan, Maiga, Sibuan and Mantabuan, covering a total land and sea areas of 350 km?.


Pic: view of Tun Sakaran Marine Park from Semporna town. Locals call it Sleeping Old Man and I guess you can see why.

TSMP is the largest marine park in Sabah (but will be superseded by 1-million-hectare Tun Mustapha Marine Park soon). I was also told that you can get a fascinating view of TSMP (they call it one of the most beautiful views of Sabah) from the peak of Bohey Dulang Island.

Below is the location map of TSMP. You also can see it in Google Map:

Every now and then I contacted some travel agents for a trip to this park, but they all wanted me to charter the whole boat (for nearly a thousand bucks) if I traveled solo, so the plan was held indefinitely until last month Edward from Borneo Star Cruise texted me, “bro, I’ll visit Bohey Dulang tomorrow. You want to join?” Of course I was more than happy to tag along!

About Bohey Dulang Island

Bohey Dulang (or Boheydulong, Bohaydulong) is the second largest island (size: 313 hectares) of TSMP and about 23 Km away from Semporna. Legend says there lives a beautiful princess named Salamia from Bum-Bum Island. Her family hid her on Bohey Dulang, to avoid a forced marriage by a notorious Sultan from the southern Philippines.


Pic: drama about Princess Salamia in Sabah Fest 2010.

However, she vanished a few days later and believed to be hidden by the spirits of this island and turned into a fairy. Even nowadays, local people say they can hear Princess Salamia singing and her dog barking during the night of full moon. Occasionally, she is seen walking around the island.


Pic: Bohey Dulang Island

The name Bohey Dulang is derived from bohi (bohey) meaning water and dulang meaning pools or depressions in Bajau language. This may refer to series of oval rock pools, roughly 2-3 m across, along the small waterfalls and main freshwater stream on the eastern side of the island.


Pic: East side of Bohey Dulang Island

People say these pools are a source of drinking water for Princess Salamia. A document reports a large cave (40 M high and over 20 M long) is situated on the east side of this island too. Could it be the home of Princess Salamia? I wonder.

Day Trip to Bohey Dulang

Ok, back to my tour. Edward and I were taking a boat from Semporna town around 11am. The weather was good and we approached TSMP in 15 minutes. The Best Time to visit Bohey Dulang are from February to April (the dry months). If you visit during wetter months like July, August, December and January, your trip would have higher chance of being spoiled by heavy rainstorm of monsoon seasons, or not, depending on your luck. The park would close the climbing trail if the weather doesn’t seem good (even if it’s cloudy and no rain).


Our boatman showed us a “secret passage” where we could see dozen of sea turtles. We cruised slowly on the sea near TSMP. It was low tide and the water was crystal clear. We could see large area of corals and white sand under the ocean.


Then we did see over 10 sea turtles passed by our catamaran one by one. Gee… though turtles look heavy and clumsy, they swim as fast as a torpedo in the water. I totally fall in love with the beautiful nature and romantic legend of this island.


You may ask, “this magical destination should have become very famous for a long time. Why it only rises as a new attraction in recent years?” Good question. In 1963, Bohey Dulang was leased to Kaya Pearl Company to establish the first pearl cultivation center in Malaysia. The island was heavily guarded by armed personnel and stranger was strictly forbidden to enter the island. That’s why Bohey Dulang is nicknamed as the Pearl Island or Treasure Island.


Then the pearl farm was closed in 1993. In 2004, Bohey Dulang, with seven other islands, is gazetted as ?Tun Sakaran Marine Park? (TSMP) by the Sabah Government. As a national park and by word of mouth, it gains more exposure and now it receives hundred of tourists every day.


TSMP is managed by Sabah Parks and they have an office and giant clam nursery on Bohey Dulang. Visitors are required to get a permit from them before entering the island. I hope they will make it a public park soon, so tourists only require to buy ticket to enter. Furthermore, Bohey Dulang needs more tourism amenities such as restaurant, watersport center and resort.


From the jetty, you can see the peak (at left in photo above) that is used as the view point for scenery of TSMP.

For a fast overview of Bohey Dulang, you may watch the short video below:

Hiking to the peak

You need to ascend a 800-Meter nature trail to reach the peak with a height of 353 Meters, which normally takes 40 minutes. The climb can be a bit challenging after rain, because some steep areas will become slippery and muddy. Do wear proper walking shoe, I strongly advise against flip-flop. The park will make it compulsory to rent a pair of hiking shoes from them for RM5, if you don’t wear the proper shoes. It’s warm and humid in the forest and hot on the peak, so please bring some drinking water.

Trail map of Bohey Dulang Island (with English translation)


Pic: the view points on the peak. The trail will lead you to the one at right, you can walk 20 Meters to the view point at the left for better sight. The dark grey rocks that form the high cliffs and large shore outcrops are mainly volcanic rocks of late Tertiary (Pliocene) and Quaternary periods. It’s unique because Semporna peninsula is the only place in Sabah where you can see these rocks.


There is a small toilet at the beginning of the trail. It is not so clean and well-maintained, but usable.


Limited supports such as boardwalk, handrails, ropes, stairway and plank path are available to make your climb easier, but you will walk on soil and rocky path most of the time and busy grabbing the small trees along the trail for support. For safety, a Sabah Parks guide will escort you on the way. Just go slow and everyone can make it quite easily.


Like other islands in TSMP, Bohey Dulang has one of the most unique and unusual plant communities in Borneo, especially coastal forest and scrub vegetation. Some plant species here are regional endemic to Semporna islands and Philippines, and not found in other locations of Borneo, for example, rare Paraboea leopoldii on cliff faces, Dracaena multiflora monocot, palm-like Cycas rumphii, cactus-like succulent Euphorbia lacei and trichoglottis geminata, a rare epiphytic orchid grows on volcanic rock.


I was looking for Selaginella tamariscina, a small plant of 4-5 cm high like a miniature tree fern. Its leafy distal branches curls inwards under hot sunlight but flattened during rain. This cute plant is a new record to Borneo, and it grows on exposed to partially shaded, gently sloping rockfaces of this island.


We saw probably nearly a hundred tourists on the way down. They looked tired but really happy. Some even encouraged us, “move on, you are close!”, “it’s awesome up there!”, “it is worth the effort.” A rain earlier turned part of the trail into creeks. Many tourists took off their flip-flop and descended barefooted, when their shoes were too slippery to hold their feet. I sweated a lot but the soothing sea breeze prevented me from overheat.


Wildlife such as long-tailed macaque and otter also live on this island but not in great number. A total of 48 bird species comprising mainly resident birds have been recorded around Bohey Dulang. The notable bird species are Metallic Pigeon (Columba vitiensis), Nicobar Pigeon (Caloenas nicobarica), Tabon Scrubfowl and Pied Hornbill. I saw more mosquitoes than other animals though. The good news is – there is no leech.


Pic: They call this ladder between boulders “Stairway to Heaven.” You should feel joyful when you reach here. Not because you will go to heaven, the peak is only a very short walk away now.


Finally I came to a flat ground and saw the light in front. I could tell the amazing scenery was waiting for me outside the dense bushes.


Hooray…!!! After a taxing climb, it’s time to enjoy the wonderful view and stay as long as you want.

The Most Beautiful Seaview of Sabah

On top of Bohey Dulang, you can have a bird-eye view of the sapphire-colored Bodgaya Lagoon embraced by emerald forest of three central islands (Bodgaya, Bohey Dulang and Tetagan), the only islands in Sabah made of volcanic rock and part of the Sulu volcanic chain. In fact, the lagoon, which is about 6.5 Km across, is a crater of an ancient volcano erupted 2.5 million years ago.


The central islands are the remnants of a Quaternary volcanic crater rim. Part of the “rim” is dissected and inundated by the sea but you can see it from its curved reef formation. I was standing on top of an extinct volcano. You may look at the satellite photo below for a clearer view of the rim.


Pic: I could see our boat at the jetty. All boats look like tiny toy from a height of over 260 Meters. The highest point of Bohey Dulang is 353 Meters and situated further south. They might open a new trail to there in future.


Pic: abandoned pearl farm


It’s noon time and most tourists have descended. The rest of us were happy to take hundred of photos. They didn’t build any fence, so be careful when you stand on the uneven surface of the cliffs.


Pic: To your right you can see the 120-Meter long channel between Bodgaya Island and Bohey Dulang. Bodgaya means “impressive mountain” in Bajau language, and it’s the largest island (795 ha) in TSMP and about 8 Km long. You also can see its highest peak, Mt Bodgaya, which is 455 Meters high.


If you say Bohey Dulang has the most beautiful sea view in Sabah, those who had been there won’t argue with you. You may forget many things in life over time, but you will always remember the breathtaking seascape of Bohey Dulang.


For the best view, you need to walk another 20 Meters to your right for second view point, which offers a truly panoramic view (like photo above). You would miss this spot if nobody tells you. This is the favorite spot of landscape photographers to capture the circular shape of the lagoon and “50 shades of blue” colors.


The volcanic rocks and mixture of Bornean and Philippines flora make this park looks a bit “exotic” even to Malaysians. Like the yacca-like Dracaena multiflora in photo above. It is common in summit scrub here but do you know that it’s only found in Philippines and Semporna Islands Park?


It’s hard to say goodbye to Princess Salamia and her lovely islands in Celebes Sea, which can match the beauty of Caribbean Sea.

How to get there

A day trip to Bohey Dulang is possible even if you stay in Kota Kinabalu City (KK). Just take a 50-min morning flight from KK to Tawau City, upon arrival get a 1-hour land transport to Semporna town, then the park is only 20 minutes away by boat. The earliest flight to Tawau departs at 7:25am, and last flight back to KK is at 7:45pm. Both direct routes are served by Malaysia Airlines and available every day. You may use Google Flight to check out the latest prices and other flight alternatives. Please note you need a permit from Sabah Parks prior to visit the island.


Starting on 1 Feb 2016, visitor will need to pay for entrance ticket to this island (which they call Conservation Fee):

Ticket Rates (in MYR Malaysian Ringgit)

Conservation Fee (to Tun Sakaran Marine Park)AdultBelow 18Below 1260 & Above
MalaysianRM8RM5FreeFree
Non-MalaysianRM20RM12RM12RM20
Climbing Fee (Bohey Dulang)AdultBelow 18Below 1260 & Above
MalaysianRM20RM10FreeFree
Non-MalaysianRM50RM30RM30RM50
Fees to climb Bohey Dulang, rates with effect from 1 Jan 2023


Please feel free to contact Borneo Star Cruise for more info:
E-mail: info@borneostarcruise.com
Phone (24×7): +60 17-820 7911 (also reachable by Text, WhatsApp, Viber, LINE)
Facebook: Borneo-Starcruise-Sdn-Bhd

Other Activities

Besides sightseeing at Bohey Dulang, there are a few other activities you can do around Tun Sakaran Marine Park (TSMP).

1. Visit Giant Clam Nursery

Due to overfishing, giant clams are highly endangered. TSMP is a refuge for seven species of giant clams (Tridacnidae and Hippopusporcellanus species).


Sabah Parks has a giant clam nursery and hatchery center on Bohey Dulang, where they breed and propagate giant clams inside and outside the Park. The display and settlement tank area, which houses a few species of giant clam (may not open to public and tourists). It’s possible to arrange an educational tour to visit their lab and research center.

2. Snorkeling & Diving

TSMP is located in Coral Triangle (a.k.a. Amazon of the Sea), which supports one of the richest marine ecological zones in Malaysia. 528 species of coral reef fish are found in the park, much more than Sipadan Island (409), Redang (209) and Tioman (233). Teeming with over 320 species of hard and soft corals, and variety of sea creatures such as eagle rays, barracuda, turtles and nudibranchs, this park is getting well-known as a scuba diving and snorkeling site.


Mantabuan Island has the best concentration of corals and marine lives. Sibuan Island is featured as one of the 101 Best Beaches of Malaysia. Therefore, both islands are the favorite picks of travel agents to impress their guests.

3. Photography

You are wrong if you think that TSMP is only about nature. Many world-renowned photographers have visited this park for human interest shots here and won some international awards. Around the islands, there are about 10 villages of Bajau Laut (a.k.a. Sea Gypsies) people living either in temporary shacks or in their boats. They maintain very traditional lifestyles and possibly the only nomadic seafarers left in the world.


Most of them are fishermen in hardcore poverty. However, when their primitive houses, nude children and pristine sea are being framed into a photo, its visual impact is so overwhelming and so out of this world (though it’s a sad reality). Whenever I drop by Semporna, I never fail to see a few boatloads of photographers heading to TSMP.

More Photos

For more photos, you may check out my photo album.

.

References

  • New records of Bornean plants from the Semporna Islands off Sabah’s east coast, KM. Wong et al., Sandakania 13 (1999): page 31-40
  • The landscape, vegetation and botany of the Semporna Islands off Sabah, Borneo, KM. Wong et al., Sandakania 13 (1999): page 41-65
  • Semporna Islands Darwin Project (2001 Jan). Management Plan for the Semporna Islands Park

Photos taken in Semporna, Sabah, Malaysia Borneo