No matter how cool is your weekday job, your best day in office can’t beat an outing to try something new. My last weekend in Kiulu was a day filled with laughter, all from my heart. Before that, I was angry with the rude text from my boss that spoiled my weekend mood. Now I pity her that she can’t free her mind from work on Saturday.
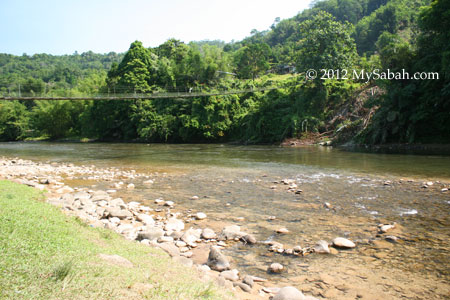
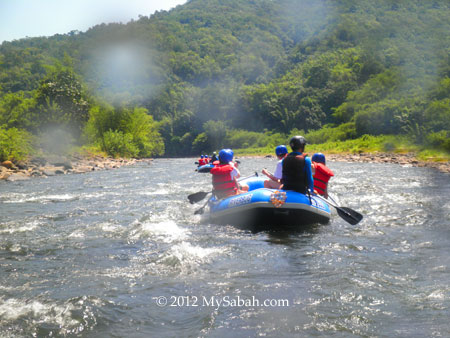
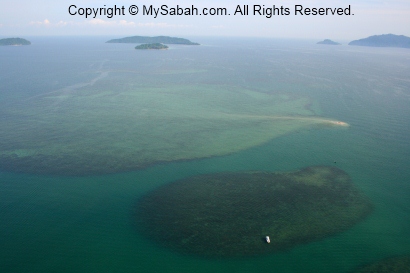
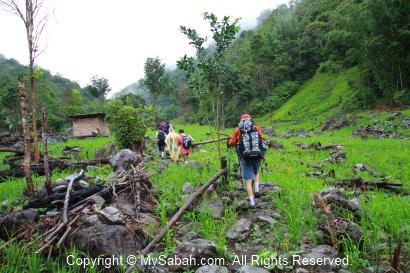
Kiulu is the second most beautiful village in Malaysia. One of the factors is its beautiful Kiulu River, the place where we raft. The river is so clean that the visibility is nearly 10 feet. Due to increasing pollution, you don’t find many rivers like Kiulu in Malaysia. Most of them are in milk tea color.
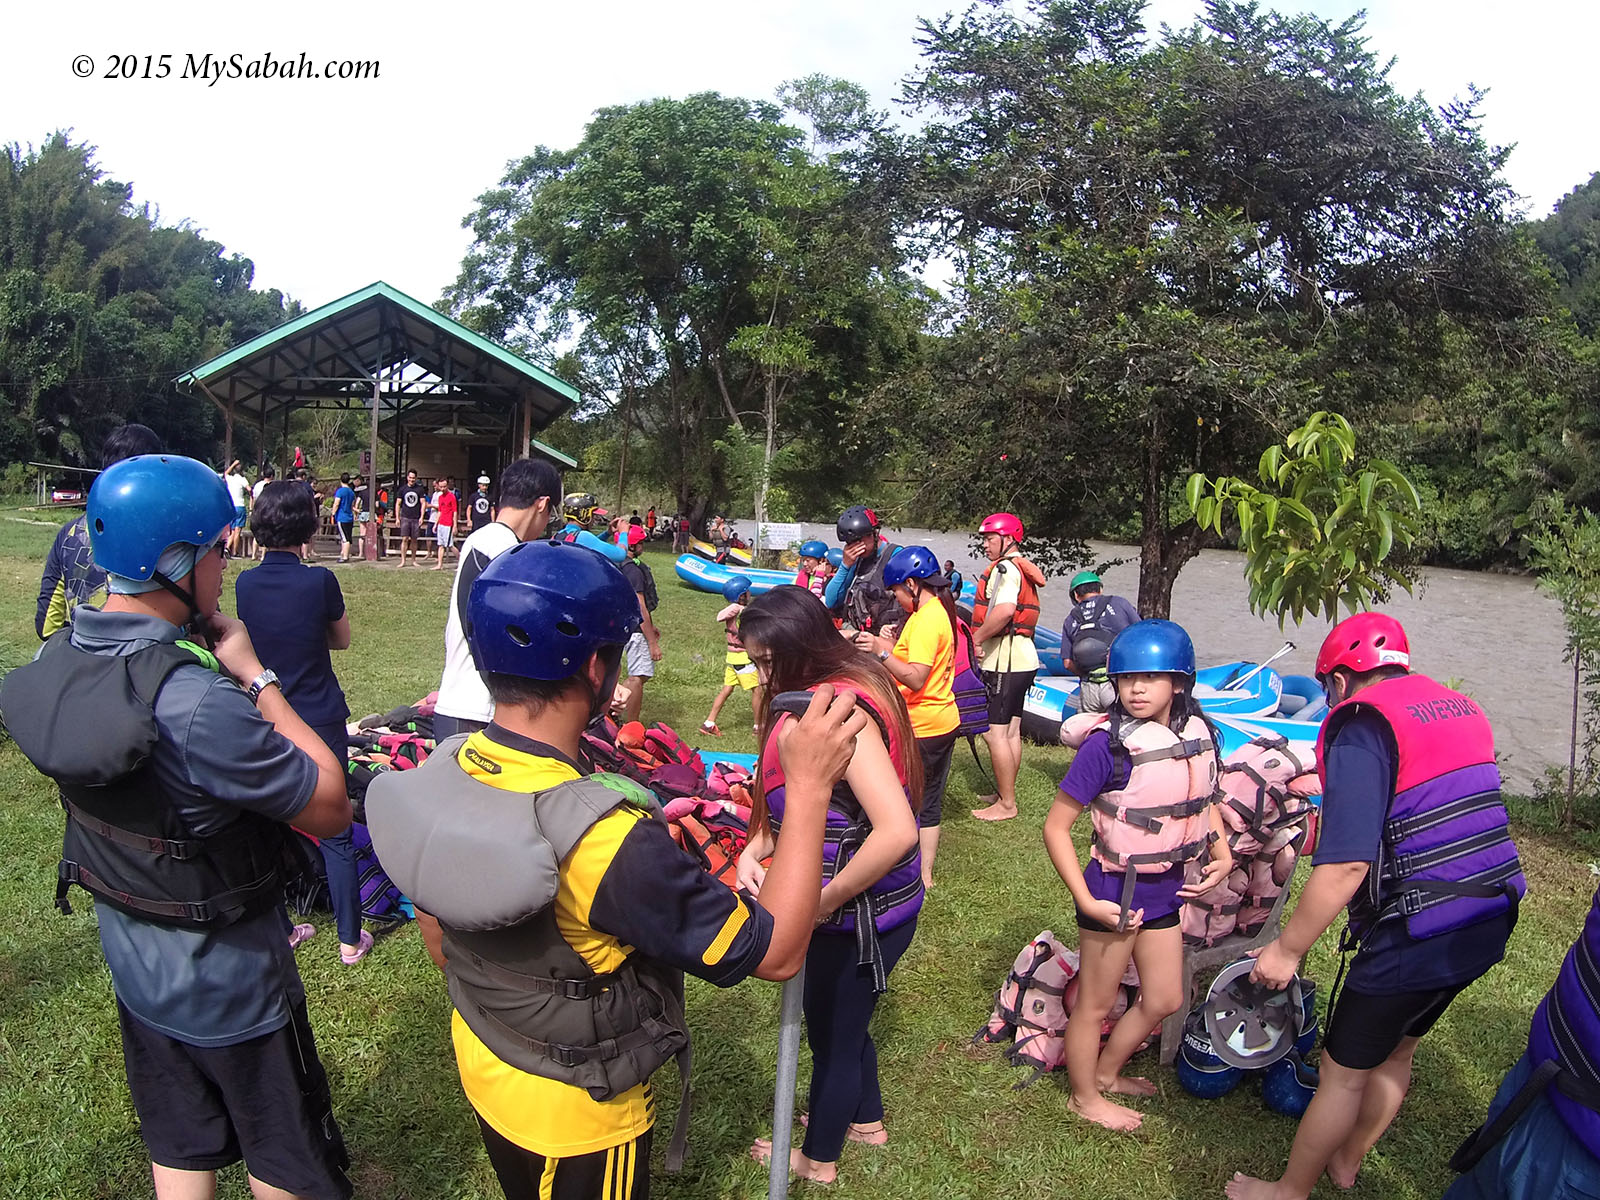
The starting point of the white water rafting is about 40 KM from Kota Kinabalu city. The rafting route is about 12 Kilometers, which took 1.5 to 2 hours. To do white water rafting, you need to book a tour package with travel agent such as Riverbug, who provides the transport, boat, equipments, guide and lunch.
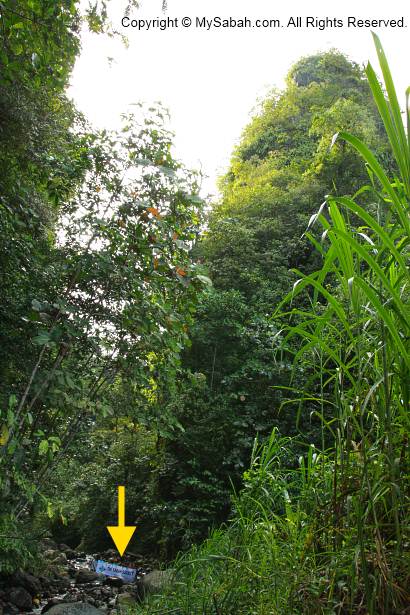
Starting point of White water rafting (Kiulu)
White water rafting may sound too adventurous (scary) to you. But no worry, the difficulty of white water rafting in Kiulu is only rated as Grade 1 to 2, which means “Some rough water, maybe some rocks, small drops, might require maneuvering”. It is not a challenging level like the Grade 3 to 4 level of Padas River. Even kids find it easy, great for family tour.
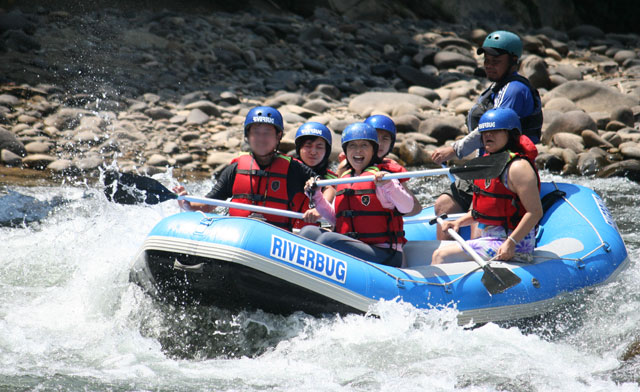
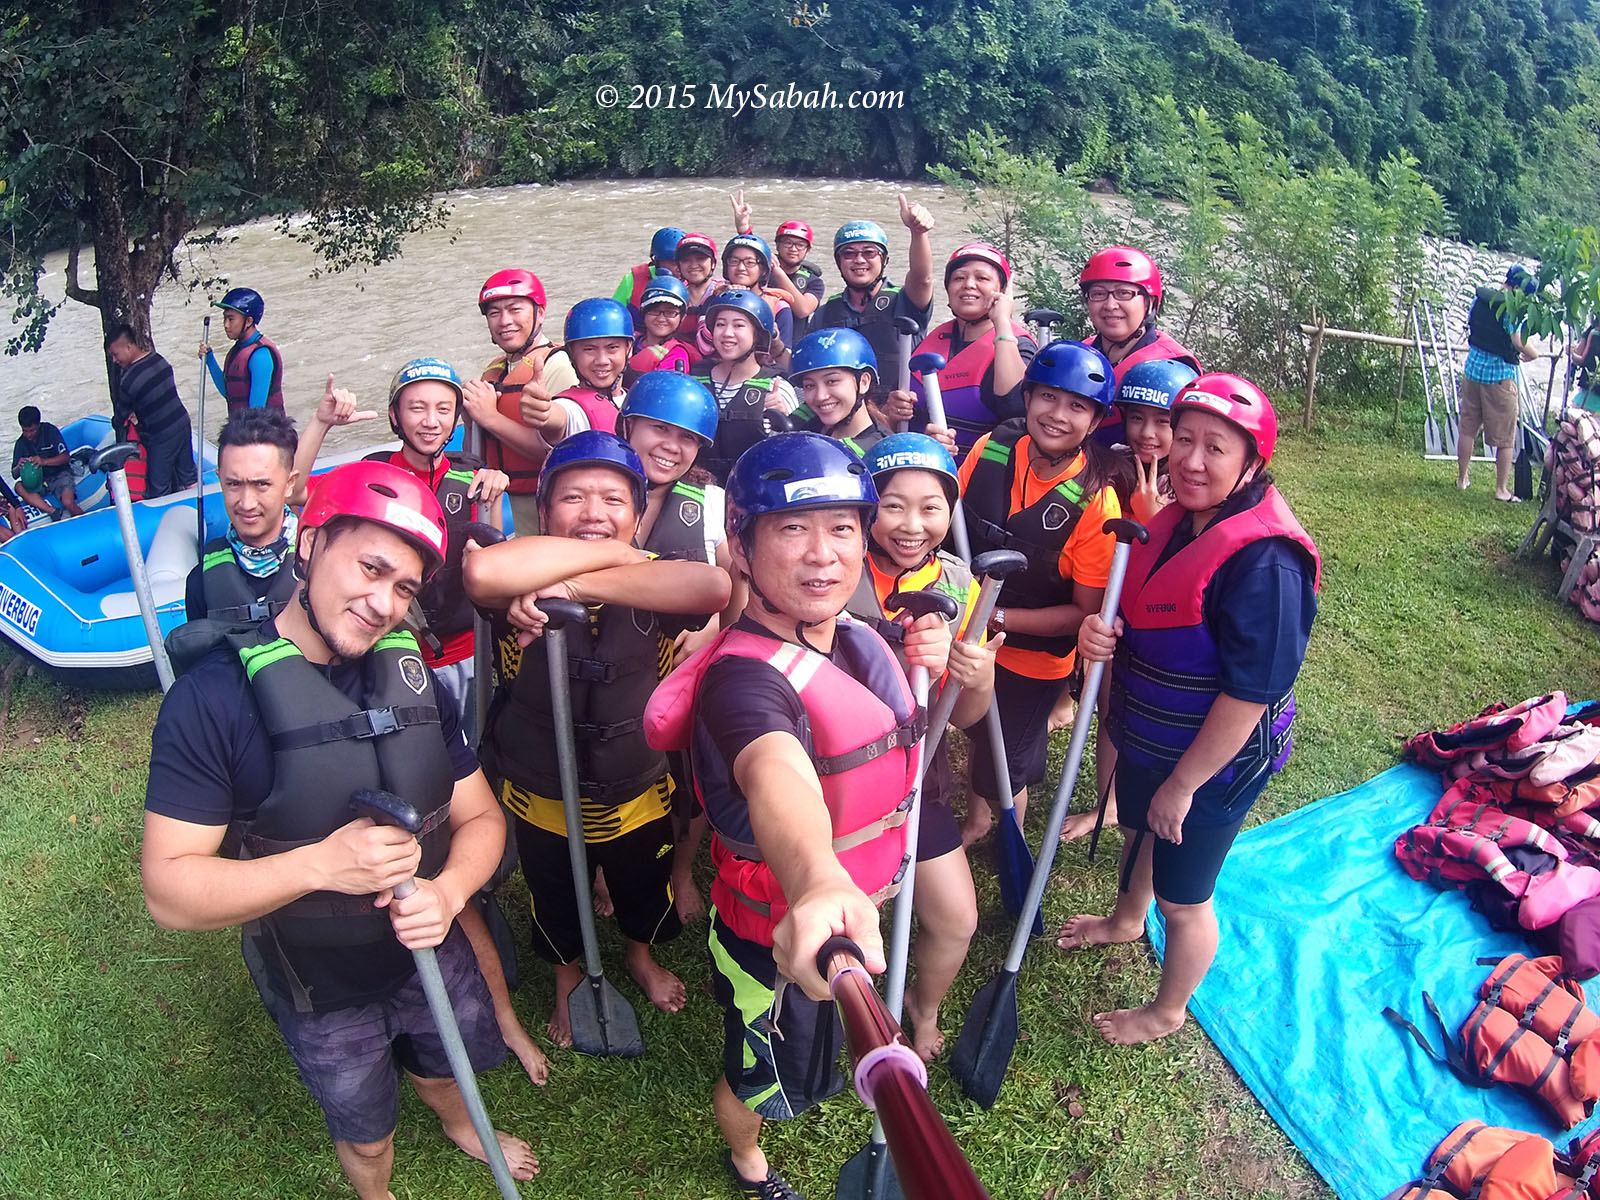
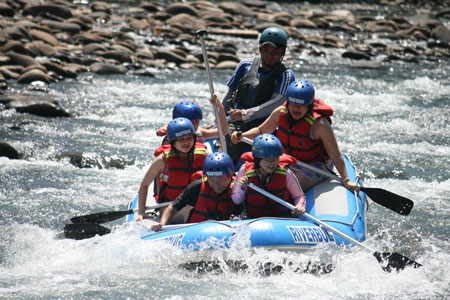
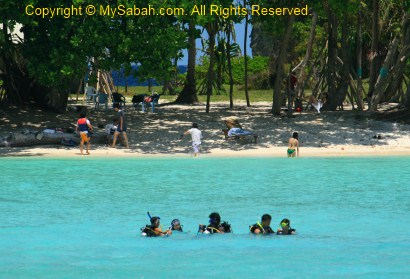
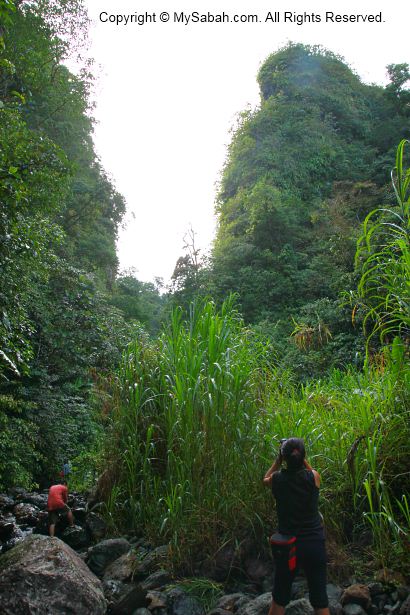
Group photo before white water rafting in Kiulu River
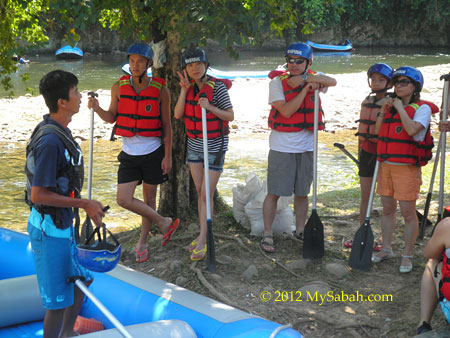
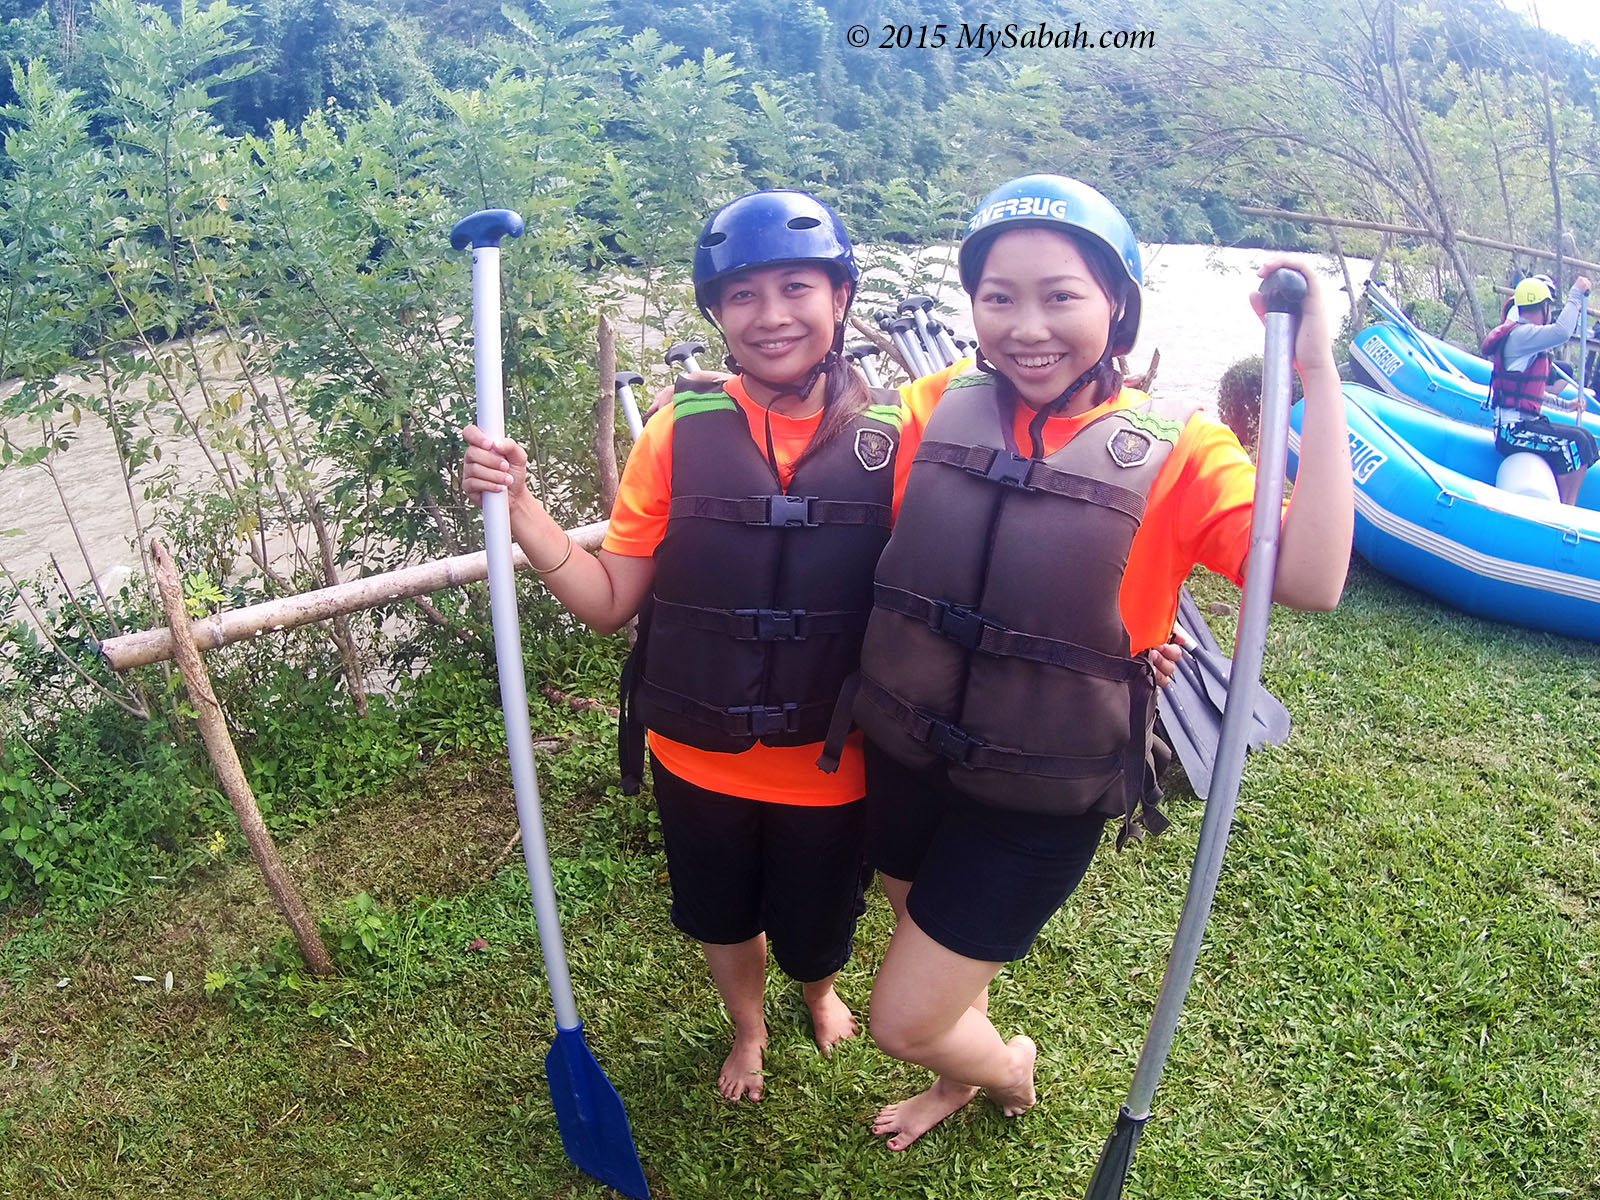
After travelling over an hour on bus, we reached Kiulu about 10am. For safety, we put on life jacket and helmet.
Daniel, our friendly guide, gave a short briefing before the white water rafting. We only need to know 3 instructions, paddle forward, backward and stop.
Everyone must wear helmet and life jacket for protection
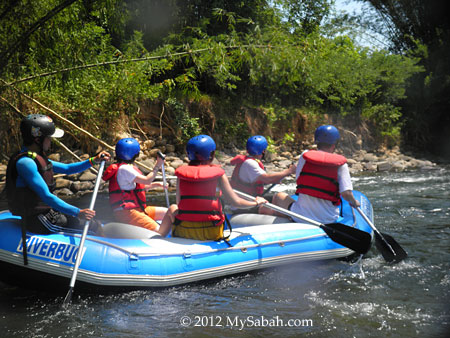
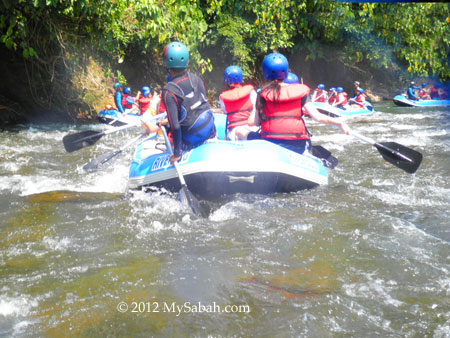
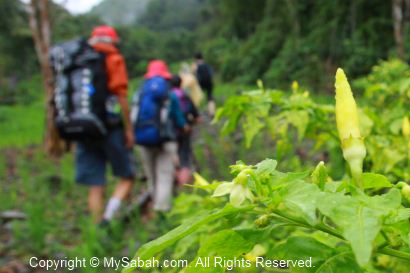
Everyone couldn’t wait to start so we got on-board very soon and started rafting. There were about 6 boats going together. Due to the dry season, the river is not deep and swift.
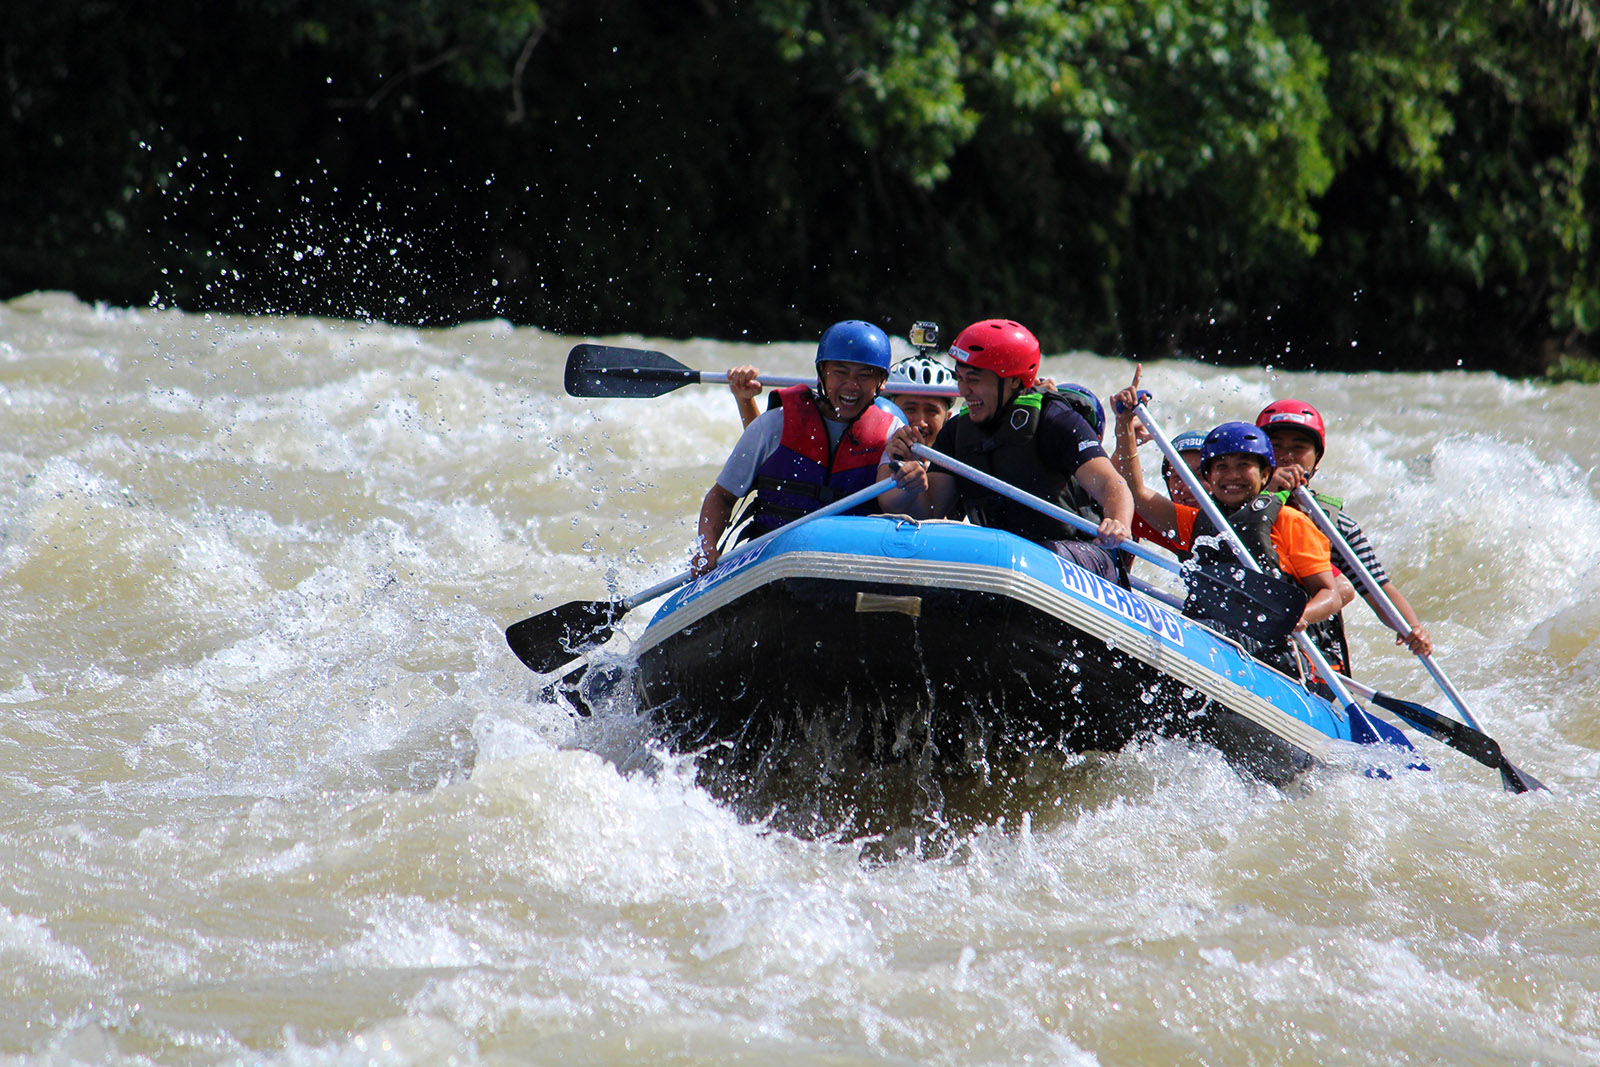
We encountered some rapids along the way, but they are almost effortless to cross. In Grade 4 river, your raft will be capsized by strong waves if you don’t paddle hard to fight your way out of the rapid. Most of the time, we were lazy and left the guide did the paddling. :-p We waste more energy making “water war” with other boats LOL (can watch it in video below).
We were very relax and enjoy the scenic countryside view along the river. We saw many big Pelian fishes in the river and some friendly villagers waving hands at us from the shore.
White water rafting is thrilling
Though the rapids were not strong, a few inexperienced tourists still fell into river. A tourist was so panic at first then found that actually he could stand in the shallow water, so funny. The playful guides also purposely pulled a few tourists out of the boat. When stopping for a rest, some of us jumped into the river to enjoy the refreshing clean water in hot day.
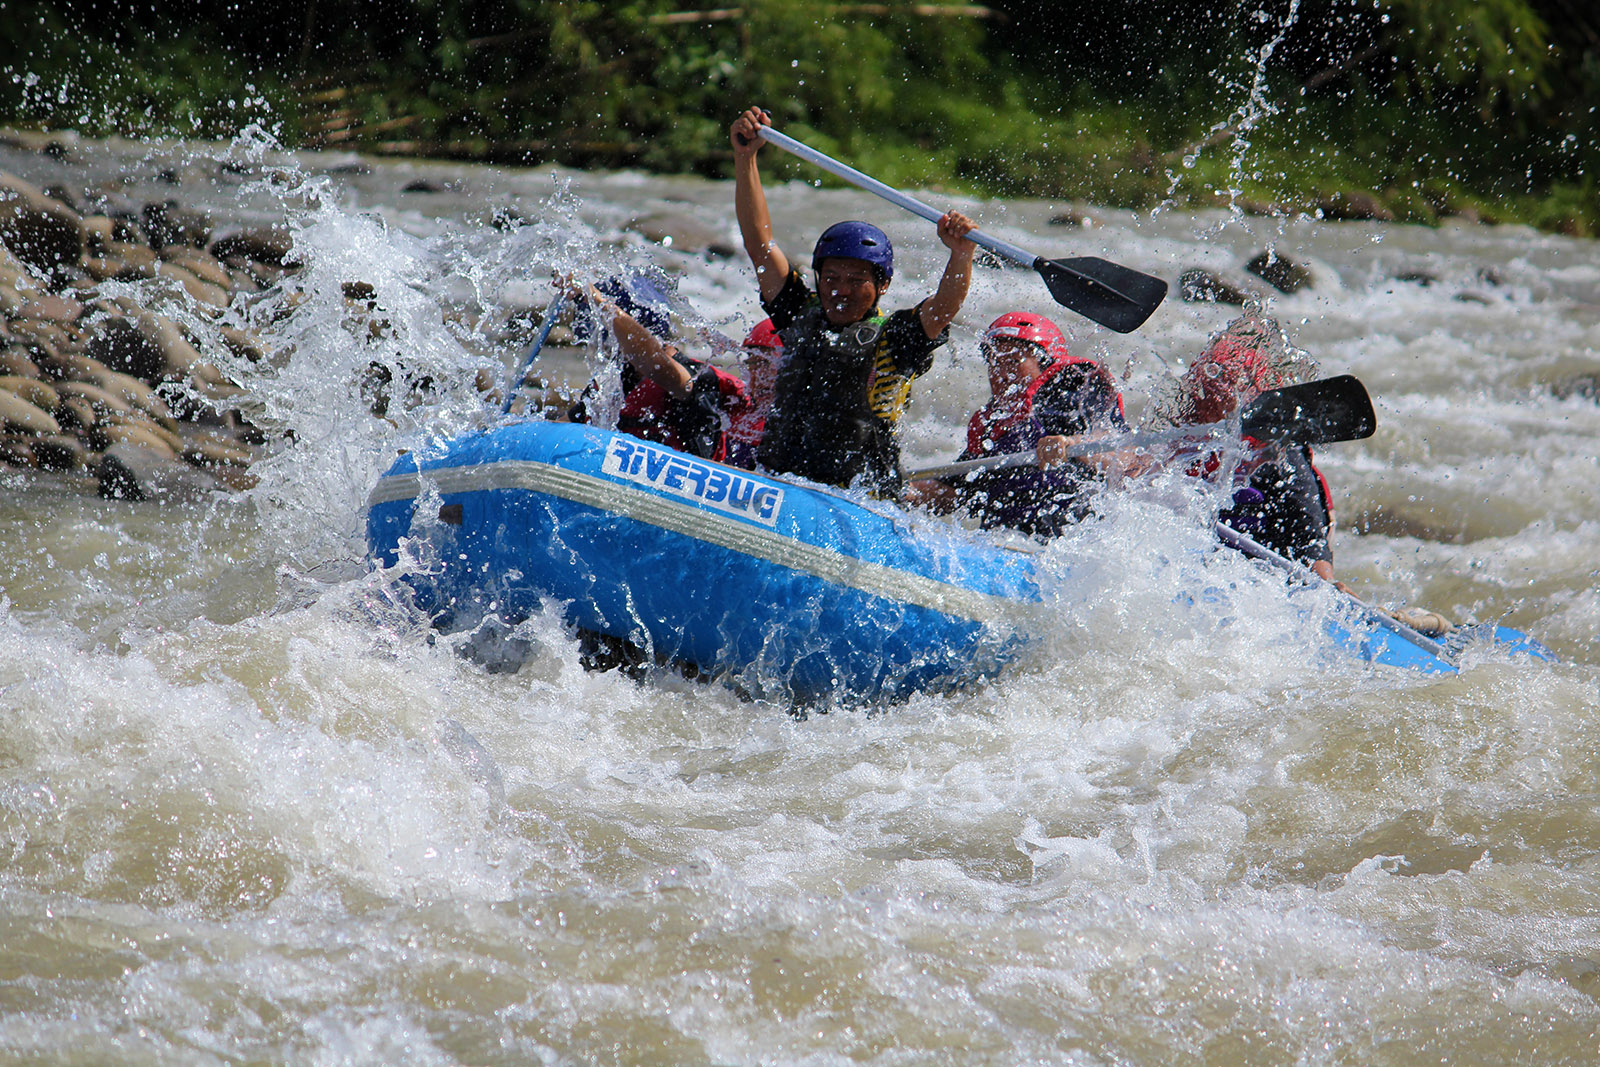
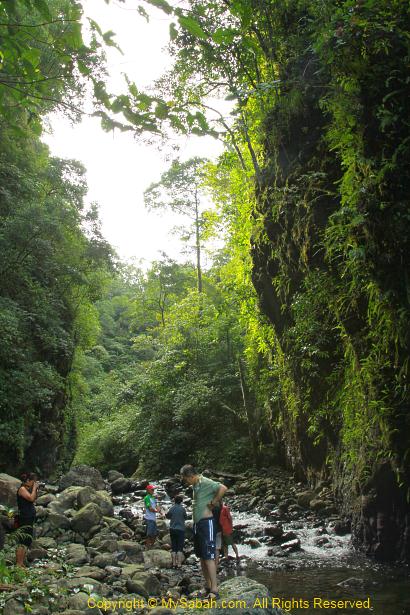
Overcoming rapid in Kiulu River
There was an official photographer stationed at a few nice photography spots to shoot us in action. You can buy the photos from him during lunch. I paid for a few photos so I could post them in this blog for sharing.
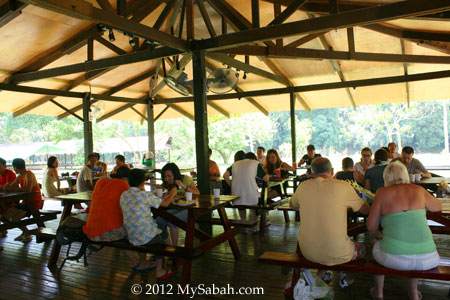
We reached our ending point around 12:30pm. Then we were transferred by bus to the activity center where we took shower, changed our cloth and had our lunch.
The lunch is quite nice. We had BBQ lamb and chicken. The muscles of my arm and legs were so sour in next day, haha..
It was an exciting night in Poring rainforest. I finally found the insect that I had been looking for years. Many friends are also very impressed with this insect. Please read on to see it.
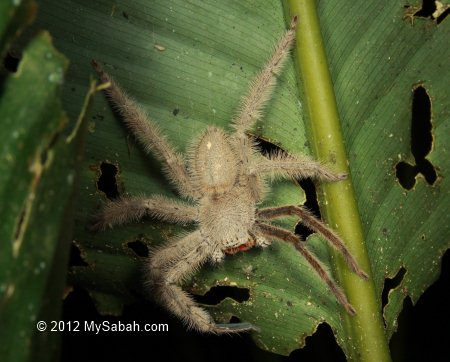
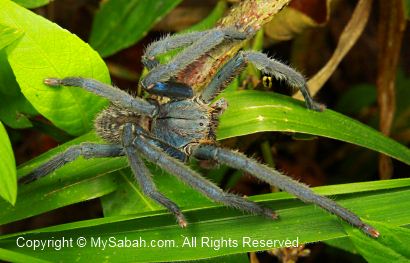
I suppose Poring rainforest is an ideal site for night walk due to its rich flora and fauna. Surprisingly, no tourist asks for a night safari in Poring, so I had to hire a nature guide to start one at 7pm. The fee is about RM70-100 (?USD20-30) per hour. We have a happy start when we spot a white wolf spider with red mouth.
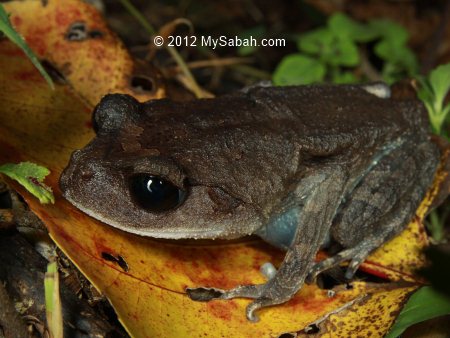
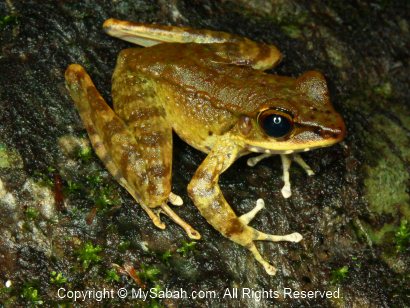
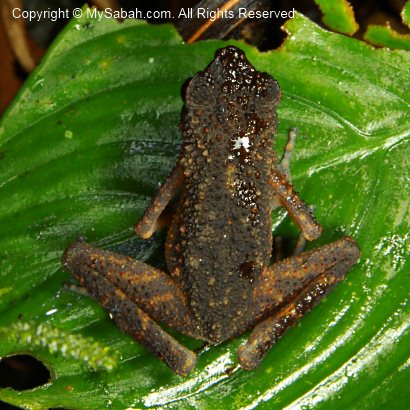
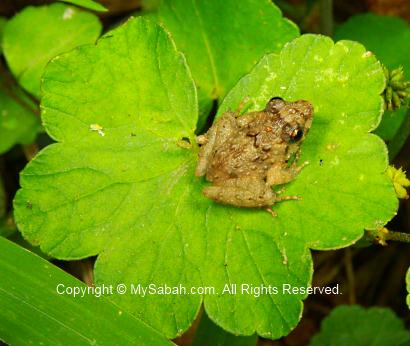
Above: A litter frog that has big head, cute..
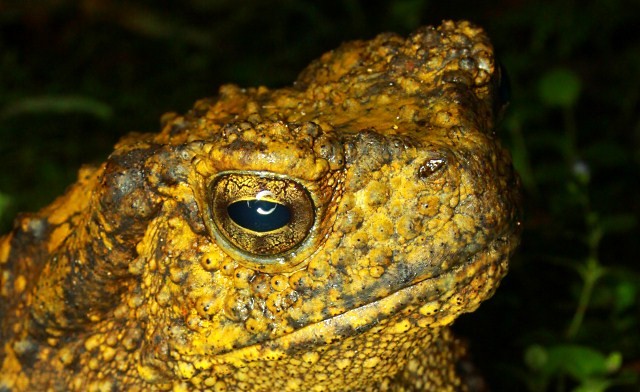
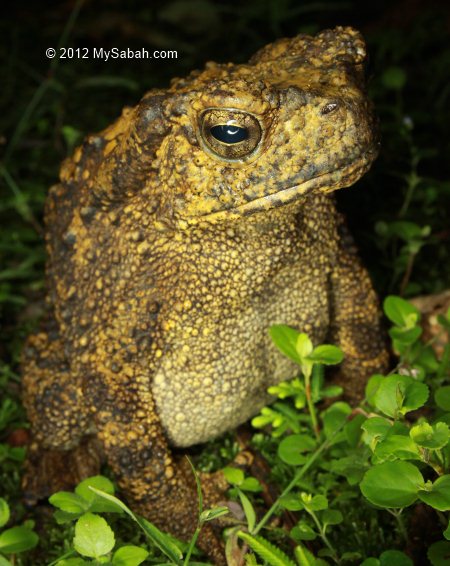
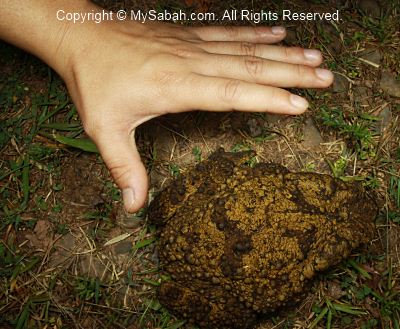
Then we saw a giant river toad, which is endemic to Borneo and famous for its foul smell. I didn’t smell anything though. There is a myth that this toad will laugh if you tickle its belly.
We rub its belly gently with a twig. You may watch the 1-min video below to see if it laughs:
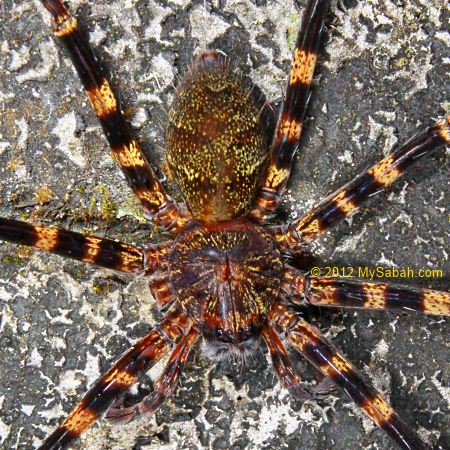
There are quite a number of big spider around, like the leopard spider above. It is easy to spot them coz their eyes reflect our torchlight.
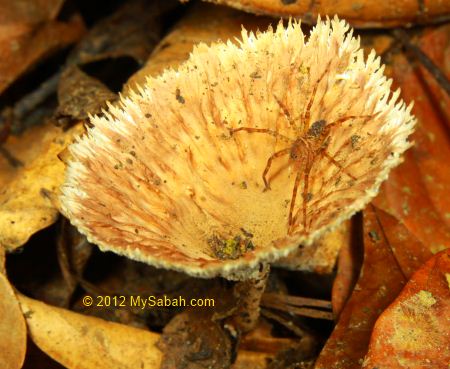
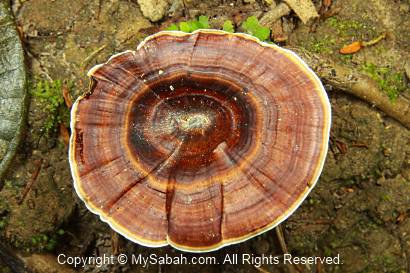
Small spider waits for prey in fungus cup.
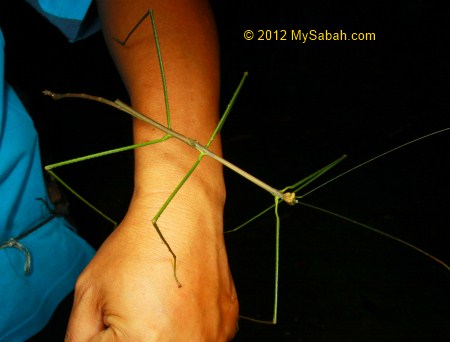
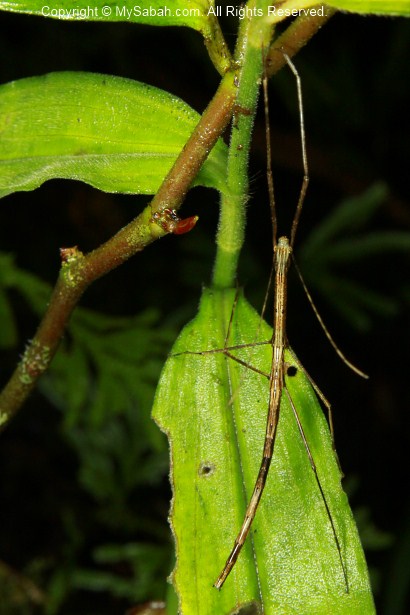
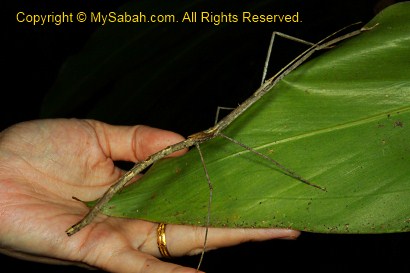
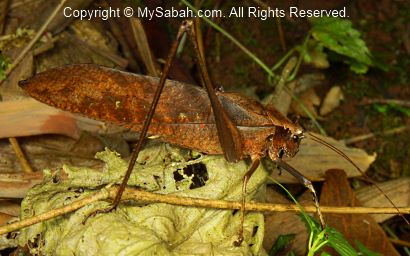
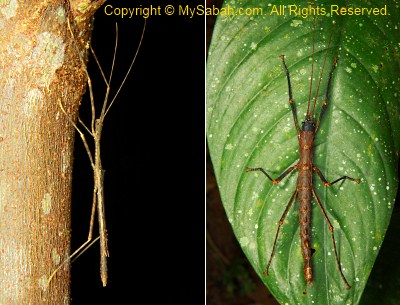
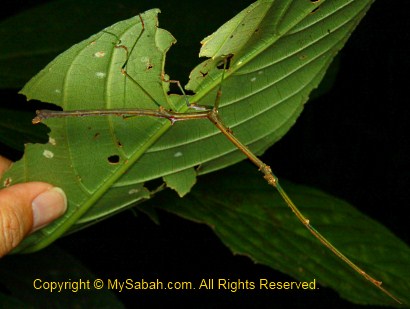
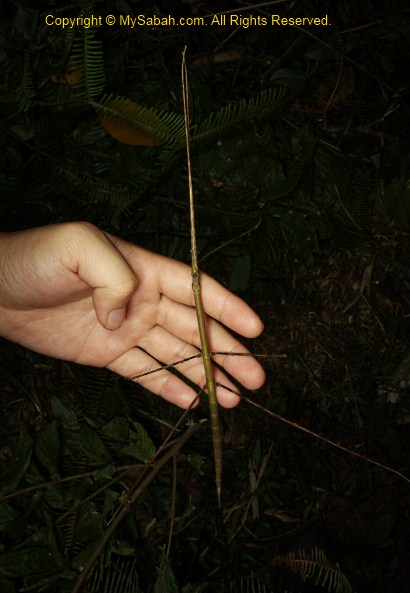
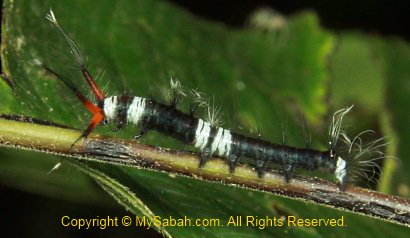
A very long stick insect. The guide says the village kids are used to eat the eggs of stick insect because its eggs are big and look like chocolate.
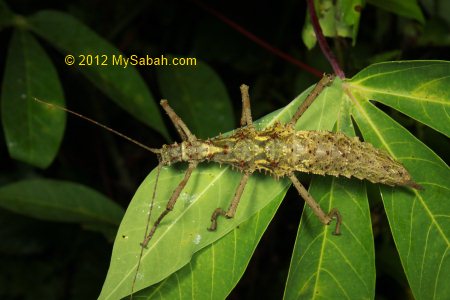
Fat stick insect on tapioca leaf. Seem like stick insect loves tapioca leaf coz I found a few more.
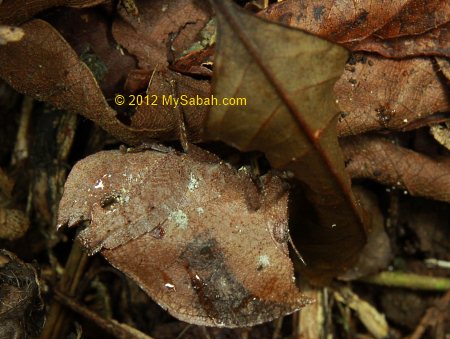
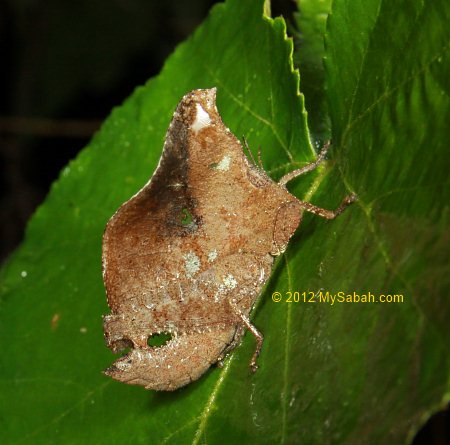
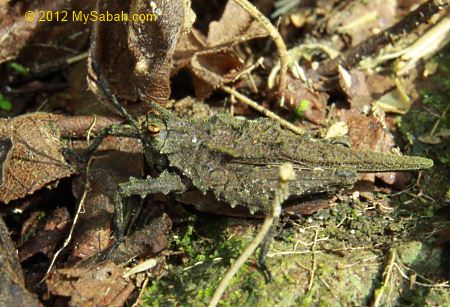
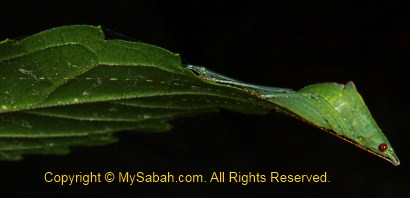
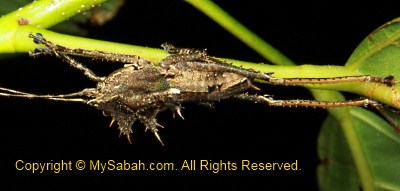
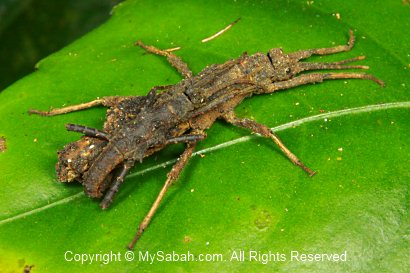
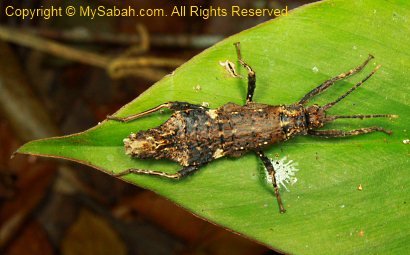
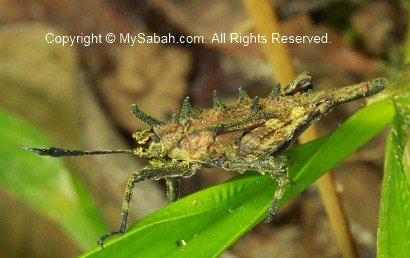
Here comes the highlight of my night walk. Can you spot anything in the photo above?
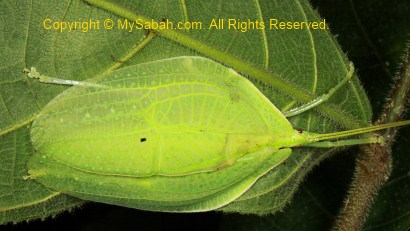
Can’t see it? Below is the answer. It’s a Leaf mimicking Grasshopper (Chorotypus gallinaceus) that perfectly camouflaged as a dead leaf.
I had heard about this insect. I’m so glad to see one. When I was busy taking its photo, suddenly it just played dead and dropped itself to the ground. The guide and me shouted, “Oh sh*t!” because it would be very hard to spot it among the foliage. Luckily we located it again.
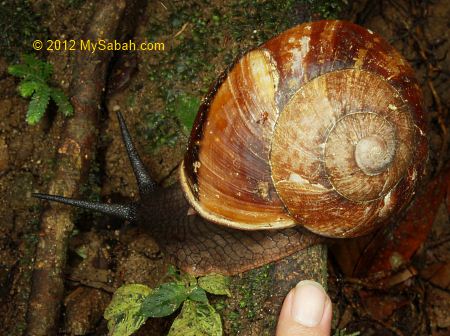
We also saw a big snail near Kipungit Waterfall. So far it’s the largest forest snail that I’ve ever seen.
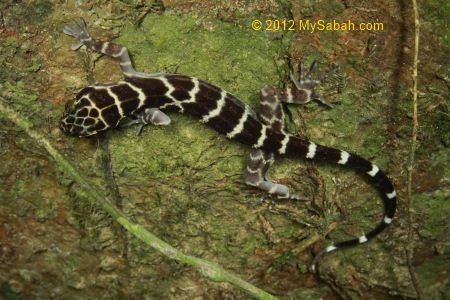
Above: Giant bent-toed gecko on tree trunk.
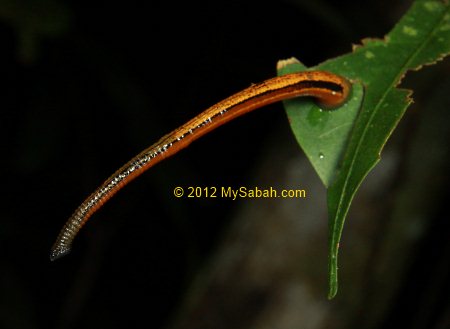
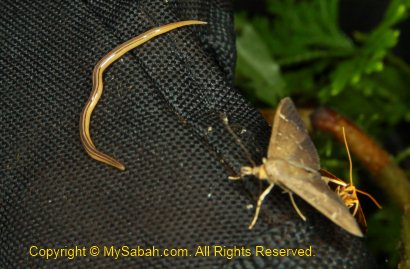
There are some tiger leeches lurking in the bush. They were so excited when they sensed our heat.
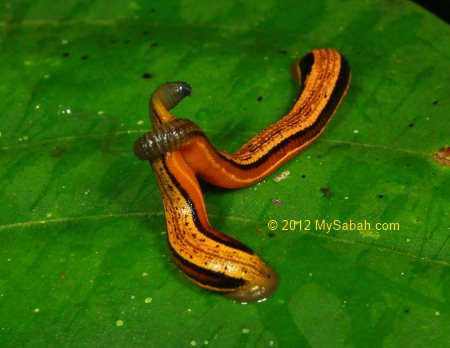
Another highlight is the mating of two tiger leeches. It lasts for quite a long time and both leeches caress each other like crazy. You may see their action in the 1-min video below: Click Here for bigger video
Our night walk ended at 11pm, just before the heavy rain came. I can’t wait to go back there again one day. If you love such activity, Poring is highly recommended for night safari.
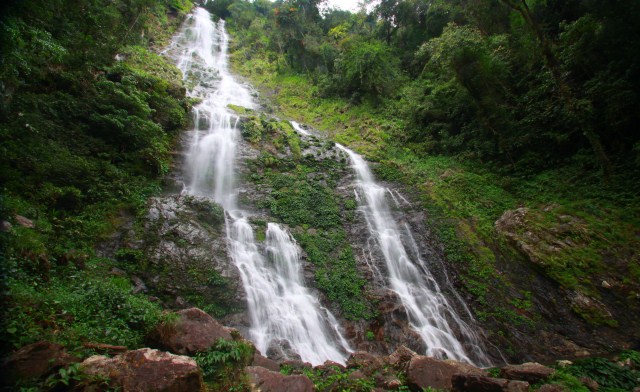
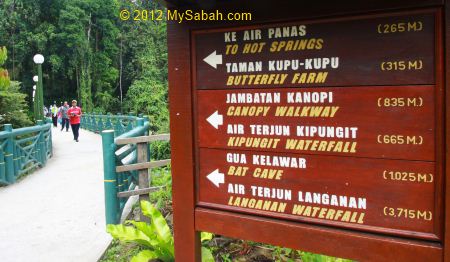
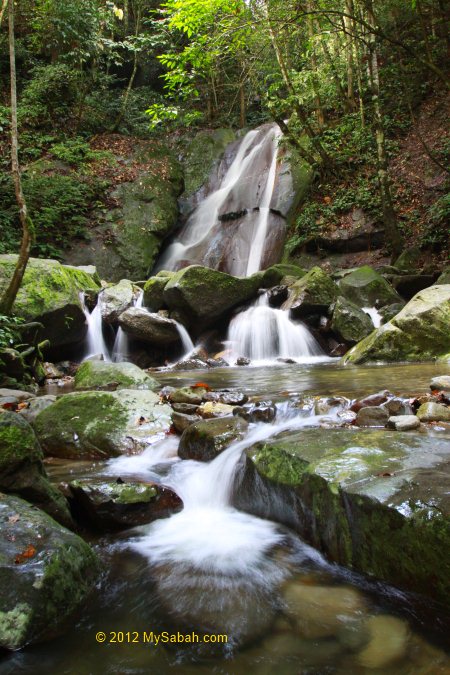
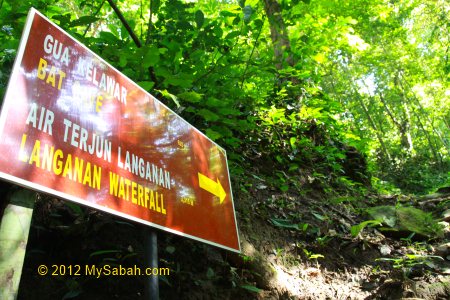
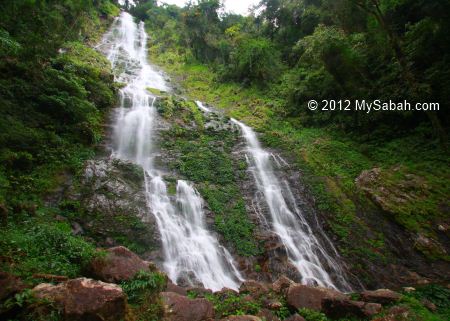
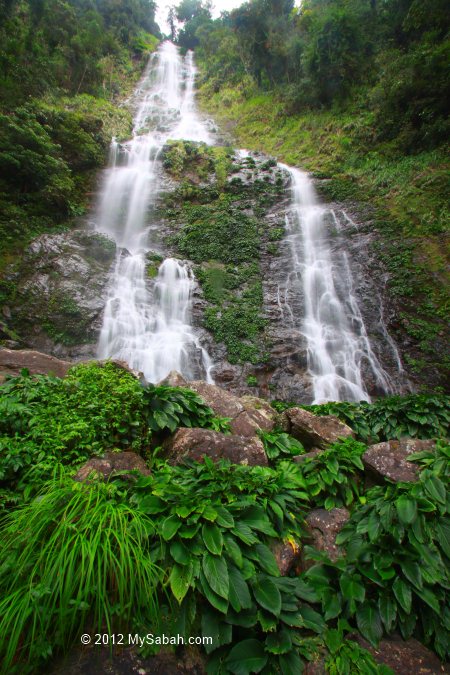
How does it feel to stand in front of the majestic 120-Meter Langanan Waterfall in Poring? Langanan Waterfall is one of the tallest waterfalls in Sabah. On the way to this huge waterfall, you will pass by the smaller Kipungit Waterfall and a bat cave, and enjoy nearly 4 Kilometers of nature trail in rainforest. Below is a walk-through for you.
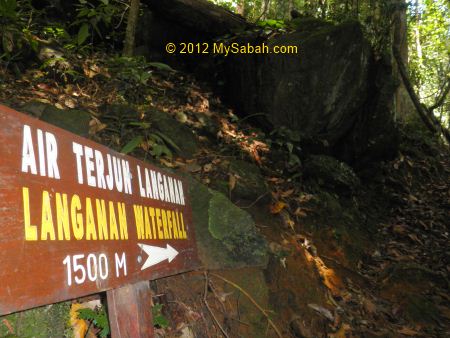
Above: this is the signage at park entrance and where you start your jungle trekking.
As you can see, your first stop Kipungit Waterfall is only 665 Meters away. Please register at the Ticket Counter before you go to Langanan Waterfall.
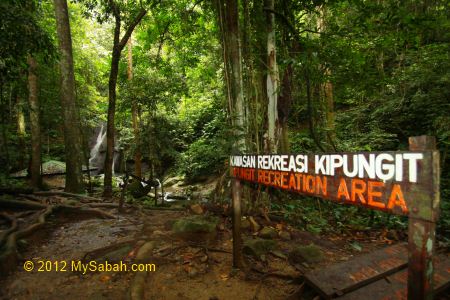
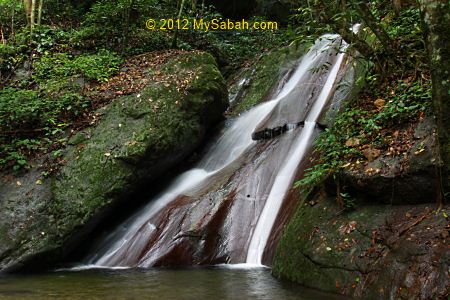
Kipungit Waterfall
Just follow the path and you will reach Kipungit Recreation Area after 20 minutes. It’s only a relaxing short walk and you are not really in a forest yet.
You would see some tourists playing with water near the Kipungit Waterfall. This is an area for picnic and swimming, and there are a toilet and camping ground nearby. As you are near the river and under the tree shade, the air is more cooling and refreshing.
Kipungit is the most accessible waterfall of Poring. I saw a few girls soaking their feet in calm water, giggling and pull their feet out of water. I tried to do the same and saw many tiny fishes nibble the skin of my feet. Kind of fun, haha.
With a height of only 10 or 12 Meters, Kipungit is nothing if compared to the 120-Meter gigantic Langanan Waterfall. Most tourists are happy with this little waterfall, but I decide to see the bigger Langanan 3.3 KM away.
You may watch the following 40-sec video of Kipungit Waterfall:
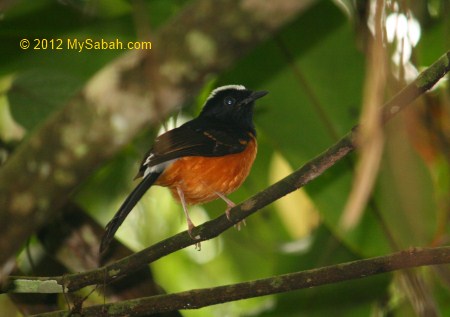
One of the birds you would see here is White-crowned shama (see photo above), which is endemic to Borneo and considered as the best singer of rainforest. You could see a dozen of them around the park in early morning. The surrounding rainforest of Poring has over 300 bird species and great for bird watching. Personally I had seen Asian Fairy-bluebird, Yellow-rumped flowerpecker (endemic) and a few types of bulbuls in Poring. Prevost’s Squirrel is also common here.
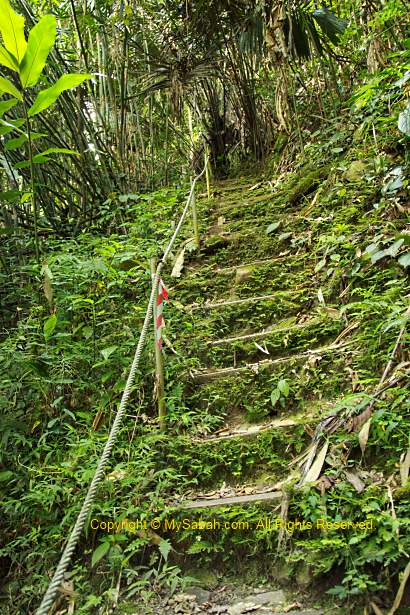
You will see the signage to Langanan Waterfall near Kipungit Waterfall. At normal walking pace, most people can reach Langanan Waterfall in 2 hours. Before you go, you should have registered first at the Ticket Counter. For safety reason, the Park won’t allow you to go to Langanan Waterfall after 2pm. Do bring water (600-1,000ML), raincoat and snacks (e.g. chocolate, cereal food bar) with you. There are leeches on the jungle trail, so you better put on your anti-leech socks.
After this point, you enter the rainforest and the surrounding won’t be tourist-friendly. The jungle trail to Langanan is quite steep in the first half. Poring is about 400-500 Meters above sea level, and the forest is mainly lowland rainforest and mixed dipterocarp hill forest, characterized by tall and dense tropical trees (20 to 70 Meters high), warm and humid air, and abundant liana and strangler fig tree.
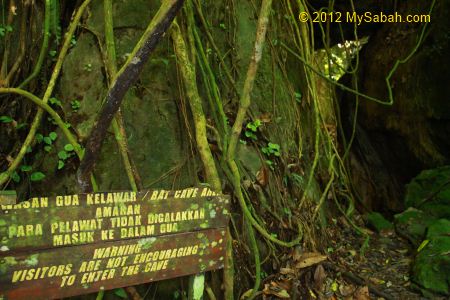
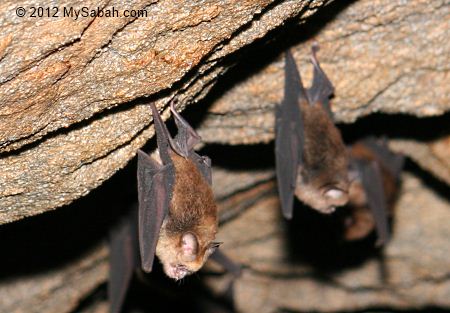
Bat Cave (Gua Kelawar)
After walking for 360 Meters, you will see Bat Cave next to the trail.
There is a broken warning notice sign reads “Visitors are not encouraging to enter the cave” (the grammar sounds funny).
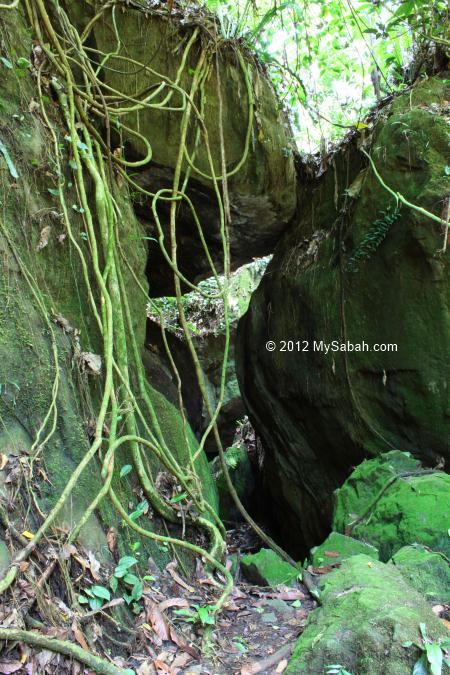
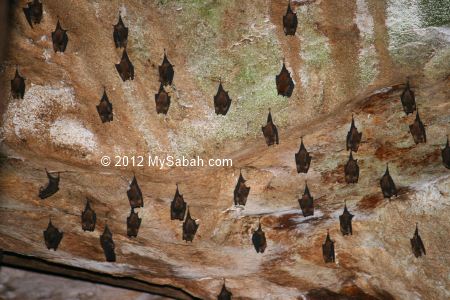
Actually the cave is a deep crevice formed by a few huge boulders that stacked together. The dark and humid space in the cave becomes the ideal roosting spot for bats. You can smell guano from outside.
I tried to go deeper inside the cave. The rock surface is covered with green moss and very slippery, so I don’t recommend you to go in.
There are hundred of bats clinging on the rock wall. The smell of guano was getting stronger so I only stayed shortly.
To see what’s inside Bat Cave, you may watch the 1min-27sec video below:
Rainforest of Poring
I continued my jungle trekking after visiting Bat Cave. The first 1.5 KM of the trail is steepness with 20� to 40� of inclination, like climbing a hill. There is no boardwalk, hand-rail and shelter hut. Part of the trail turned muddy after rain.
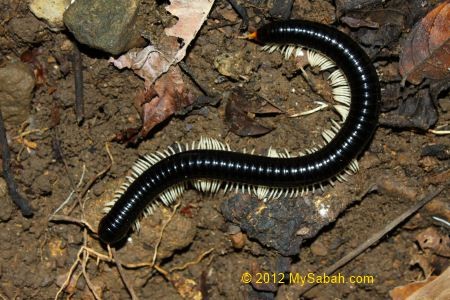
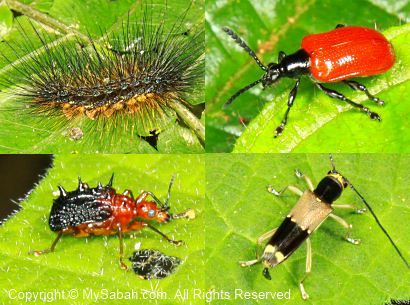
You can see some bug along the forested trail, like the 9-inch long millipede above.
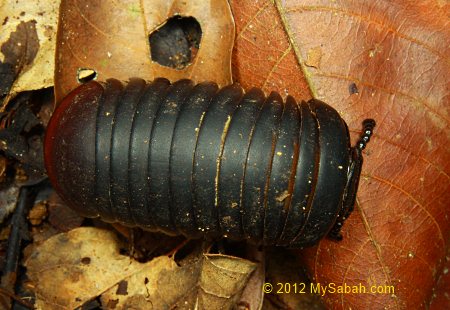
I played with a pill millipede that foraged on forest floor.
You can watch the 46-sec video below to see why it is called “Pill” Millipede:
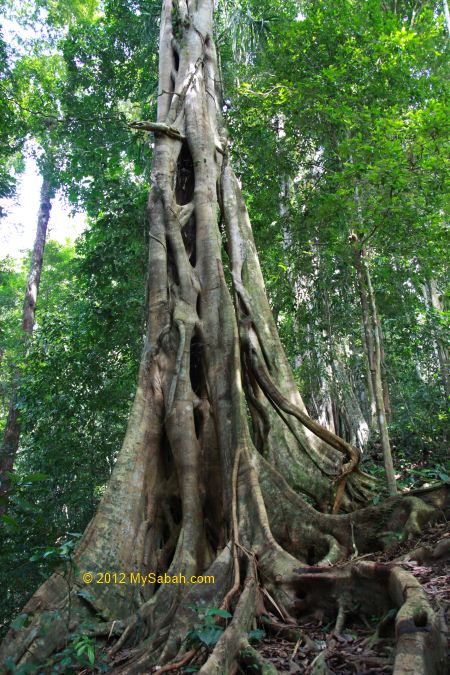
Strangler fig tree is a common sight in Poring rainforest. The host tree is killed by parasitic strangler fig tree that wrap around it.
There is a small stream to cross. The water is shallow with some rocks above water, I can walk on them to cross the river without getting wet.
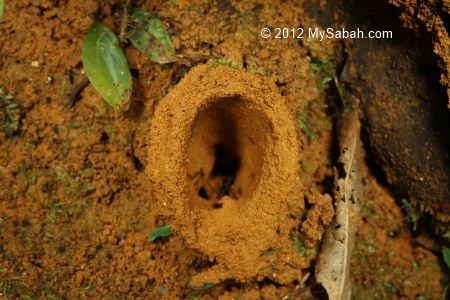
I saw many burrows on the exposed soil of the slopes. I think they are belong to hornet or wolf spider.
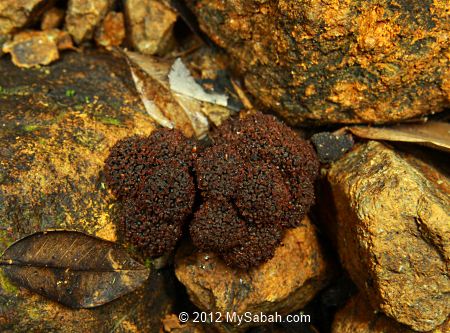
Animal dropping next to a water hole, probably belong to small mammal such as civet.
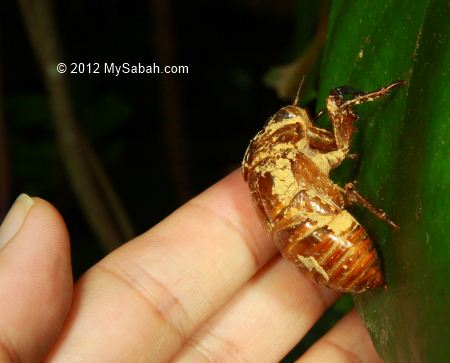
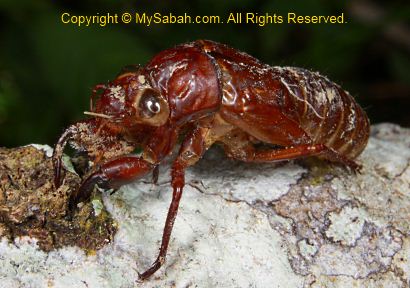
Shed skin of cicada, can be used as cooling agent for Chinese medicine.
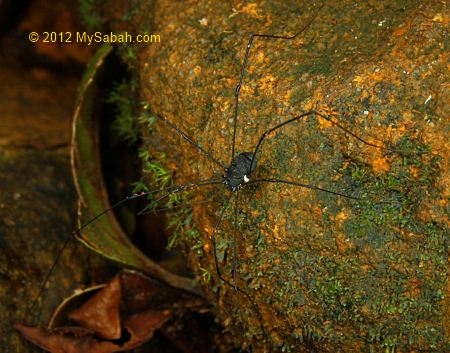
Above: daddy longlegs (harvestmen spider) are everywhere.
Surprisingly, I only saw 3 leeches, far less than I expected. Probably the Park clear the trail twice a month, and leech dislikes ground surface that has no grass and foliage. The buzzing deer flies are more of a concern. They cut a small wound on your skin to suck your blood. The bite will become very itchy for next few days.
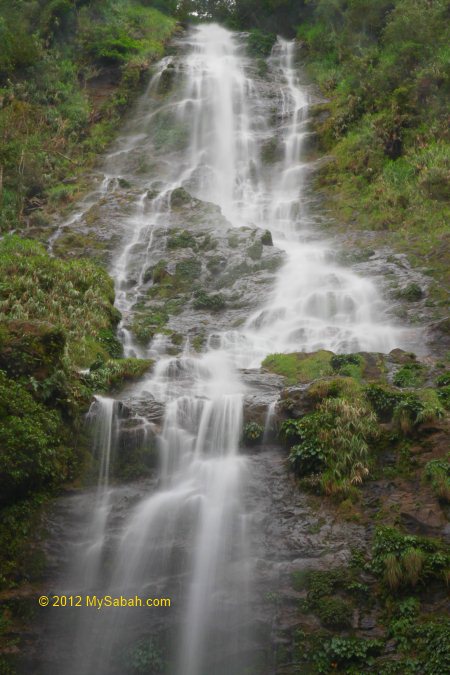
Langanan Waterfall
The milestones along the trail have worn out and I had no idea how far I walked. On the way, I saw 2 groups of high school students and 1 group of tourists returning from Langanan. I was dismayed by their answers “the waterfall is still very far away” when I checked my progress with them. 🙁
Anyway, I just kept walking and felt relief to see the signage above. Though I was only half-way there, the trail is not steep anymore from this point on and there are more descending trail.
After long hours of jungle trekking, I heard the thundering sound of Langanan Waterfall not far away. I speed up and finally I reached Langanan Waterfall!!!
This 120-Meter Langanan Waterfall is the tallest waterfall that I’ve ever seen. Before that, the tallest fall I saw was the 38-Meter Takob-Akob Waterfall in Maliau Basin. The huge water volume creates a micro-climate, it was windy there and I was shower by the droplets from splashing water high above.
It’s such a rewarding experience. This huge waterfall really worth my long hours of hiking.
You may watch the 1-min video of Langanan Waterfall below:
Btw, before you leave the Park, don’t forget to sign-off at Ticket Counter to inform the Park that you are back from Langanan safely. Otherwise they will send a search and rescue team to look for you.
Sabah is lucky to have many world-class diving destinations. Tourists travel thousands of Kilometers to Sabah just to dive here (and they come back again and again). By right diving should be a popular sport in Sabah then, but most locals never explore these eco-treasures at our “doorstep”, so it is like having a snow field nearby but never try skiing. However, I believe the interest is high. Hope this article will help to answer most questions you have about diving, in less technical way.
What is Scuba Diving?
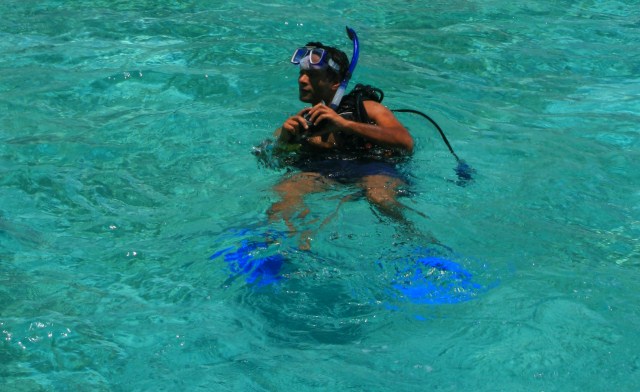
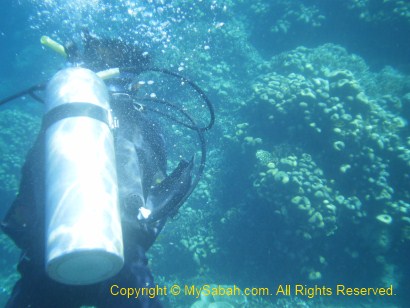
As seen in TV, human does not have gill, so divers need to carry gas tank and breathing equipment that supply oxygen to them underwater, with mask and fin for better maneuver in the water. That is what we call “Scuba Diving” in simplest way. Scuba is a word derived from Self-Contained Underwater Breathing Apparatus. The gear may look like a heavy burden, but they become “weight-less” once you are in the water.
Who can Dive?
YOU, as long as you are healthy, physically and mentally, and 8 years old or above. Diving is not an activity reserved to upper-class nobles and adventurers; you are only required to take a diving course (more on this later).
Why Dive?
70% of earth is covered by water. No matter how far you travel on land, you only see less than 1/3 of the world. Diving will be an eye-opening experience. Below are more reasons for diving:
Sabah is part of “Amazon of the Sea” (Coral Triangle). The Coral Triangle covers the waters of Indonesia, Sabah, Papua New Guinea, Philippines, Solomon Islands and Timor-Leste. Sabah is inside the zone of this most diverse marine environment in the world, with an abundance of coral reef.
Diving is FUN. Yeah, the most important of all. You get the most out of an island trip. Forget about Nemo, underwater is an alien world where you will see more interesting wildlife than the land.
Impress your Date. Just kidding. But don’t you feel “my hobbies are listening to music and watching movies” sounds a bit boring and ordinary?
Is it Dangerous? Got shark? I know most of you will ask. In most dive sites of Sabah, you would see very small sharks such as bamboo and reef sharks, which are only a few feet long and hardly to be harmful. In fact, they are very elusive and will try to run away from you. You would see hammer-headed sharks in remote islands such as Layang-Layang and Sipadan. They are not dangerous unless provoked. You should be excited to see sharks instead.
In short, diving is a safe sport. Safety is always a top priority in diving. Divers are not only being taught on using the dive equipment, they are also trained to overcome any possible adverse circumstances in the water. In every dive, divers will be led by a highly-skilled Dive Instructor or Dive Master, who had received extensive professional training. Each diver also needs to team up with another diver to form a “buddy” system, to look after each other. For security and conservation purposes, divers are asked not to touch or provoke anything in the water. There is almost no room for disaster, to divers who follow instructions.
How to Become a Diver?
You must be a certified diver before you are allowed to dive.
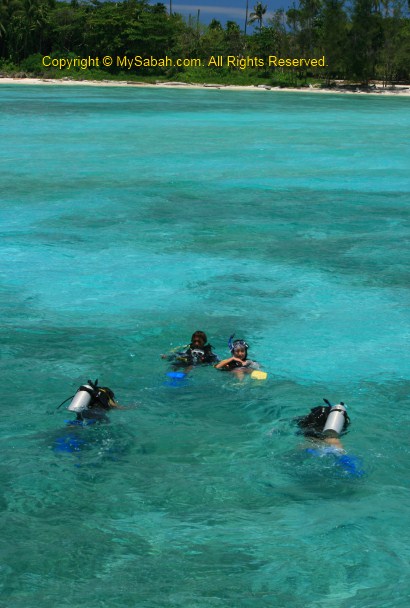
The only exception is signing up for a Discover Scuba Diving package, which costs about RM200 to RM600 (USD70 – USD300). Participants without cert will be briefed on dive theory and safety, practice in shallow water, then go for diving under supervision. However, they cannot go deeper than 12 Metres and there is no qualification earned for the dive. For kids above 8 years old, there is a junior diving program designed for them (e.g. Kids Bubblemaker Scuba Diving), please check with a dive operator.
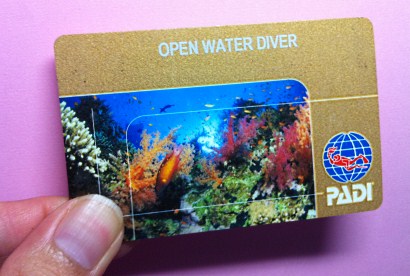
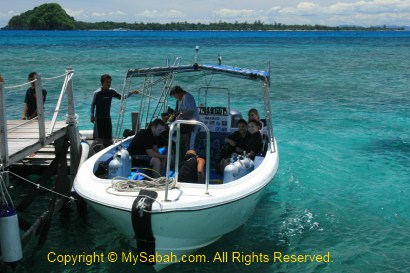
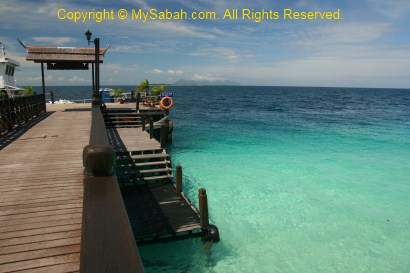
To be a certified diver, you will need to register with a dive operator for an Open Water Diver (OWD) training, an entry-level scuba certification. Certification from PADI (Professional Association of Diving Instructors) is the top choice because it is the world’s largest diver training organization, which means your cert will be recognized worldwide. All Sabah dive operators offer PADI’s OWD training program for a fee ranges from RM1,000 to 1,500 (USD350 – USD500), which includes (package may vary) boat transfer, diving permit, park entrance fee, jetty fee, use of diving gears, lunch, exam fee and one diver manual for you to keep. The training will take 3 to 4 full days, depending on your learning pace. The schedule is flexible, for example, you could complete the course in four weekends, instead of four consecutive days.
Under the guidance and supervision of a Dive Instructor, trainees will be taught and showed on using diving gear, dive principles, diving skills and procedures, safety, etc. In the start, the training will be done in confined environment such as shallow water on the islands such as Gaya and Mamutik Island. Once the students acquire the necessary skills and knowledge, the instructor will bring them for 4 or more guided and boat dives in deeper water. At the end of the course, trainees must pass an exam with a score of 75% or more. Even though the paper only consists of 50 multiple choices questions, it is very difficult to pass without a thorough studying of the Diver Manual. Once you pass, you will get an OWD qualification which allows you to dive up to 40 Meters in depth, but in most recreational dives, you dive between 10 to 25 Meters.
Above: PADI diver card. You need this to be allowed to dive.
Ongoing Dives
It is really fun to join the training with a group of friends, as you can share the joyful experience and go diving together in future. Divers may not find treasures in a sunken old ship but many find a dream career as a dive master, underwater photographer, as they further advance their education under the PADI Diver Education System. Divers also can promote tourism by telling others the beautiful world they see underwater. Every year divers can contribute to the environment by becoming a volunteer in conservation projects such as marine clean-up by Project AWARE.
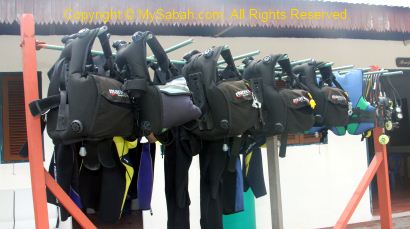
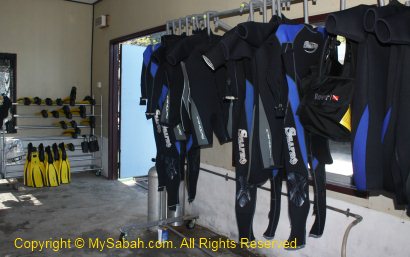
PADI OWD qualification is a lifetime certification, so it will not expire. You are advised to dive regularly to refresh and improve your skills. Even exploring the same dive site in different day will give you pleasure surprise and new finding. You do not need to buy your own diving suite and equipment because these are provided by dive operators. Tip: join a local dive club, so you will enjoy deep discount on diving trip.
Recommended Dive Sites
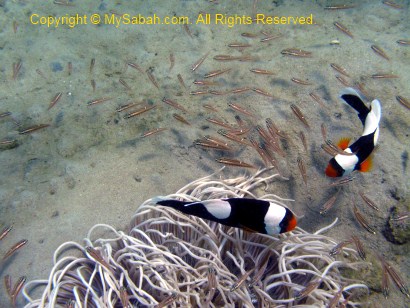
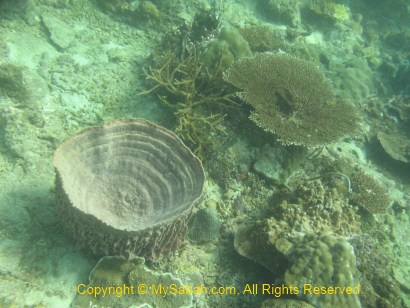
Tunku Abdul Rahman Marine Park has over 50 dive sites, where you would see Cuttlefish, Moray Eels, Lionfish, Pufferfish, Nudibranchs, Scorpionfish, Demon Stingers, Frogfish and schools of Barracuda, Snappers, Fusiliers and Anthias, and many macro lives. Lucky divers would see turtle and whale shark. Pulau Tiga and Mantanani Island are other fascinating sites at west coast of Sabah.
At east coast, divers’ favourites are Sipadan, Mabul Island, Mataking Island, Kapalai Island, and Lankayan Islands. Each island has 5 or more dive sites, and every dive site is given interesting name which implies something unique about it, for example, Eel Garden, Barracuda Point, Hanging Gardens, Spotted Ray Channel, Shark’s Cave. Sipadan is the best and you could easily see more than 10 sea turtles in every dive, but many divers advise me to “save it for the last”.
For more information on diving and training, you may call Downbelow Marine & Wildlife Adventures Sdn. Bhd., who is running a PADI 5-Star Dive Centre (status awarded to professional level training centers offering exceptional experiences), at +60 88-488997 / +60 88-485 366, or visit their web site at: http://www.divedownbelow.com (E-mail: info@divedownbelow.com)
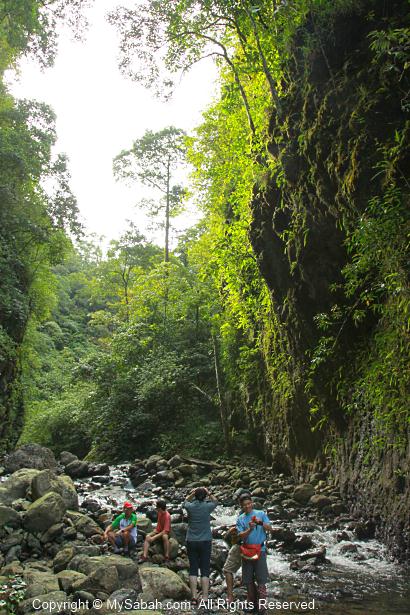
Minitinduk Gorge is the ancient gateway to Mt. Kinabalu, as it is on “The Hugh Low Trail”, an original summit trail used by documented first male climbers, Sir Hugh Low (1851) and Sir John Whitehead (1888), and female climber, Lillian Gibbs (1910), of Mt. Kinabalu, the highest peak of Malaysia. After another “tourist” trail opens in 1924 (by R.F. Evan and Sarel), climbers / tourists are no longer using this trail located in Kampung Kiau (Kiau Village) of Kota Belud district.
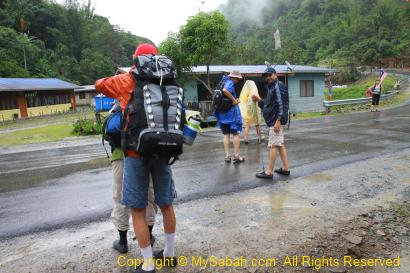
Last month I joined a 2-day-1-night camping trip organized by The Sabah Society to explore the gorge. The weather was good for the past few days until we departed in the afternoon, but the heavy downpour didn’t hold us back. By 2:30pm, we reached the junction to Kampung Kiau (Kiau Village), which is a few Kilometers (KM) after Nabalu and 29 KM before Ranau, and where we met up with Mr. Martin Moguring, our guide from Kinabalu Park. Dr. Ravi, the co-writer of the book “The Hugh Low Trail”, is the organizer of this trip.
Then we drove to the school in Kiau Village, which takes another 30 minutes. We parked our cars in the village and walked to the starting point, just a stone throw away from the village. We were told in advance that we will cross multiple small rivers, so most of us were wearing short. Our group also hired 3 porters (Rony, Abinus and Bengent) to carry some of our bags and supplies.
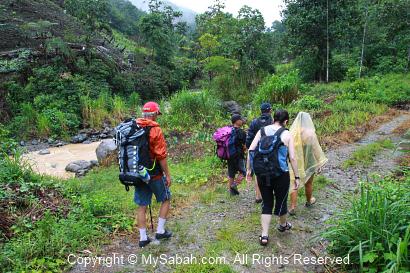
Jungle Trekking & River Crossing
The distance from Kiau Village to Minitinduk Gorge is only 3.5 KM and take about 2 hours of trekking. For the first day, we walk 3 KM to Sambatang Cave and camp there. The second day we walk from the cave to the Gorge, which is only 500 Meters away. FYI, the gorge is in a private land outside of the Kinabalu Park boundary.
In the beginning, we passed through the farmland, mainly consists of paddy, maize, ginger and other food crops.
Pretty soon we entered the secondary forest, characterized by dense undergrowth. It is still raining so it’s very humid in the forest and this “activates” the little brown forest leeches that live in deeper jungle and love wet environment (and our blood!). There are not many of them and most are only 1cm in length. I had seen forest leeches 5 times bigger in primary rainforest, so these tiny-sized blood suckers didn’t bother me. I didn’t even feel that I got one leech bite until I saw my leg bleeds.
Though it’s a newly generated forest, there are still potential dangers around. Like the harmless looking plant in photo above, its leaves are poisonous and able to make your skin really painful and itchy when touched. But there are many “good” plant too, Martin shows us some plant that can be used as food, preservatives or herbal medicines by local people.
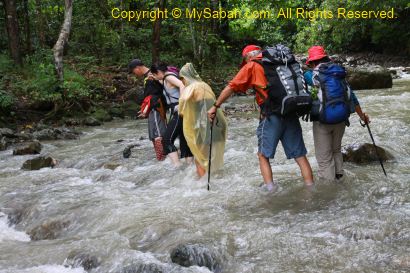
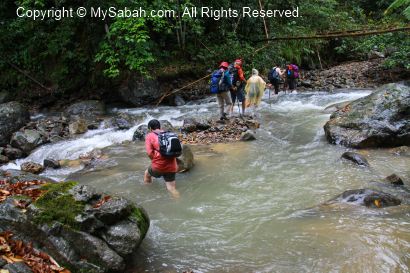
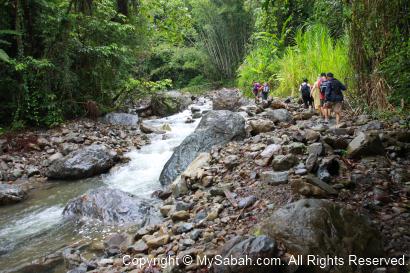
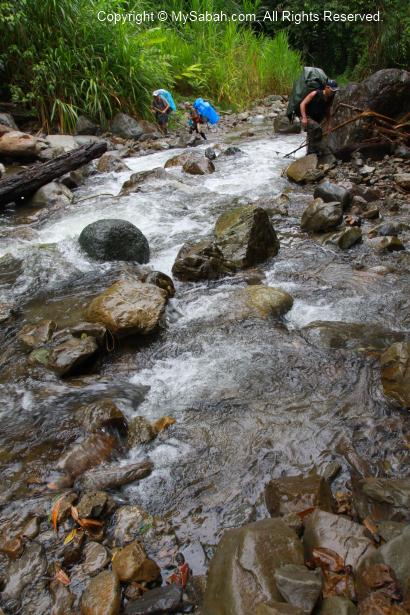
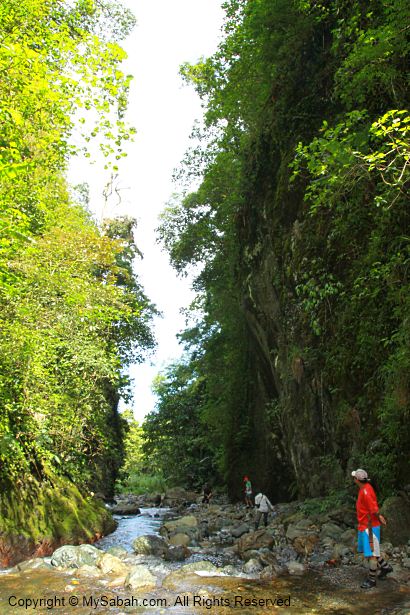
As I’m an experienced hiker, the trail is not rugged and I consider it as an easy walk, not strenuous and challenging at all. Most of the time, we moved on the nature trail adjacent to the Kadamaian River and its tributaries such as Kolapis, and there are about 10 river crossing. But I’m not so used to river crossing. After heavy rain, the rivers rose, turning swift and deep.
Though the depth of river only reaches our knee level, the current is strong enough to push you down if you don’t stand firm. The worst thing is the murky water caused by heavy rain, we can’t see the irregular bottom. We had to cross slowly, probing the depth in front with one foot to avoid stepping into deeper water. I almost fell into the icy-cold water with my camera once.
My best advise is – Trust NO rock and boulder near the river. They all look deceptively safe to step on, but they offer zero friction, after being “waxed” by the river for a long time!
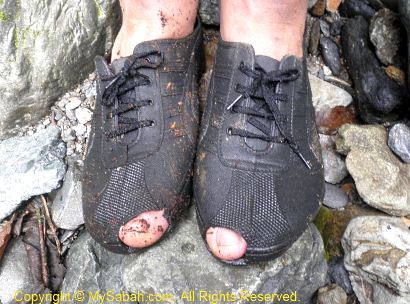
Our socks are soaking wet. Only Dr. Ravi walks with happy dry feet. He also shows us his simple solution – just drill a hole on the shoe for draining of water, lol.
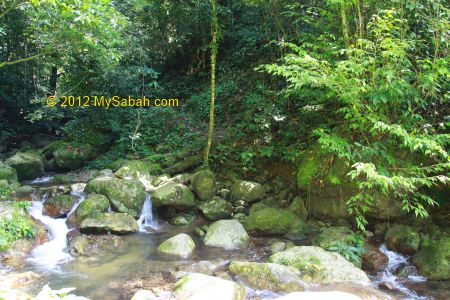
As we were moving further up the river, the boulders get bigger and bigger and see more and more cascading streams, the characteristics of river upstream. The water is so clean, unlike other milk-tea color rivers caused by excessive logging in upstream area (e.g. Padas) of Sabah.
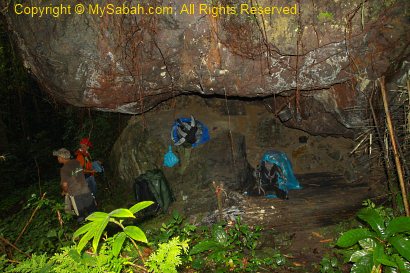
Sambatang Cave
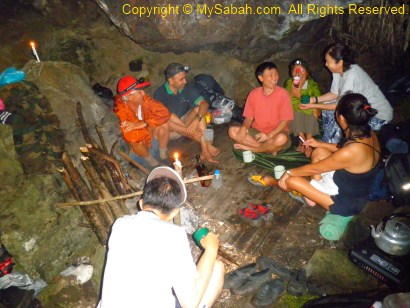
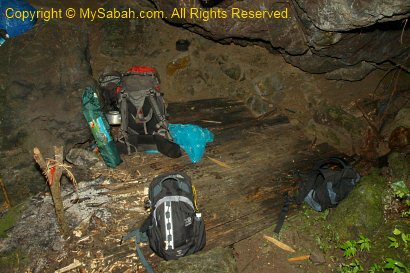
Finally we reach Sambatang Cave at 5:30pm!
Actually Sambatang Cave is a cavernous space under an overhanging huge boulder. It can accommodate 3 to 4 people.
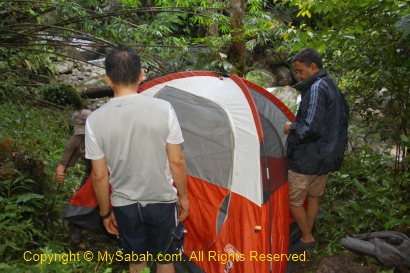
Since the daylight is vanishing, we quickly setup 3 camping tents on the flat area near the cave.
According to the porters, Sambatang Cave is an ideal natural shelter, even the heaviest rain can’t flood the cave.
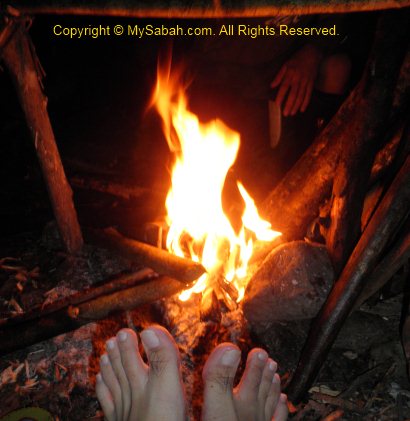
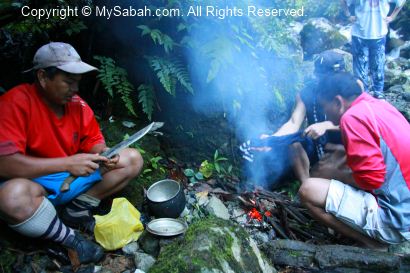
The porters collected some wood and started a camp fire to “smoke” the cave, as the smell can keep creepy animals such as snake and centipede away from the cave. I’m so happy to keep my feet dry and warm.
Light not only attract insect, it also draws human. After having instant noodle as dinner and a few rounds of hot coffee, everyone squeezes into this small cave to warm themselves up with camp fire.
Night Walk
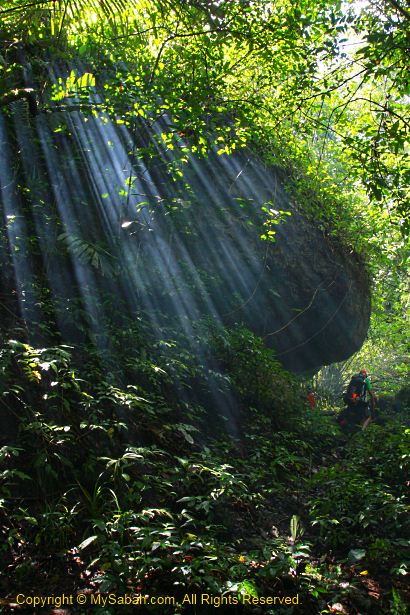
When I started to see bugs crawling around the cave, I decided to take a night walk to check out the bug party in forest.
Above: a stick insect pretends or thinks that it’s a stick.
You can hear a lot of frog calls near the river.
Same as frog, toad is everywhere too.
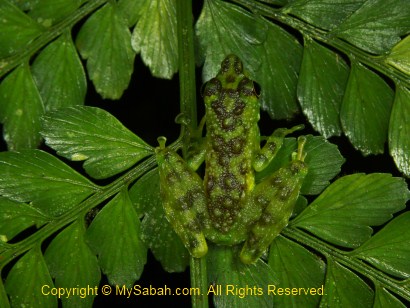
Above: This little green frog is almost invisible on the green fern.
When the night is late, I go to bed in Sambatang Cave, which is also the place the early explorers like Sir John Whitehead and Lilian Gibbs spent their night before heading to the summit, as described in their chronicles more than a hundred years ago. Do remember to bring floor mat and sleeping bag if you plan to sleep inside the cave. Torchlight / LED headlamp is needed if you want to do your business in dark night. The night was so cold that I can feel the chill in my 7°C-grade sleeping bag.
What’s for Breakfast?
My biological clock waked me up at 6am next morning. I saw the porters busy preparing breakfast. From their happy smiles, they must be waiting for something really tasty.
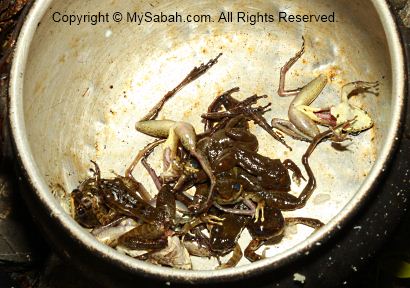
Out of curiosity, I take a look what is inside the pot. Oh dear, those are the frogs they catch. No wonder I saw them searching for something along the river last night. Well, I was there hunting for frog photos but they hunt for the frog meat.
Then they grill the frog over the fire. Please note that only certain frog species are edible as some are poisonous. You can find the edible frogs for sales in local native market called “Tamu”. Species such as Limnonectes ingeri (greater swamp frog), Limnonectes kuhlii (Large-headed Frog) and Limnonectes leporinus (Giant River Frog) yield high demand as food by local people.
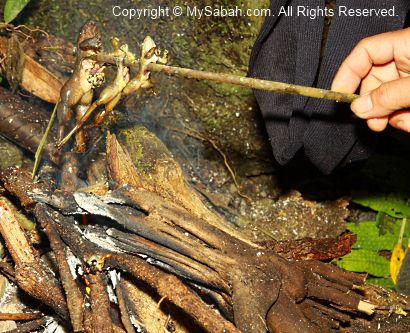
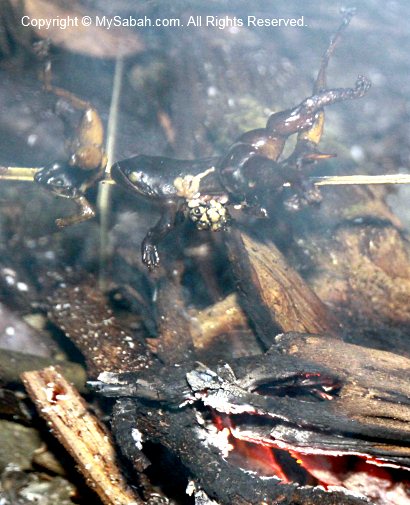
Above: almost done…
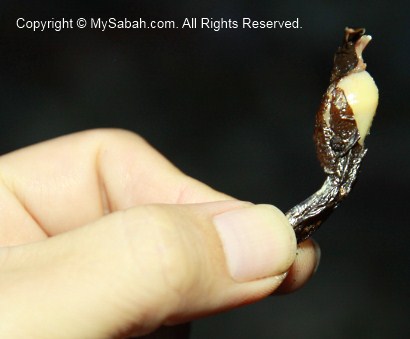
They gave a frog leg for me to try. Being open-minded and “adventurous”, I eat it. To my surprise, the frog meat is so sweet and tender. It is slightly chewy but taste a lot better than chicken, trust me.
Minitinduk Gorge
After breakfast, we leave our bags in cave and head to Minitinduk Gorge, which is only 500 Meters away. 15 minutes later, we exit the dense canopy and see Minitinduk Gorge is right in front of us! Minitinduk means “the meeting of two beaks” in Dusun language. The gorge looks like a twin towers less than 50 feet from each other, with Kadamaian River flows between them. Someone believe the gap is even narrower and both sides almost touching each other in the past, as a legend says a Kiau couple can jump over to the other side, when they try to escape from a group of headhunters from Bundu Tuhan.
We take a group photo with banner. We look so small in the photo. The gorge is about 150 feet in height. There is a theory saying that the gorge was once a waterfall with a lake at the bottom. One day the waterfall collapsed and creates the gap that bisected the hill, based on a historical record that there should be a lake under Mt. Kinabalu but is never found.
Inside the gorge is an opening with Kadamaian River flows between the vertical rocky cliffs. Even though tourists nowadays don’t use this trail, the Kadazandusun people believe this is still the holy trail for the spirits of the dead to go to their final resting place, the Mount Kinabalu, and this gorge is the gate. It sounds scary when our day of visit coincides with the Chinese ghost festival day.
The water of Kadamaian River is from Mt. Kinabalu. It looks cleaner than our tap water and nice for a dip. Too bad I didn’t bring my swim trunk.
If you follow the ancient trail further upstream, you can reach the summit trail of tourists at Lowii or Paka Shelter of Mt. Kinabalu. On the way, you will see super-huge Kadamaian Waterfall. Someone estimate the height of Kadamaian Waterfall is about 250 to 350 Meters and could be the tallest waterfall of Malaysia.
Enough with photo-taking, we left Minitinduk Gorge. It is really a nice trip over the weekend.
We packed our backpack and go back to Kota Kinabalu city at 11am. Personally I would like to thank The Sabah Society members who spent months of research to retrace this historical trail. You may watch the 6-minute video on our trip to Minitinduk Gorge.
Reference “The Hugh Low Trail: The Quest for the Historical Trail to the Summit of Kinabalu” by Dr. Ravi Mandalam, Dr. Chin Shui Hiung and Christopher Chin, published by The Sabah Society, Jan 2004
Photos taken in Kota Belud, Sabah, Malaysia Borneo
Here comes the highlight of my trip in Crocker Range Park, the night walk! I did two night walks, 1st night in Insectarium, and 2nd night in 2.036KM Crocker trail. You see nothing much in both places during daytime, but they turn into a busy world when night falls. If you are interested in night walk, you can arrange in advance with the Park at Administration Office or Crocker Nature Center during office hours. They will send a ranger to guide you. Usually the walk starts at 7:30pm.
Night Walk in Insectarium
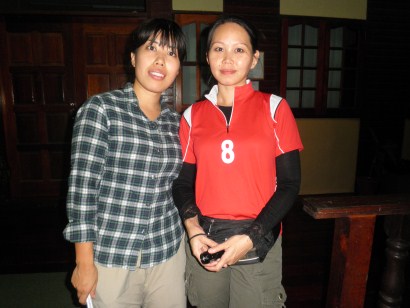
For my 1st night walk in Insectarium, the Park sends two ladies to accompany me, wow. They asked, “would you mind if the guide is female?” I smiled and replied, “No… Of course not” (why should I, hehe..). Oh, by the way, the lady at the left is Tomomi Kan, a Japanese volunteer from JICA. At the right is Lucy Suin, a Sabah Parks staff.
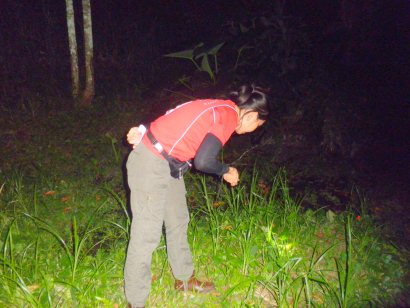
No kidding… these girls have sharp eyes. They started to discover bugs the moment we stepped into Insectarium. Normally girls will scream when they see bugs. However, these girls are so happy to find creepy creatures in the dark, like enjoying a treasure hunt. With the aid of torchlight, we search every inch of Insectarium and left no leaf unturned.
One by one, the bugs reveal themselves under their torchlight. I wonder how they did it. Probably they are so used to insect collection. Crocker Range Park has over 400 species of insects, making the Park one of the best spots for collecting specimen.
Above: this might be a Malaysian Earth Tiger (Cyriopagopus thorelli) tarantula spider
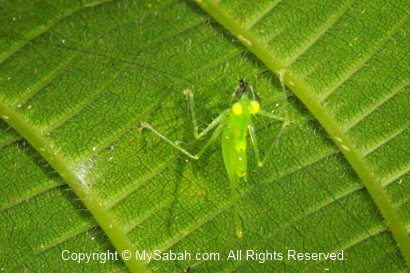
Above: a cricket disguised as the tip of leaf!
There are more bugs discovered when we moved closer to the pond and stream areas. It was such a joyful experience!
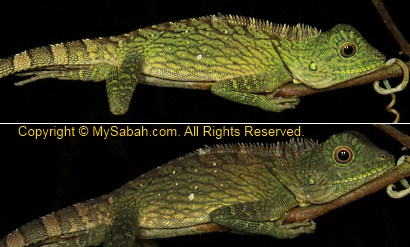
Above: an agamid that can change color in minute
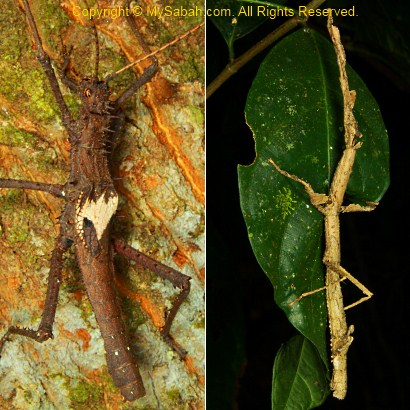
Above: a very long stick insect found by Lucy, the highlight of the 1st night walk.
It started to rain at 10pm, so we had to stop our night walk and said goodbye to each other. Anyway, I’m really happy to bag so many good shots.
Night Walk in Crocker Trail
Because of the exciting experience, I decided to arrange another night walk in Crocker Trail (2.036 KM) next day. This time the Park sends Mr. Rosandy Angkusup to guide me. I feel sorry to make them work until late night in fasting month (Puasa), so I tipped all the guides. Same as the lady guides, Rosandy has a trained eyes to beat the smart camouflage by bugs, especially stick insects.
Above: a moulting cicada. The moulting was so slow that we couldn’t wait until it finished.
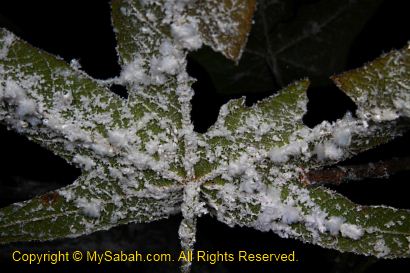
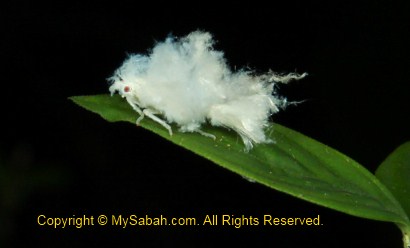
Above: the cotton-like substance is a group of Wooly aphid insect, amazing…
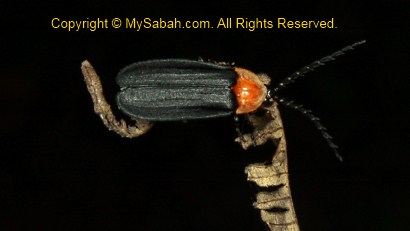
We saw at least 3 fireflies in the jungle.
It is so impressive that crickets can look so different to one another.
Above: this alien-like cricket was shown in National Geographic channel before. The Crocker Trail is far more promising because the trail is inside the real forest.
Besides bugs, we also saw a Shama bird sleeping on tree, a mouse deer, heard the loud barking of a barking deer (probably smell our presence) and 2 civets at the edge of primary rainforest. We would get some if we carry hunting rifle, haha. Of course, poaching is prohibited in national park.
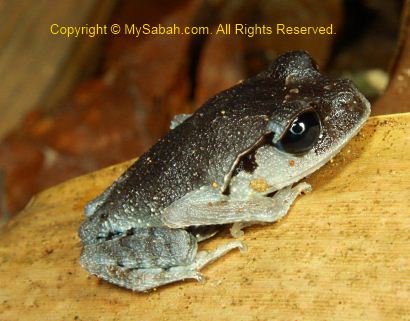
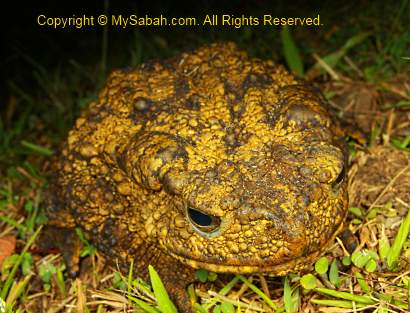
Above: giant river toad
Stick Insects
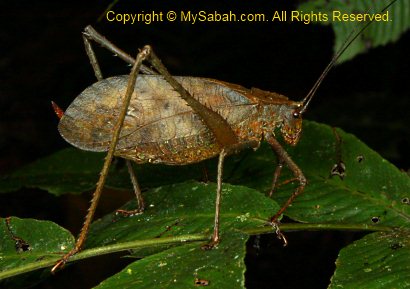
Rosandy is so professional in spotting stick insects (I always miss it!). I never saw so many stick insects in one night, nor do I know stick insects have so many species and variety. Some can play dead and some can release foul smell as a defense. Some can fly while some can’t. But all of them have one thing in common – they look like stick.
Above: very long stick insect
We moved so slowly that the night walk ended at 12:30am and our torchlight was almost out of battery. This is the best night walk I’ve had. I’ll be back one day.
WARNING: I know this blog would attract insect collectors. Please be informed that collection of any flora & fauna in national park without a permit, whether the subject is dead or alive, is a serious offense. You will be fined heavily or even jailed for illegal collection. Crocker Range National Park is NOT a place for you to look for toy pet!!!
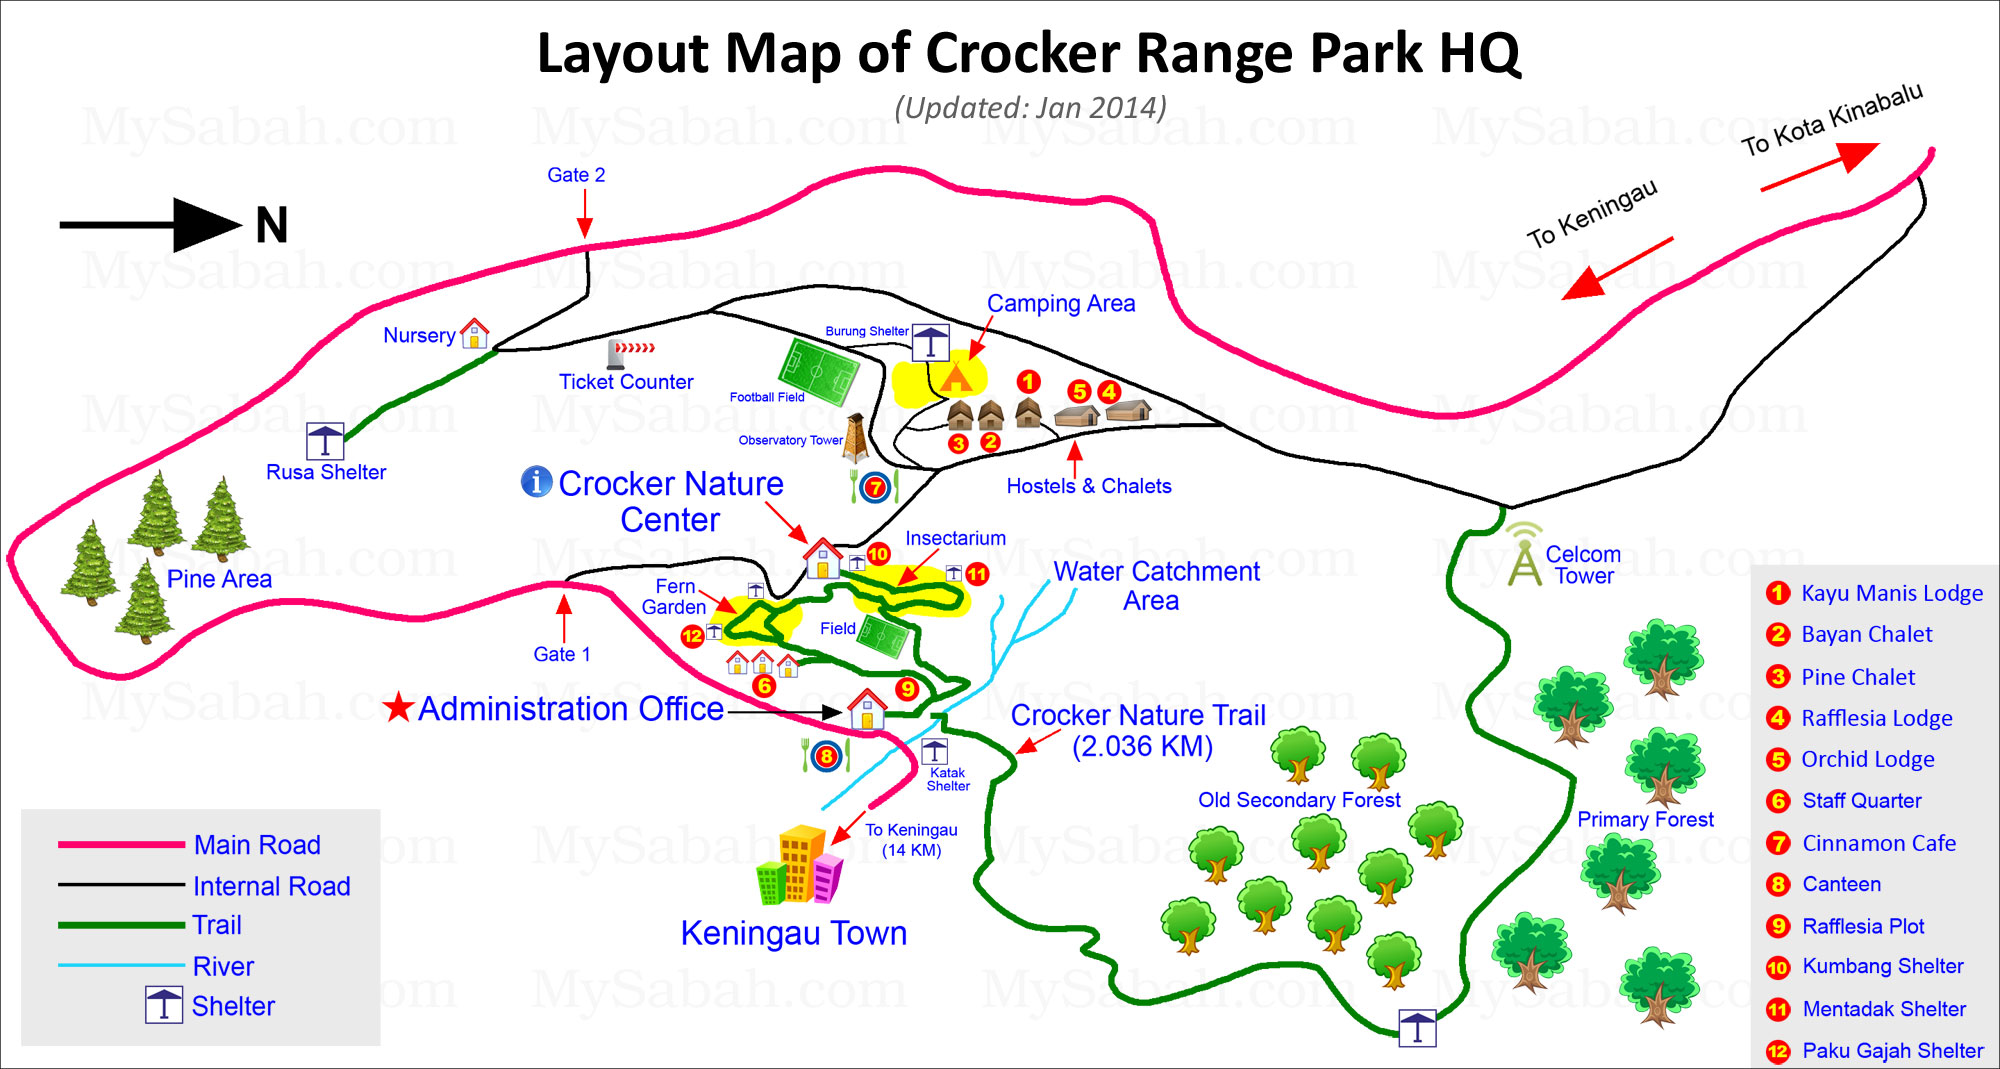
Crocker Range Park is one of the most important national parks of Sabah, due to its rich biodiversity and ecology values. About 500 plant species (1/3 of Borneo’s species), 107 mammal, 67 amphibian, 52 reptile and 26 species of freshwater fishes are found in this Park. There are two nature trails in the Park.
Please refer to the layout map below for the location of both trails:
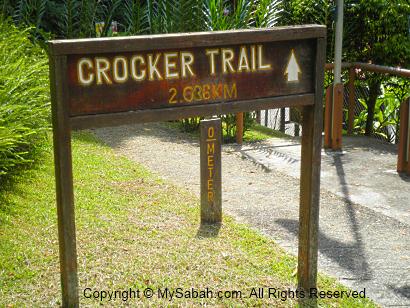
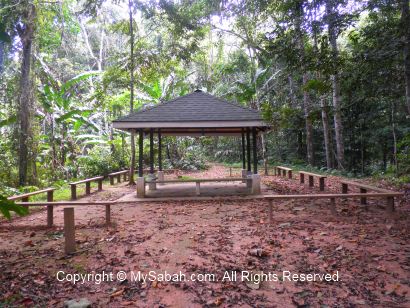
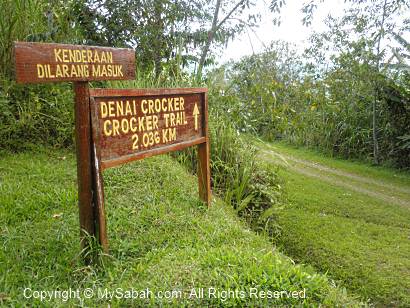
Crocker Trail (2.036 KM)
Nature lovers should talk a walk in the 2.036-Kilometer Crocker Range. The starting point is just next to the Administration Office. It’s quite a leisure jungle trekking for less than 3 hours and ends at a point which is 500 Meters from accommodation area (hostels/chalets). You also can start the trekking from opposite direction (i.e. from ending to starting point).
The trail is a nature route but in fairly good condition, so you won’t lose your way. The terrain is not challenging though there are a few mildly steep path.
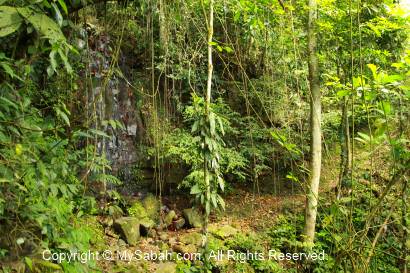
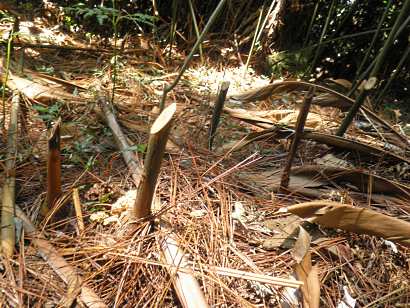
In the begining of the trail is a waterfall and small stream.
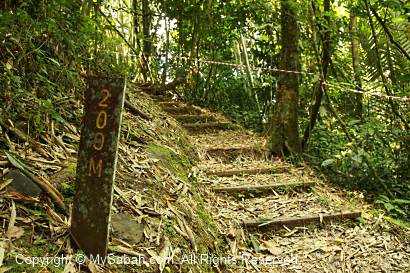
There is a signage in every 100 Meters. You should bring raincoat, insect repellent and a bottle of water with you. There might be forest leeches around in wet season, so you may put on your leech socks. It was very dry during my visit, so I didn’t see any leech.
The first half of the trail is inside old secondary forest, which was used to be a plantation, so you will see rubber, bamboo and banana trees.
Then you will come to the zone between secondary and primary rainforests. At night, if you are lucky, you would see wildlife such as sambar deer, sun bear, barking deer, mouse deers, wild boar or civets around this area. In daytime, I’m afraid you won’t see any big animal. I only saw a few birds, squirrels and treeshrews. You can pay attention to the shrubs along the trail, you might spot some interesting insects and plant.
Above: the moult skin of cicada. Cicada spends 12 to 13 years underground. If your child is as old as this cicada, he is in high school already.
Above: At 1,150th Meter, about halfway of the trail, there is a shelter for you to rest.
Above: the ending point of the Crocker trail. Just follow the gravel road and you will see your accommodation in 10 minutes. To be honest, this trail is less impressive than other forest trails I try in other national parks. But in night time, this trail offers so much to see. Read the next article to find out.
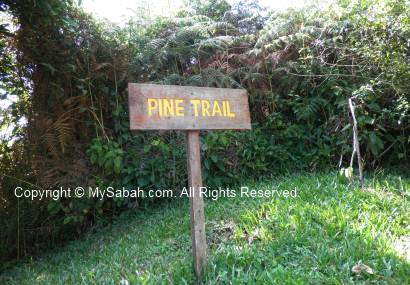
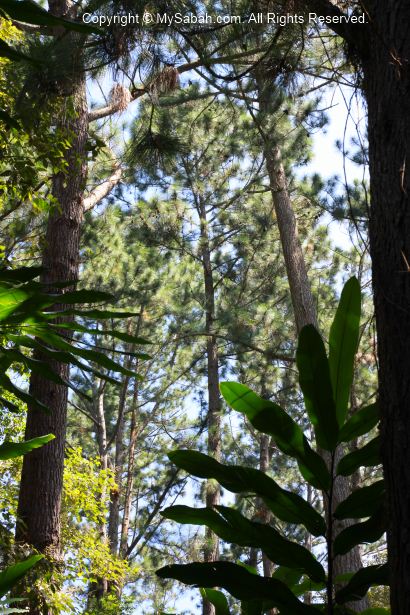
Pine Trail
The second trail, which I don’t recommend, is the Pine Trail near the ticket counter (refer to map for location). It is very poorly maintained and look more like an abandoned trail.
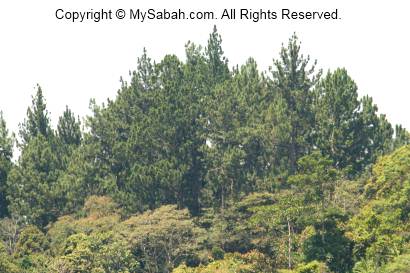
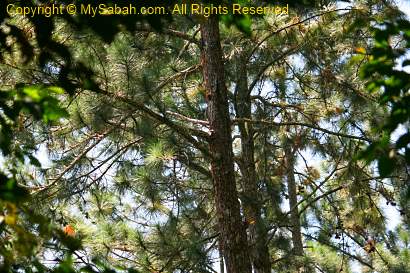
The dense pine woods look so beautiful from a distance. That’s why I decide to check out the Pine Trail. The pine trees were planted by the previous land owner. The Sabah Parks staff did advise me that the pine trail is in less than ideal condition and he doesn’t encourage me to explore.
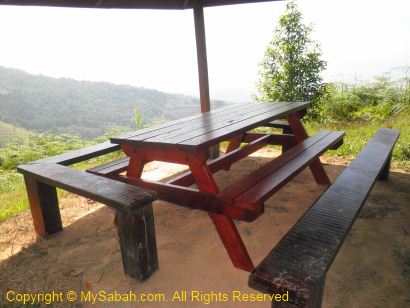
The 1st 150 Meters walk to the Rusa Shelter (Pondok Rusa) is quite ok. I had a good opening view of Crocker Range and Keningau valley from the shelter.
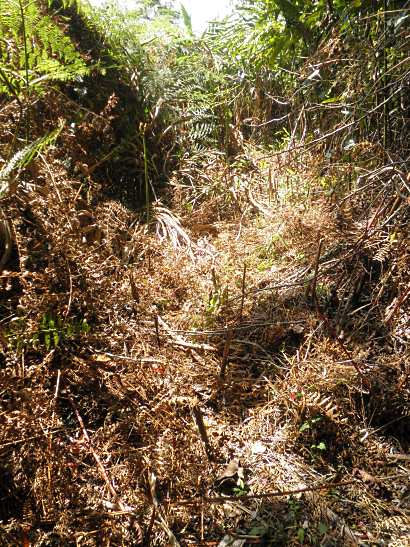
Driven by curiosity, I proceed deeper to the pine trail, where the trail condition gets quite uninviting. The trail was almost unrecognizable and covered by long grass and dense shrubs, and some parts are so narrow. I feel very uncomfortable walking on grass stack with shrubs so near to me, coz that’s where the snakes like to lurk. Though I was hesitating, I was still moving in and I had no idea where is the end.
You also need to be very careful not to trip and fall on the sharp incisions of Acasia shrubs. Such “trap” is everywhere on the trail.
Above: the needle-like pine leaves
It took me more than 30 minutes to reach the pine tree area.
The trail disappears, so I assume I have reached the ending point.
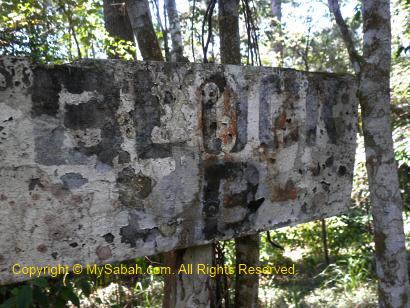
Above: anyone can read what is written on the signage?
Here I am, under the pine trees and surrounded by dense undergrowth. But what’s the point? What am I doing here?
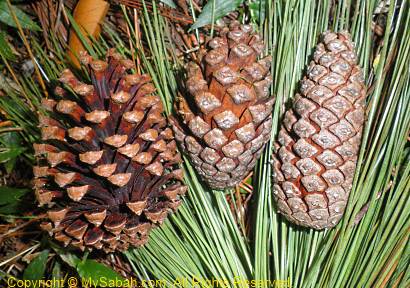
Well, there are a lot of pine fruits on the ground. Someone like to collect this, but not me. Now you know what is the pine trail about.
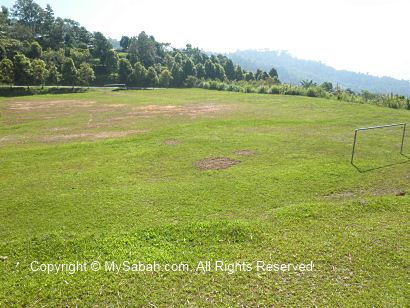
On the way back to my cabin, I passed by a soccer field, which is worth a mention here.
Soccer Field
The football/soccer field is quite near the camping ground. The Sabah Parks guides tell me that I can see deers playing soccer here at night. Just kidding.
Yes, you can see Sambar Deers (Payau) and Barking Deers (Kijang) wandering in this field at night. Sabah Parks is trying to plant fruit and food crop to attract more deers. In future, they will open a new “Deer Trail” as a new attraction for deer sighting.
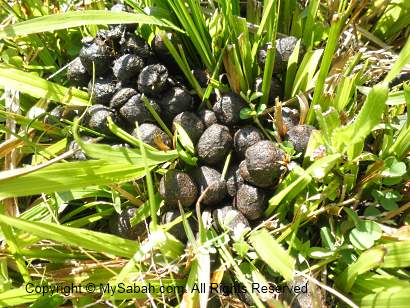
If you walk around, you would see deer dropping on the field, an evidence of their visit.
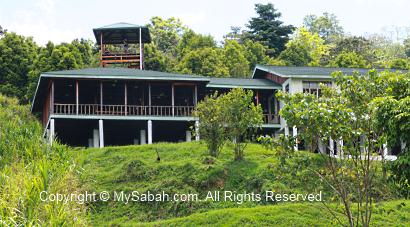
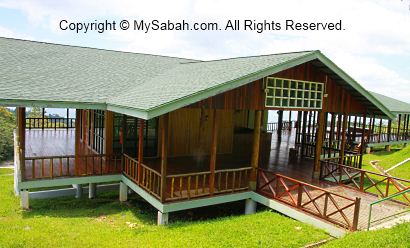
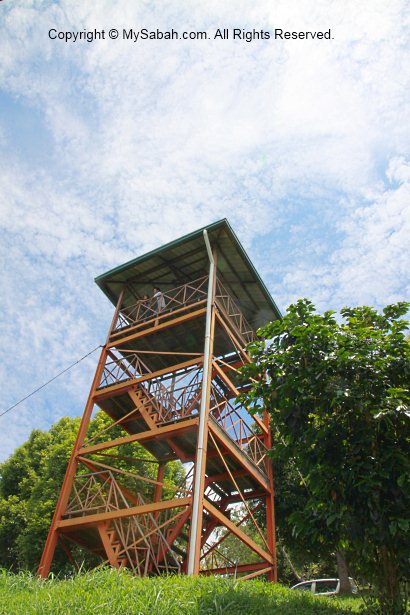
Observatory Tower
Another point of interest you should check out is the 20-Meter observatory tower next to the restaurant in Crocker Range Park. It is just a stone throw from the Crocker Nature Center.
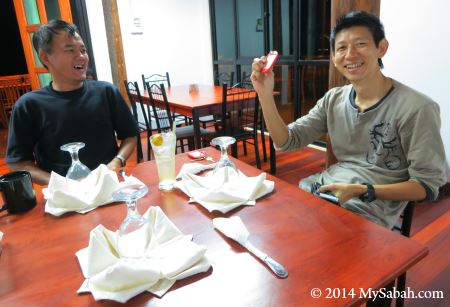
Above: the restaurant (Cinnamon Cafe) next to the tower, opens from 8am to 9pm daily.
Above: having dinner in Cinnamon Cafe
Above: Cinnamon Cafe doesn’t have many choices of food but it tastes ok.
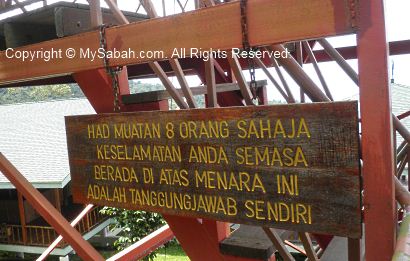
The notice says the tower only allows a maximum of 8 visitors at a time and use it at your own risk.
The structure of the tower is mainly steel and very solid.
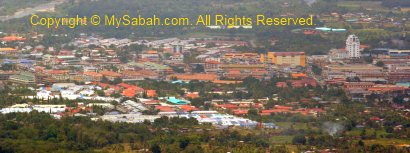
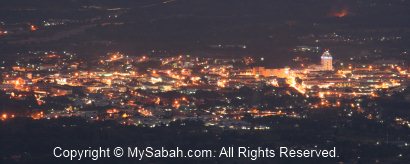
The feature of this tower is – you can get a very nice view of Keningau town from the top. I took the following photos on the tower. You can see the Juta Hotel clearly, the highest building of Keningau.
This article tells you how to organize a climbing trip to Mt. Tambuyukon. You may skip this if you don’t plan to climb the mountain. Please note that planning and preparation for Mt. Tambuyukon trip is tedious and time-consuming. If you have little spare time, getting a tour operator to arrange everything is a good option, but the cost will double or even triple.
Planning & Preparation for the Climb
Step 1. Gather the Climbers
First, you need to decide the number of climbers and the climbing date. Prepare a name list (with Full Name, MyKad/Passport No. and Phone contact) and confirm a date with all the climbers. Usually May to July are dry months and best time to climb. However, the global climate has gone haywire, for example, the La Nina or El Nino phenomenon would change weather pattern. Nobody can predict the weather, so you better be prepared for the worst. But try to avoid Dec and Jan, which are the wettest months.
Normally, you need 5-day-4-night to complete the climb. For experienced and fit climbers, 4-day-3-night is possible. If you are unsure, just plan for a 5-day climb.
Step 2. Book the Date with Sabah Parks
You need to book the climb with Sabah Parks at least 1 month in advance. All the paperwork and registration are done with Sabah Parks office in Kinabalu Park (Tel: +60 88-889888). Later, you will still need to communicate with Sabah Parks back and forth on various arrangement, more on this later.
Under Sabah Parks policy, only a maximum of 9 climbers (exclude Sabah Park rangers and porters) are permitted in one trip. Inform Sabah Parks your climbing date and submit your name list. They will mark the date for you if no other group climbing.
Step 3. Plan the Itinerary
Once the climbing date is confirmed, you may plan your itinerary.
Below is the summit trail map of Mt. Tambuyukon. Click it for bigger picture:
Below is a standard 5-day schedule (for reference only. You may adjust it):
Day 1
6:00am
Depart from Kota Kinabalu to Kinabalu Park
8:00am
Register at Kinabalu Park. Fill up climber & Indemnity forms. Pay for climb permit & insurance. Collect climber tags.
9:00am
Transfer into 4WD to Monggis Substation
10:30am
Register at Monggis Substation. Meet porters & Briefing by guide.
11:00am
Start trekking to Wuluh Camp (KM6)
4:00pm
Arrive Wuluh Campsite for camping overnight
Day 2
7:00am
Breakfast
8:00am
Trekking 4.8KM to Musang Camp (KM10.8) for camping overnight
3:00pm
Arrive Musang Campsite
Day 3
3:30am
Breakfast
4:00am
Trek up to summit of Mt. Tambuyukon
10:00am
Reach the Summit (KM14)
5:00pm
Back to Musang Campsite for dinner & overnight
Day 4
7:30am
Breakfast
8:30am
Descend 13 KM (via old trail) to Monggis sub station. Overnight in Monggis Sub Station
Day 5
8:00am
Breakfast
9:00am
4WD transfer back to Kota Kinabalu
1:00pm
Arrive KK
Below is a 4-day itinerary (for very tough climbers only):
Day 1
Depart to Kinabalu Park
Register at Kinabalu Park.
Go to Monggis substation by 4WD
Overnight in Monggis
Day 2
8am: Breakfast
Start climbing to Musang Camp (13KM old trail recommended)
Overnight in Musang Camp
Day 3
Breakfast
Climb to the Summit (KM14)
Back to Musang Camp for overnight
Day 4
Breakfast
Back to Monggis via 13KM old trail
Go to Ranau (by 4WD)
Back to Kota Kinabalu
Of course there are other variations of itinerary, depends on your needs.
Step 4. Working out the Budget
This part is not easy… You only know the exact amount spent after the trip.
Mandatory Expenses
Climb Permit: RM100 for Malaysian, RM200 for foreigner
4-Wheel-Drive (4WD) Transport (Ranau-Monggis Substation return trip): RM400-500 per car
Sabah Parks Ranger Guide Fee: RM70/day (Policy: 1 ranger is required for every 3 climbers)
Conservation Levy: RM3 for Malaysian, RM10 for foreigner
Insurance: RM7 per day (you must insure the porters & rangers too)
Camping Fee: RM10 per pax
Food: estimated RM20/day per pax
Optional Expenses
Tour Guide: RM100-150 per day. Besides guiding, they can cook & setup camp for you.
Porter: RM70/day (carry up to 20Kg)
Cooking service: extra charge if you also want tour guide to cook for you
Accommodation (Monggis Substation): RM10/pax per night (not so sure the rate)
Use of cooking facilities (e.g. gas) in Monggis Substation: RM50
Certificate: RM5
Misc. Expenses
Individual / group may purchase the items below:
Camping tent
Portable cooking stove & utensils
Cooking gas cylinder, RM5 each (for portable cooking stove)
Personal medication (e.g pain-killer, anti-septic cream) & 1st Aid Kit (for minor cut & injury)
Insect repellent, mosquito coils (anti-sandfly)
For example, there are 3 Malaysian climbers who would like to hire one 4WD and two porters for a 5-day trip. The budget will look like table below (all fees in Malaysian Ringgit (RM), USD1 = RM3.3):
Item
Price
Qty.
Total (RM)
Climber Permit*
100
3
300
4WD Transport
500
1
500
Sabah Parks guide fee (RM70 x 4 day)
280
1
280
Camping Fee
10
3
30
Conservation Levy*
3
3
9
Porter (RM70 x 4 day)
280
2
560
Insurance (RM7 x 4 days x 6 pax)
28
6
168
Food (RM20 x 5 day)
100
3
300
Accommodation (Monggis)
10
3
30
Certificate
5
3
15
GRAND TOTAL:
2,192
*Malaysian rate
So the basic fee is about RM731 (=RM2,192/3 pax) per climber. Please note that optional, individual and misc expenses are not included in this calculation, so the final cost will be more than this.
Step 5. Physical Training
Very Important! Ask your climbers to start physical training. Climbing Mt. Tambuyukon is a few times harder than Mt. Kinabalu, and it is no joking matter. Climbers who never exercise regularly is almost guaranteed failure. You just can’t hide your weakness from Mt. Tambuyukon. The climber must jog at least 15KM per week for consecutive 3 months, the more the merrier. The more pain you get in training, the more relaxing your climb will be. The most suitable training track is the hilly trail. Do exercise the muscles of arm and waist, because the extra strength will help you a lot on carrying bag and free climbing.
For elder climbers, you may advise them to take glucosamine daily supplement before the climb. That can help preventing serious knee pain after climb.
Step 6. Briefing & Discussion with Climbers
Have at least one meeting with all the climbers and do the following:
Briefing: Tell them what they should prepare (see “Things to Bring” below) and what to expect (better if you can show them my blog about Mt. Tambuyukon, haha).
You may start collecting money from all climbers, so you can start purchasing food & supplies for the group, also as a non-refundable “deposit” to avoid inconsiderate people withdraw in last minute.
Get the mobile phone number of everyone to keep in touch.
Assign one or more members to help you on food preparation.
Step 7. Booking Porters & 4WD Transport
Though it’s possible to carry the bags and supplies yourselves during the climb, hiring porters will greatly reduce your burden and the climbers will have better chance of reaching the summit. During emergency situation, porters will be the extra hands that save life. Besides your personal backpack, do not forget you also need someone to carry your camping tents, food & supplies, portable cooking stove, cooking utensils, etc.
You can contact Kinabalu Park to arrange for the porters and 4WD transport. Each porter can carry up to 20Kg of stuffs. Just call Kinabalu Park about 1 week before the climb and tell them how many porters you need. Most of them are villagers from Monggis Village near to the Substation. Usually they will wait for your group at Monggis Substation.
Step 8. Guidelines for Food
You may start buying food 1 or 2 weeks before the climb. Below are some tips:
Our warm and humid climate causes food to spoil quickly and you can get food poisoning. Avoid bringing “wet” food (e.g. fresh meat & fish), which is prone to growth of bacteria.
Avoid food that needs a long time to cook coz it will consume more cooking gas.
You don’t need to prepare food for porters and rangers.
Instant noodle is a poor choice for breakfast (before the climb) coz the excessive salt dehydrates you. Personally I highly recommend Oat meal coz it releases energy for many hours. You may mix oat meal with sugar & milk powder to make it tastes better.
Avoid heavy or canned food. You also can’t dump the empty can in the camp. No, you can’t bury them.
You may bring frozen meat so you can have meat in day 1.
Remove food packing to reduce weight & size.
Every day the climb starts from morning and ends at evening, so you can’t stop to cook lunch. You need to prepare packed lunch in the morning.
Ration, organize, pack and label the food nicely in plastic bags (prevent getting wet).
Store all the food in a proper backpack for porter to carry.
Hang the food on air to prevent rats and civets having a buffet.
Prepare food menu list so you knows what to cook each day. It is taxing if you only start sorting out what to cook, after a long tiring climb.
You can refill water at the rivers / streams (KM5, KM6, KM8 & KM10.8), but bring a few bottles just in case.
Bring a few garbage bags for disposal of leftover food.
Please find out if anyone has any food preference (allergy, vegetarian and religion).
Control the weight of your food. Don’t bring tons of food!
Step 9. Final Check
To make sure everything is in place, you should do the following a few days before your climb:
Pack and weight your food to check if you have hired enough porters to carry it.
Remind Kinabalu Park again on the climbing date and number of porters you need.
Sabah Parks may send their Ranger from Poring. Confirm with them if the ranger will wait for you at Poring or Monggis.
Confirm with 4WD driver on the pick-up date & time.
Send a friendly reminder to all the climbers (e.g. date of departure & gathering time).
Things to Bring
MyKad/Passport: required for registration at Kinabalu Park
Camping tent
Sleeping bag (the temperature can drop to 10°C at night)
Optional: energy bars, hand glove, pen & notepad, lighter, camping light
Tips & Advices
Keep your backpack light. I repeat, keep it LIGHT!
The temperature of Mt. Tambuyukon ranges from 6°C – 30°C (43°F – 86°F). of course, the higher the altitude, the colder. It’s quite windy near the summit.
If you hire a porter to carry your bag. Don’t let him carry everything. He might be very far ahead. Bring raincoat and water with you in a small bag.
If you plan to overnight in Monggis Substation in last day, you may leave a set of clean clothing (and some food) in their storeroom. Pointless to bring unused stuffs up and down the mountain.
Don’t bring too many clothing. Keep 1 set of clean clothing for bedtime
One of the best shoes for trekking in wet tropical forest trail is “Adidas Kampung” rubber shoes, available locally for RM6–7 a pair only and water-proof.
Hygiene: wash your hands before meal and try to drink only boiled water.
Drinking unboiled river water is quite unavoidable. Prepare some water purification tablets to sterilize river water. Available in outdoor shops.
Trim your fingernail & toenail before the climb.
Potential Problems / Dangers
Below are a list of issues you should prepare to prevent/rectify:
Diarrhea: use handwash sanitizer for cleaning before meal. Bring medicines just in case.
Leech Bites: wear leech socks
Wasp / Bee / Hornet: bring medicines if any climber allergy to bee stung
Deer Fly / Sandfly: apply insect repellent with DEET formula or burn mosquito coils
Thorny rattan & poisonous plant along the trail: look before you grab anything for support
Snake: just watch out under the rocks / log
Dehydration: bring enough water. Rehydration salt is useful.
Fall / Slip: be extra careful at slippery or steep trail
Sprained ankle: watch your steps
Blister & small cut: use anti-septic cream
Losing way: stick with the group
Falling tree branches: pray!
Tour Packages
Now you can see that it’s a lot of work and preparation. If you don’t want to do the tedious planning, you may hire TYK Adventure Tours (Tel: (6088) 232821, 238702 Email:tykadto@gmail.com) to arrange everything for you, from transport, meals, registration, porters, guides to camping tents. Of course it’ll be more costly.